Membership Management
Offer flexible recurring membership plans that drive patient loyalty and predictable revenue.
Key Features
- Multi-Service Memberships
Create membership plans that include multiple services, treatments, or appointment credits. - Recurring Billing
Automatically collect payments on a specified date each month. - Flexible Plan Upgrades
Allow members to seamlessly upgrade to higher-tier plans at any time. - Monthly Service Credits
Allocate monthly service allowances or credits based on membership level. - Member Booking Access
Enable patients to book included services directly from their membership benefits. - Custom Service Eligibility
Define which services are available within each membership tier. - Automated Renewals
Keep memberships active with recurring renewals and payment processing. - Usage Tracking
Monitor member credits, appointments, and service utilization in real time. - Membership Dashboard
Manage memberships, renewals, payments, and activity from a single view.
Benefits for Clinics
- Generate predictable recurring revenue.
- Increase patient retention and loyalty.
- Encourage regular appointments and treatment adherence.
- Reduce administrative workload through automation.
- Create upsell opportunities with tiered membership plans.
- Improve cash flow forecasting and business stability.
- Deliver greater value and convenience to patients.
Turn occasional visitors into long-term members with automated memberships, recurring payments, and seamless service booking.
How to create a new membership
To add a membership go to the Admin Area, then open the "Memberships" page and click on the “Add New” button from the top-left section.
After the membership was added the system will redirect you to the events page of the newly added membership.
Please click on the “Events” button of the month you need to add the events to.
There are 2 types of events that can be added in a month:
- Services
- Groups of services
Each membership will be assigned services added through the Admin Area.
Membership services are added under the “Membership” general services category.
Ordering and booking a new membership
To order a new membership we must select a client first, this can be done from the "Contacts" page from the top menu.
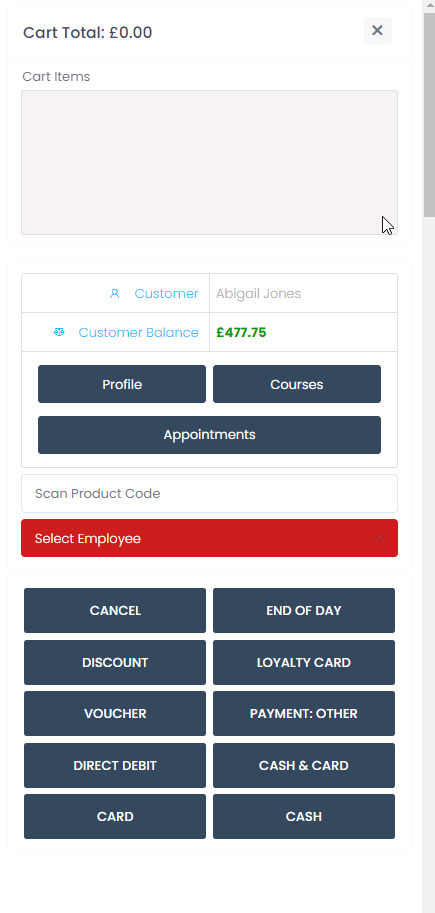
Once a client is selected, it will be visible in the right hand side, under the Cart.
Click on the “MEMBERSHIP” button from the top menu and choose which membership to order for the selected client.
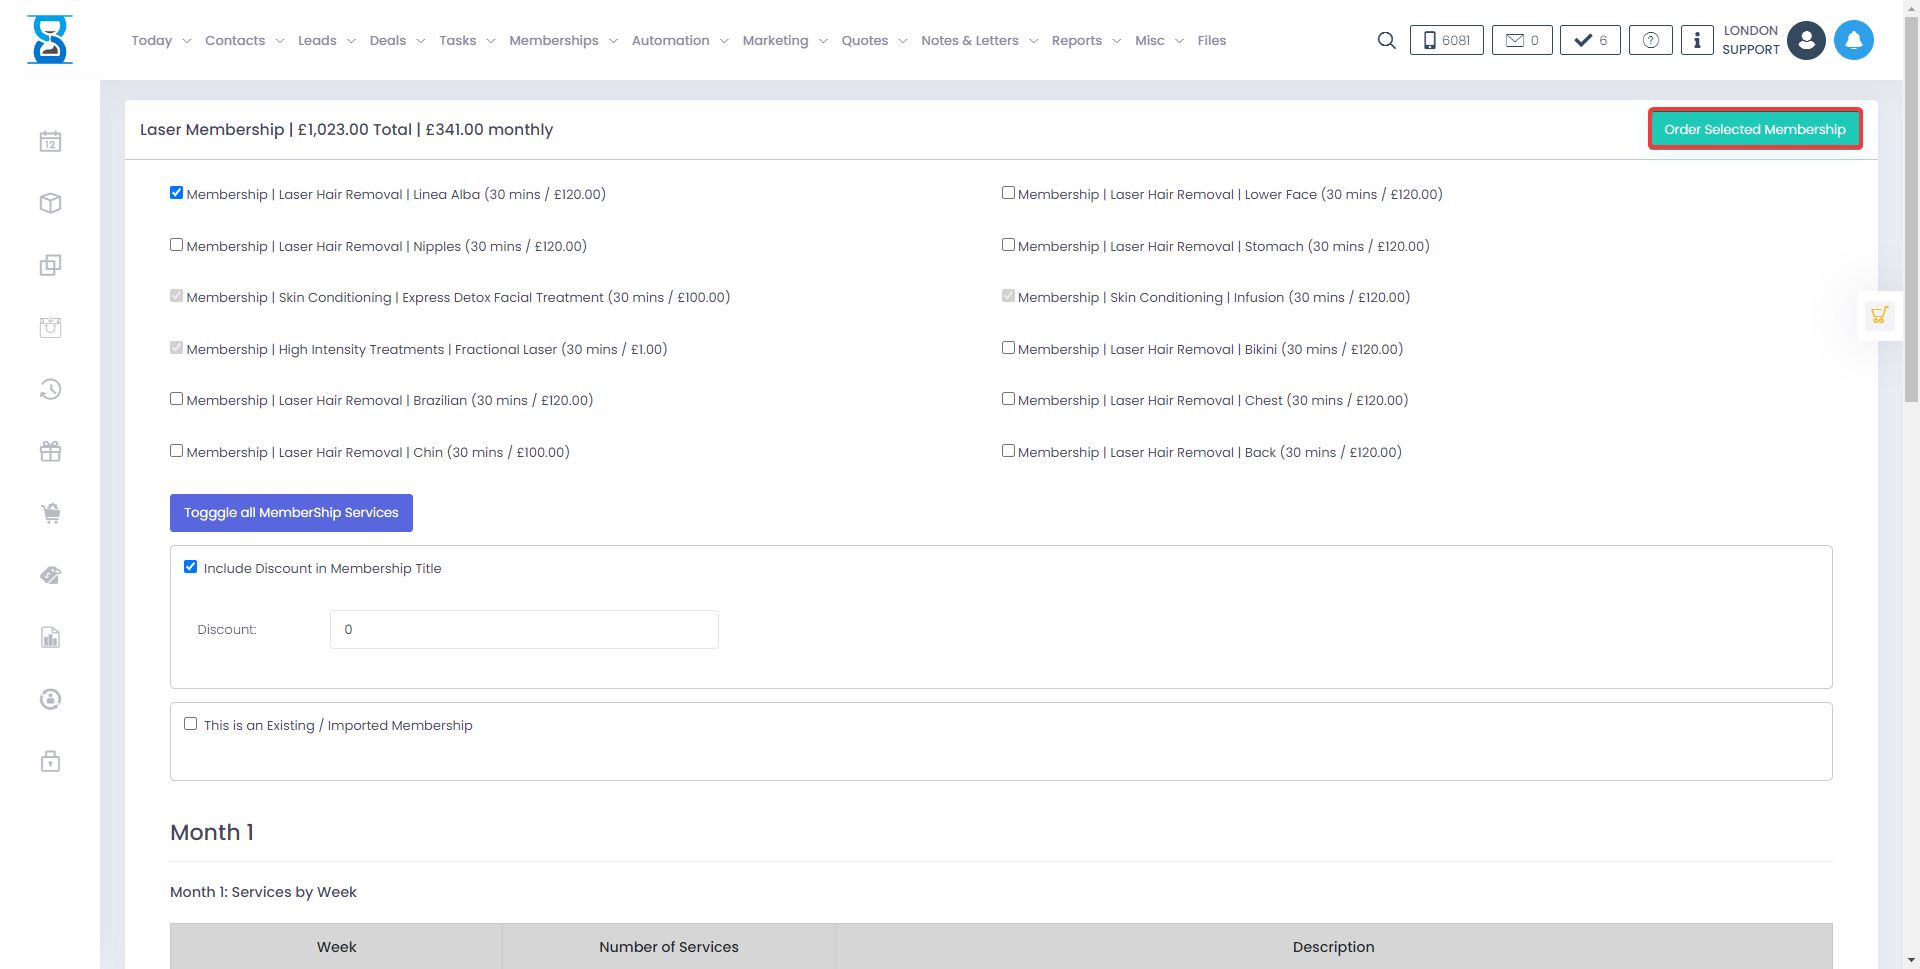
Choose the membership services each month and then click on the green “ORDER SELECTED MEMBERSHIP” button.
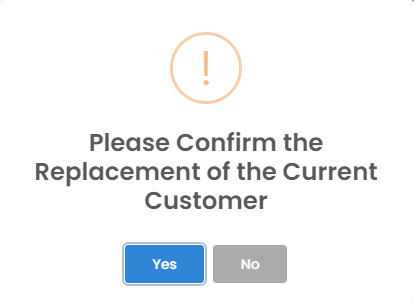
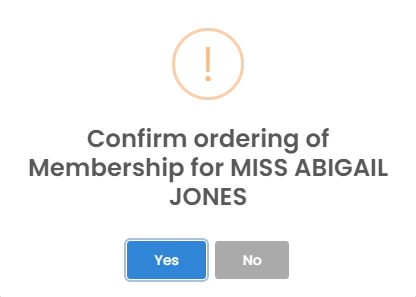
Check in the confirmation prompt if this is the correct client (shown in capital letters) that you need to order the membership for. If everything is OK, select “Yes” in the confirmation prompt.
Taking payment for the membership
Once the membership has been ordered, the system will automatically redirect you to the membership payment page inside the client profile.
In order to start taking payments, we need to ask the client for their direct debit details (name, account number, sort code and address) in order to create a direct debit mandate.
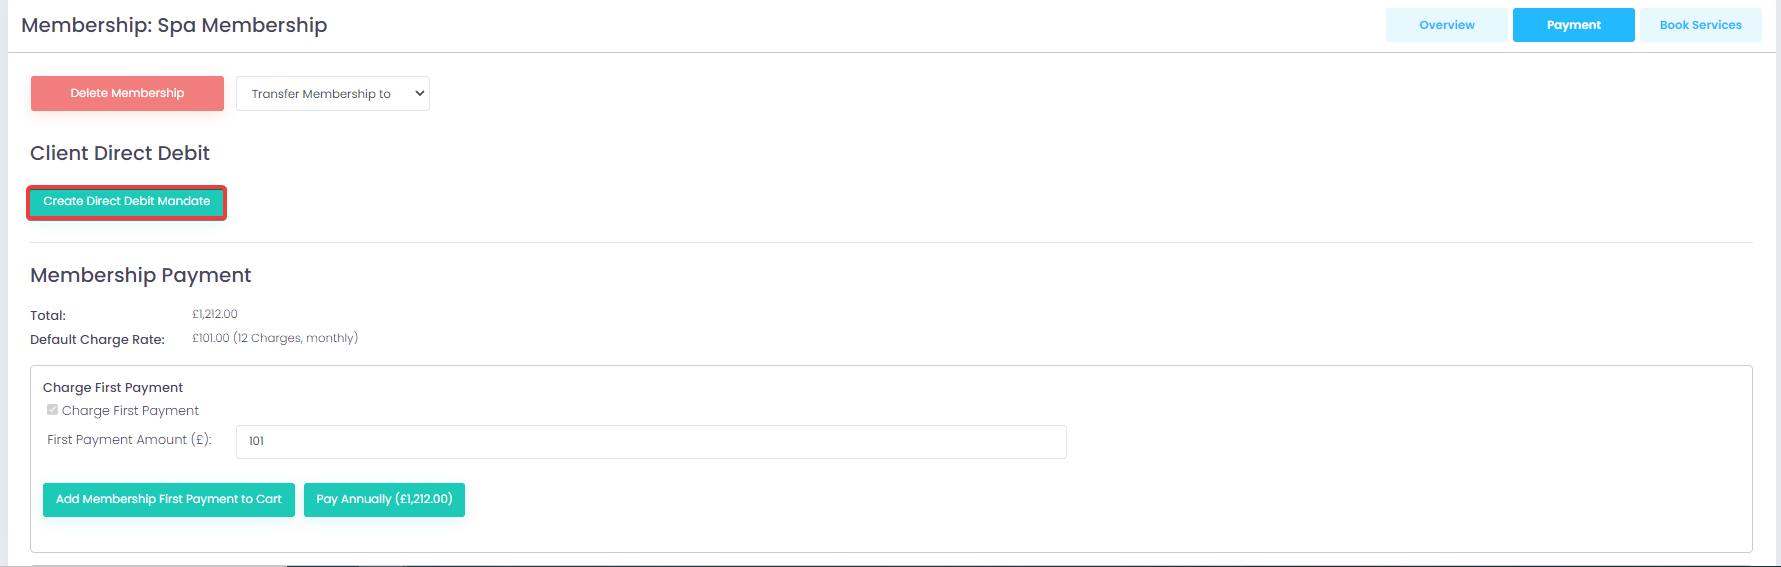
To create a new direct debit mandate, click on the green “CREATE DIRECT DEBIT MANDATE” button.
After that, you will be redirected to a page where you can enter the client’s direct debit information.
Complete the form and then click on the green “Set up Direct Debit” button from the bottom.
After you’ve clicked “Confirm”, you can see the “Direct debit mandate successfully set up” message.
After the mandate has been set up, you can see the details in the payment page and we are now able to take the deposit and create a direct-debit subscription for the membership.
To charge the deposit, click on the green “ADD MEMBERSHIP FIRST PAYMENT TO CART” button.
To create a new direct debit subscription, select the “Take payments from a specific day” under the “Create Subscription” section, choose the next month and the day the customer wants to have their direct-debit go out and then click on the green “CREATE SUBSCRIPTION” button and confirm.
How to order a new membership step by step
To order a new membership we must select a client first, this can be done from the Contacts page from the top menu.

Search for the client by name, email, phone number or postcode and then click on the blue “Select Client” button.

Once a client is selected, it will be visible in the right hand side, under the Cart.
If a client is already selected, the system will ask you to replace it, select "Yes".
Click on the “MEMBERSHIP” button from the top menu and choose which membership to order for the selected client.
Choose the membership services each month and then click on the green “ORDER SELECTED MEMBERSHIP” button from the top right.

The system will ask you to confirm the order.
Important:
Check in the confirmation prompt if this is the correct client (shown in capital letters) that you need to order the membership for. If everything is OK, select “Yes” in the confirmation prompt.
How to takea payment for a membership step by step
Once the membership has been ordered, the system will automatically redirect you to the membership payment page inside the client profile.
In order to start taking payments, we need to ask the client for their direct debit details (name, account number, sort code and address) in order to create a direct debit mandate.
If we already have a mandate set up, e.g. the client has previously paid for another membership using direct debit, then we just click on the update button to find out the next possible charge date and we are able to continue paying the deposit and setting up the subscription.
To create a new direct debit mandate, click on the green “CREATE DIRECT DEBIT MANDATE” button.
Important:
The system will open a popup window, asking you to confirm if this is the intended client that you need to create the direct debit for.
If this is the correct client, select “CONFIRM”.
If a different client’s name is displayed, click “CLOSE WINDOW”, select the correct client and then click on the “CREATE DIRECT DEBIT MANDATE” button again.
For the wrong client: When you click on “CLOSE WINDOW”, the current page will refresh and you can click on the blue “Select” button from the client’s profile in order to select the client and then create the direct debit mandate without having to leave the page.
After you click on the green “CONFIRM” button, you will be redirected to a page where you can enter the client’s direct debit information.
Complete the form and then click on the green “Set up Direct Debit” button from the bottom.
Confirm the direct debit details.
After you’ve clicked “Confirm”, you can see the “Direct debit mandate successfully set up” message.
Click on “CLOSE WINDOW” to return to the membership payment page.
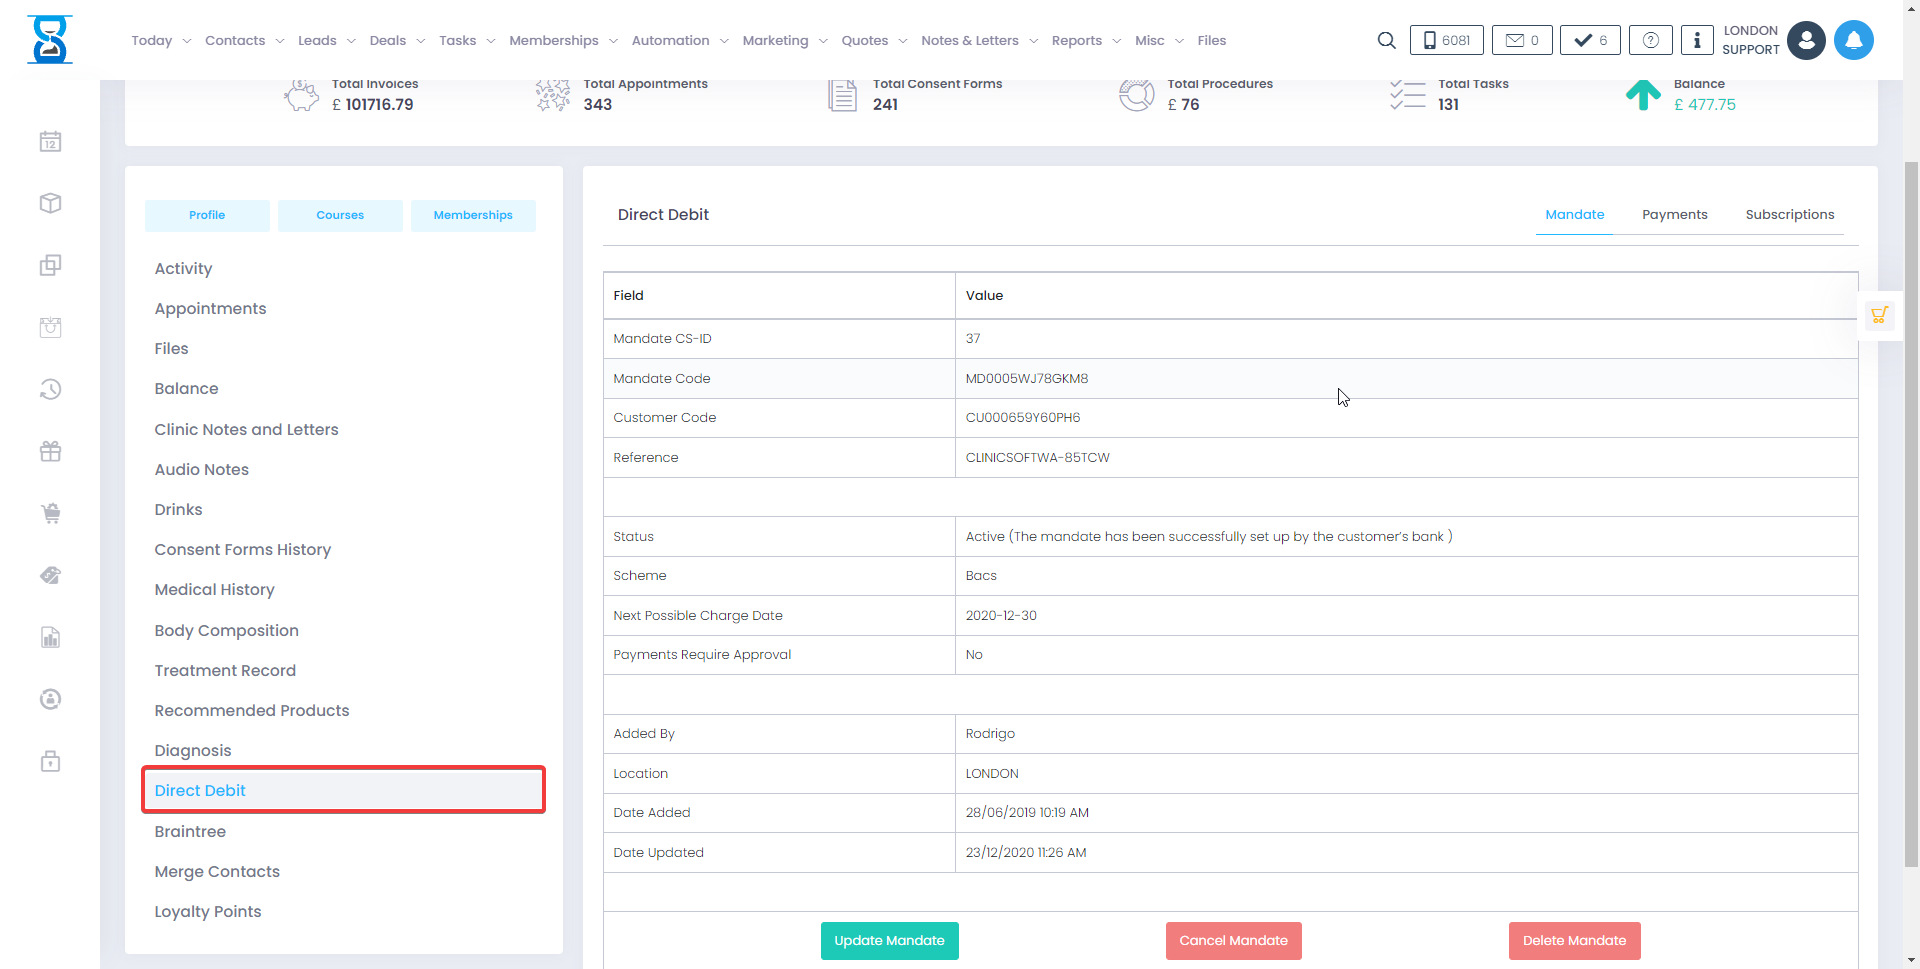
After the mandate has been set up, you can see the details in the payment page and we are now able to take the deposit and create a direct-debit subscription for the membership.
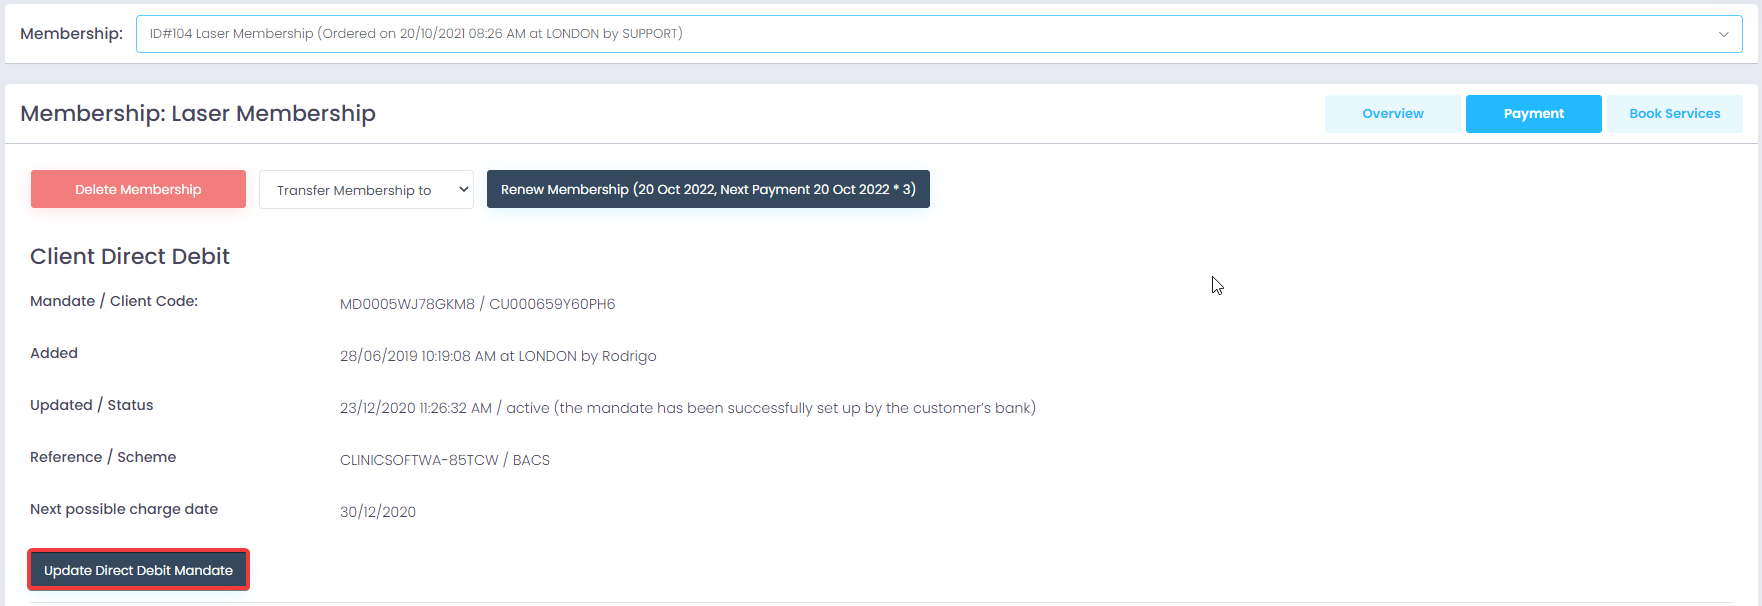
For clients that already have direct debit in the system, click on the “UPDATE DIRECT DEBIT MANDATE” button in order to update the mandate status and next possible charge date.
Important:
Upon clicking the “UPDATE DIRECT DEBIT MANDATE” button, if the mandate’s status is failed, cancelled or expired we cannot charge new direct debit payments and we need to contact the client to set up a new direct debit mandate.
To create a new direct mandate, from the client’s profile click on the “DIRECT DEBIT” button, delete the existing mandate and then click on the “CREATE DIRECT DEBIT MANDATE” to create a new one.

Important:
Do not cancel active mandates, doing so will also cancel all payments and subscriptions created using that mandate.
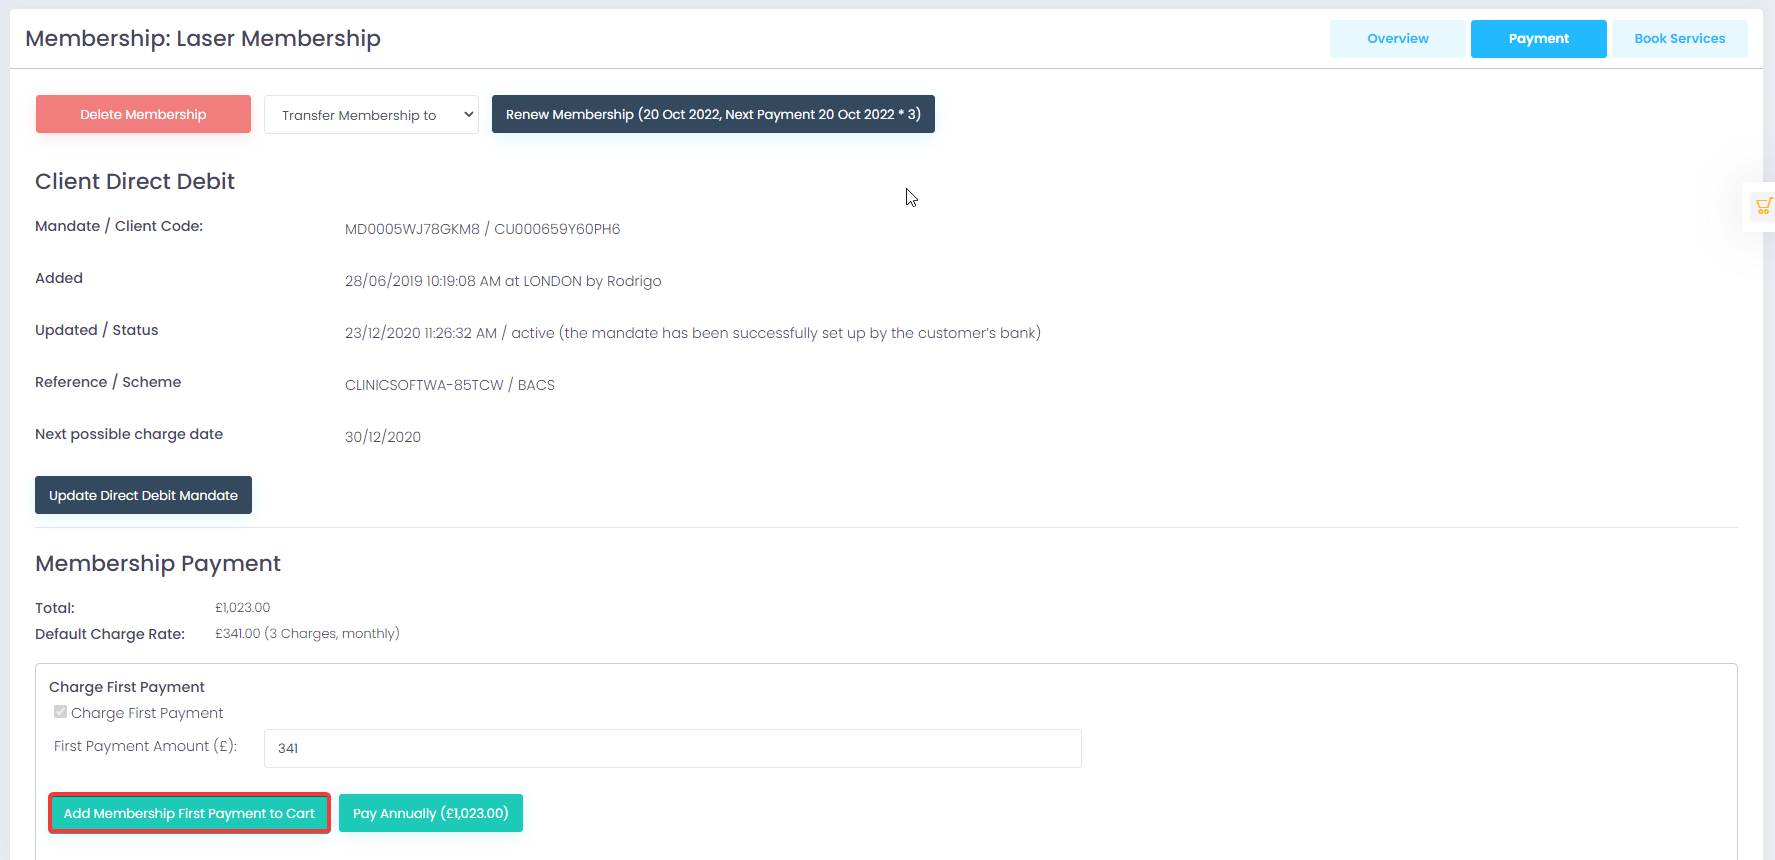
Once we have the direct debit mandate set up, from the membership page we can begin charging the deposit and creating the subscription for the ordered membership.
To charge the deposit, click on the green “ADD MEMBERSHIP FIRST PAYMENT TO CART” button.
Then click on the CASH or CARD buttons from the right side to charge the deposit.
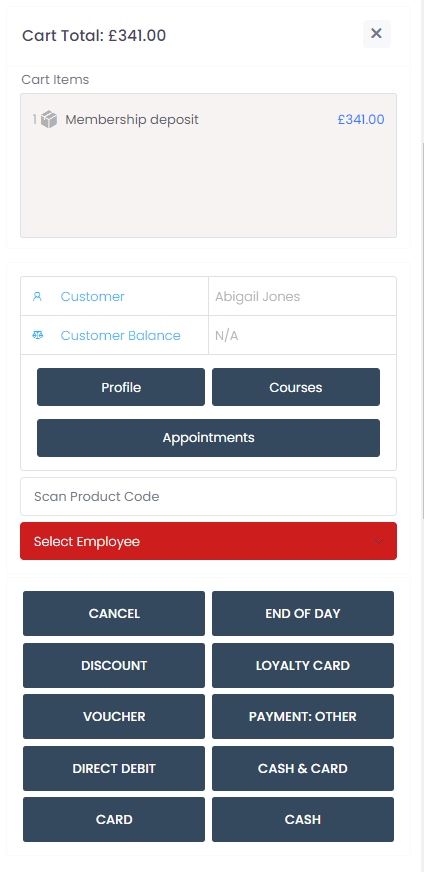
Important:
When clicking on the CASH/CARD buttons, select “Yes” when the system asks you if you want to keep the current customer selected.
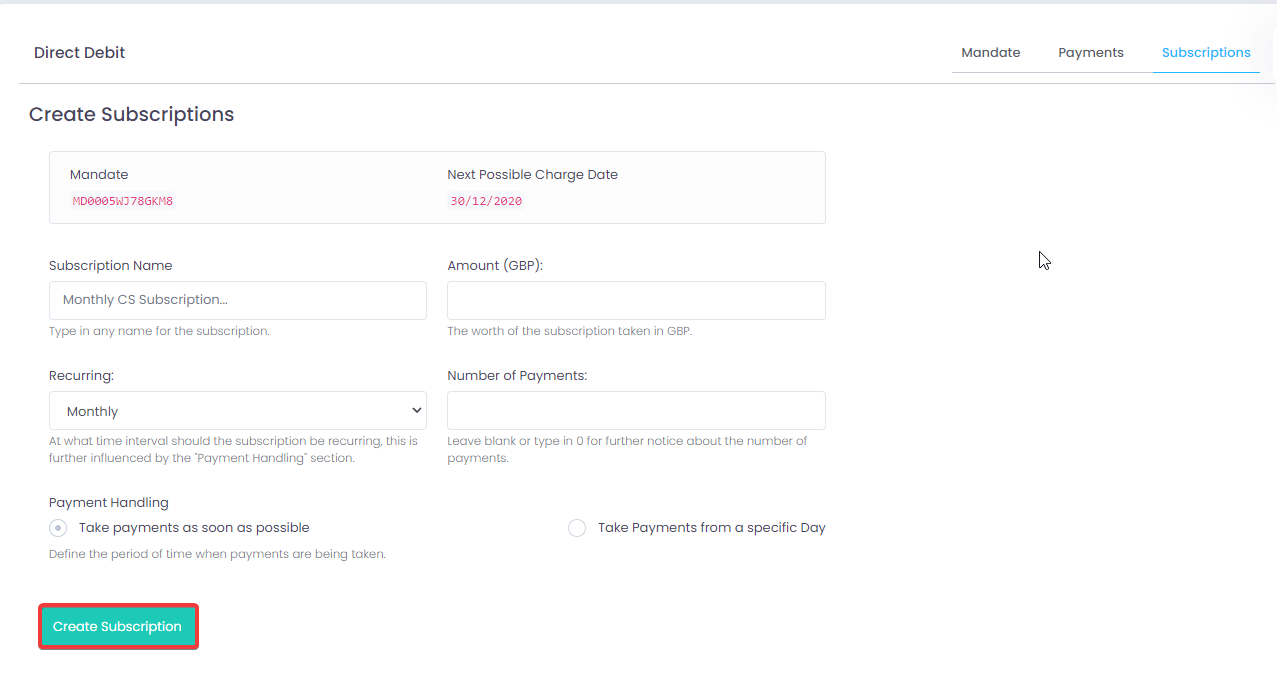
Once we’ve charged the deposit we are able to create a subscription for the remaining 11 months of the membership.
To create a new direct debit subscription, select the “Take payments from a specific day” under the “Create Subscription” section, choose the next month and the day the customer wants to have their direct-debit go out and then click on the green “CREATE SUBSCRIPTION” button and confirm.
Important:
Please make sure that you are charging the direct debit starting from the next month as the deposit represents the first month of the membership.
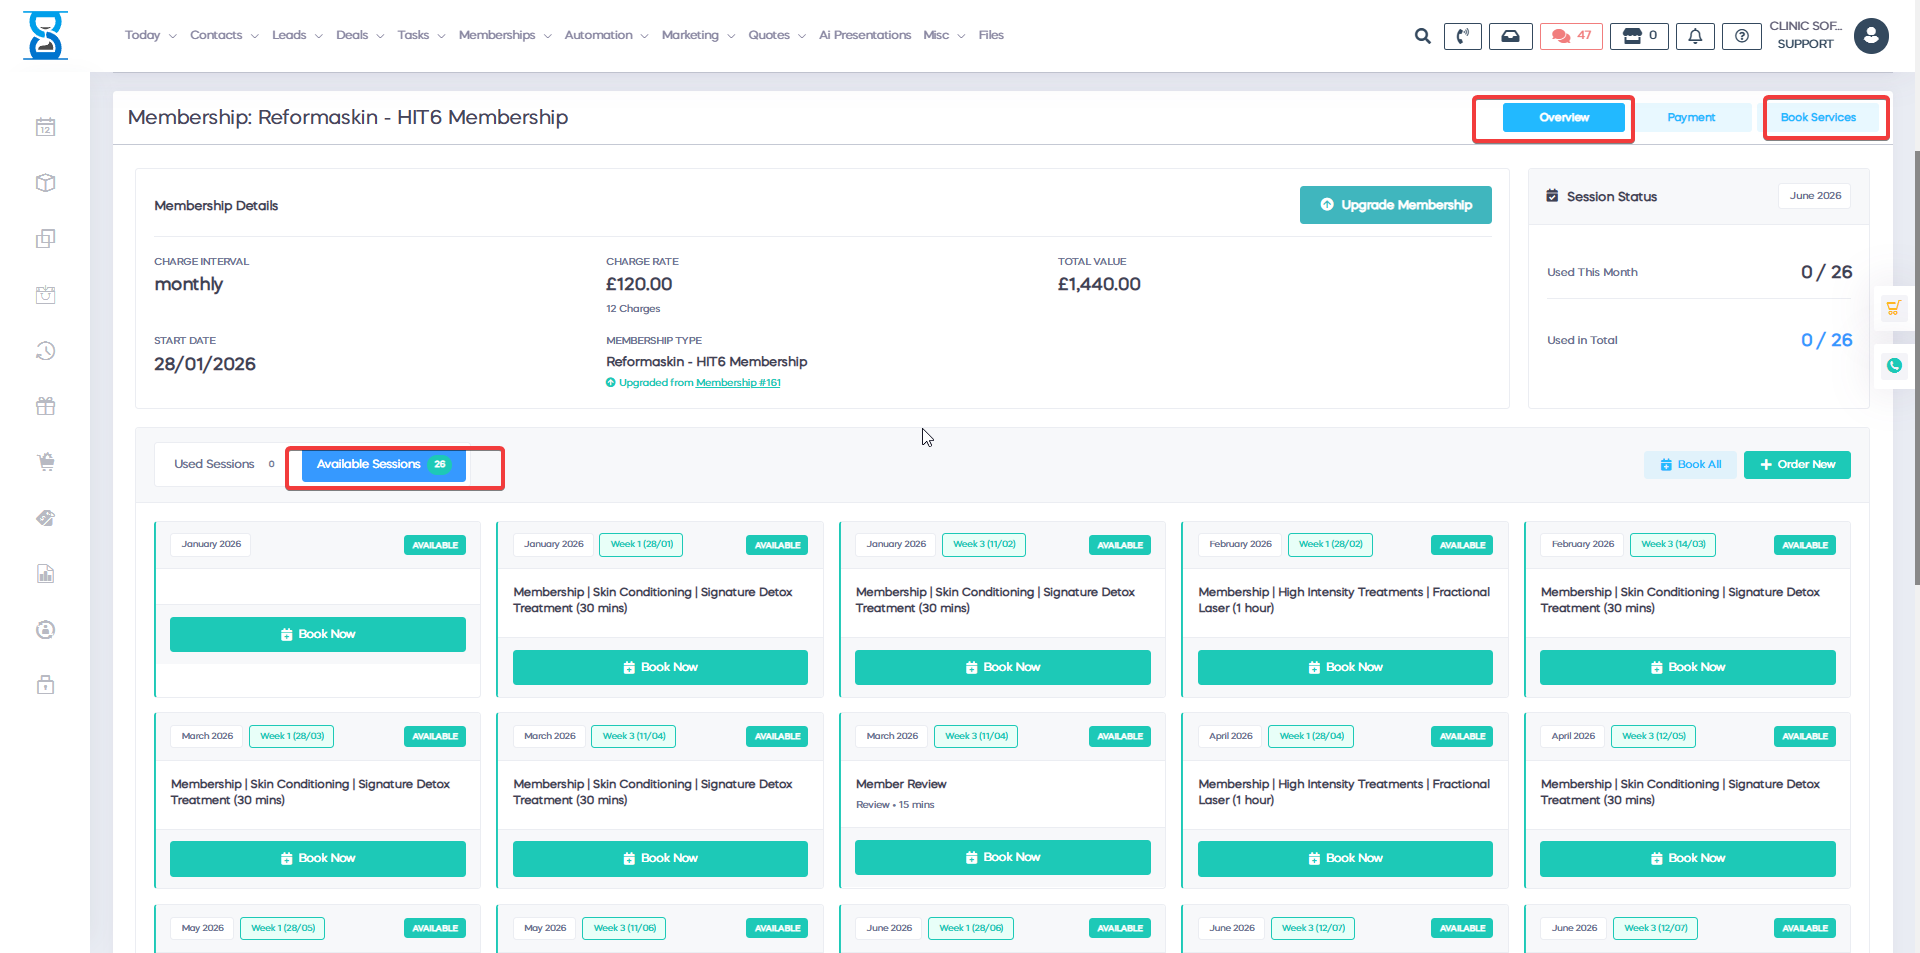
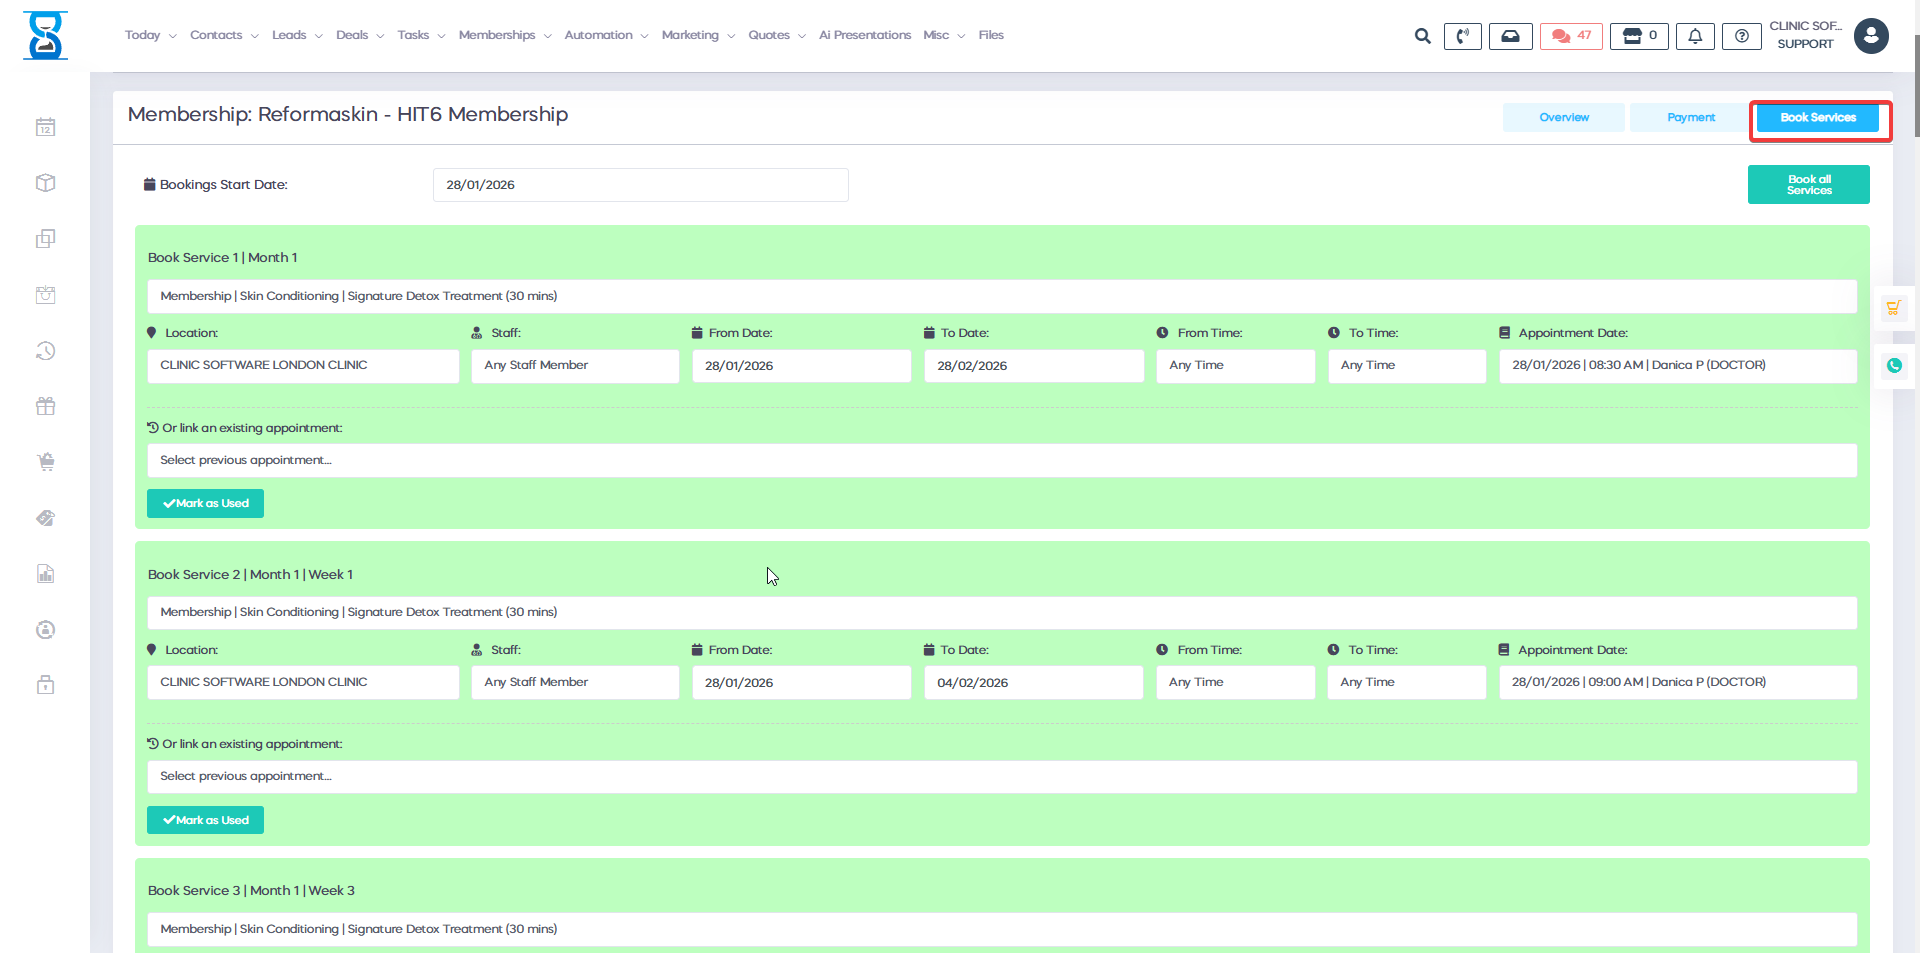
Booking the membership services
You can automatically book in advance the services that were selected when the membership was ordered from the “Book services” tab.
You can choose the “Bookings start date” and also amend the date and time of each booking before clicking on the “BOOK ALL SERVICES” button to automatically book all the services of the membership in advance.
Membership Upgrade
The Membership Upgrade feature allows clinic staff to easily move a client to a higher membership plan while ensuring pricing and benefits are updated accordingly.
How to Upgrade a Membership
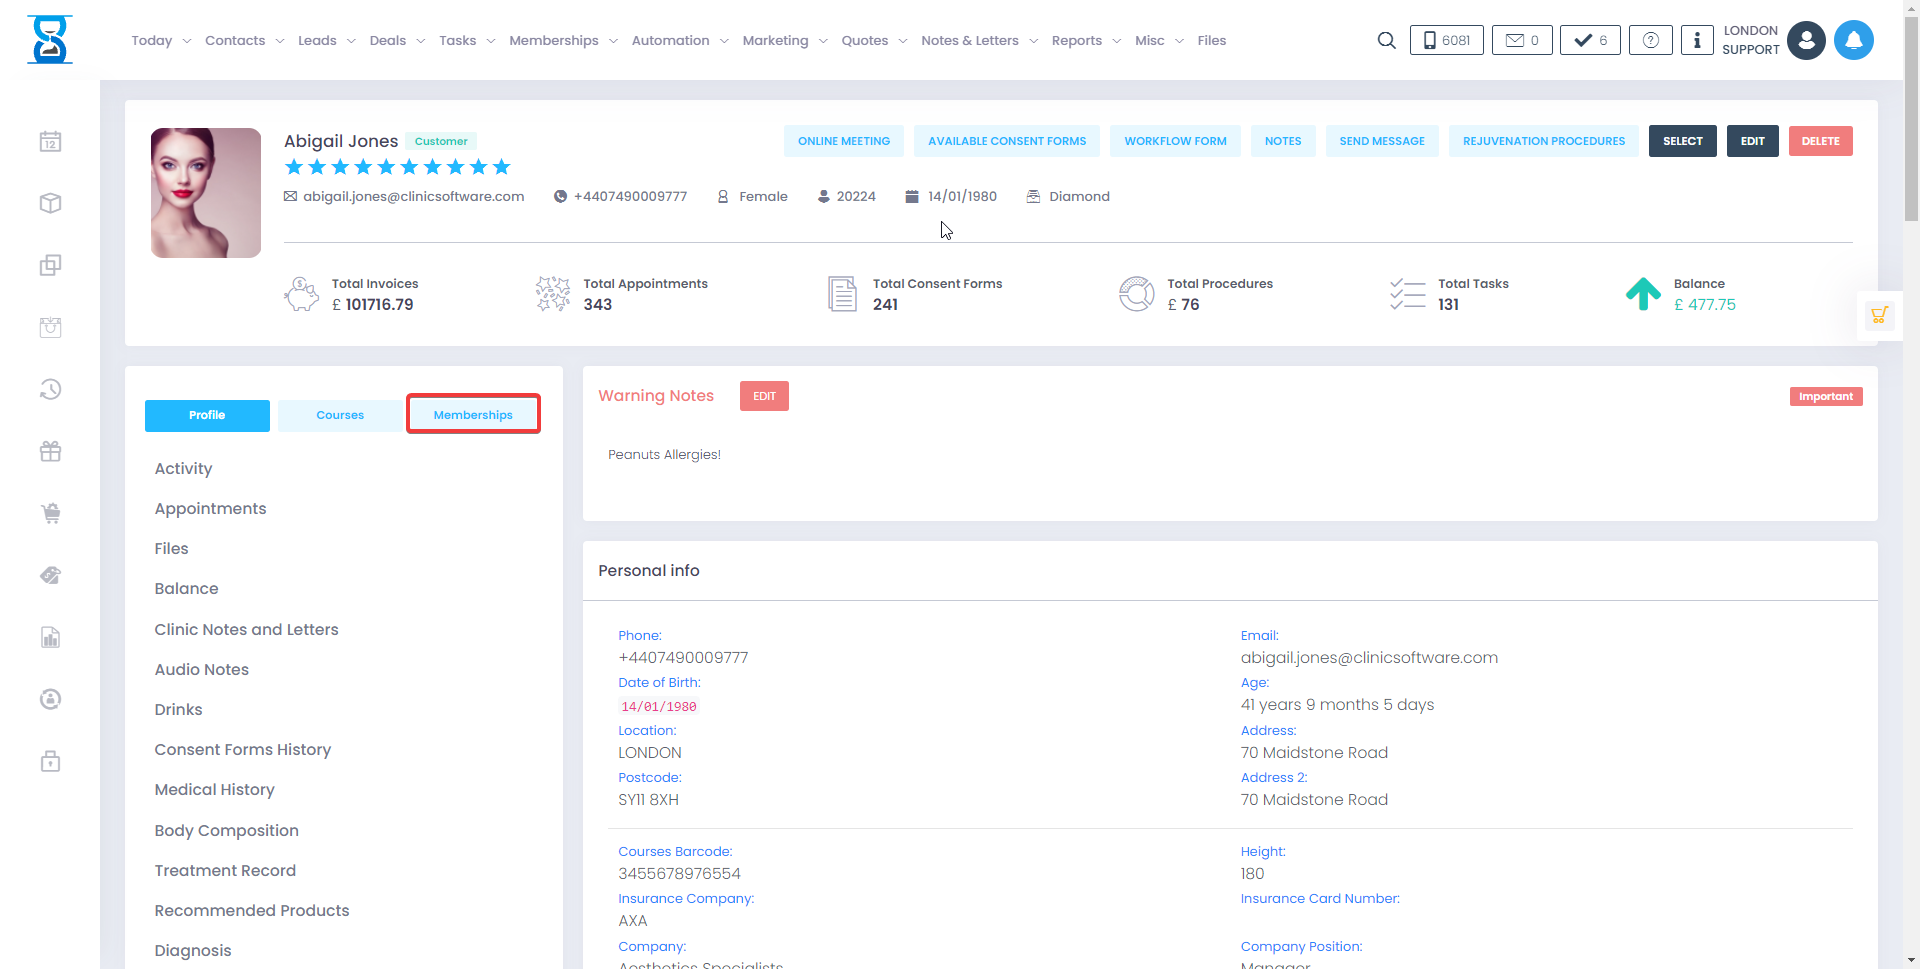
- Navigate to the Client Account.
- Select the Membership tab.
- Click Upgrade Membership.
- Choose the desired membership plan from the available upgrade options.
- Review the updated membership details, including pricing and included benefits.
- Confirm the upgrade to apply the changes to the client's account.
Benefits
- Quickly upgrade clients to plans that better meet their needs.
- Automatically applies the pricing associated with the selected membership plan.
- Provides access to additional membership benefits and services.
- Helps maximize client engagement by offering enhanced treatment and service options.
- Maintains accurate membership records and billing information within the clinic system.
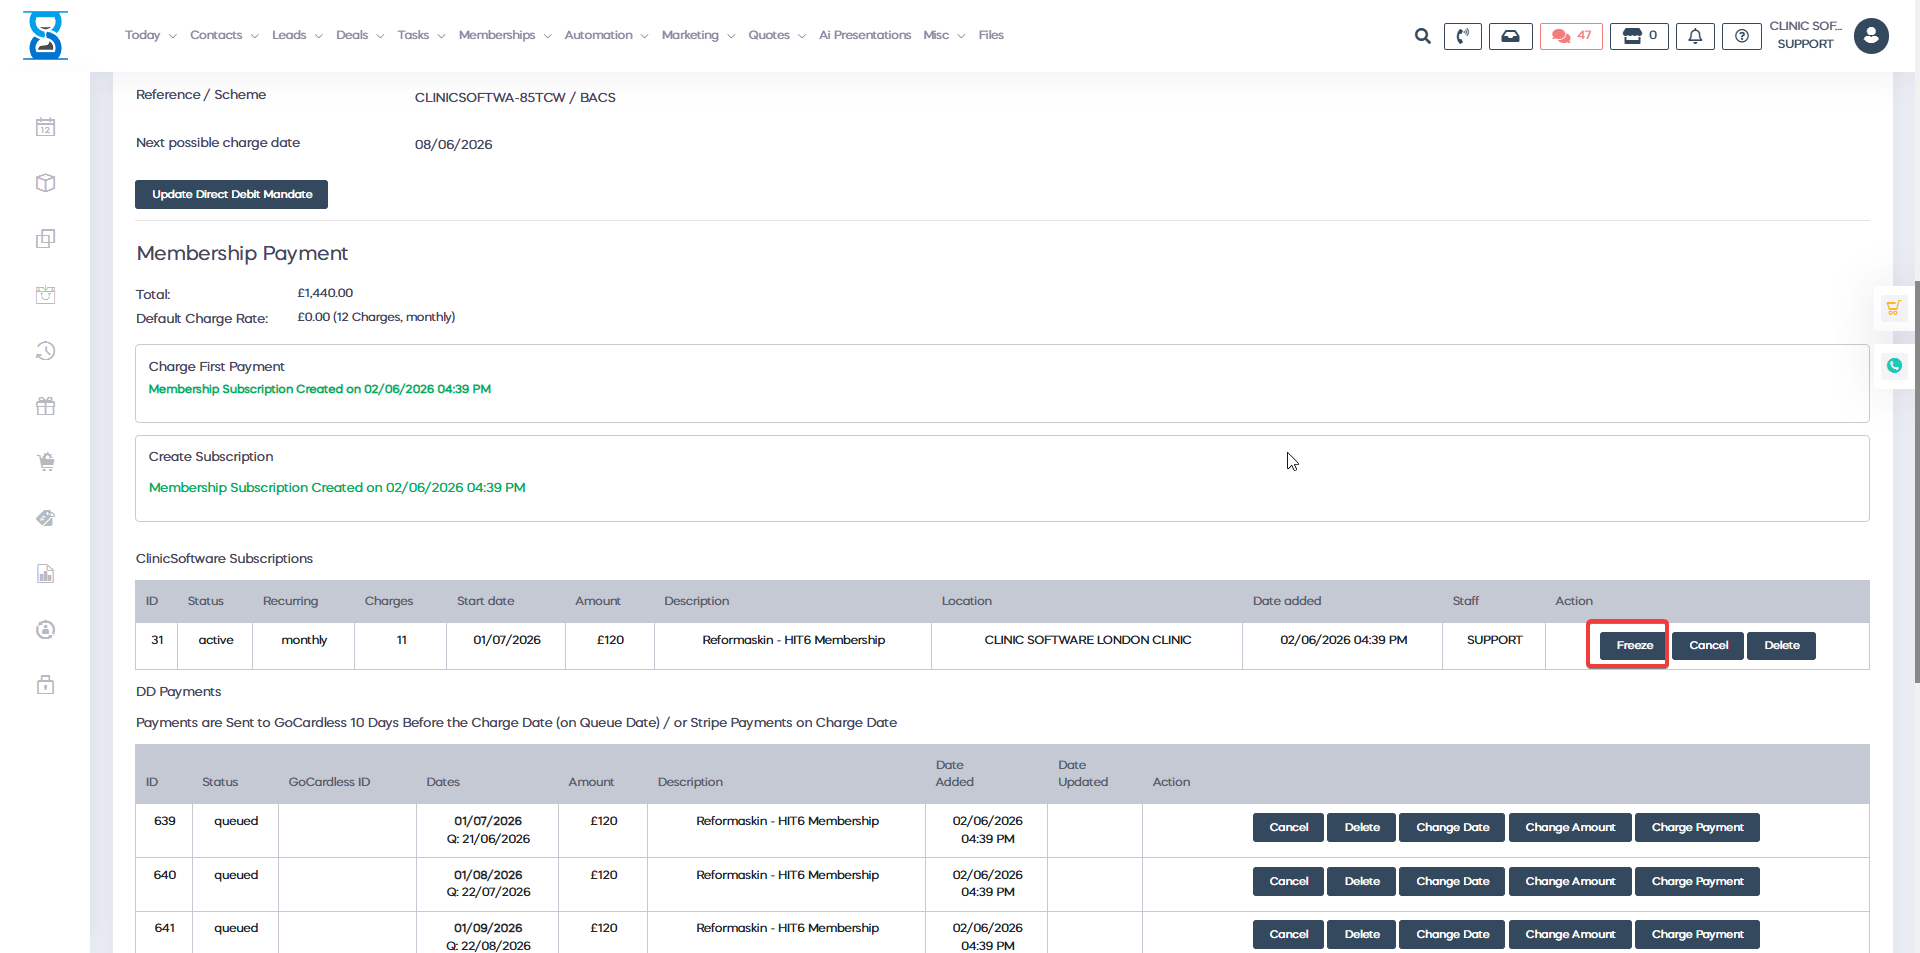
How to delete or freeze a membership and link it to a receipt.
You can go to Client profile =? membership payment and there you have the buttons to delete and also to link a membership p[aym,nt to a previos invoice if the client already paid once
Ordering a new membership online