This is an example of a workflow that is using the paperless consent forms feature:
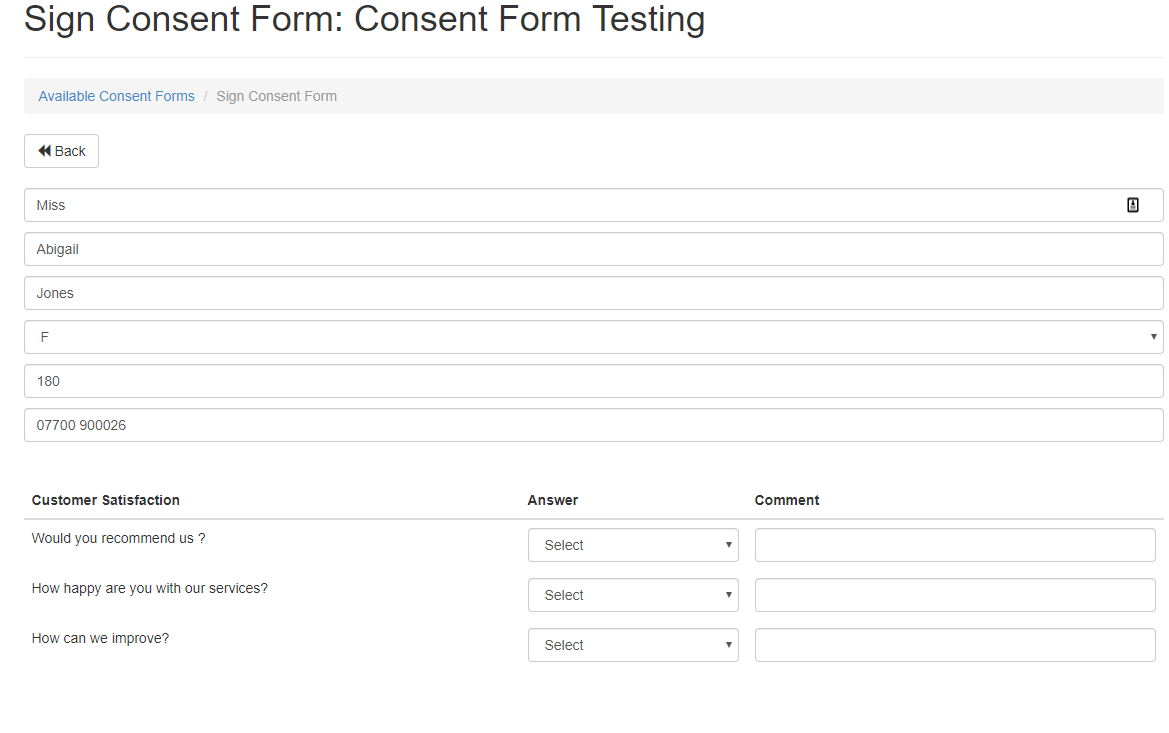
This is an example of a consent form which was signed using a mobile phone:
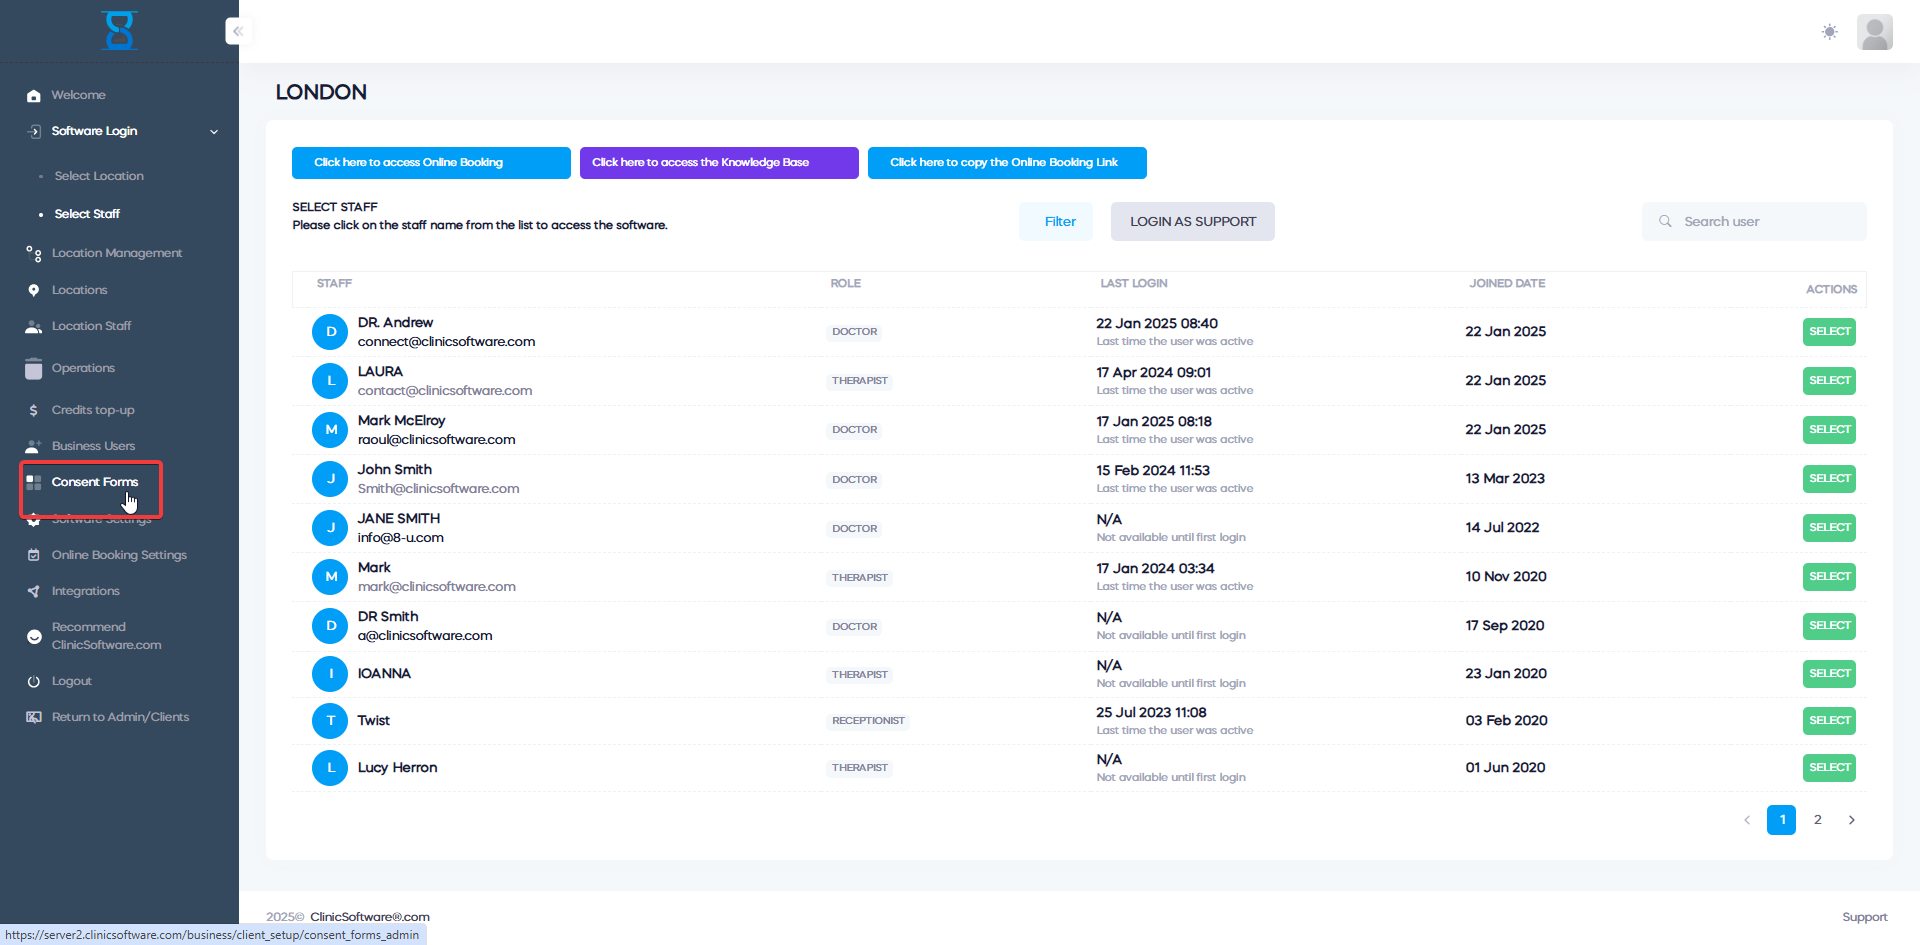
Access the Consent Forms from the Admin panel. To access the admin panel for the consent forms, press the 'Consent Forms' button from the left menu before accessing the main software.
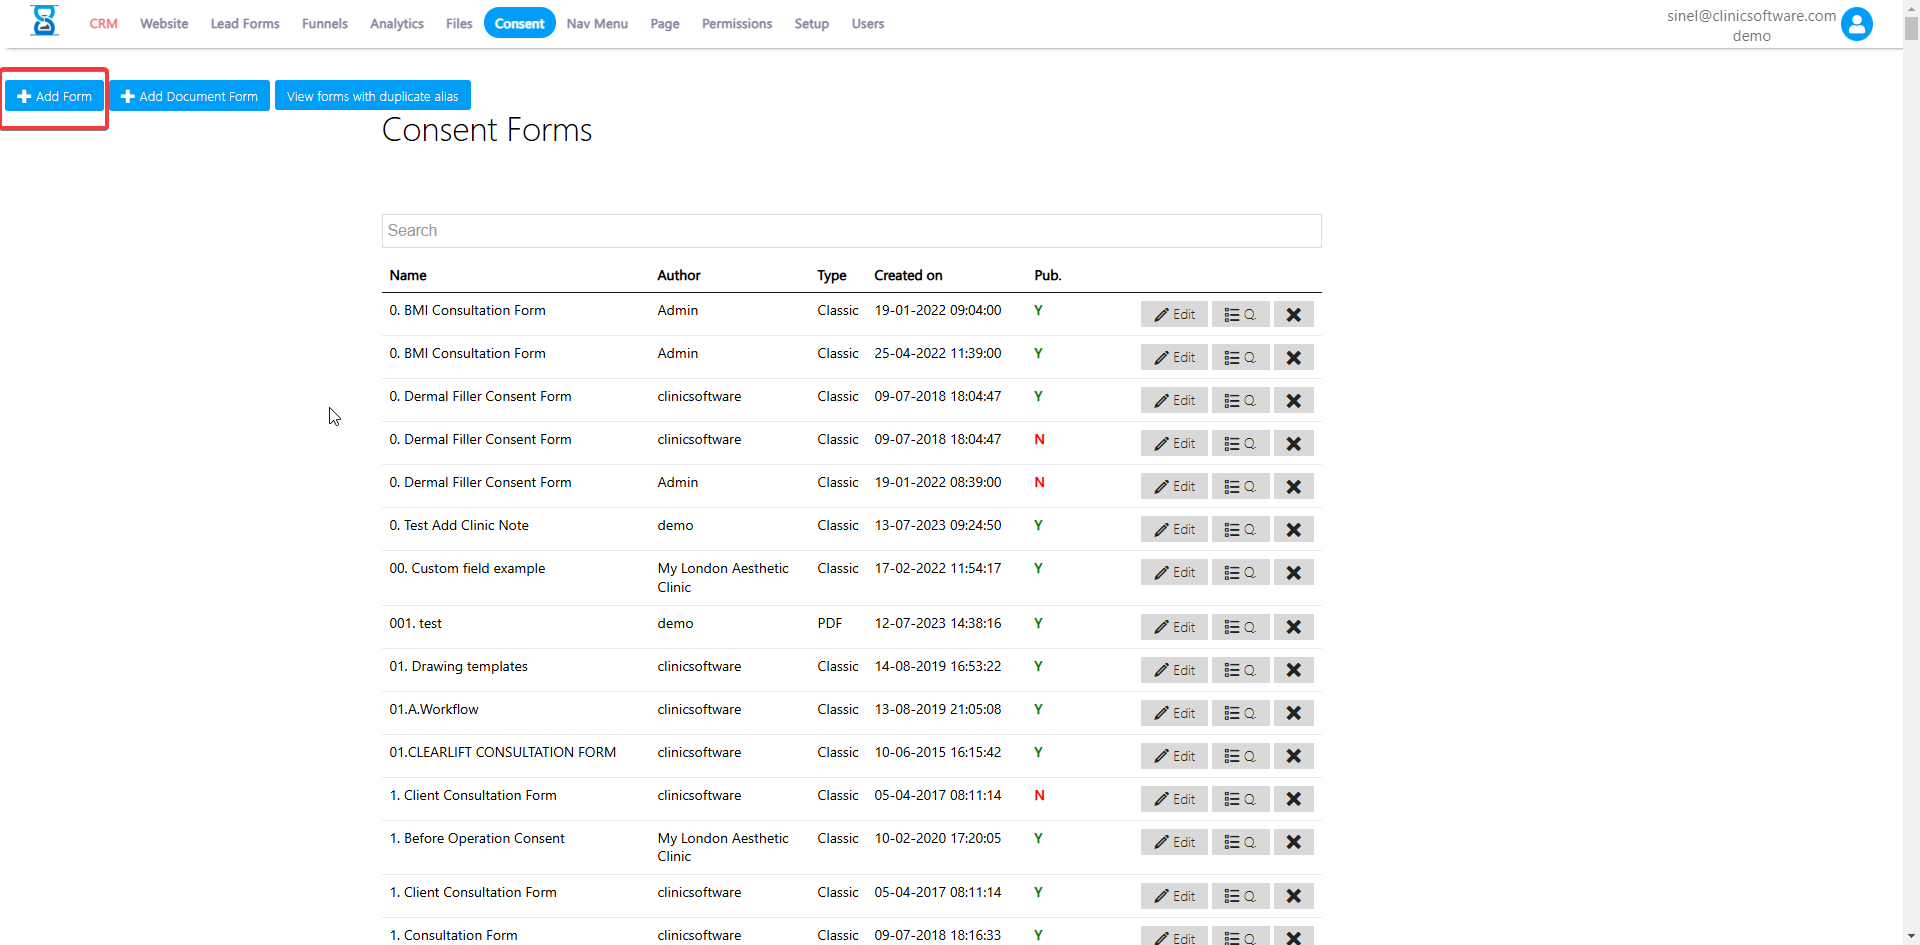
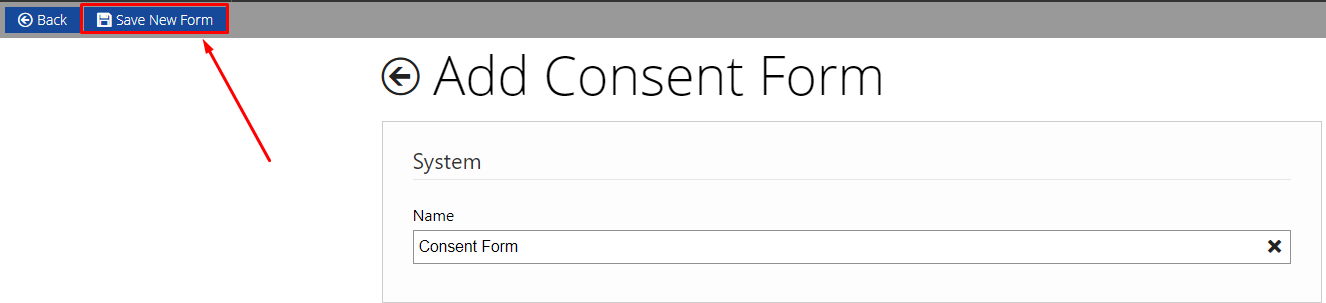
Press the 'Add Form' button from the top-left menu, enter the consent form name and press 'Save New Form'
Write the consent form content or copy it from Microsoft Word / PDF.
While writing the consent form content you can insert fields using the placeholders:
Placeholders are identifiers that tell the system where to place the fields inside the consent form, and can be seen by the double brackets {{ }}.
There are 3 types of placeholders:
- client placeholders (client fields section, are pre-filled with the client details when signing the form)
- staff placeholders (staff fields section, are pre-filled with the staff details when signing the form)
- custom placeholders (any field that is not in the above 2, the majority of fields on your consent form will be of custom type)
From the custom fields you can add the following types of fields:
- current date
{{current_date format="d/m/Y"}}
This will place the current date in the format specified by the "format" attribute when signing the consent form.
- input boxes (single line input)
Example: {{input alias="" name="" placeholder=""}}
For each placeholder we have attributes, e.g. the alias="", they are optional and can be used to identify which
clients completed a field in a certain way if needed in the future by the means of a custom report.
The placeholder="" attribute of the field will display the pre-fill message of the field.
- checkboxes:
E.g. {{checkbox alias="" name="" checked="false"}}
Where if the checked attribute is true (checked="true") the checkbox will be checked by default when the client signs a new consent form.
- select drop-box
{{select alias="" name="" options="" labels="" default_option=""}}
Where the options attribute represent the value of the options and the labels attribute represent the name of the options.
Options are delimited by the ";" character, you can put the same value inside both the options and labels attributes.
e.g. {{select alias="" name="" options="Yes;No" labels="Yes;No" default_option="Yes"}}
- textareas (multiple lines input boxes)
E.g. {{textarea alias="" name="" placeholer=""}}
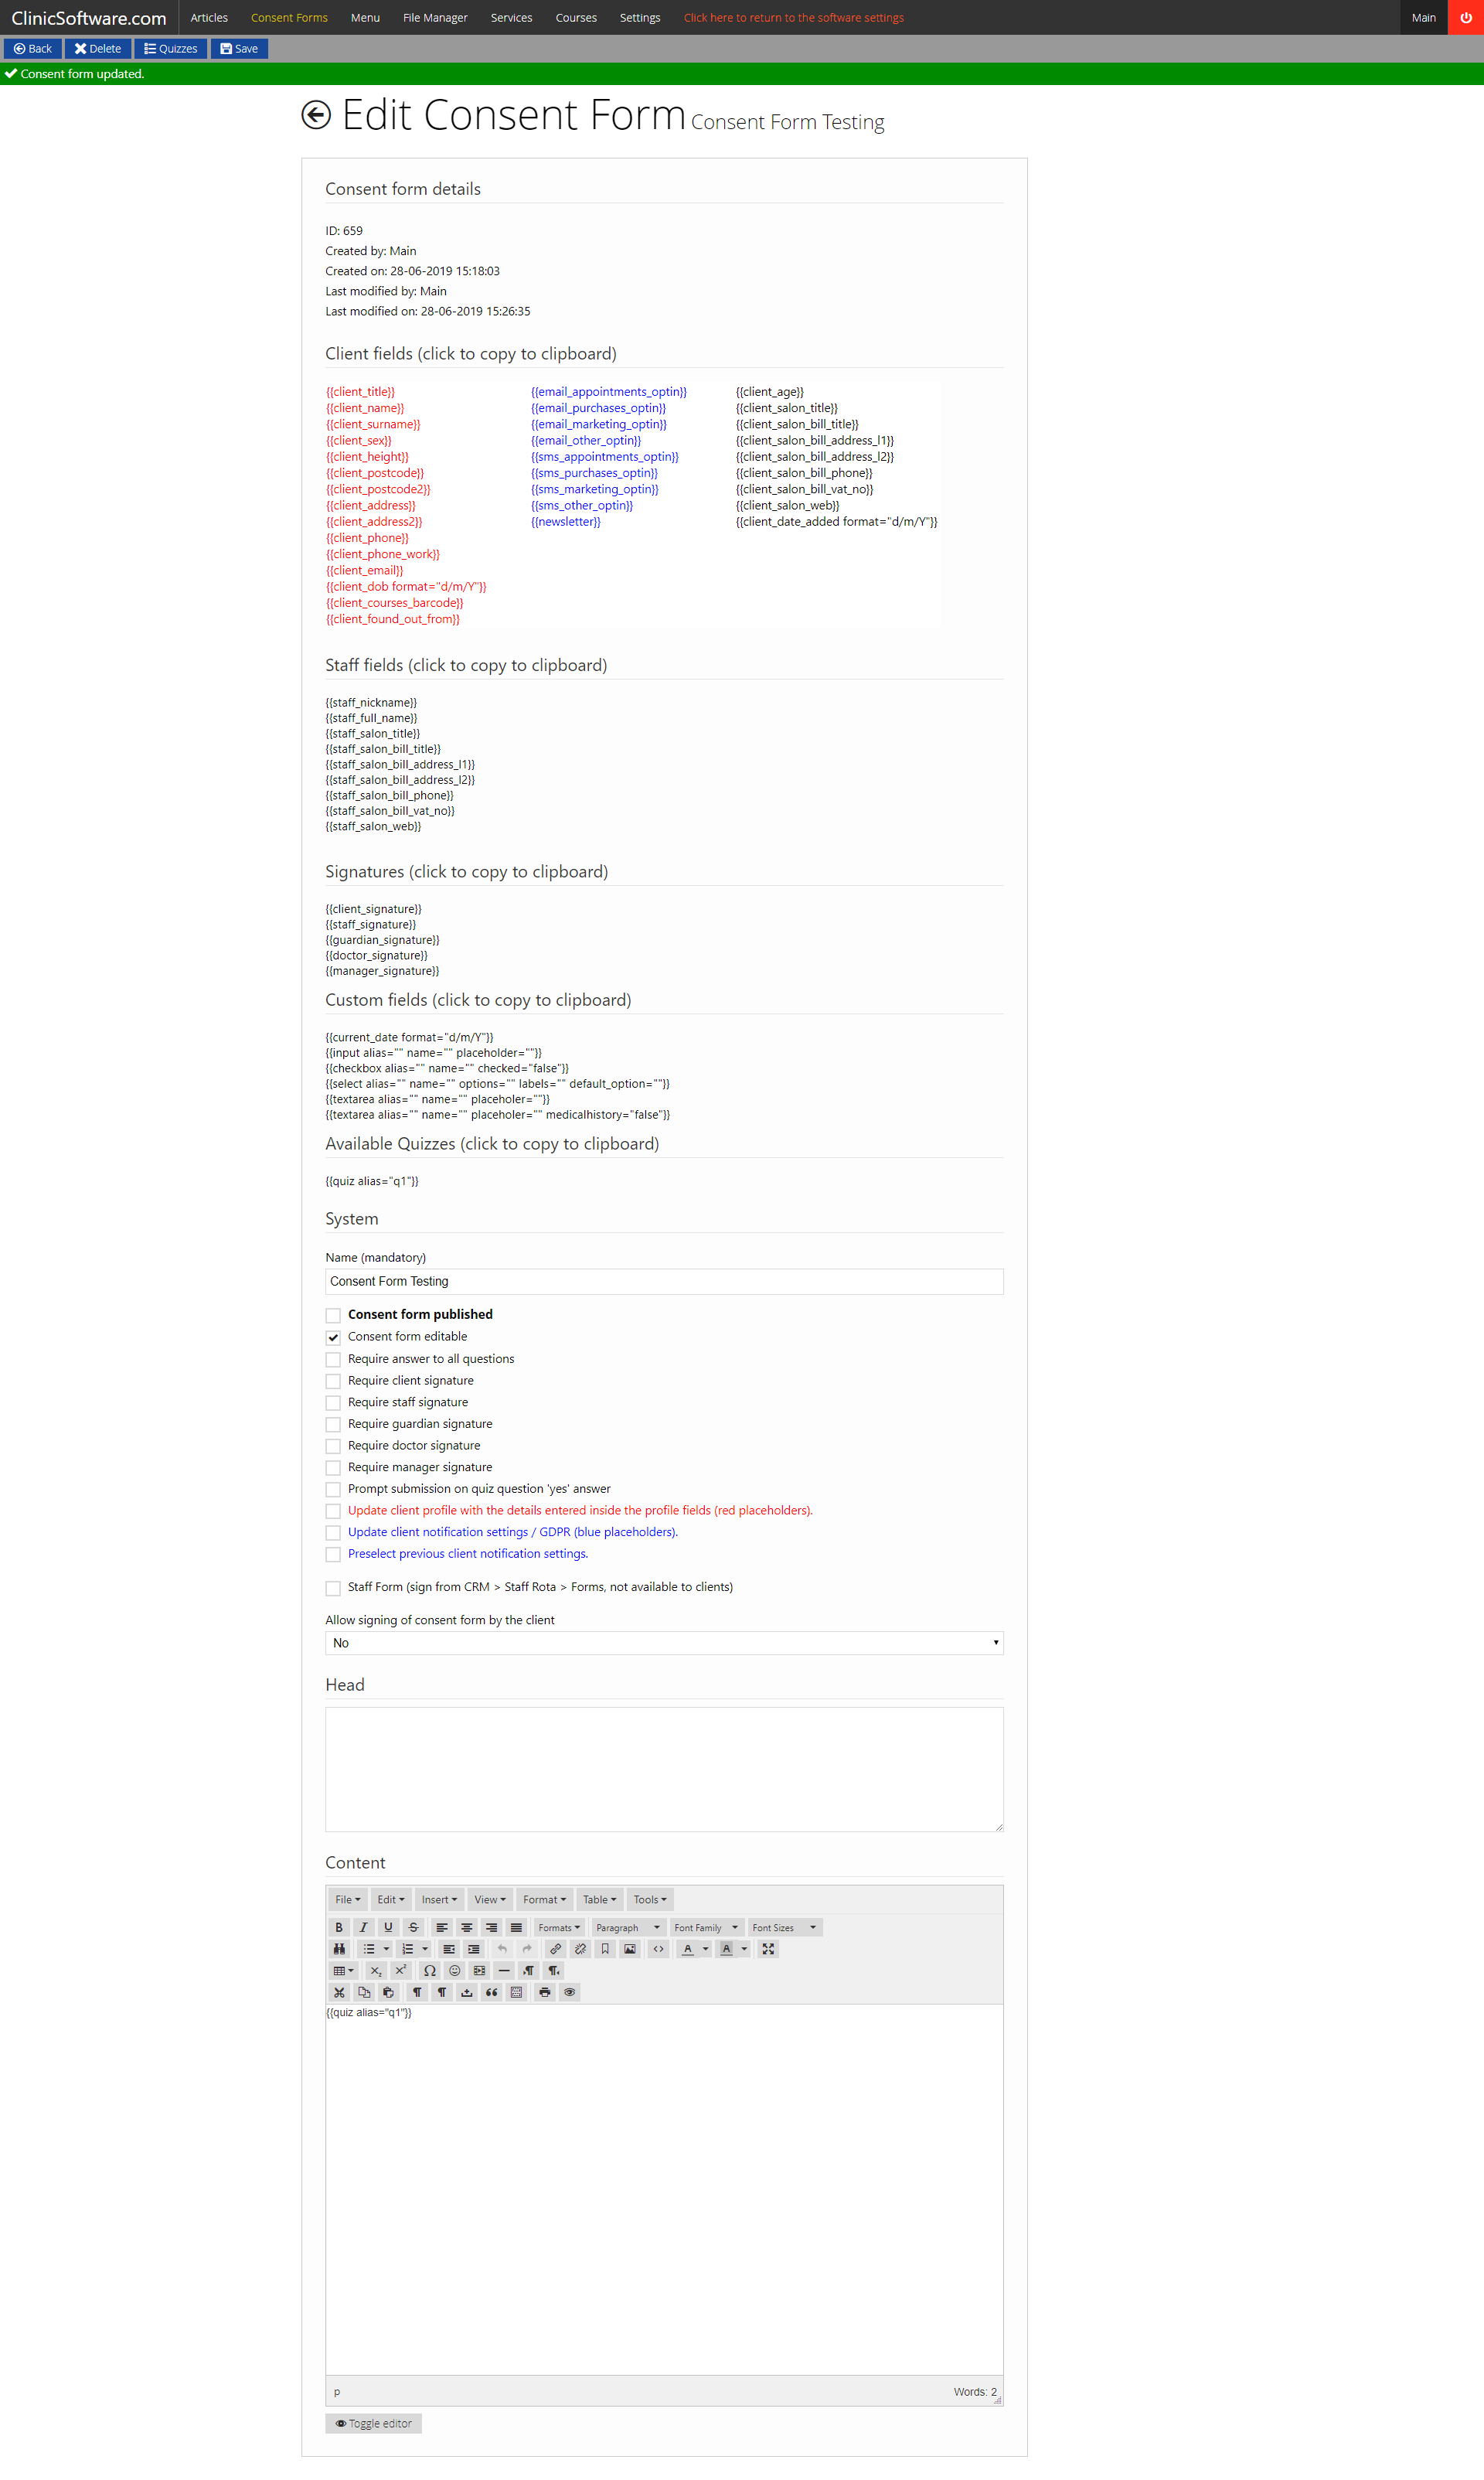
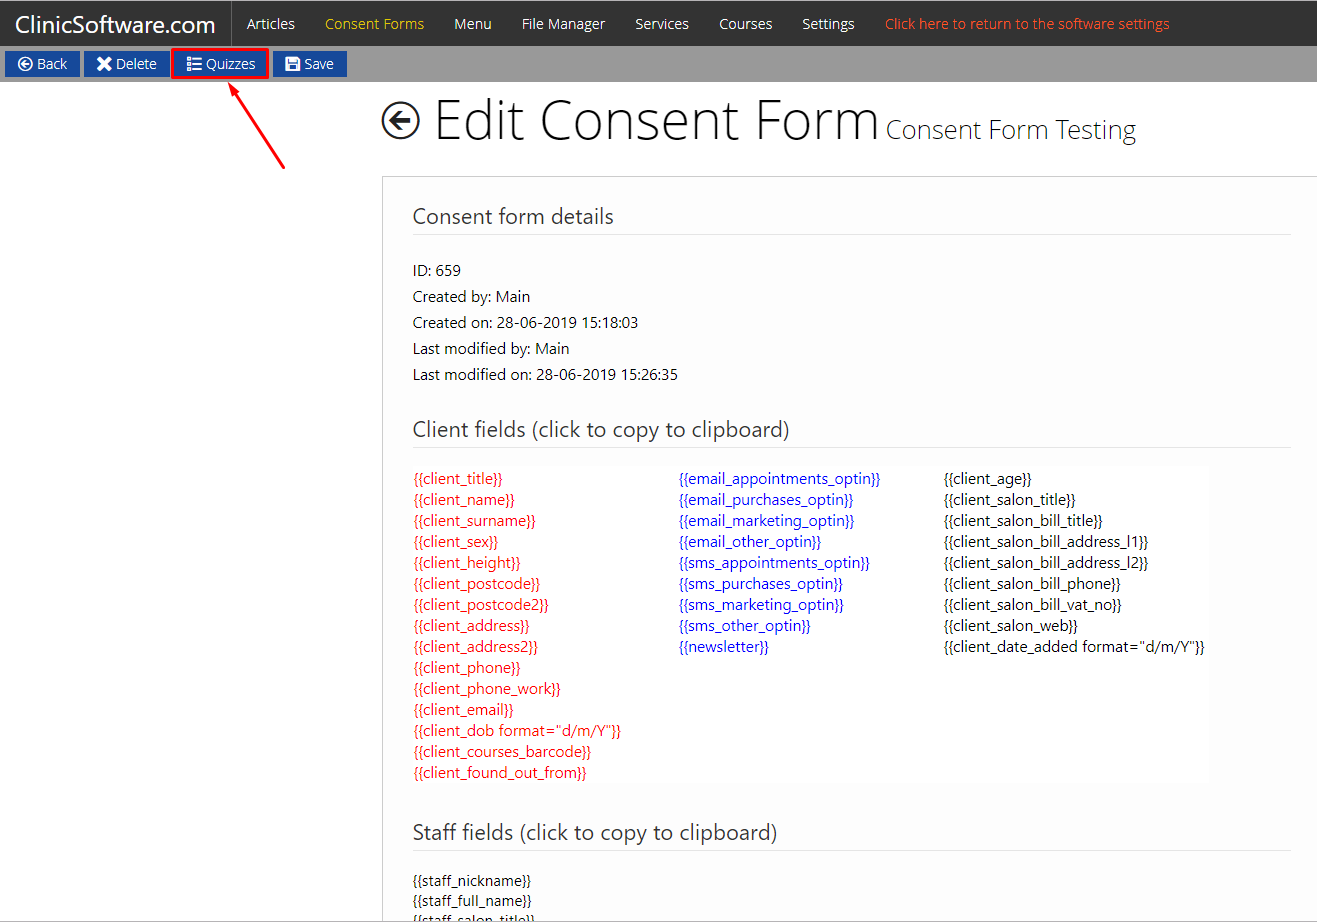
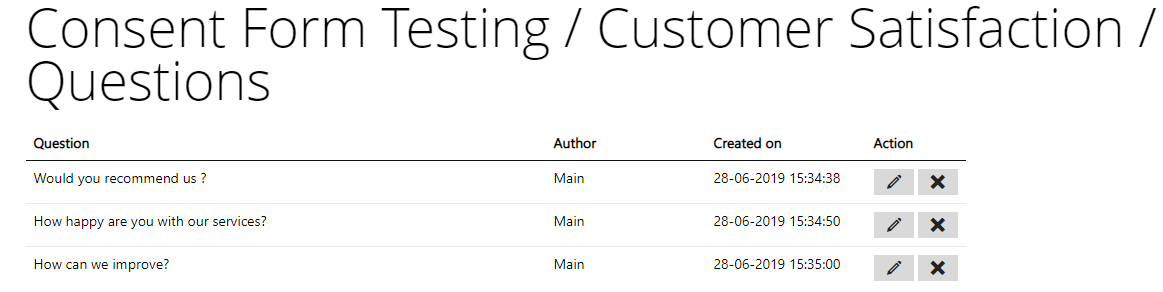
For each consent form we also have quizzes that represent a set of questions with a yes/no answer together with a comment field.
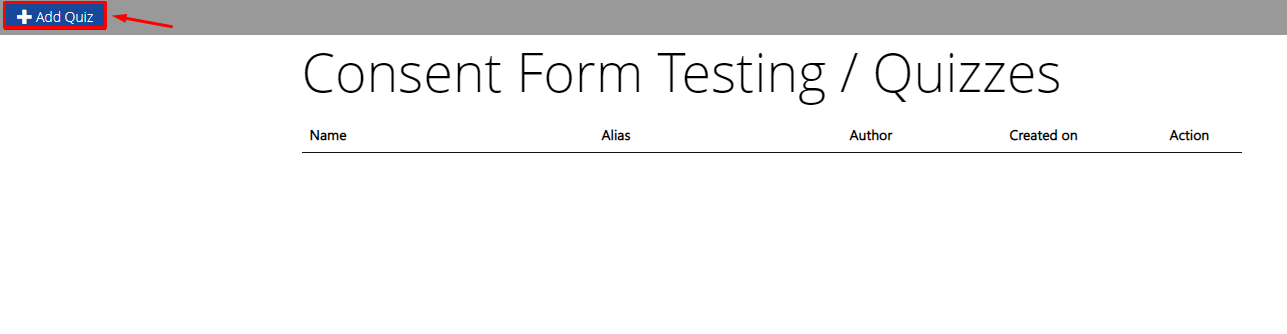
To add a new quiz press the Quizzes button from the top menu followed by the 'Add Quizz' button.
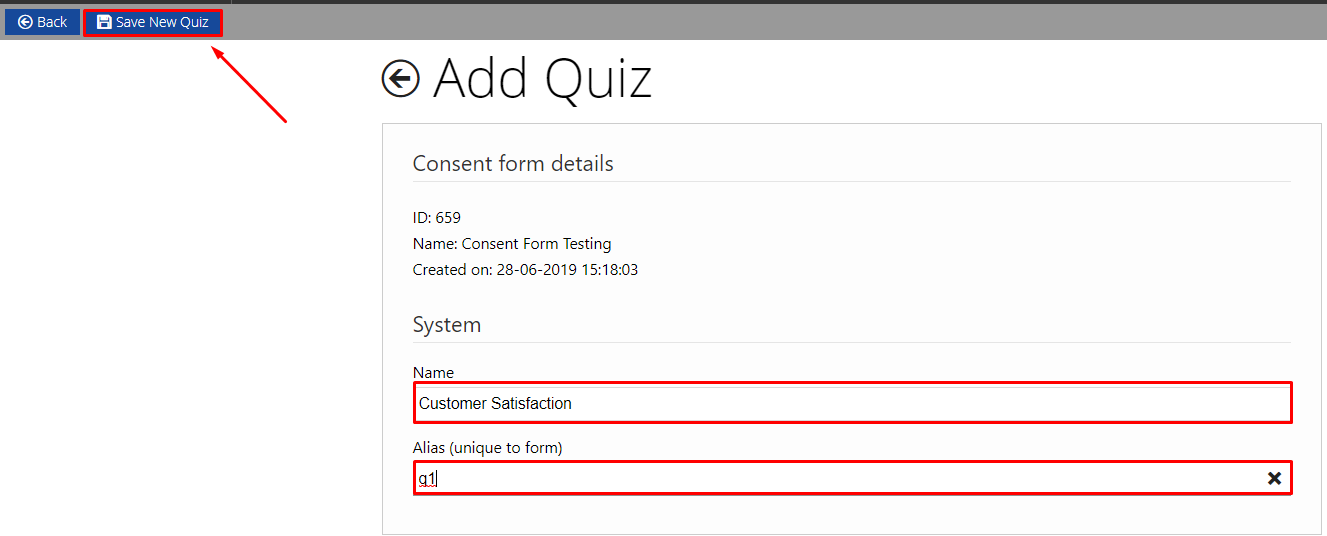
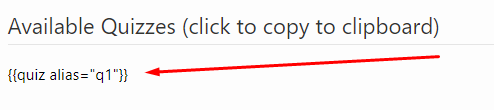
Enter the quiz name and alias and press the 'Save New Quiz' button, the alias field is used to create the placeholder that we will be later placing inside the form.
After the quiz has been added, access the questions of the quiz by pressing the Questions button.
To add a question to the quiz press the 'Add Question' button from the top bar.

After all of the questions have been added to the quiz, to add the quiz to the consent form copy its placeholder displayed inside the edit consent form page below the custom fields to the form.
Once you are happy with the consent form that you have created, tick the checkbox saying "Consent Form Published" and the form will be available.