
![]()
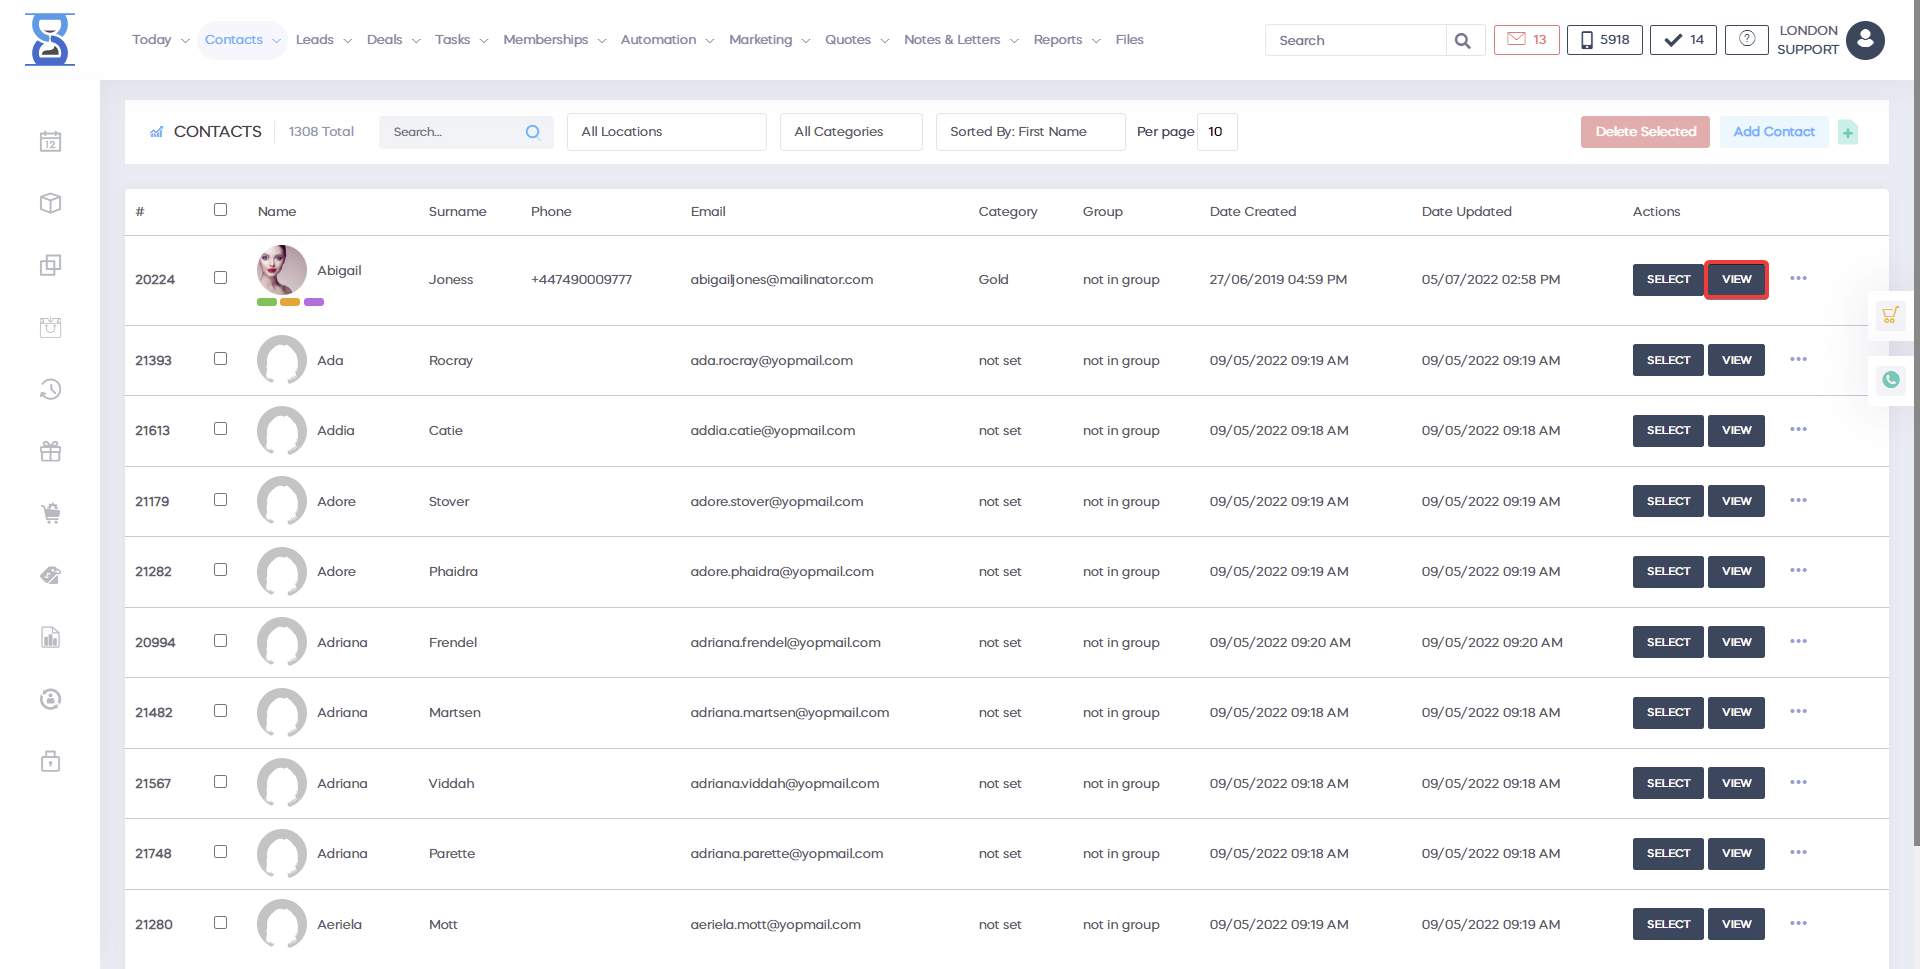
From this page, you can view, add, modify, select and access features such as consent forms and rejuvenation procedures.
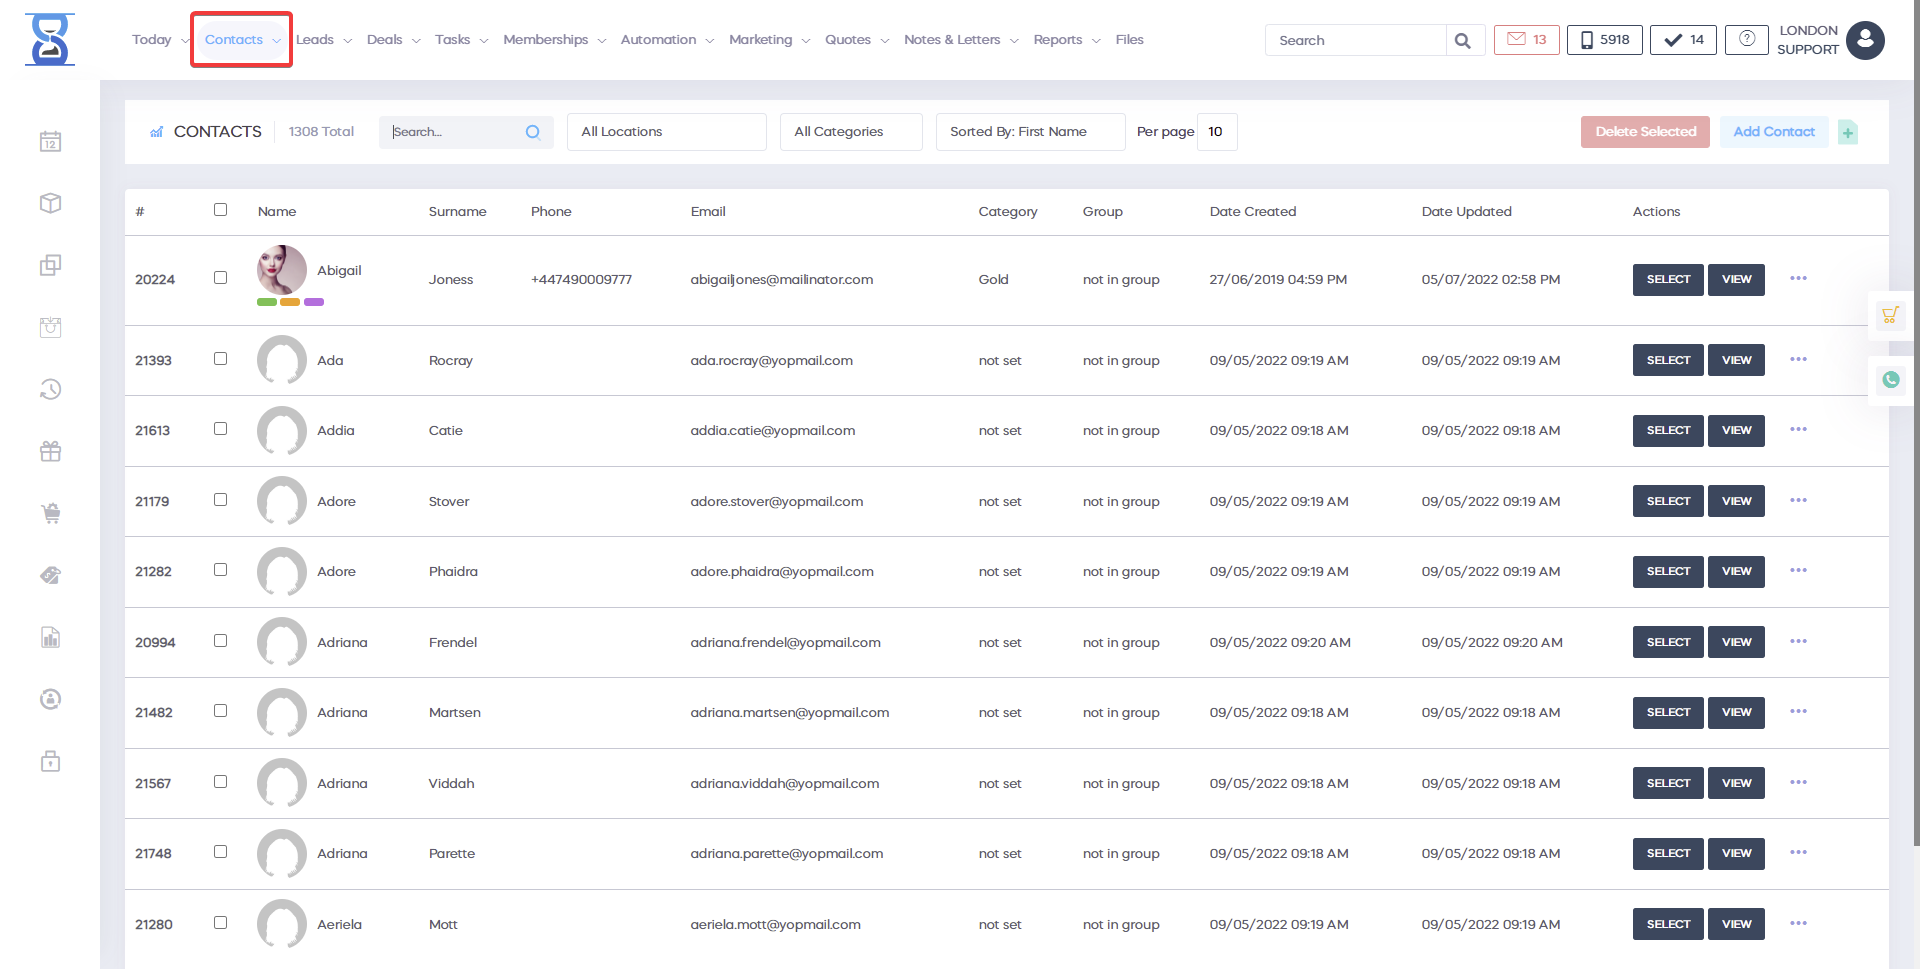
Clients are added on a location basis.
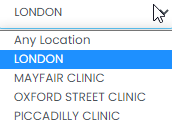
To display only the clients that were added at your location use the “Location” drop box located at the top of the page.
To search for a client use the “Search customer” field located at the bottom of the page.
You can search by name, postcode, email, phone, date of birth, courses card and loyalty barcode.
Customers are listed alphabetically; we include details such as Name, Current Account Balance, Group, Category, and behaviour stars (the blue starts next to the client name) that indicate bad behaviour such as not showing up on time or failing to notify.
The account balance can be positive (displayed in green colour) or negative (displayed in red colour) indicating that the customer is in debt.
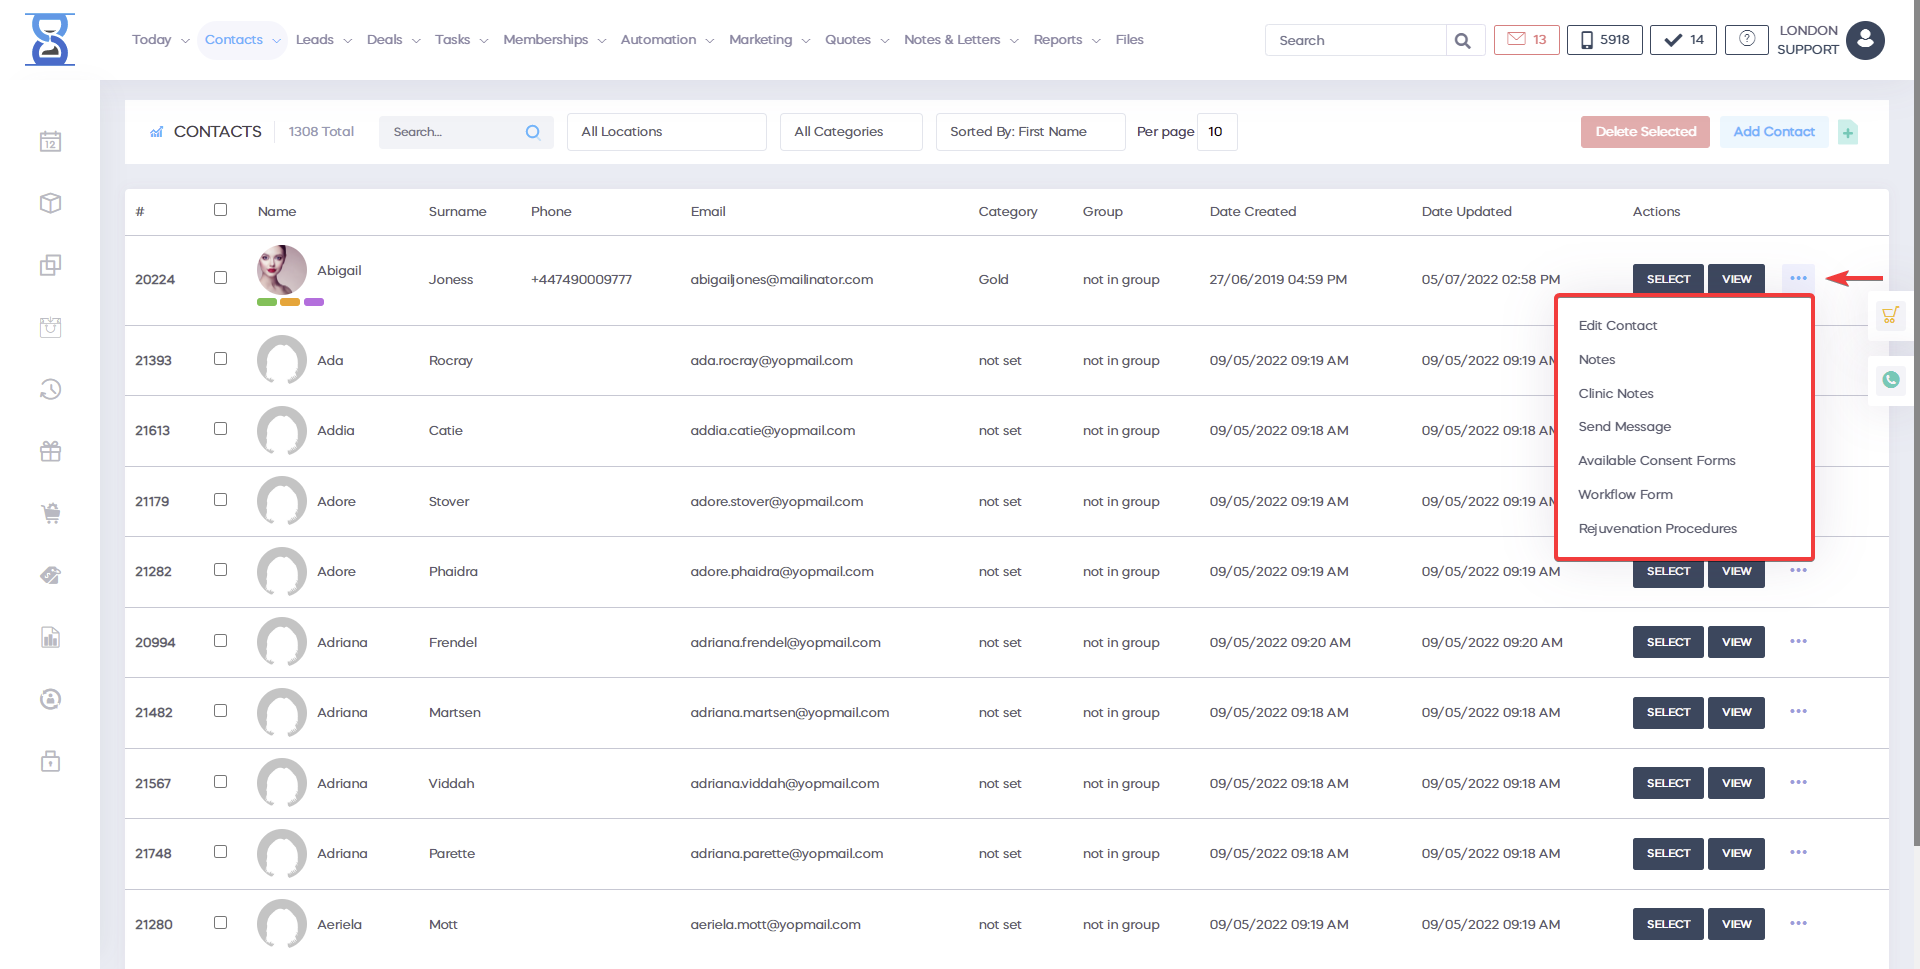
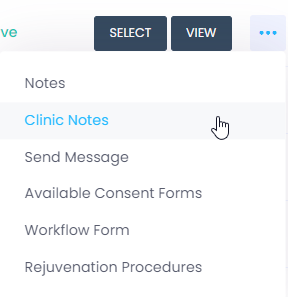
The “Notes” button opens a window from which you can set the client loyalty category, behaviour stars and the following notes: behaviour, profile, profile warning, and course instalments.
![]()
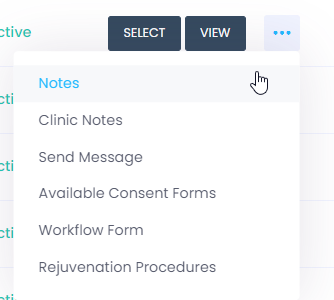
The “Clinic Notes” button will open a page from which you can manage the clinic notes of the client.
More details on how to use the page on the Client Profile / Clinic Notes section of the user guide.
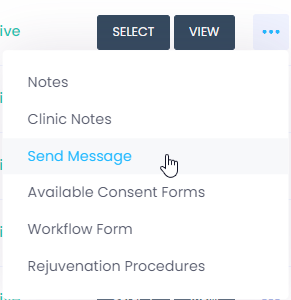
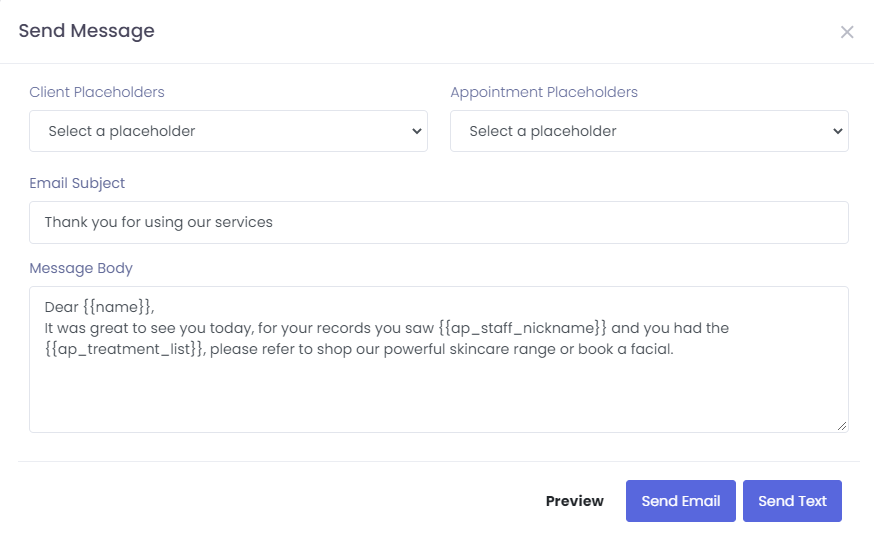
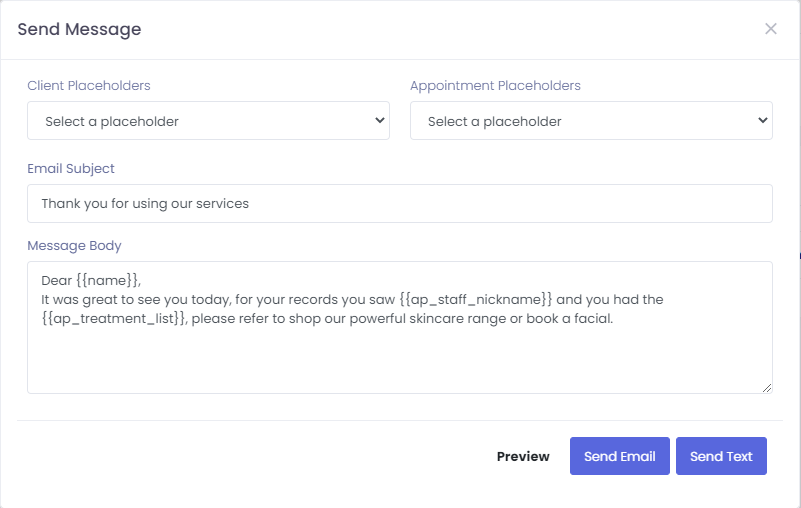
The “Send Message” button will open a window from which you can send a message to the client.
The message can include placeholders that will automatically replace the client name, phone, email etc.
To preview the message that will be sent press the “PREVIEW” button.
To send the message press “SEND EMAIL” or “SEND SMS”.
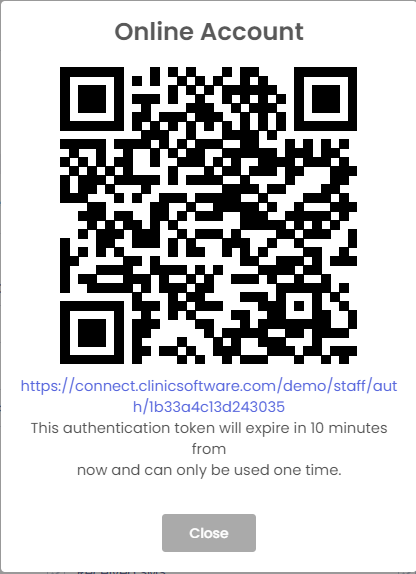
The “Consent Forms” button will open a window from which you can authenticate automatically based on one time use tokens by QR Code to the Online Booking / Available Consent Forms page.
![]()
To log in using your tablet for consent form completion and signing, scan the QR Code using the barcode scanner application of your tablet.
You can also click on the generated link below the QR image to log in from your current PC.
After you have scanned the code or clicked on the link the system will automatically log you in as staff, select the client and open the available consent forms page.
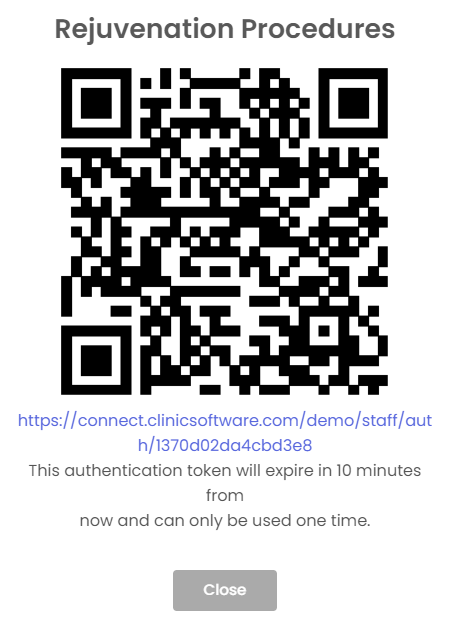
The “Rejuvenation” button will open a window from which you can authenticate automatically based on one time use tokens by QR Code to the Online Booking Rejuvenation feature.
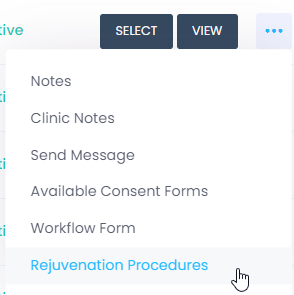
To log in using your tablet to the rejuvenation feature, scan the QR Code using the barcode scanner application of your tablet.
You can also click on the generated link below the QR image to log in from your current PC.
After you have scanned the code or clicked on the link the system will automatically log you in as staff, select the client and open the client rejuvenation procedures.
CLIENT PROFILE
From this page, you can view and edit the client details, view/email/print receipts, appointment history and clinic notes.
To access the client profile press the “View” button from the clients list page.
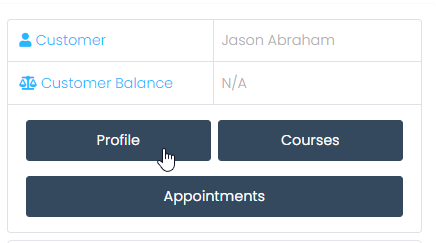
When the client is selected, you can also press the “PROFILE” button from the client selection details below the cart (right column) to access his/hers profile.
You can also access the client profile from the appointment details window by pressing the “Customer profile” button.

To select the client press the “Select Client” button from the top left section.

Forms History button
This will open the client consent forms page from which you can download the signed client consent forms.
Please refer to the client consent forms section in this user for more details.
The “Forms History” button is located at the middle of the client profile page (scroll down).

Available Consent Forms button
To open the client available consent forms press the “Available Consent Forms” button located at the middle of the page (scroll down).

This will opened all consent forms and if you press sign you can sign the one you need

To log in using your tablet for consent form completion and signing, scan the QR Code using the barcode scanner application of your tablet.
You can also click on the generated link below the QR image to log in from your current PC.
After you have scanned the code or clicked on the link the system will automatically log you in as staff, select the client and open the available consent forms page.
Rejuvenation Procedures button
To open the client rejuvenation procedures press the “Rejuvenation Procedures” button located at the middle of the page (scroll down).

To log in using your tablet to the rejuvenation feature, scan the QR Code using the barcode scanner application of your tablet.
You can also click on the generated link below the QR image to log in from your current PC.
After you have scanned the code or clicked on the link the system will automatically log you in as staff, select the client and open the client rejuvenation procedures.
Drinks history button
This will open the “Drinks ” page from which you can view what drinks the client had during each appointment.
Please refer to the Client Drinks History section in this user for more details.
The “Drinks History” button is located in the middle of the client profile page (scroll down).
![]()
Send Message button
The “Send Message” button will open a window from which you can send a message to the client.
The “Send Message” button is located in the middle of the client profile page (scroll down).
![]()
The message can include placeholders that will automatically replace the client name, phone, email etc.
To preview the message that will be sent press the “PREVIEW” button.
To send the message press “SEND EMAIL” or “SEND SMS”.
CLIENT CALLING FEATURE
With these features, you can initiate a call to a client and also have the capability to take notes during the call or select another client, not the current one.


CLIENT APPOINTMENTS (CLIENT PROFILE SUBPAGE)
From this page, you can view the appointments history of the client.
To access this page press the “Appointments” button from the client profile top section.


To return to the client profile page press either the “View profile” button (bottom left) or the “Back” button (top left).
CLIENT BALANCE (CLIENT PROFILE SUBPAGE)
From this page, you can view the client account balance history (when the client has deposited or withdrawn funds from his/her account and the balance before and after the operation).
To access this page press the “Balance” button from the client profile top section.

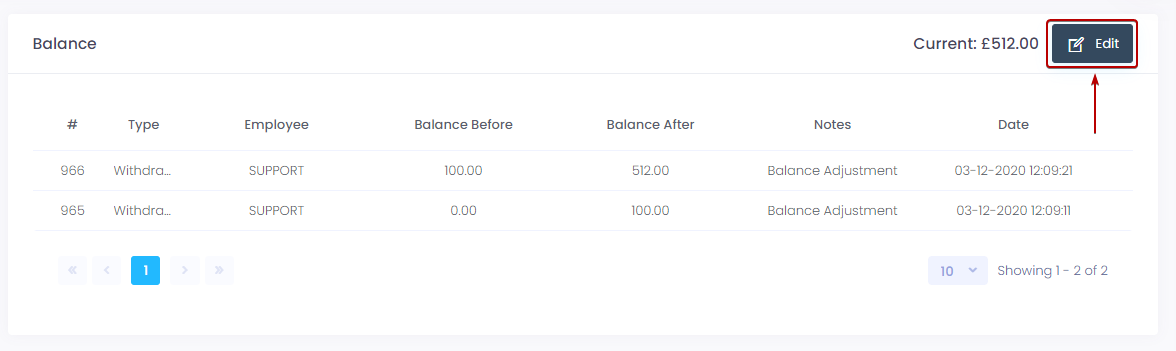
To return to the client profile page press either the “View profile” button (bottom left) or the “Back” button (top left).
CLINIC NOTES (CLIENT PROFILE SUBPAGE)
From this page, you can view, add, edit and remove clinic notes for the current client.
To access this page press the “Clinic Notes” button from the client profile top section.
To add a new clinic note, press the “Add New Clinic Note” from the bottom of the page.
To edit or delete existing clinic notes use the “Edit” and “Delete” buttons from the right side of the note.

To return to the client profile page press either the “View profile” button (bottom left) or the “Back” button (top left).
EDIT PROFILE (CLIENT PROFILE SUBPAGE)
From this page, you can edit the client details, set notes, set client category and group, assign loyalty card, add and remove voucher barcodes, merge client accounts.
To access this page press the “Edit” button from the client profile top section.

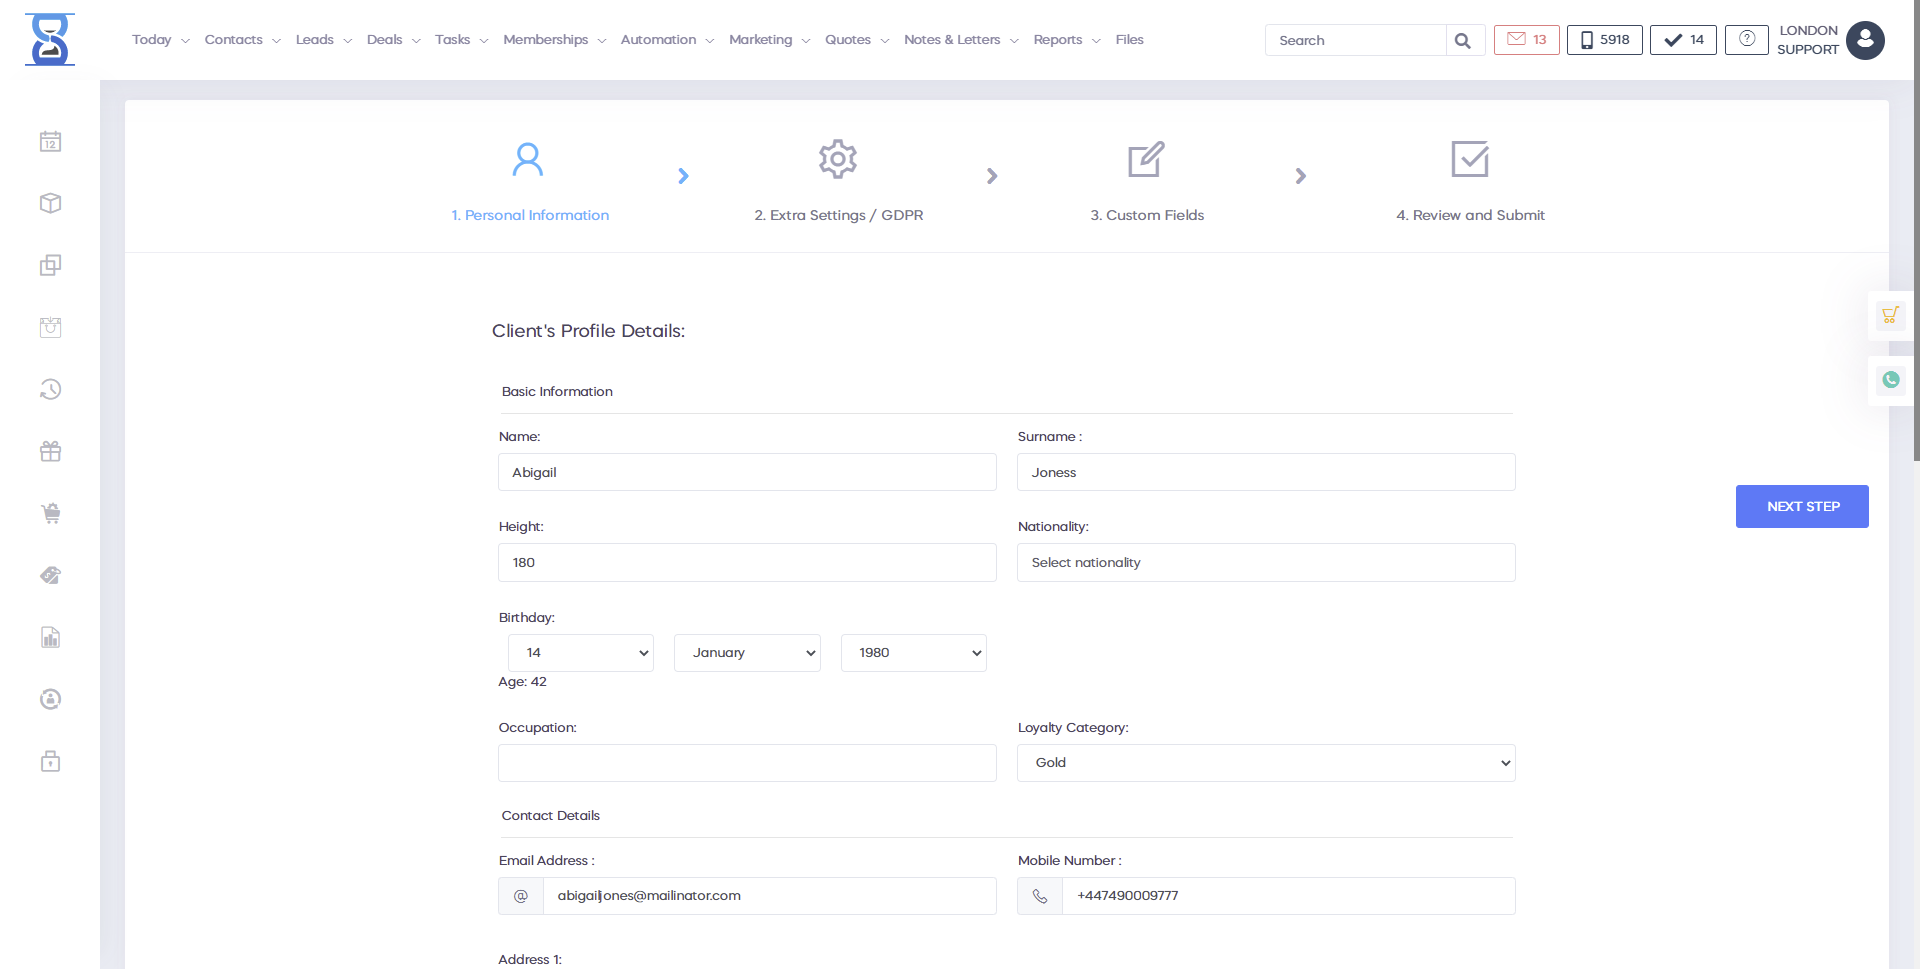
To update the client details make the necessary changes to the client details fields and then press the “Save Changes” button located on both the top right and bottom of the page.
On the same corner where you have Edit client there are more features like
1)View Assigned Jobs
This is where you can see all automations that are in progress for that client and check the status.

2)Automation Trigger
You can use these to build up an automation for a customer based on the one you made.


3)Set "Referred By"
You can add a client to the referral schema. Search for the client, set who referred them, and track each referral easily.


4)Online Meeting
This feature allows you to send an email with a link for an online meeting to a client.


5)Send Invoice

6)Set Warning
These features can help you to set a warning for a client, a warning that you already created in the Admin Area => Client custom warnings.


7)Cancel All Upcoming Appointments
With these features, you can prevent a client from making any future appointments.


To assign loyalty points, fill in the “Loyalty Points” field and then press the “Save Changes” button.
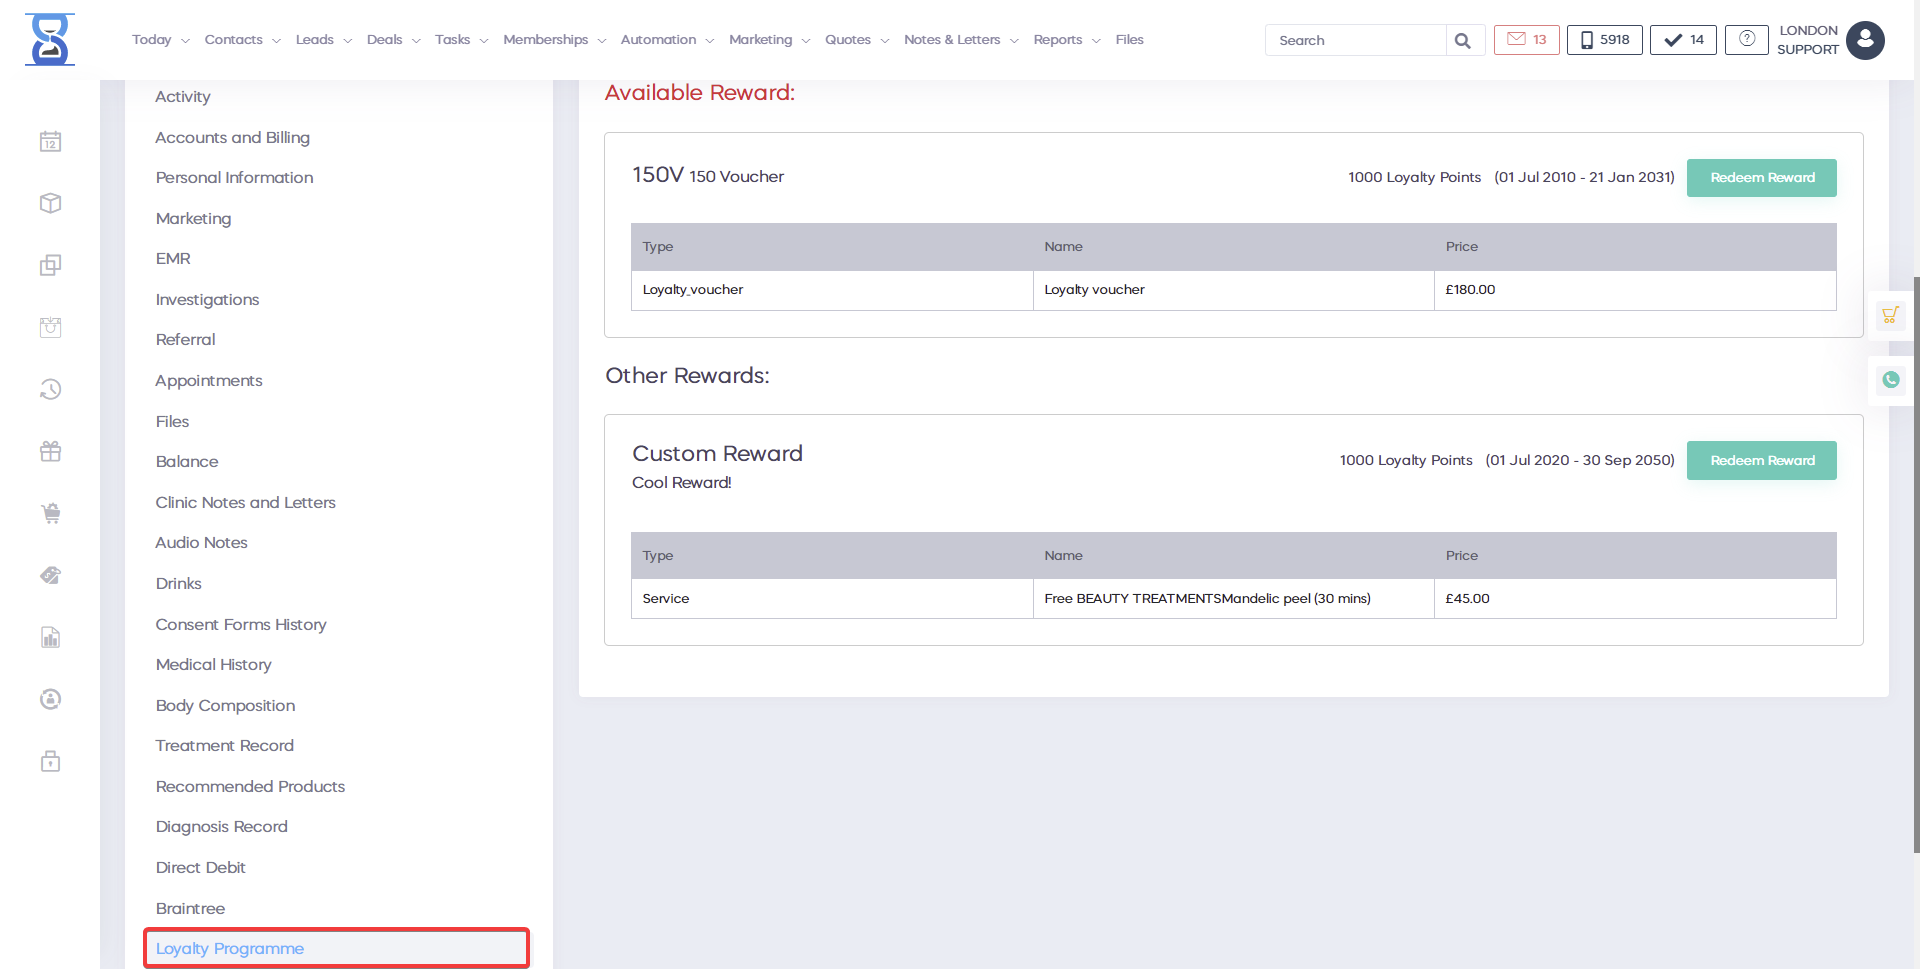
To add a new voucher to the client account, open the edit profile page and fill in the “New Voucher Code” field with the voucher barcode and then press the “Save Changes” button.
To remove an existing voucher delete its barcode form the list (leave the field blank) and then press the “Save Changes” button.
The amount on each voucher is displayed in the client profile page.

MERGE CLIENTS (CLIENT EDIT PROFILE SUBPAGE)
From this page, you can merge client accounts.
To access this page open the edit page, and press the “Merge Clients” button from the client edit profile page.
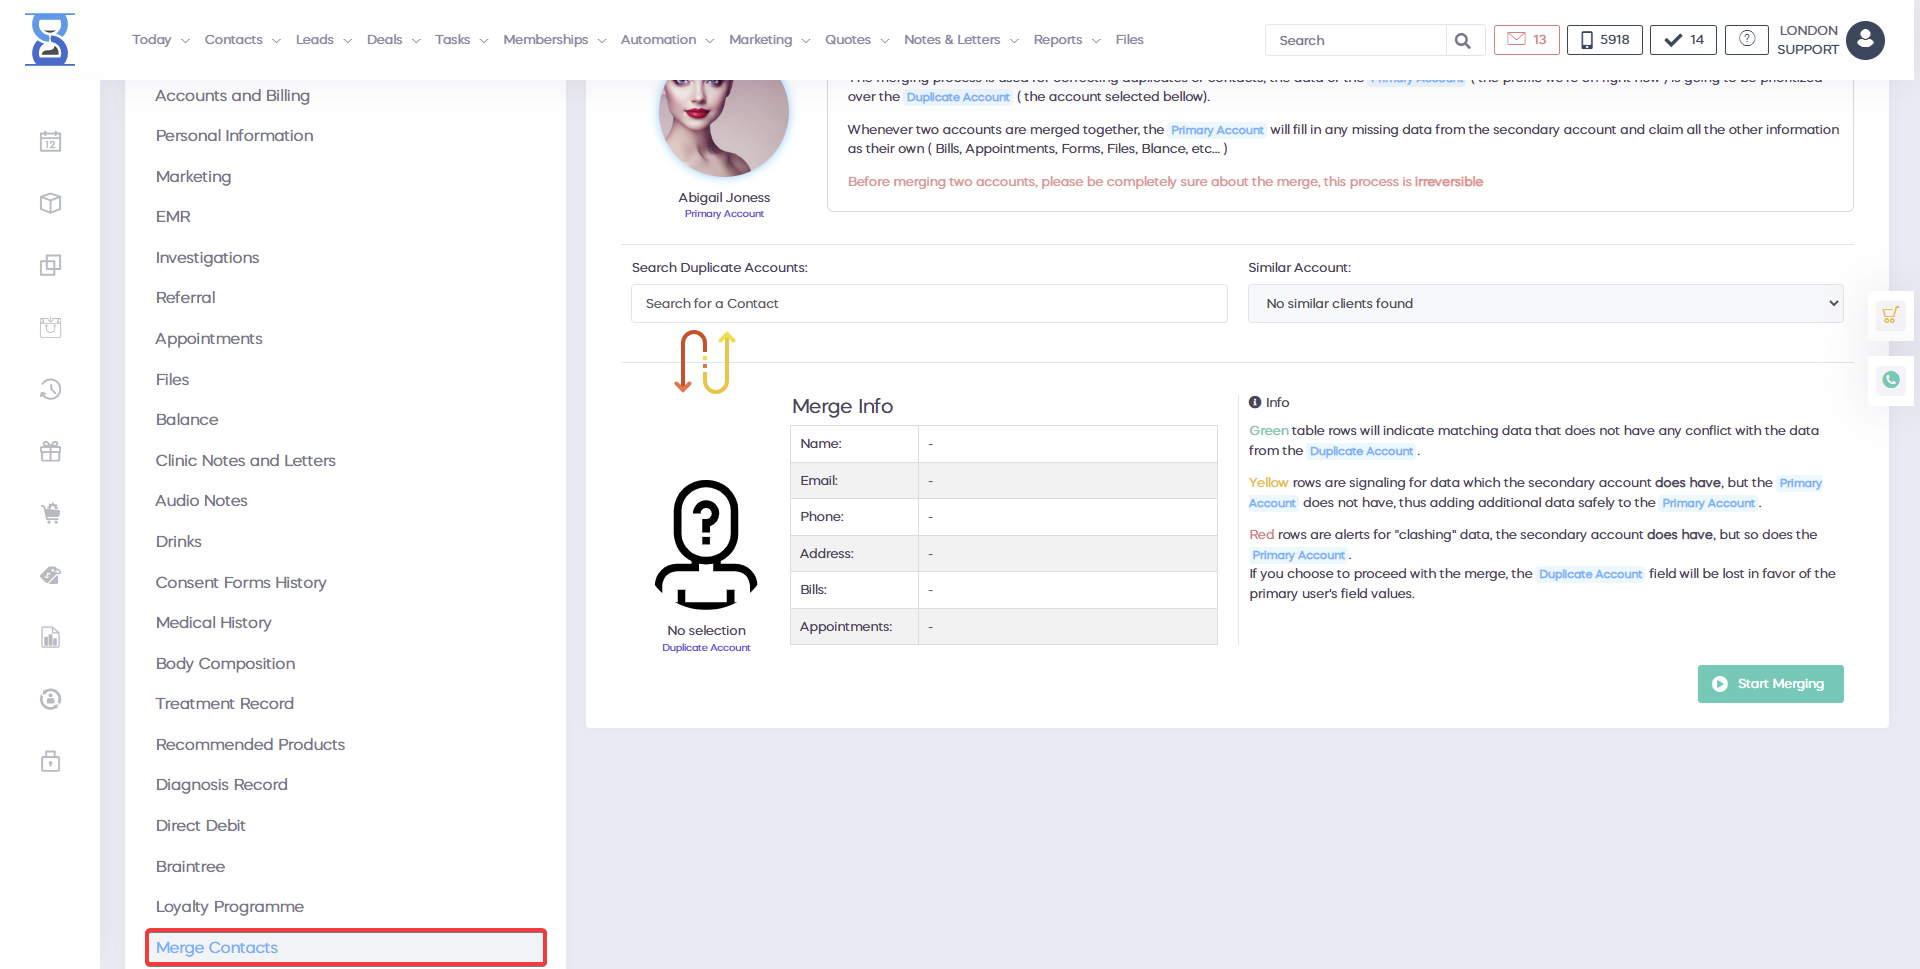
Only the staff with manager rights can perform this operation.
A login window will open asking you to confirm your credentials.
The system will automatically find duplicate accounts that contain the same email address and display them in the “Select Account” drop box.
If you wish to specify the secondary client account manually, enter the account ID in the “Enter ID” field and press the “Find Account by ID” button, the secondary account details will load in the bottom half of the page.
Complete the merger by pressing the “Merge Client Accounts” button from the bottom of the page.
Please allow some time for this operation to complete and do not leave this page during the operation.
When the accounts have merged the activity of the secondary account is moved to the primary account and the secondary account is deleted.
DELETING A CLIENT ACCOUNT (CLIENT PROFILE)
To delete a client account, from the client profile page press the “Delete” button from the top section.

Only the staff with manager rights can perform this operation.
A login window will open asking you to confirm your credentials.
CLIENT CONSENT FORMS (CLIENT PROFILE SUBPAGE)
From this page, you can download the client signed consent forms.
To access this page press the “Forms History” button from the client profile page located at the middle of the page.

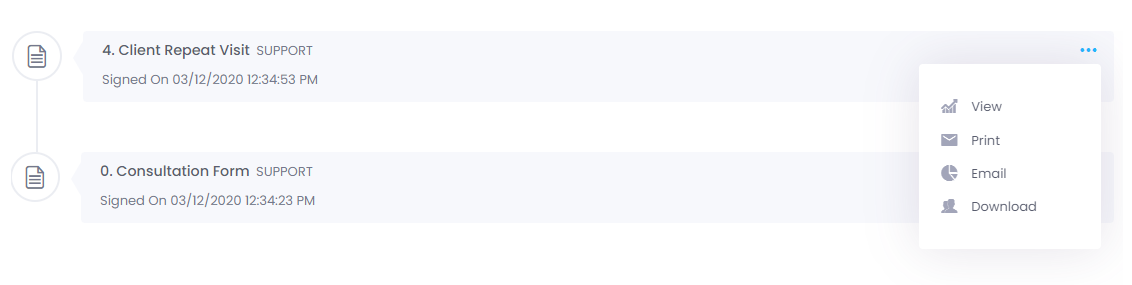
To download a signed consent form in PDF format press the “Download” button on the right of each entry.
To view the available consent forms for signing in to the online booking application, press the “View” button.
This will open the QR code authentication window from which you can scan the code or click on the link to access the page.
To return to the client profile page press either the “View profile” button (bottom left) or the “Back” button (top left).
CLIENT DRINKS HISTORY (CLIENT PROFILE SUBPAGE)
From this page, you can view each drink that the client had, on what date and appointment.
To access this page press the “Drinks” button from the client profile page located at the middle of the page.
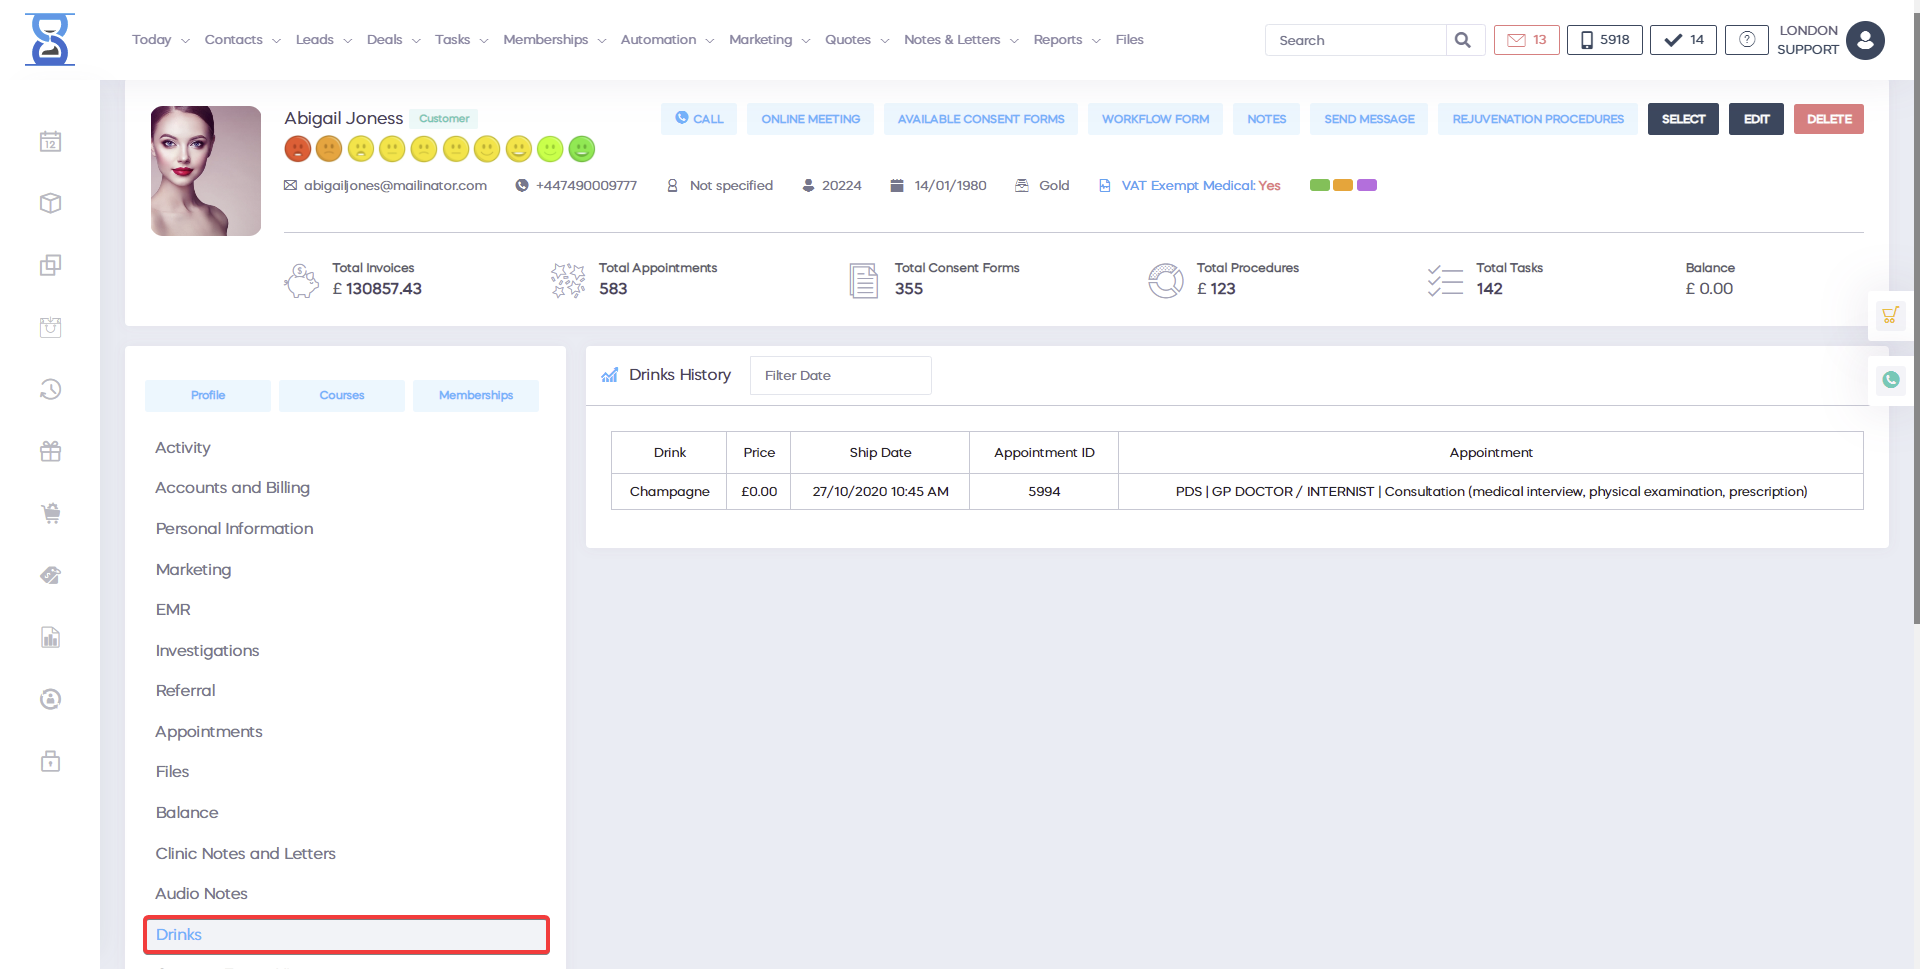
The drinks are added from the Appointment Details Window / “Drinks” button.
Please refer to the Day Book section of the user guide for more details.
To open the appointment from which the drink was added, press the “Open in Day Book” button from the right side of the drink entry.
To return to the client profile page press either the “View profile” button (bottom left) or the “Back” button (top left).
The client Contact section is a great feature where you can manage almost all business aspects regarding your customers: you have the option to search your contacts by phone number, email, the data on the membership card - ID number, category and various criteria. You can also filter your contacts by location. If you do business with multiple locations, you have the option to organize your customers in different categories, based on their costs - thus you can provide them discounts and get them to book your procedures more often. You can sort clients by first name or last name. In addition, you can determine how much you want to have available on the page - we can enter some great features we have in the system.
The new customer can click the Add Contact button. At the same time, you should know how important it is to have proper customer segmentation in place - who the customer is basically. The customer is the person who purchased your product or service, it wants a certain service. In your scenario, customers can be segmented - an action which helps your business focus on important different aspects. If you segment your customers based on their interest in a treatment or a course, you can better market your business and promote it on different social media channels - facebook, google, twitter, linkedIn. By making a client segmentation, you can target customers interested in certain procedures they may be interested in. You can have budget and segments, customers in a standard, classic version for campaigns. If your clients can't afford a luxury treatment, by doing segmentation you can easily save money by redirecting the budget.
For example, i t doesn't make sense to go for a laser hair removal procedure for clients who have never had it before and probably can't afford it. Instead, you can do customer segmentation and target only the people who are interested in the procedure. The Contact tab gives you access to a wide range of powerful tools. If you log into the customer account, you will be able to see not only their contact details, but also what their value is to your business: what is the total amount of invoices and how much they spent so far. Also, you can see how many meetings have been booked, the number of calls you had with them, forms they signed, purchases they made and how many tasks related to this client you have done. You can also check the customer`s account balance. At the top of the page you have the option to start live online meeting with the customer. You can submit new available forms or content and you have the option to sign a workflow form with the client, providing them with a code, based on their treatments.
You can add notes for the customer, send a message by directly forwarding it via SMS text, or you can access the resolution characteristics of a procedure, which will allow you to take pictures before and after and compare the evolution in time. You can update the client`s details: if you scroll down, you will see the timeline and filter it by searching different activities. You can to see all booked appointments, scheduled meetings all receipts, courses the clients have ordered online, data entered by the customer, appointment status or notes from the clinic. You can also see who has rescheduled the meeting, canceled it or signed a new permanent form as well as anything related to communication with the client. You can add treatment records if you have direct debit with this customer, check direct debits payments, see the client`s activity and the balance in their account.