
The consumables system is designed to keep track of the products usage during normal clinic operation.
It does this by allowing you to specify how much of a particular product you used during an appointment session and using that value to deduct the stock from the products.
The consumables system is divided in 3 parts:
- CONSUMABLES TREATMENTES (admin area, initial setup)
- APPOINTMENT CONSUMABLES (calendar – appointment details window)
- CONSUMABLES STOCK (admin area, stock deduction)
We will focus on the Calendar implementation in this section of the User Guide.
For more details on how to set up the consumables and deduct the product stock please refer to the Admin Area section of the User Guide.
The “Appointment Consumables” option from the Calendar is only used to specify after the appointment has been completed how much of each product was used to perform the treatments; we will refer to this action from now on as “allocation of consumables”.
The product usage/allocation can be specified in units or percentages.
E.g. For units allocation we can allocate 75ml of 150ml of dermalogica exfoliator cream or a 50 %.
The total units will be used to determine the product stock deduction later in the Admin Area.
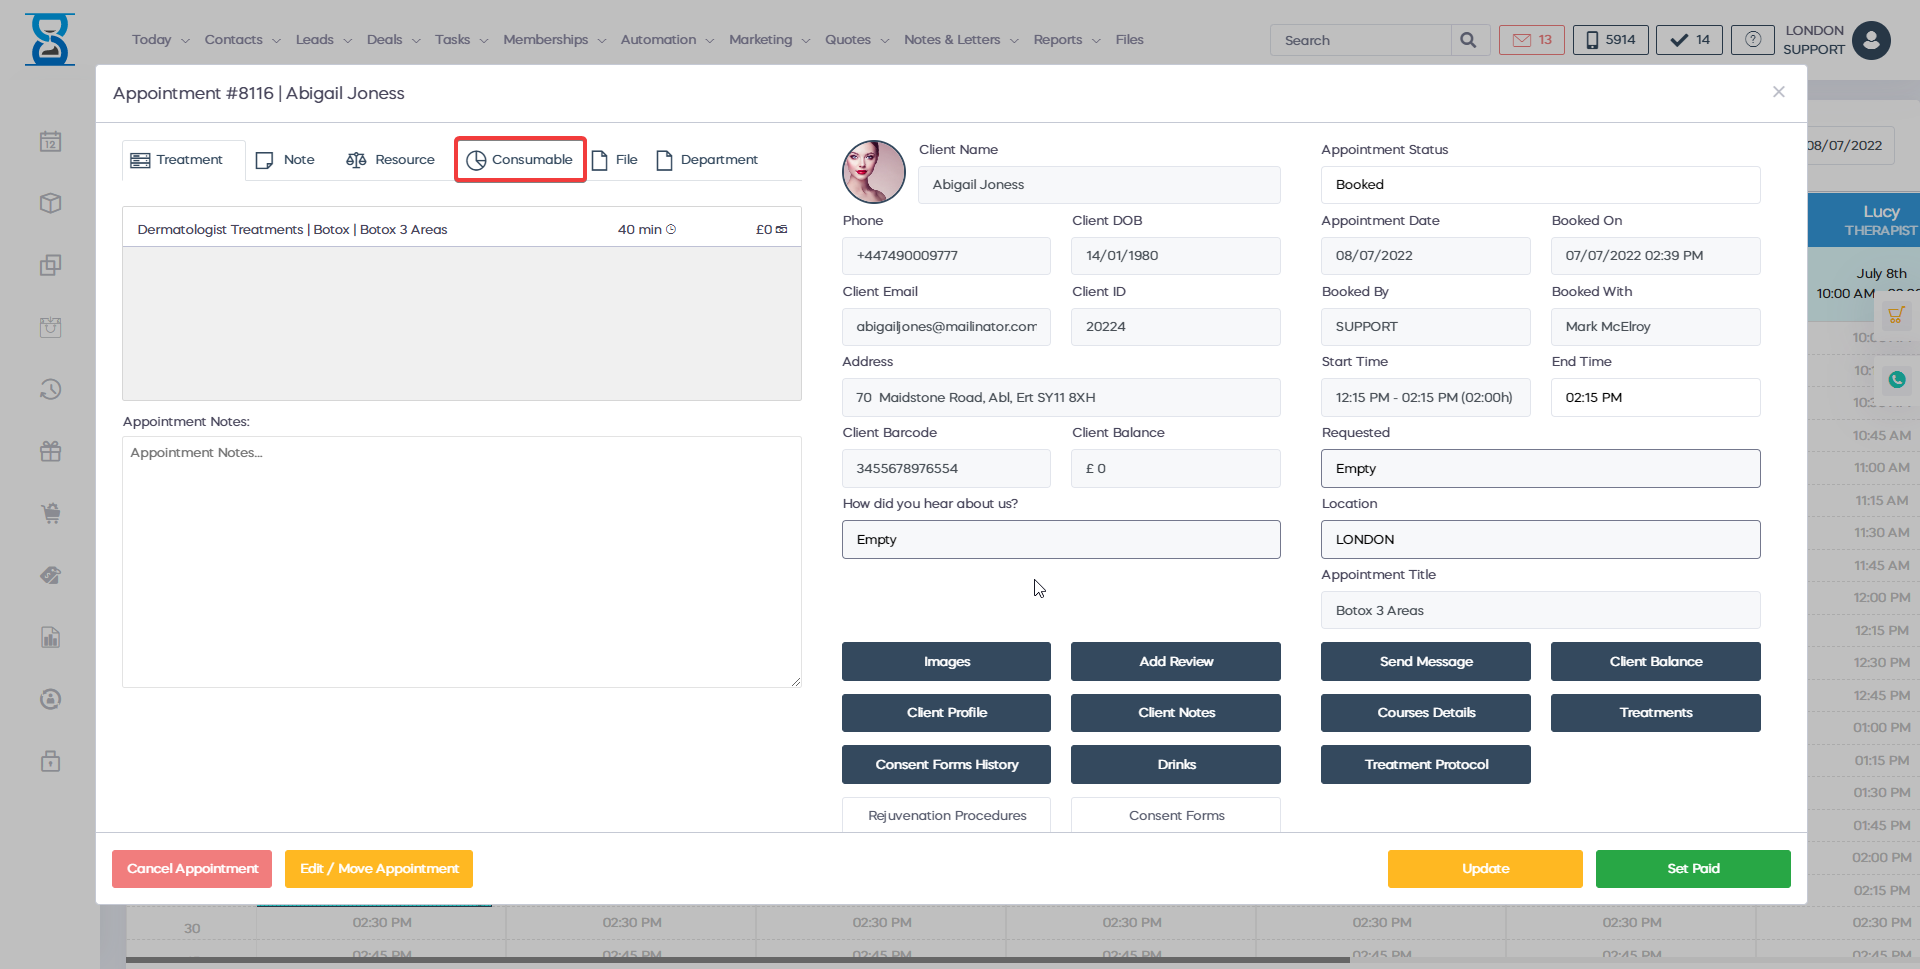
To open the “Appointment Consumables” window, press the “Consumables” button from the “Appointment Details” window.
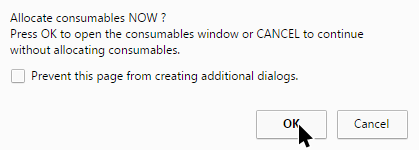
The system if configured will also prompt you to allocate the consumables when the status of the appointment has been changed to “Paid” or when the “Set Paid” button is pressed:
The “Appointment Consumables” window is divided in to 2 sections:
- The “Appointment treatments” section
- The “Selected treatment consumables” section
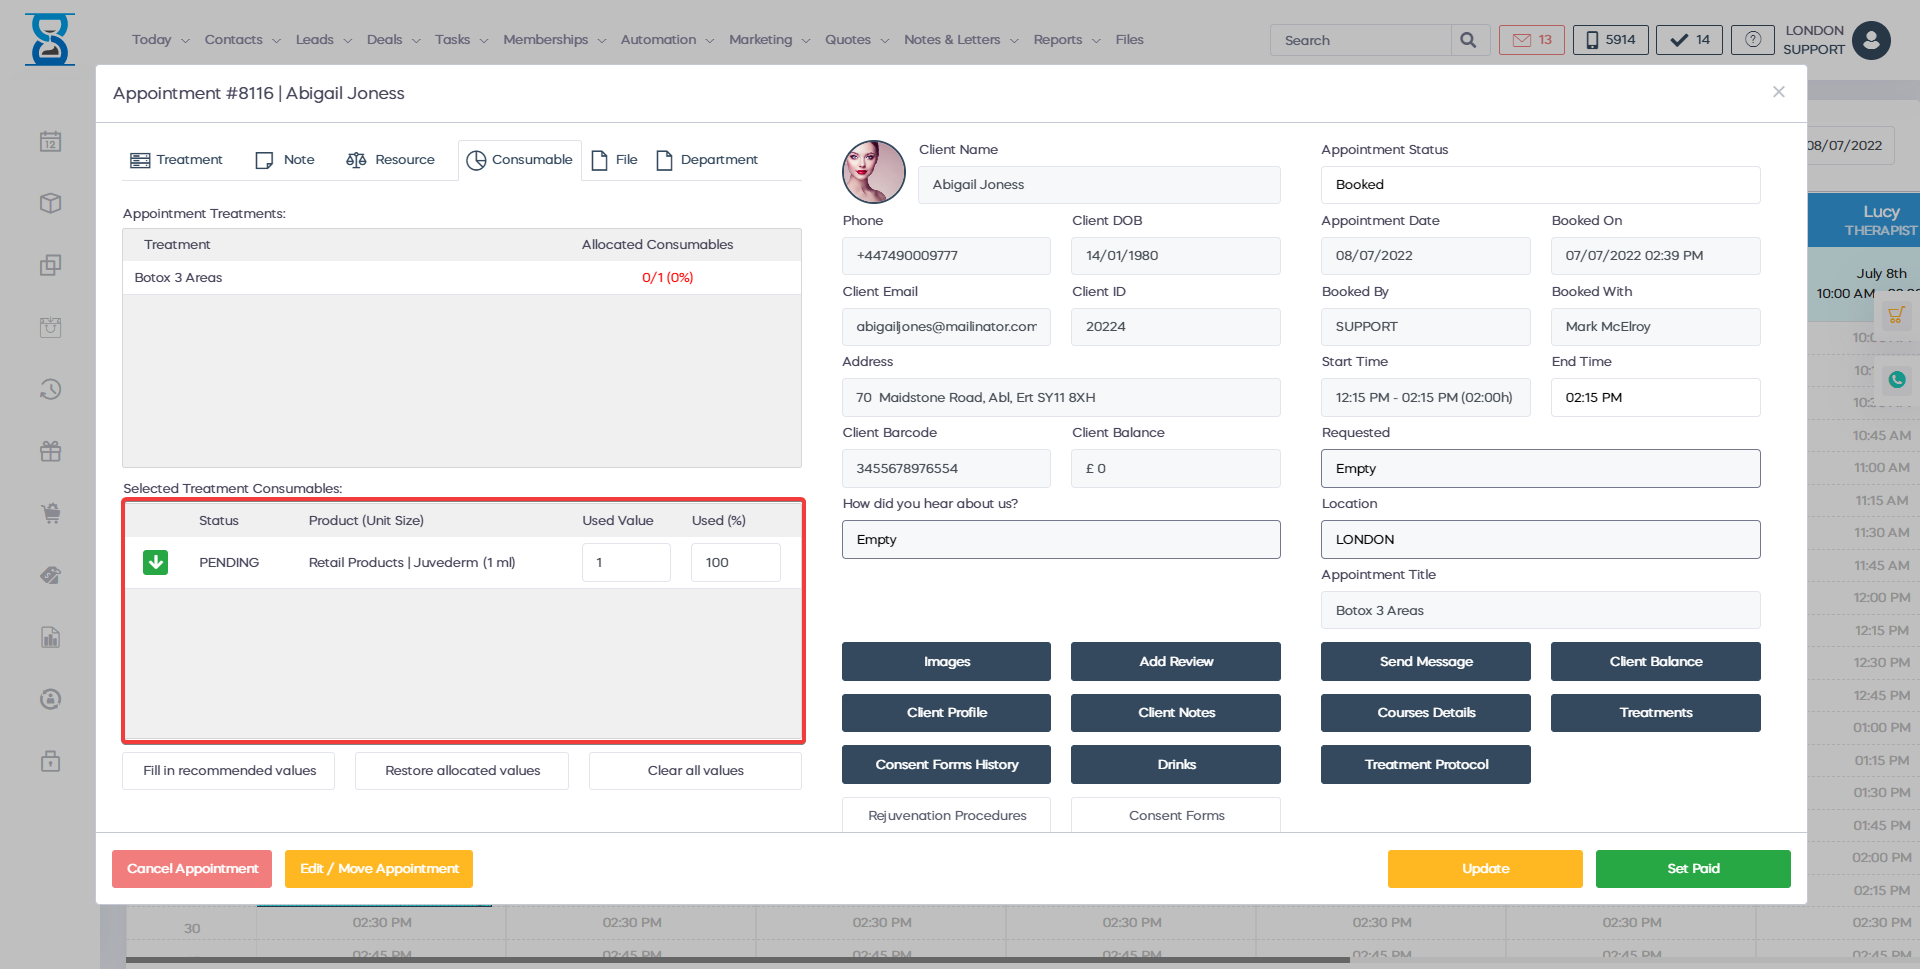
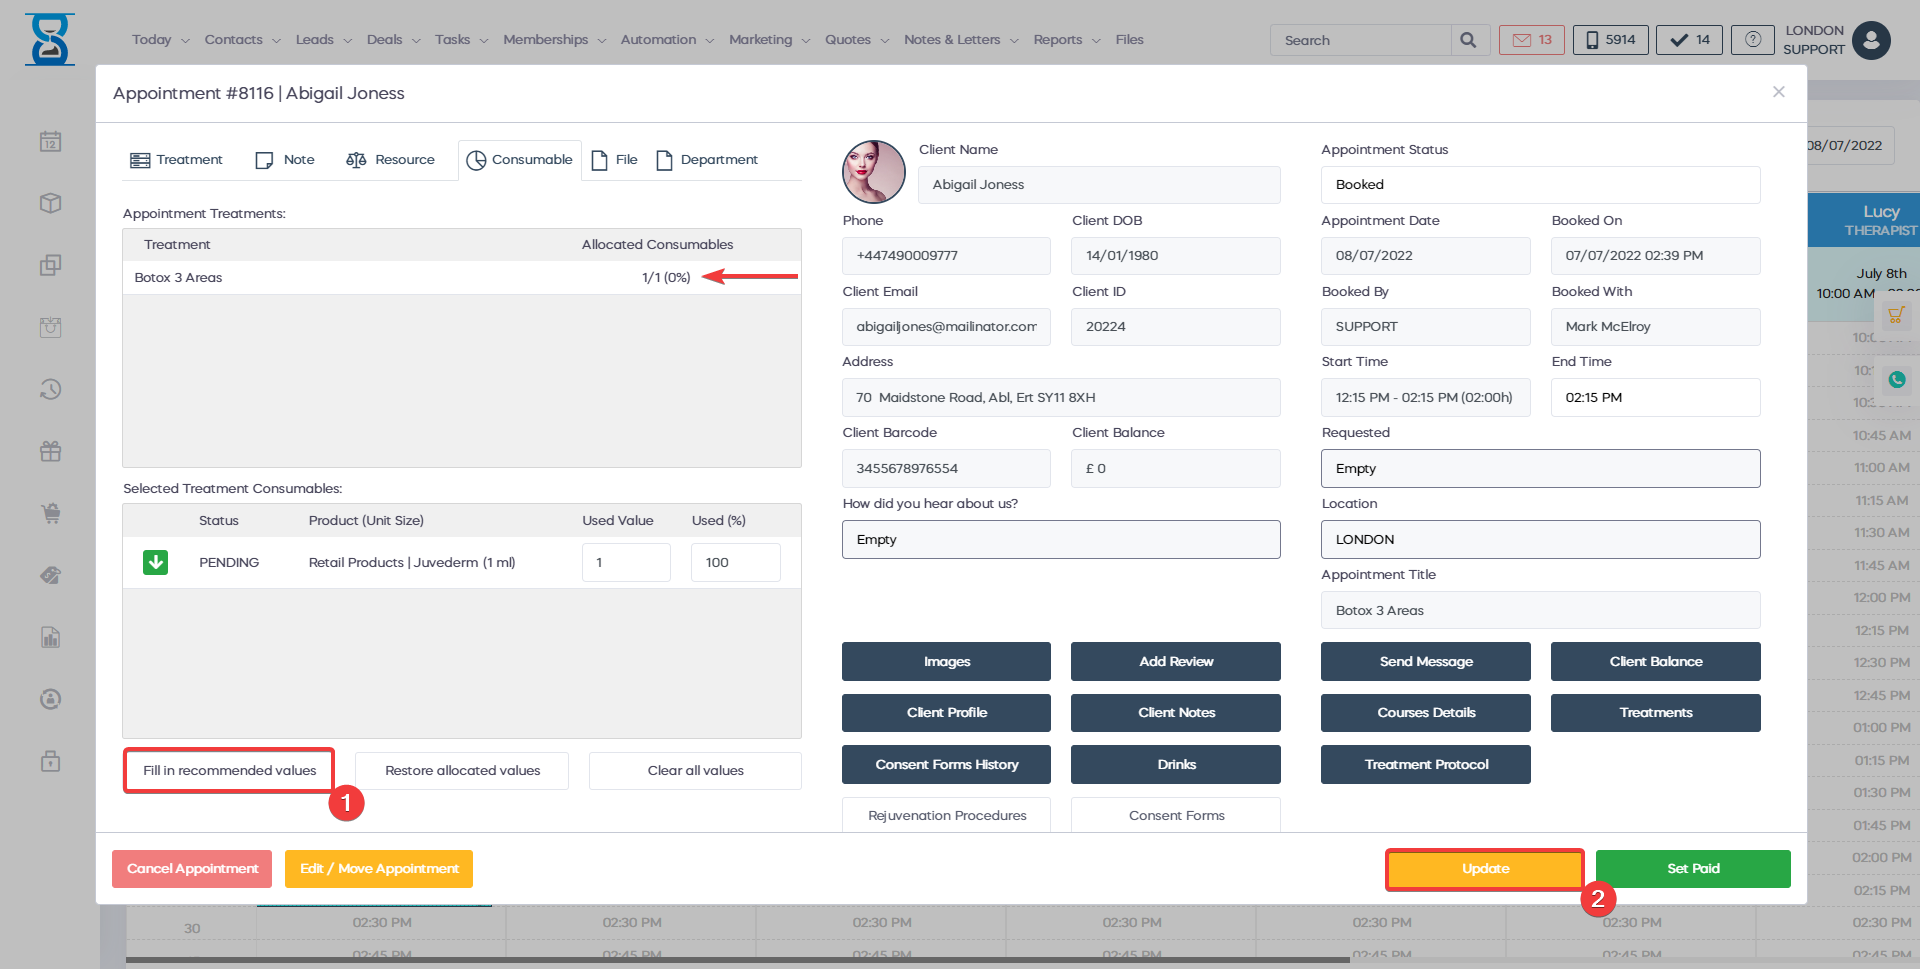
In the “Appointment treatments” section we list each treatment of the appointment with the allocation status of its consumables, shown in the “Allocated Consumables” column.
If not all consumables for the selected treatment are allocated then the status is shown in red colour for easy identification.
To continue, we must select the treatment by clicking on it (by default the first treatment is already selected).
Selections in both sections of the window are displayed with a blue background.
When we select a treatment from the “Appointment treatments” section, the “Selected treatment consumables” will update to display the selected treatment consumables.
Select the treatment by clicking on it (by default the first treatment is already selected):
After the treatment has been selected, its consumables will show up in the “Selected treatment consumables” section of the window:
For each consumable we have 3 status values:
- PENDING – the consumable has not been allocated
- ALLOCATED – the consumable is allocated, the allocated values can be changed if required
- LOCKED – the consumables is allocated and has already been used for the stock deduction, further changes are not possible.
Consumables that have been allocated (ALLOCATED status) can be changed at a later date by returning to the appointment details window and pressing the “Consumables” button.
If the consumable has been used for stock deduction in the admin area, its status will be changed to LOCKED and not further change is possible.
The “Used Value” and “Used %” are tied together, when you enter a value in the “Used Value” field, the percentage will be calculated automatically in the “Used %” field and vice-versa.
Example of “Used Value” and “Used %” fields:
The “Storage Room” drop box lets you select the room from which the consumable was taken so that we can keep track of it and deduct stock from the correct storage room.
Consumables can also specify a mandatory storage room, in which case the “Storage Room” will be selected automatically by the system and cannot be changed by the staff.
The mandatory storage rooms will be displayed with a grey colour on the drop box:
Example of mandatory storage room that cannot be selected by the staff:
The “RESTORE RECOMMENDED VALUES” button will set the “Used Value”, “Used %” and Storage Room to the values specified in the Admin Area.
The “RESTORE ALLOCATED VALUES” button will set the “Used Value”, “Used %” and Storage Room to the previous values if the consumable has been allocated previously.
To specify how much of a consumable has been used for the selected treatment, click on the consumable and fill in the “Used Value” OR “Used %” and select the Storage Room.
Do this for all the treatments and their consumables by selecting the treatment and then specifying the allocation for each of its consumables then press the “SAVE” button.