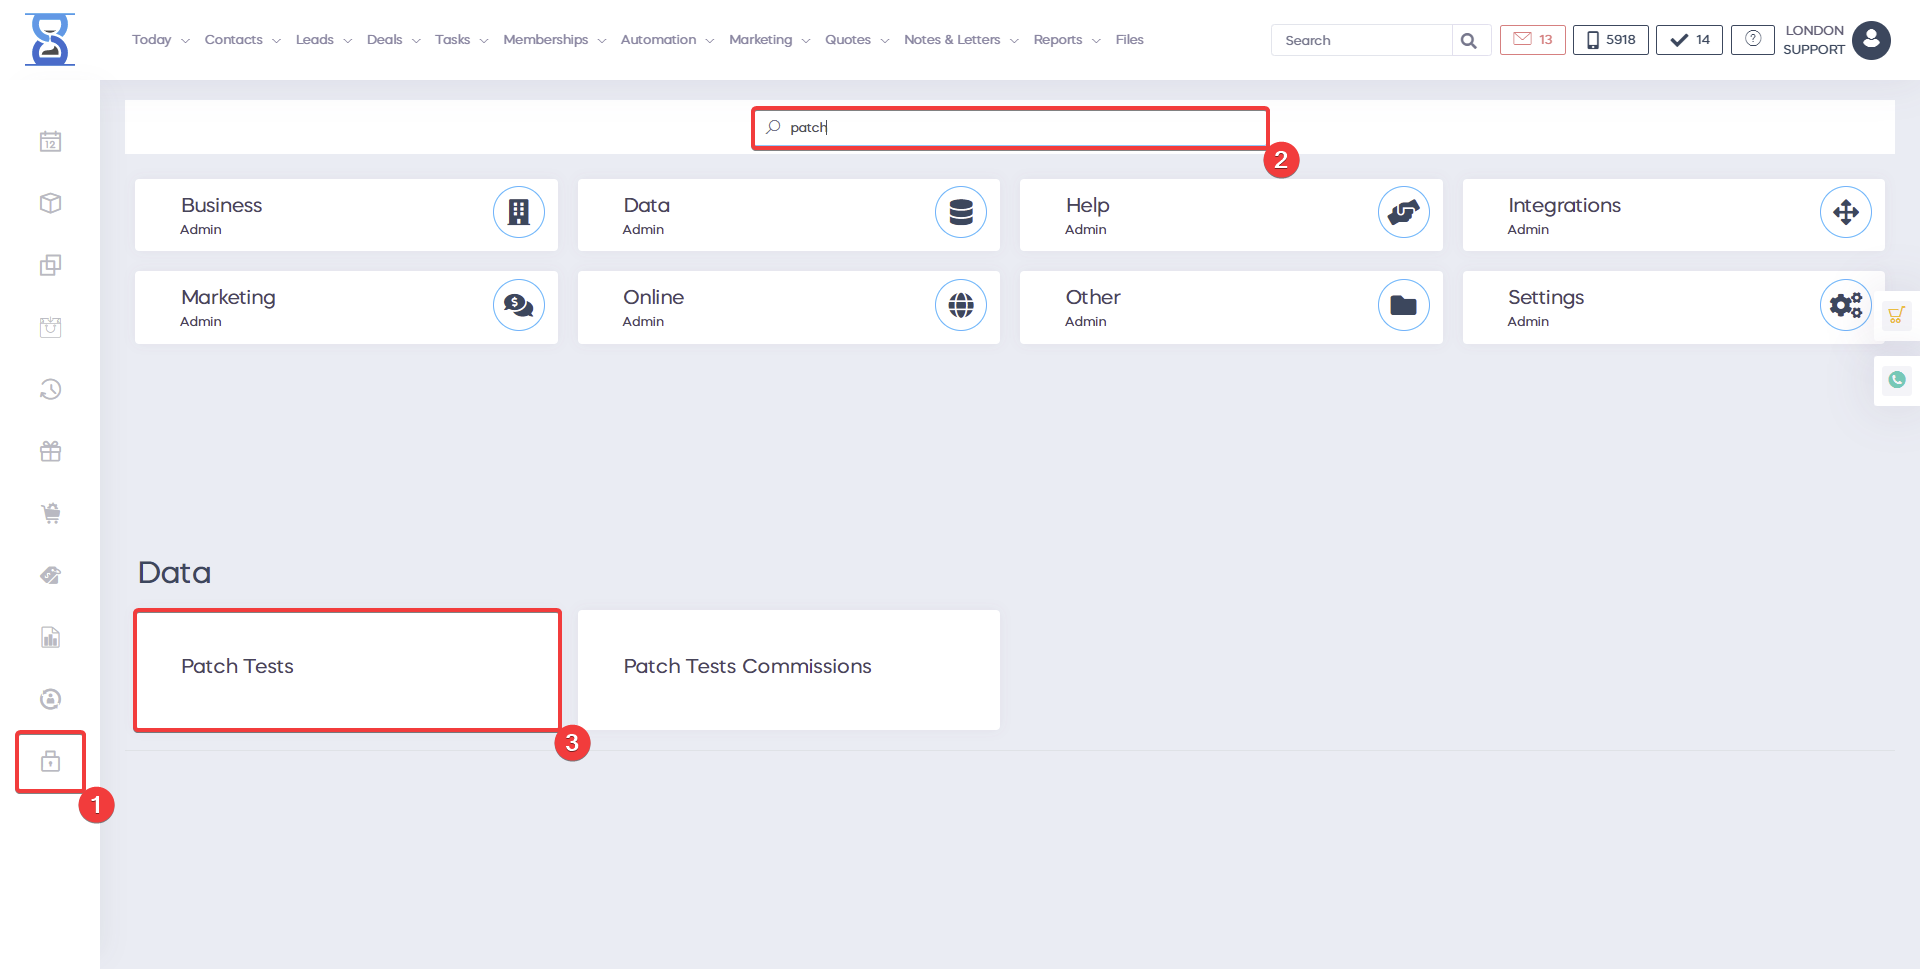
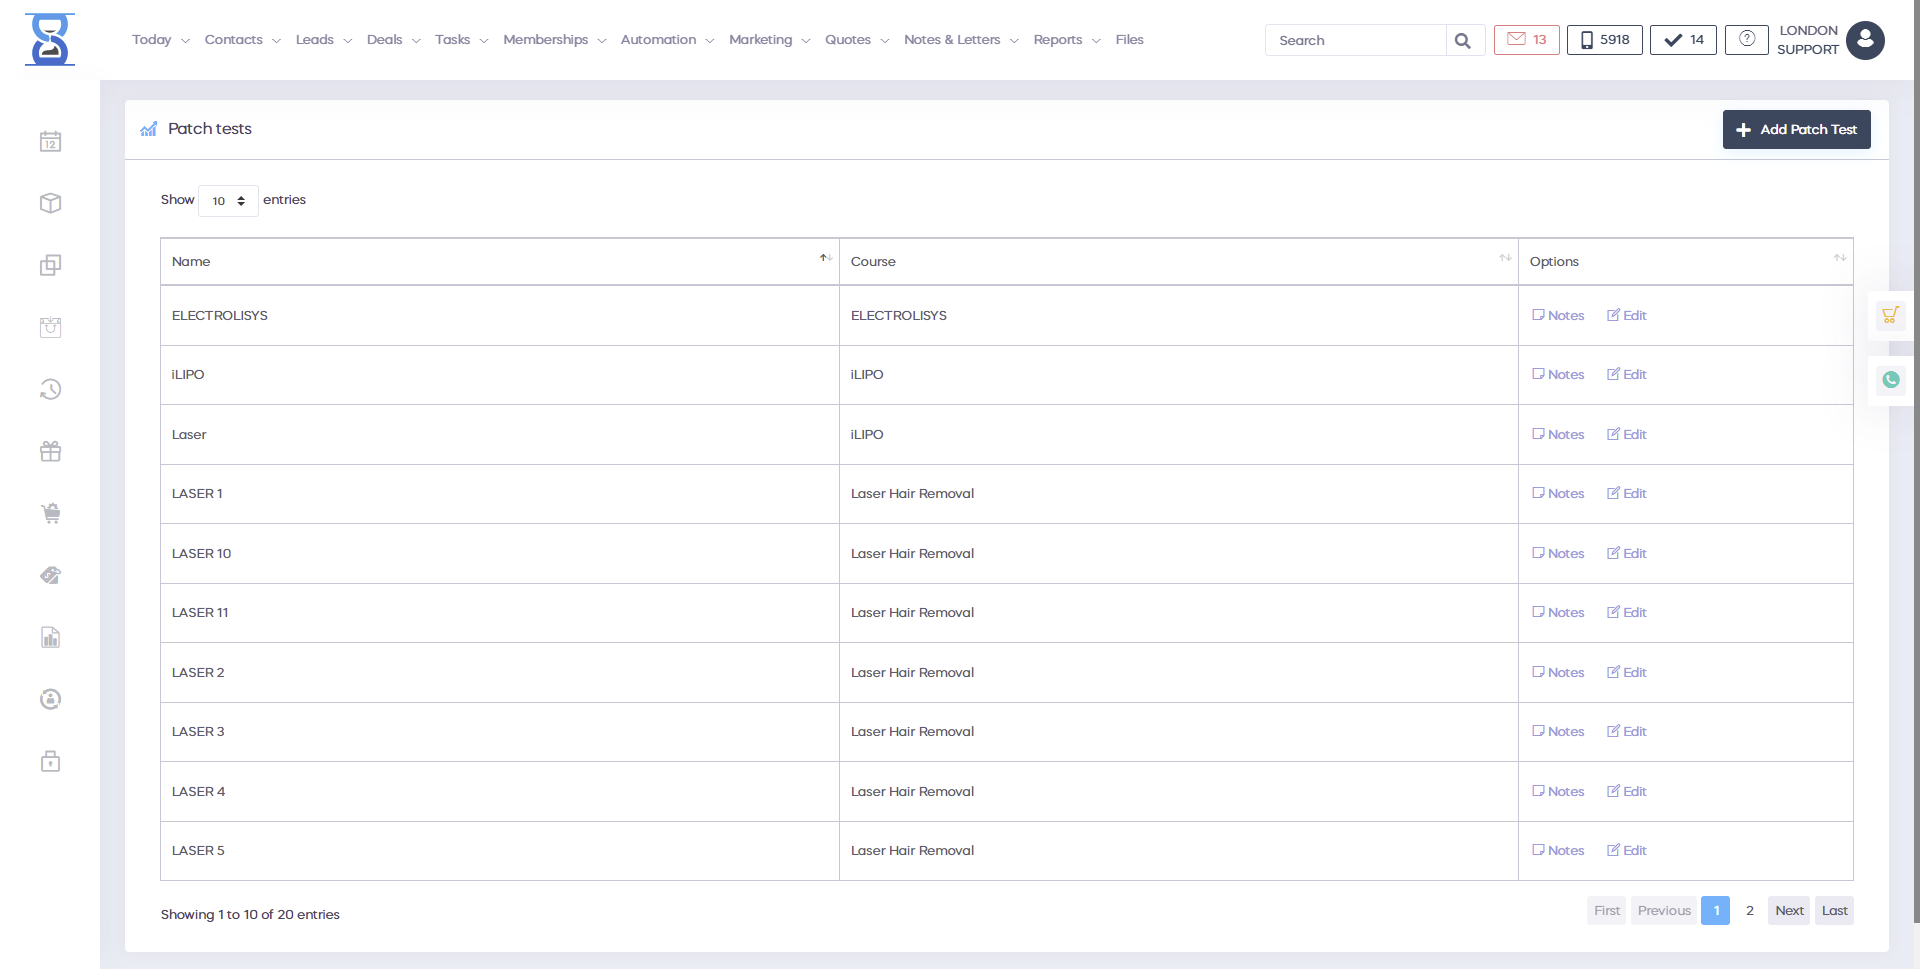
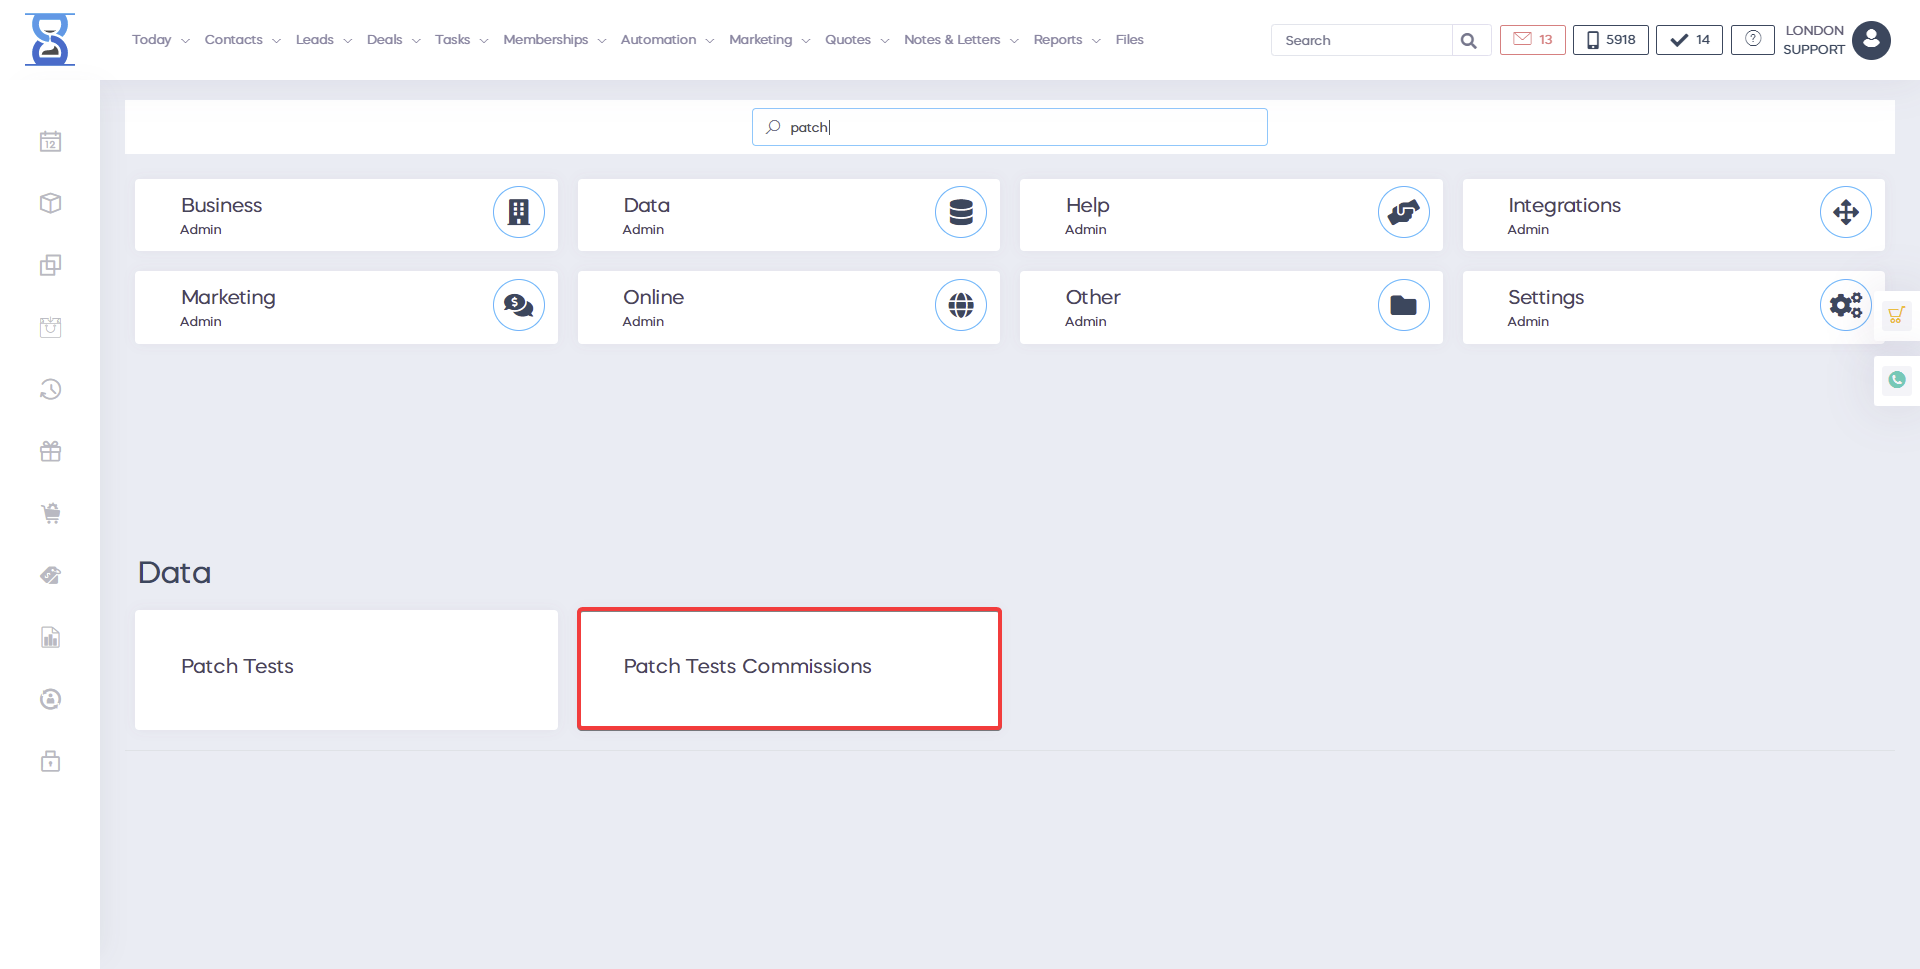
Patch tests are part of a course’s directory, e.g. for laser, you can have different patch tests that represent different laser types. How to add patch tests in the system will be covered in the Admin Area section of this user guide.
How to book batch tests will be covered in the Day Book section of this user guide. We will focus on the client patch tests management from this page.
From this page, you can add a patch test to the client account or edit the details of an existing patch test. Patch tests can also track which course the client has ordered in the course directory that the patch test belongs to after it has been added to the client account. This page can only be accessed if the client is selected in the system, if not then the system will automatically redirect you to the clients list page from which you can press the “Select Client” button.
The patch test that you wish to add or edit is selected from the “Selected Free Patch Test Course” drop box.
After the patch test name we display “| NO” if the patch test is not currently assigned to this client and “| YES” if the patch test was added previously in which case we will be editing an existing patch test. To add/assign the selected patch test to the selected client fill in the “Area Interested” and “Course Recommendations” fields and then press the “Add Patch Test” button (bottom left).
The patch test will also be added to the receipt with 0 as value if you wish to create a receipt that can be viewed in the customer profile and print the receipt. (Create and print the empty receipt by pressing the “CASH” button). If you do not wish to issue a receipt simply press the “CANCEL” button from the right column The status of the patch test can be changed only after it has been added to the client. After the patch test has been added you can change the status of the patch test at a later date (e.g. after the client had its patch test performed).
Note: Only staff with manager rights can update a patch test after its status has been set. To modify an existing patch test status and/or the “Area Interested” and “Course Recommendations” fields select the patch test from the “Selected Free Patch Test Course” drop box (existing patch tests have the suffix of “ | Y”), make the necessary changes and then press the “Update Patch Test” button (bottom left). After the patch test is updated it will show up in the “Patch Test Details” section who updated it and when. Also when the customer orders a course that is in the same course directory as the patch test it will show up here.
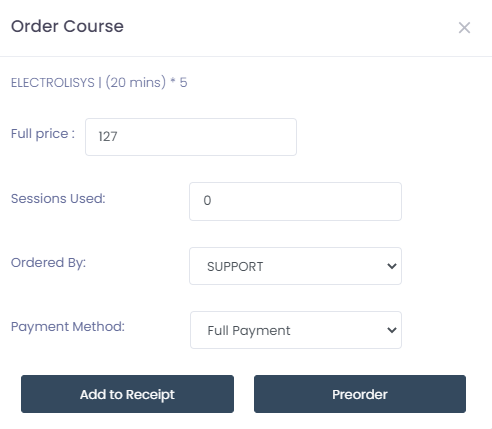
The “Order Courses” button is a link to the “COURSES / SESSIONS -> Courses” page.