
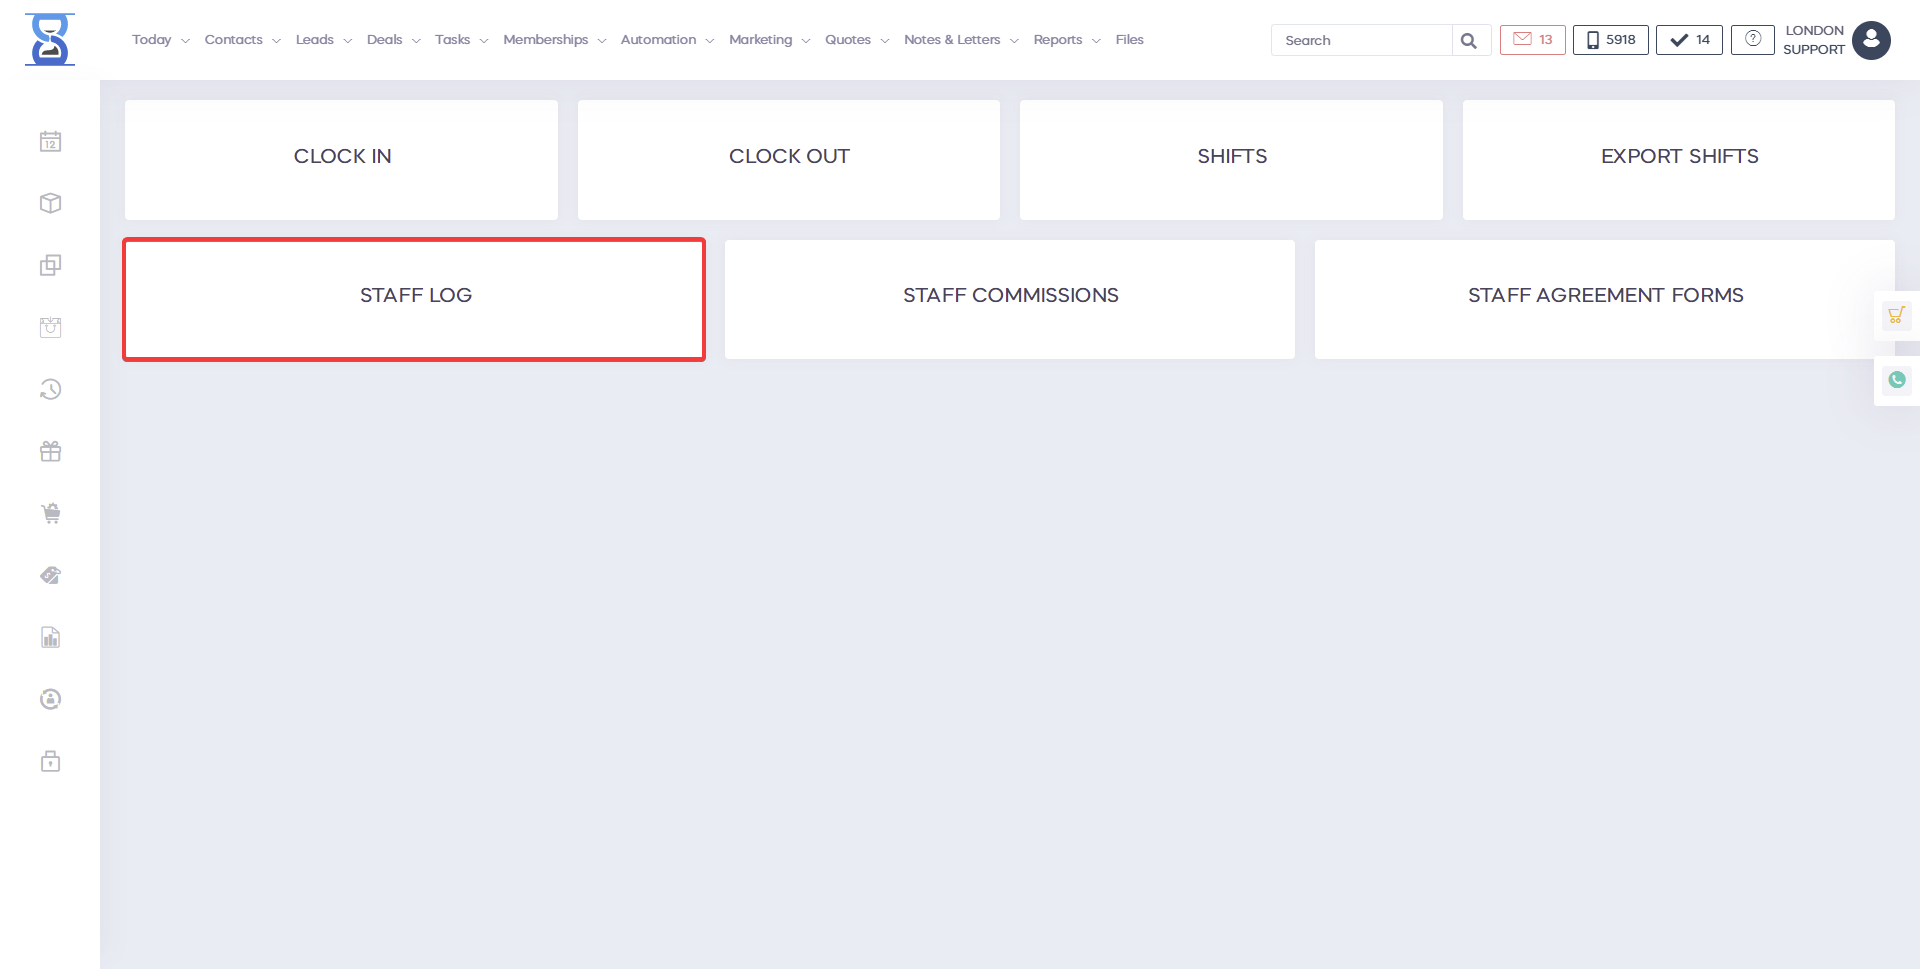
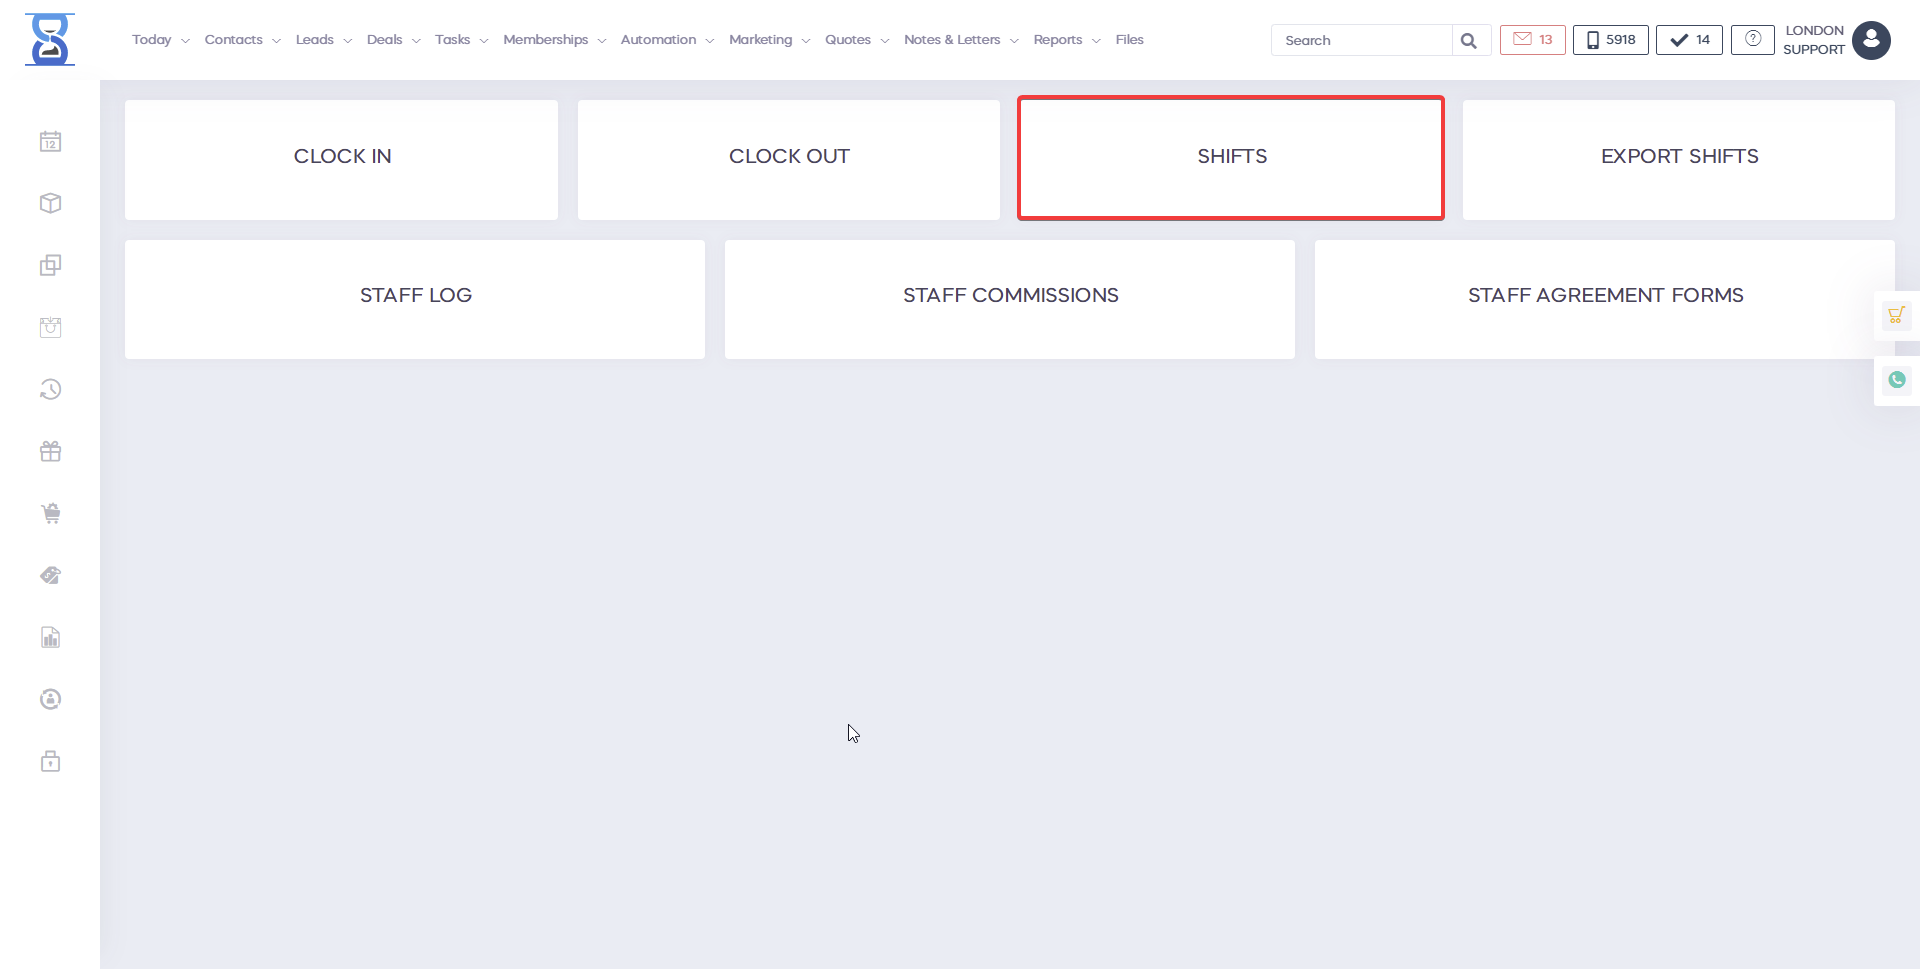
From this section you can clock in and out the staff, set and export the shifts time schedule and view the staff clocked in/out log.
To begin, first, check the selected location (defaults to the currently logged in location) for multi branch licenses.
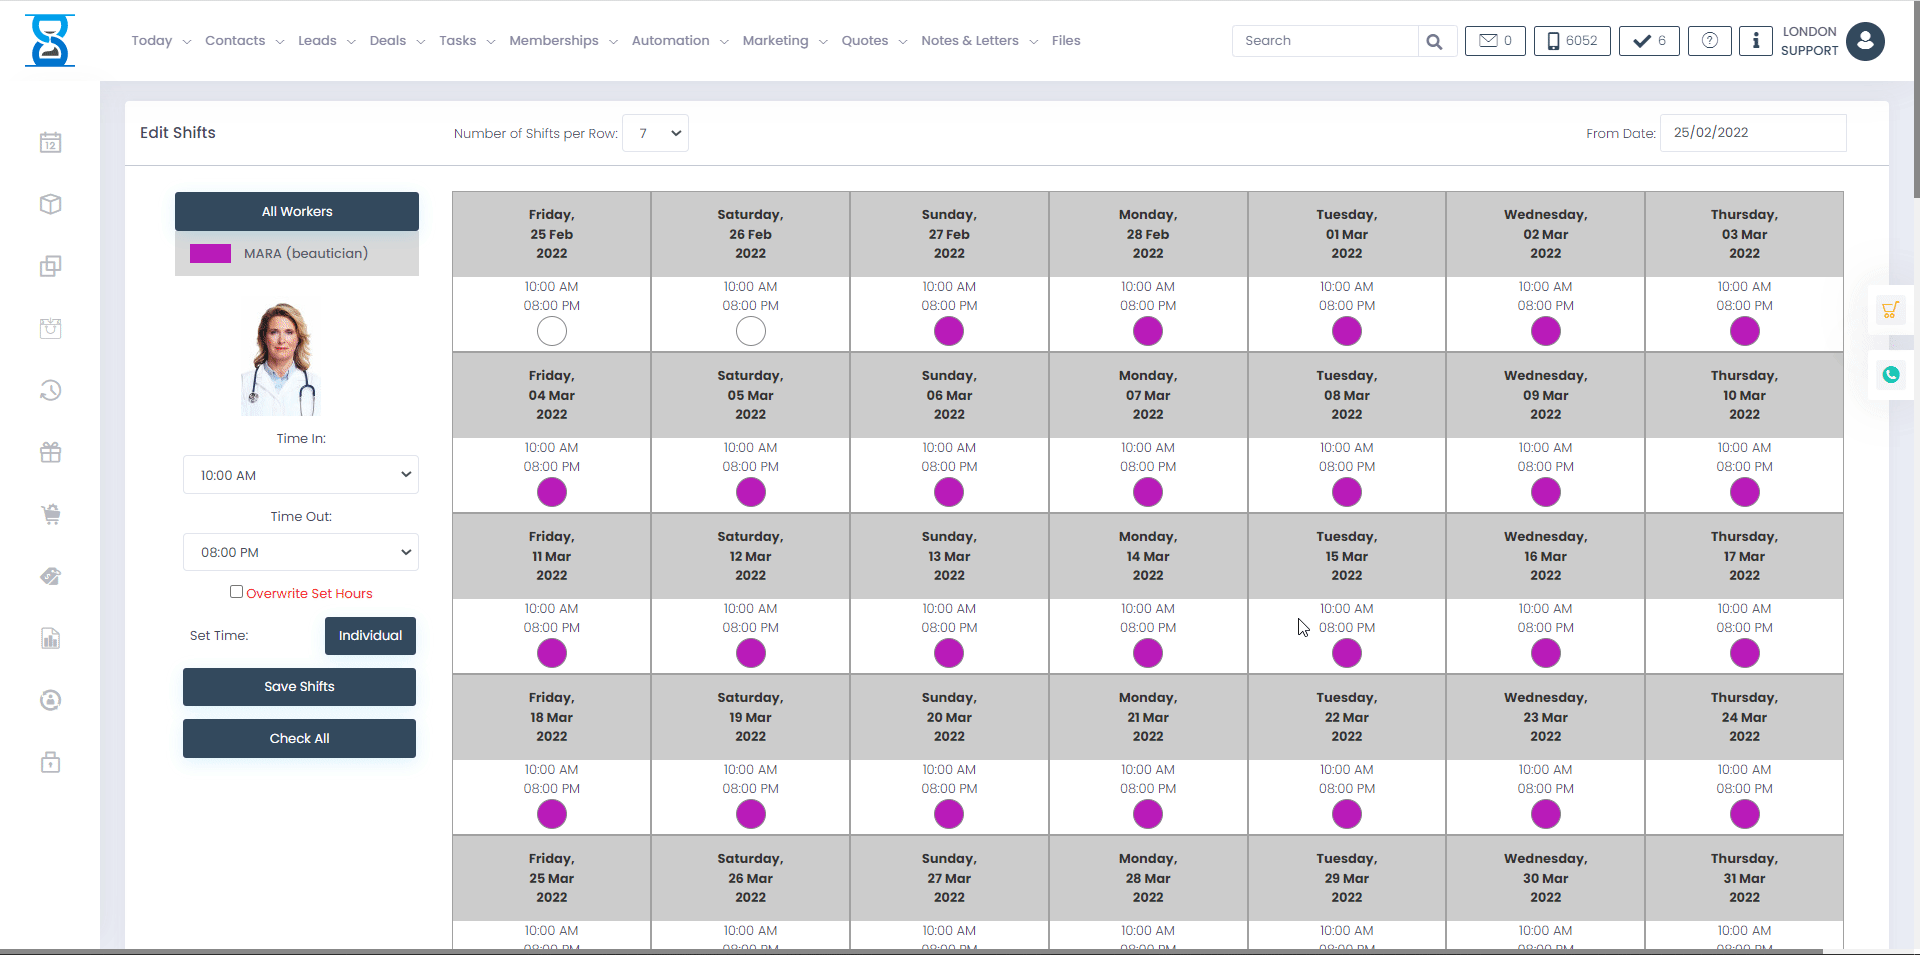
To view the shifts for only one staff, click on the staff from the left column. You can also do this by clicking on their corresponding entry (coloured square) in the left column.
To change or set up new shifts for the selected staff press the „Edit Shifts” button.
You can set the shifts in two ways:
1) General time – this will set the „Time In” and „Time Out” values from the left side above to all selected days.
2) Individual Time – this will allow you to specify a different time in and time out for each day.
When setting the shifts in the general time method the shifts that are already set will not be changed unless you check the „overwrite set hours” checkbox (dangerous as it overwrites the time on all the days displayed in the right column). To mark a day as a workday, click on the empty circle so that it shows up as filled and then press the „Save Shifts” button. This day does not have a shift set on it and the staff will not be shown in the Daybook on this date.
In individual time mode, you can set the time the staff clocks in and out on a daily basis rather than globally for all active days shown in the right column. This is the recommended and safe way of modifying the clock in and clock out for a particular day.
From this page, you can clock in and out the staff, set and export the shifts time schedule and view the staff clocked in/out log.
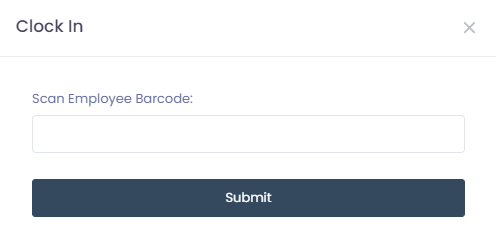
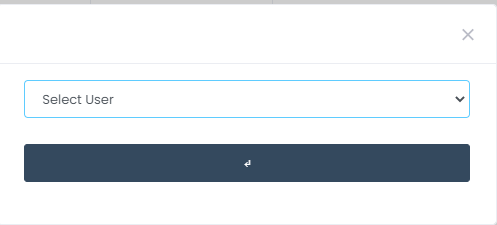
To clock in at the start of the shift press the “CLOCK IN” button. You will be prompted to scan or type in the staff barcode.
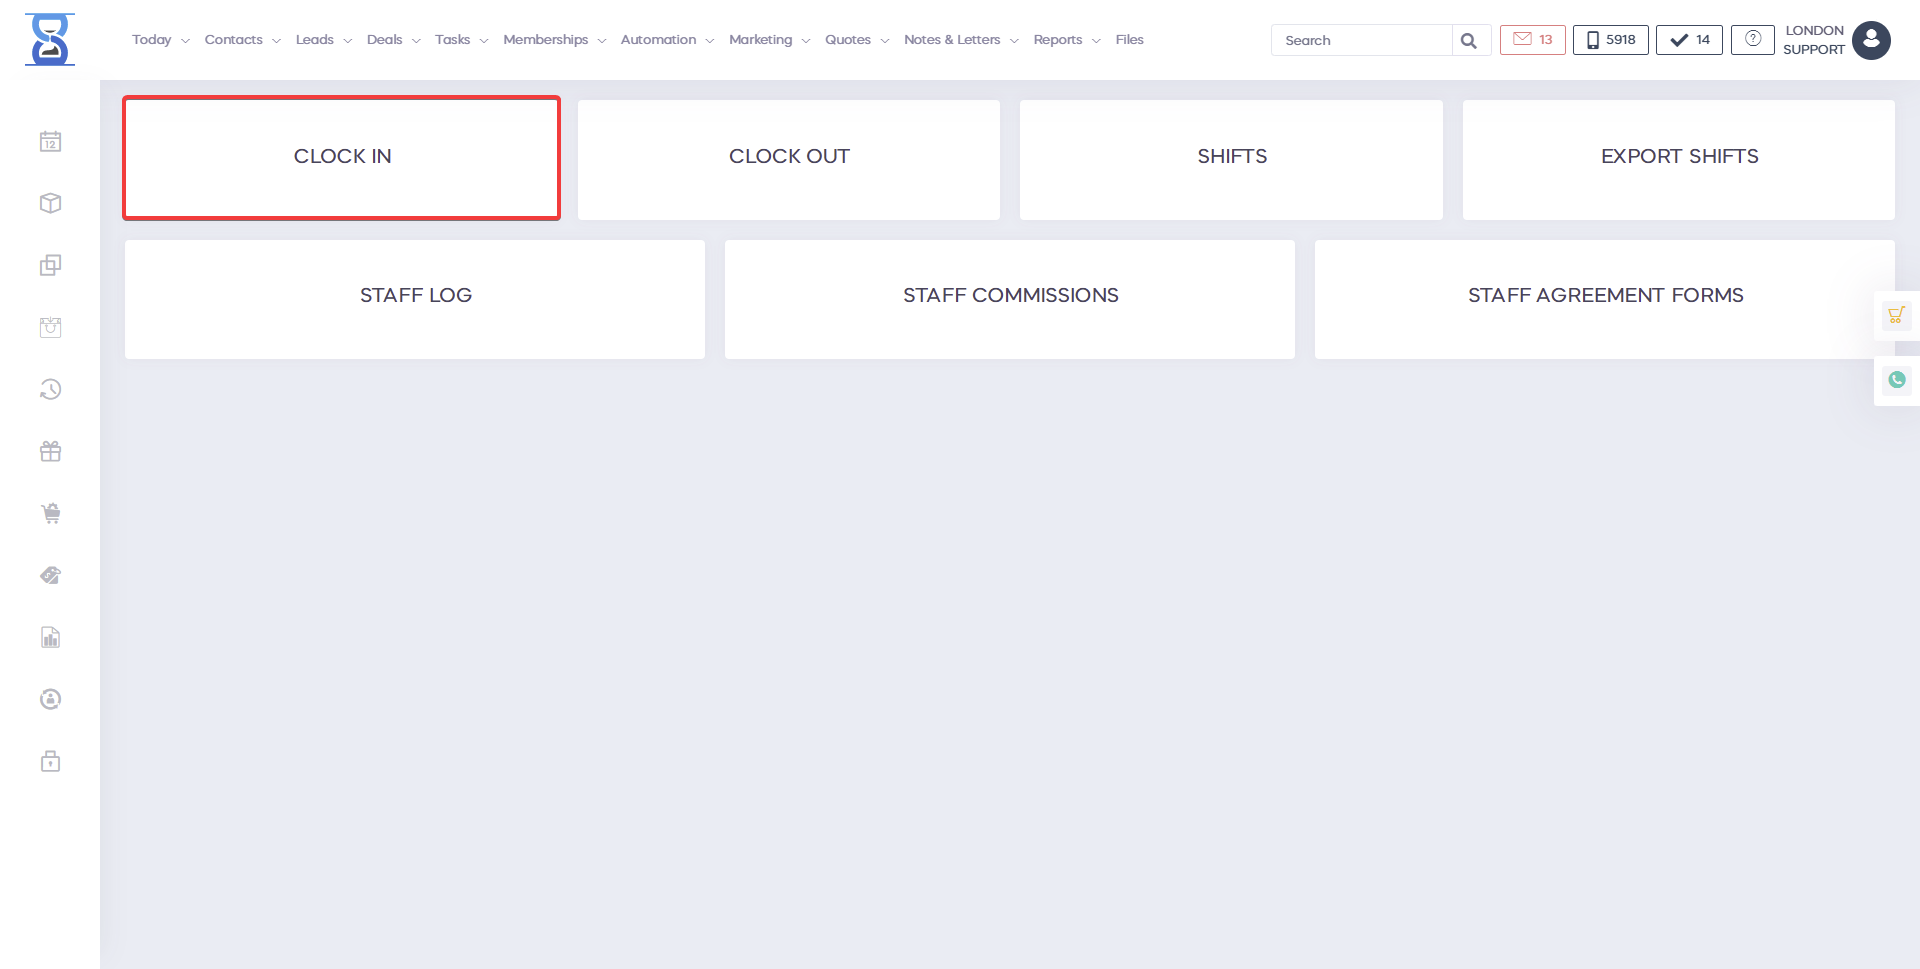
To clock out at the end of the shift use the “CLOCK OUT” button, scan or type the staff barcode and then press “Submit”. Viewing clocked in/out logs The time a staff has clocked in and clocked out can be viewed from the “STAFF LOG” page.
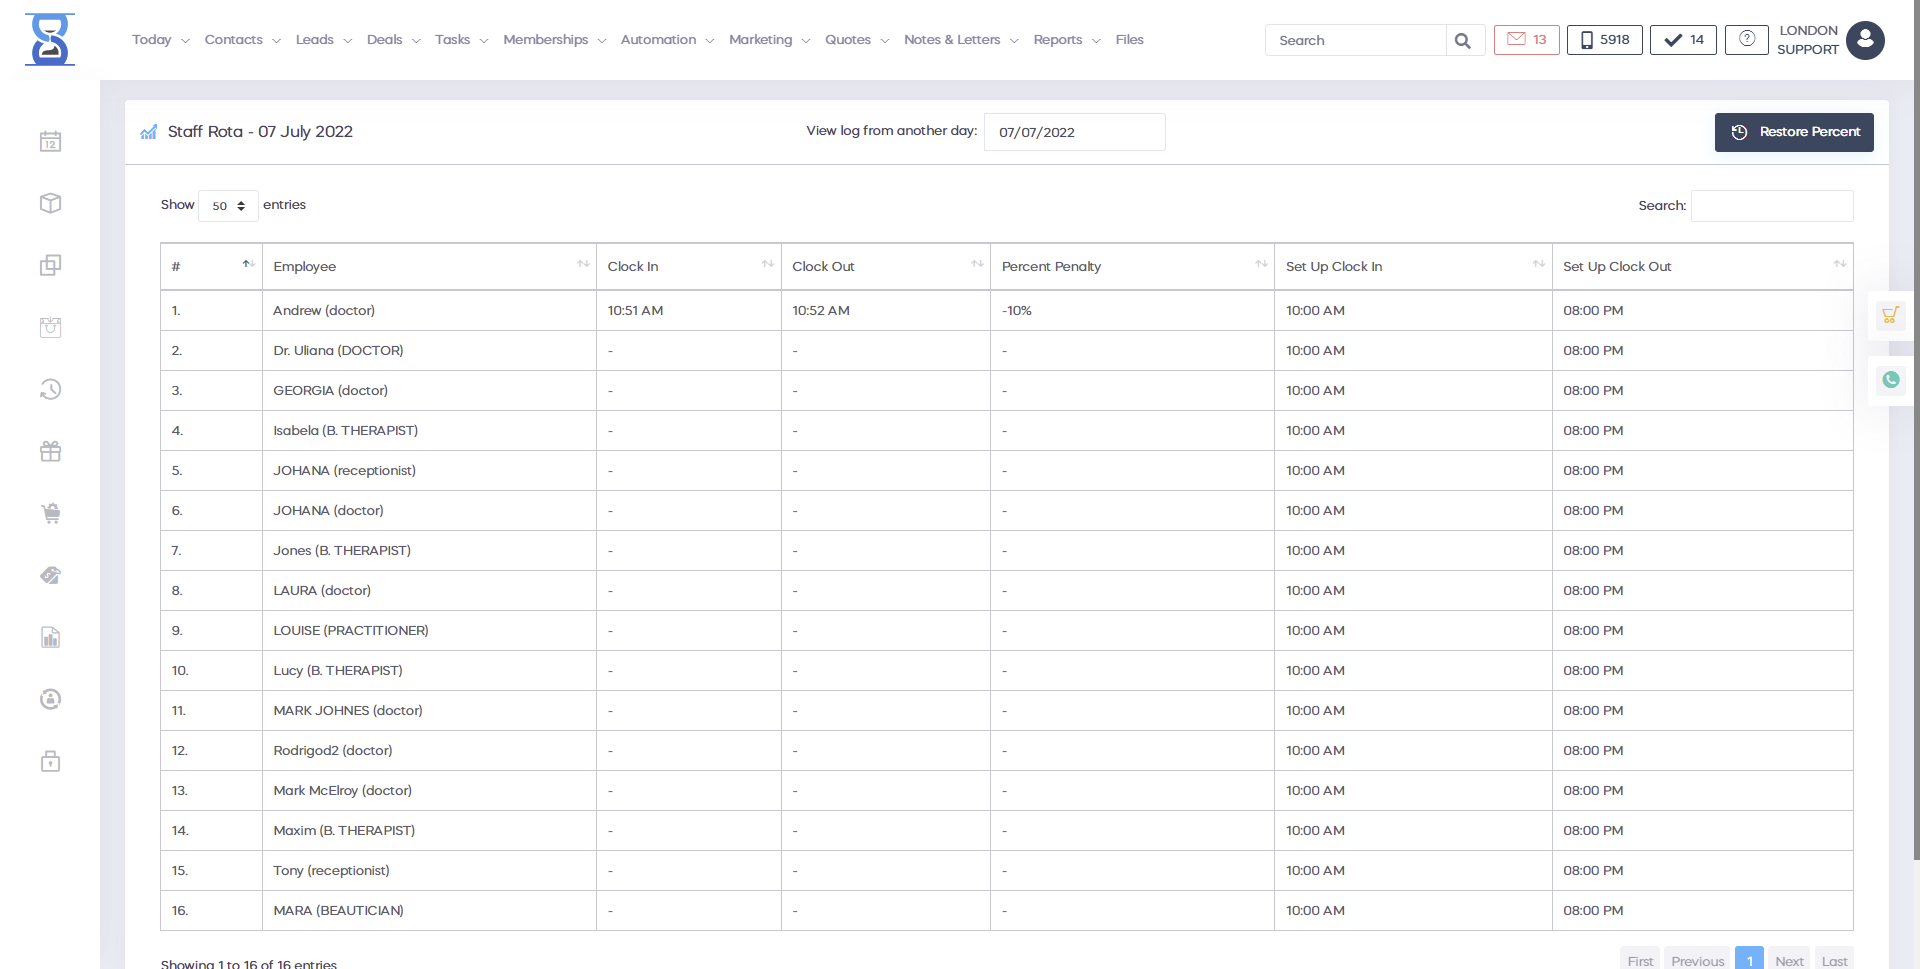
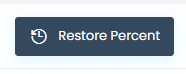
If a staff member has clocked in later than the set shift start or earlier than the set shift end, a penalty can be applied and the entry will be displayed in red colour. The penalty is configurable in the system. To reset the penalty status of a clocked in entry, use the “Restore Percent” option.
To view the log of a different day, use the date field.

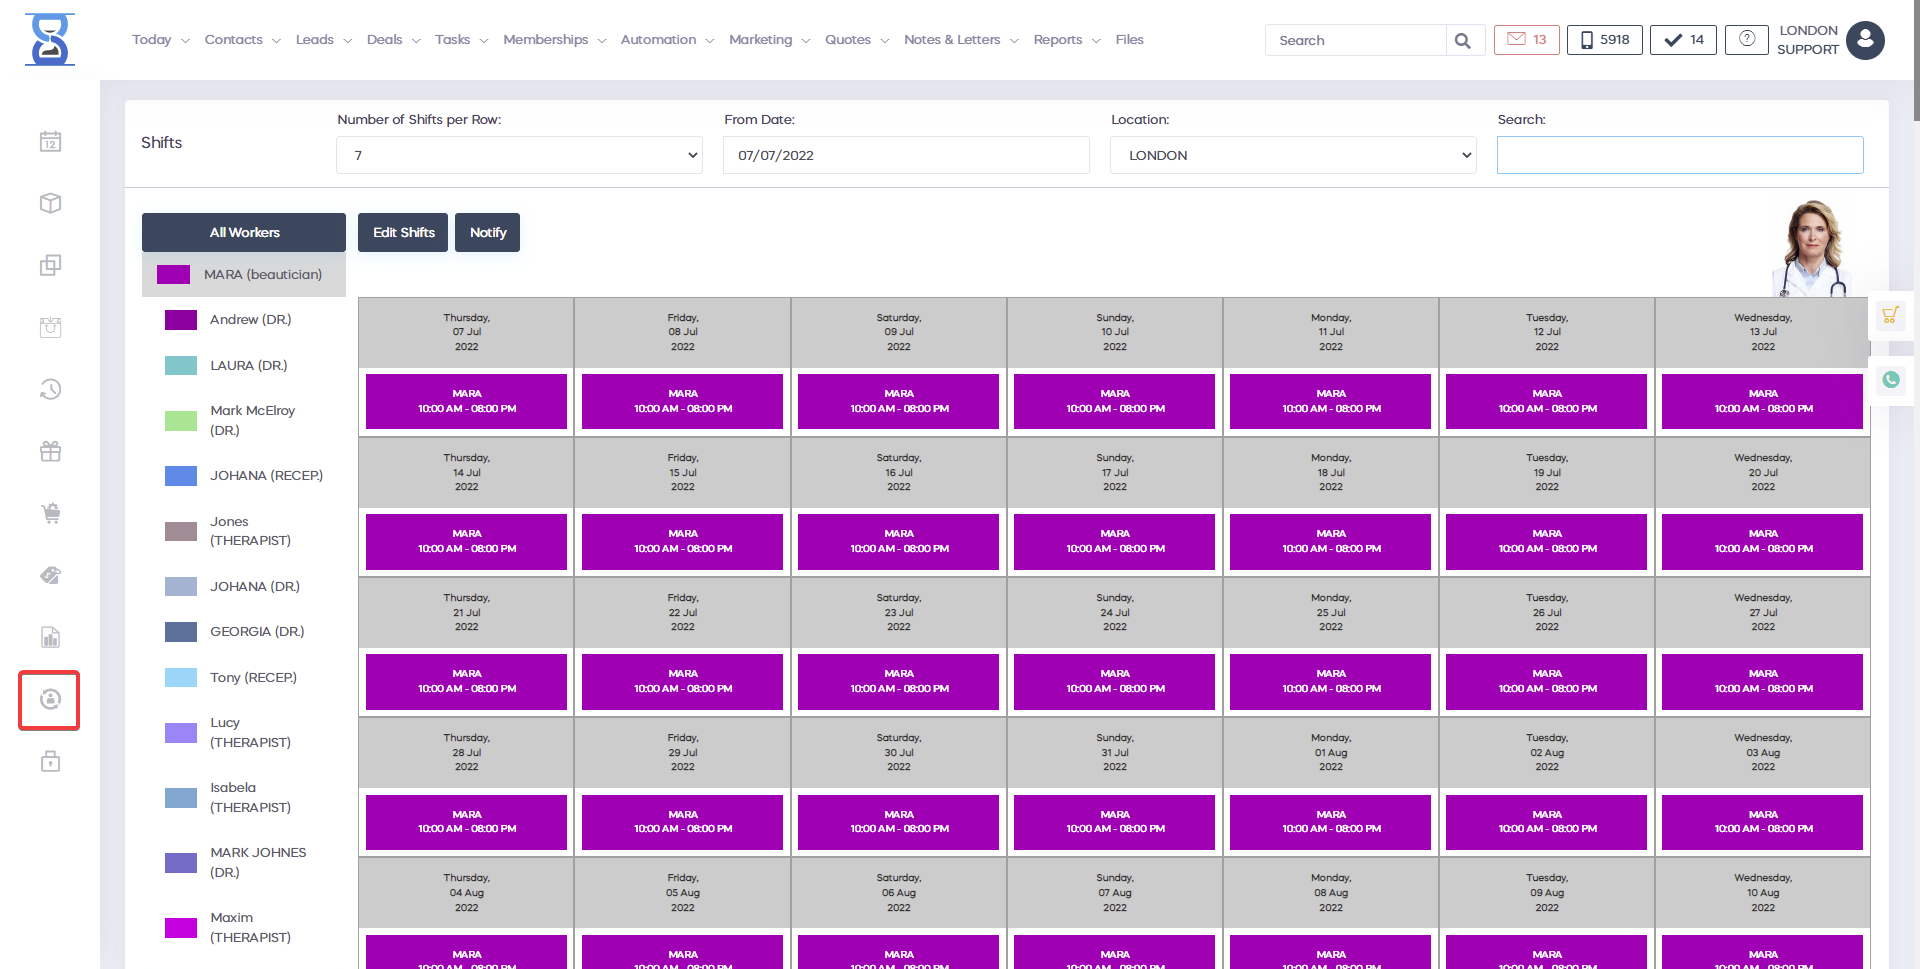
Setting the shifts Shifts can be viewed and set only by a user/staff with manager rights. To view the shifts press the “SHIFTS” button.
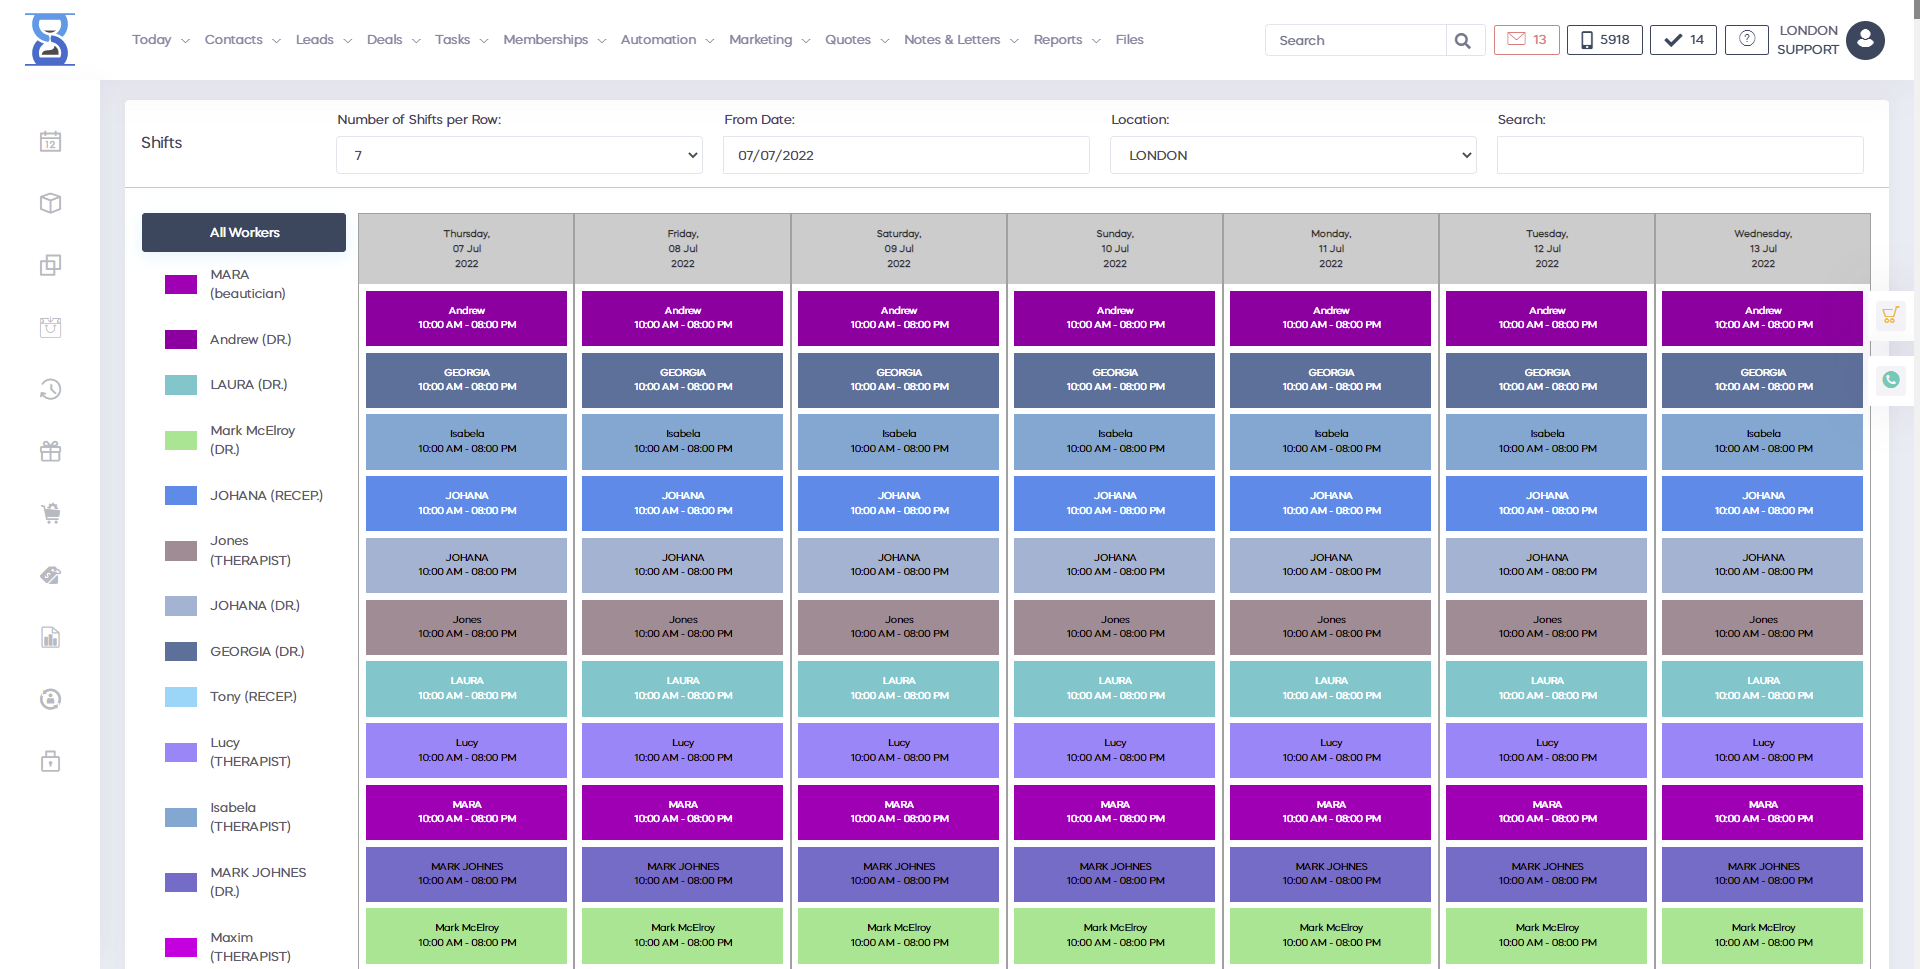
To begin, first, check the selected location (defaults to the currently logged in location) for multi branch licenses.
To view the shifts for only one staff, click on the staff from the left column. You can also do this by clicking on their corresponding entry (coloured square) in the right column.
To change or set up new shifts for the selected staff press the „Edit Shifts” button.
You can set the shifts in 2 ways:
1) General time – this will set the „Time In” and „Time Out” values from the left side above to all selected days.
2) Individual Time – this will allow you to specify a different time in and time out for each day.
When setting the shifts in the general time method the shifts that are already set will not be changed unless you check the „overwrite set hours” checkbox (dangerous as it overwrites the time on all the days displayed in the right column). To mark a day as a workday, click on the empty circle so that it shows up as filled and then press the „Save Shifts” button. This day does not have a shift set on it and the staff will not be shown in the Daybook on this date.
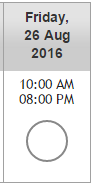
If we click on it will change to a filled state (active)
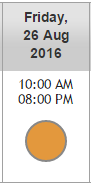
In individual time mode, you can set the time the staff clocks in and out on a daily basis rather than globally for all active days shown in the right column. This is the recommended and safe way of modifying the clock in and clock out for a particular day.
General time method steps:
- Choose the time in and time out from the left column.
- Check the empty circles of the days you wish to set the set time in and time out
- Click on the „Save Shifts” button.
Important: We don’t recommend this but if you wish to modify an existing shift using the general time method then you will need to also check the „overwrite set hours” checkbox. Be very careful when doing this as it will overwrite the time on all the days shown in the right column. Individual Time method steps:
- Press the Individual button from the left column
- Check the empty circles of the days you wish to set the set time in and time out
- For each day select the time in and time out values
- Click on the „Save Shifts” button
We recommend that you use the “Individual” method when changing the shift time for a particular day. Other useful features: Notify Staff: When a staff is selected (the viewing mode is for the shifts of only one staff) you can press the “Notify” button to send a message to the selected staff.
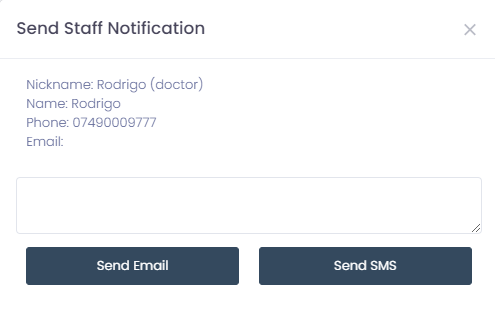
Notify All Staff: This will send out notifications (SMS or email) to all the staff in the selected location.

Recurring Busy Time: From this window, you can set busy slots inside the Day Book automatically for the selected days and time interval. It saves time not having to go inside the Day Book and do this manually (e.g. when you want to set leave time for a couple of days).
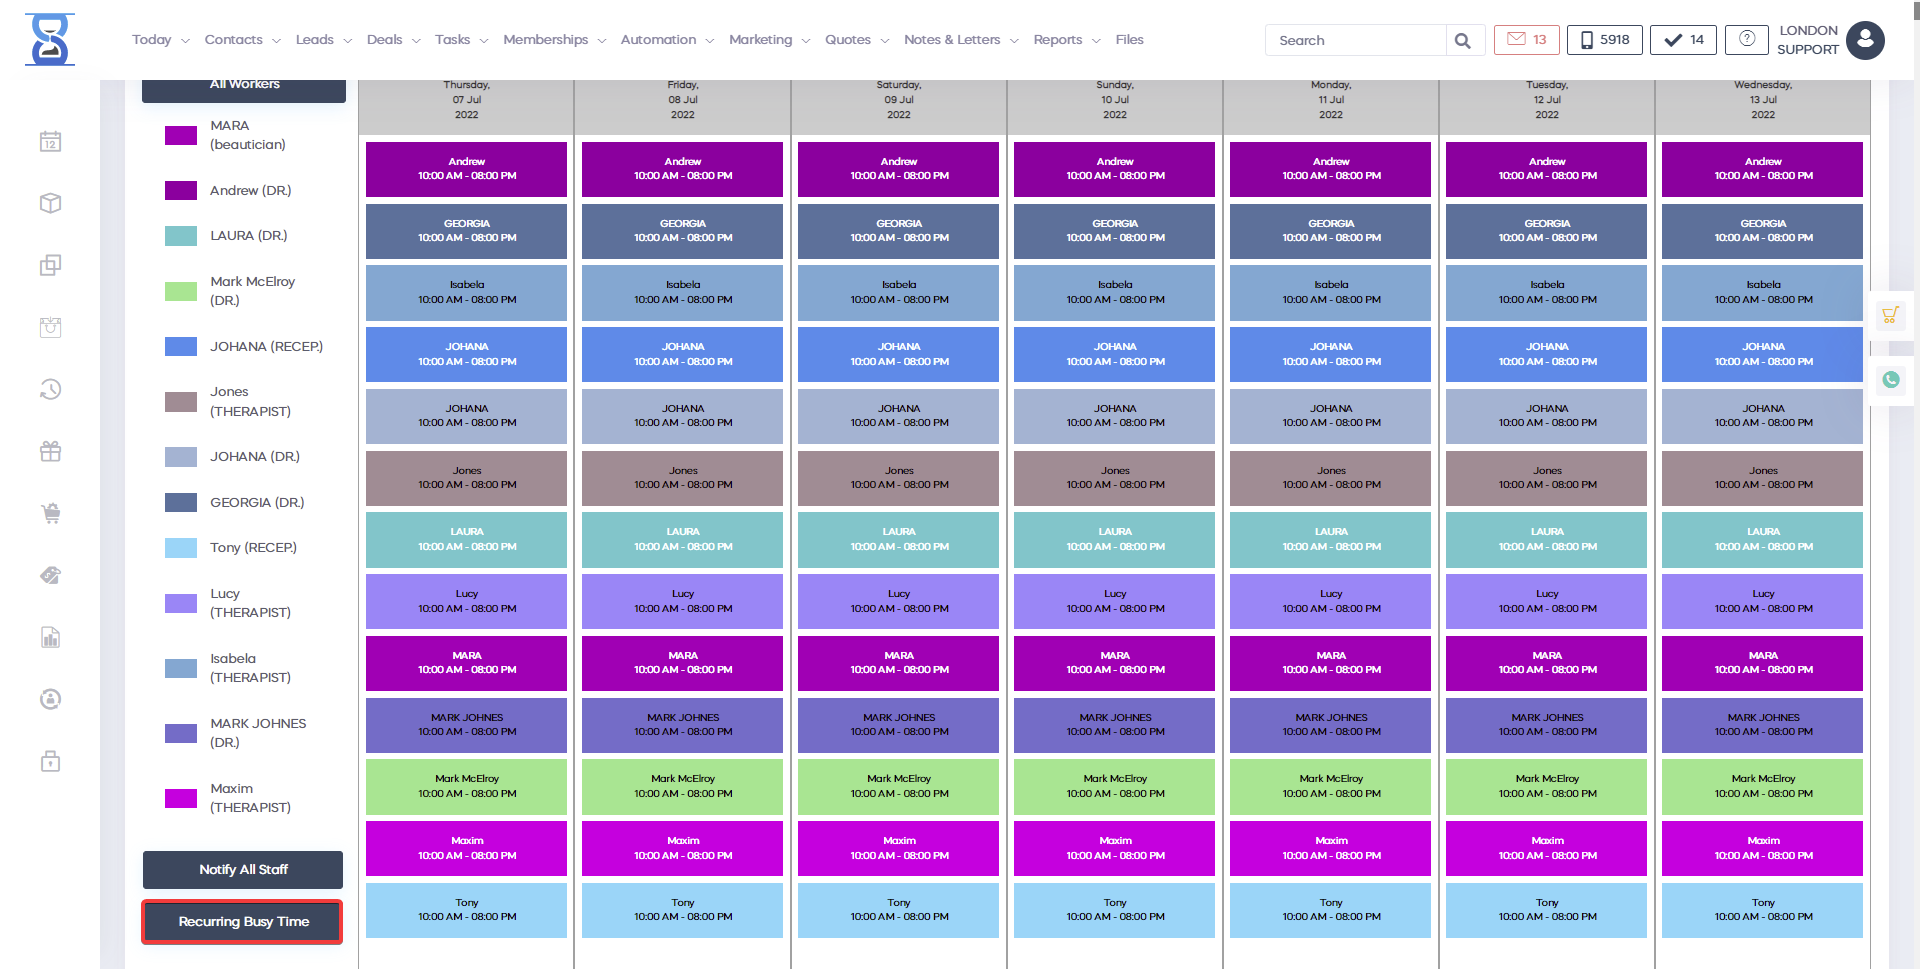
On the left column, you have the staff list for the selected location shown in the window title. You can select or deselect all the staff from the list by checking “Select All Staff”. On the right column, you have the date interval that you wish to set the busy time (“Start Date” and “End Date” fields) and the time the busy time starts and ends ( “Start Time” and “End Time” fields). “Cancel all busy time for the selected day” if checked will delete ALL busy time slots for the selected days before adding the busy time for the selected time, use this carefully. “Cancel previous busy time if overlapping” will delete any busy time that conflicts (overlaps) with the date and time range selected in this window, use this carefully. CLEAR BUSY TIME will DELETE all bus time slots for the selected date range, use this carefully.
By rotating staff shifts with rotation function, you can determine the shifts of your employees. After defining the shifts, you have the option to export the changes and email your employees about their shifts for the next month. They have the ability to do the clocking in the morning and leave in the evening. You have a nice journal page, where you can actually check the time they did clock synchronization and output. You have the option to define the commissions of your staff, based on their sales. In addition, you can store your staff agreement and employment forms contracts. It`s very important to know that after defining a shift, the employee will be available in the Calendar. At the reception, or online when your customers go to book an appointment, once you define the move, the move will connect with the calendar in real time.
You can book Busy time, you can have recurring shifts and you can make changes in advance. The staff rotation feature provides you with the opportunity to observe each member, based on their respective rotation and make the necessary adjustments to improving productivity. You can discuss your schedule with your management team and see which members will be rotated, based on their work and efficiency in executing specific tasks. This feature not only provides the treatment - you can track attendance and give the exact member performance and feedback, as it is required in business management. You have a special tracking attendance report, to see how busy they are and how much money the business is actually creating.
You can make sure all of your customers` expectations are clear and will help you with maintaining your employees rotation, based on customer meetings. This means creating a better image of your business. You won't have to keep the customer with the same therapist all the time. It's good to rotate therapists and assign them to your customers. In case one of them falls ill for a short period of time, you can use the characteristics of the feature, in order to increase your business efficiency. Also, it will be easy to see who brings the best performance in the company and who should get rewarded for providing the best treatments to your customers.