
A resource refers to a room or a piece of equipment required to provide a particular service at your salon / clinic (e.g. tanning bed, massage room or laser machine).
Resources are separate to each location and are assigned to services or courses through categories.
Resources categories are lists of resources that can be assigned to services, courses and patch tests.
A resource can be part of more than one category.
Only one resource category can be assigned to a particular service, course or patch test.
For each service, course or patch test you can also specify one resource category for the online booking application.
Online resource categories are checked automatically for conflicts and assigned to appointments.
Note: Resources are not enforced in the application; the system will allow you to book an appointment without resources but will prevent you from creating resource conflicts if you choose to use them. For flexibility (e.g. sharing of resources) you can also override this restriction by using the "Ignore" checkbox.
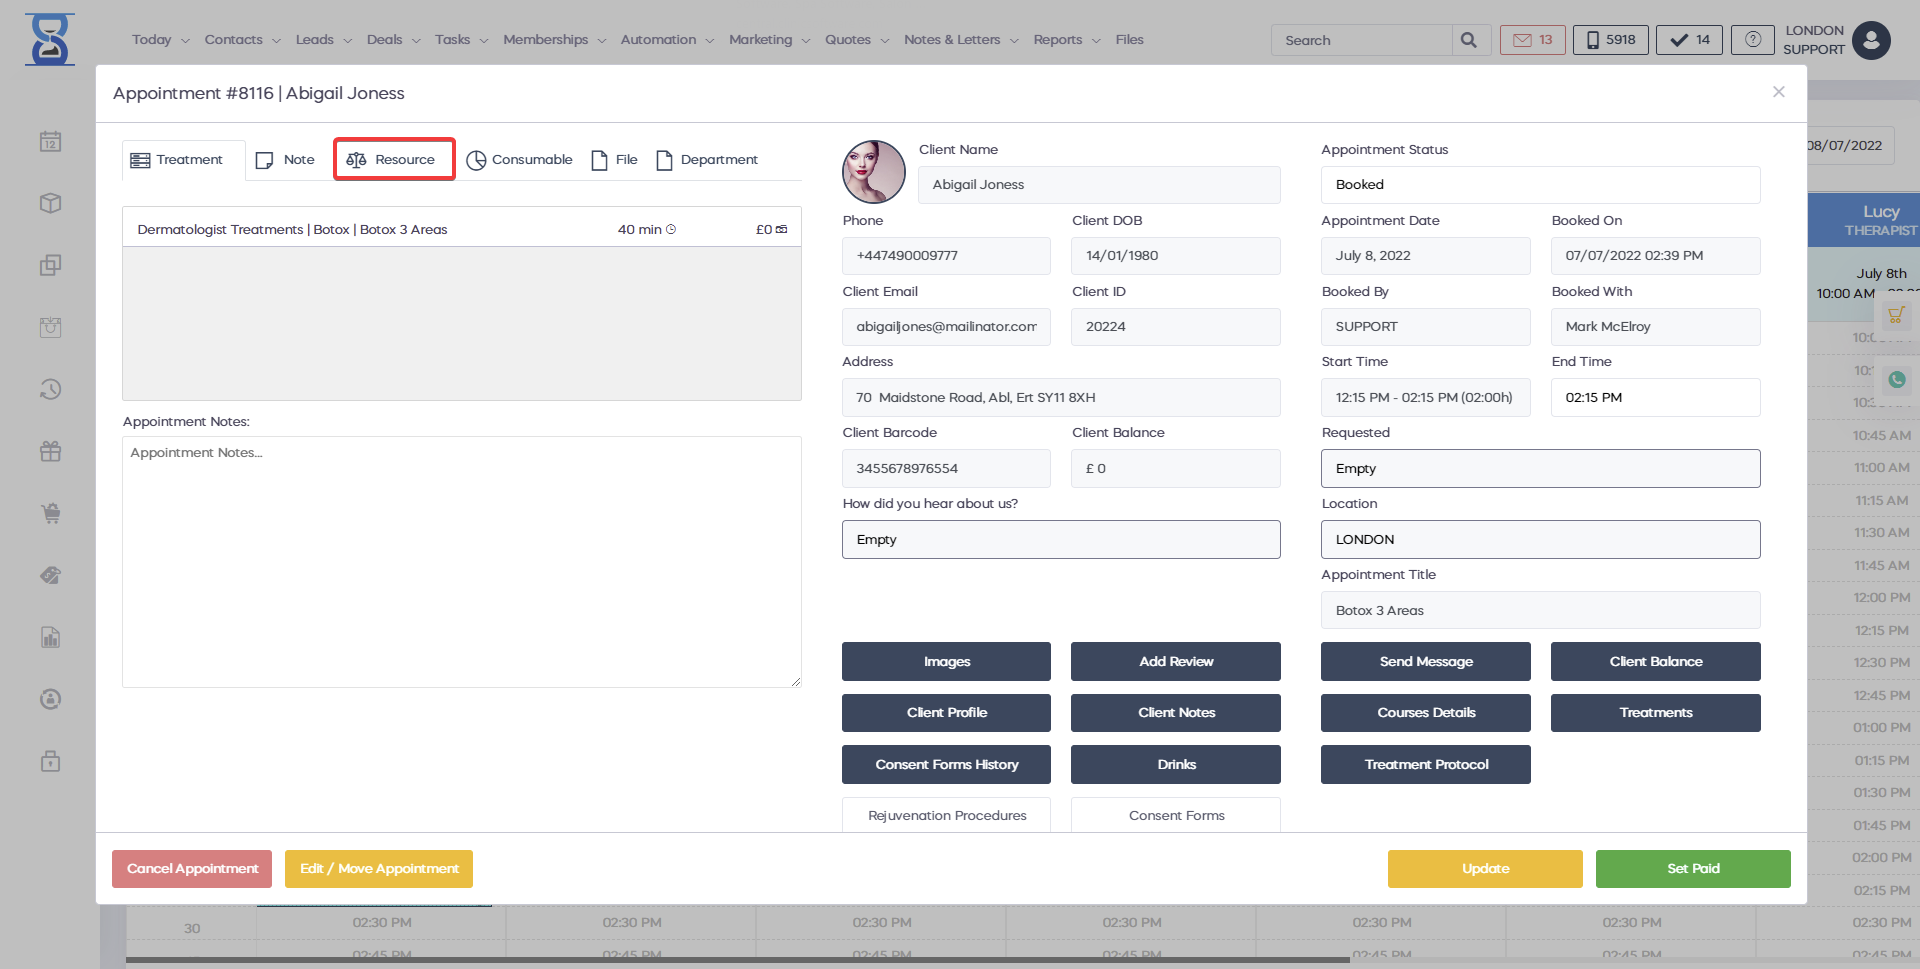
Resources can be assigned when the appointment is created by pressing the “RESOURCES” button from the “New Appointment” window and updated later if required from the “Appointment Details” window.
Details on resources administration will be covered in the “Admin Area” section of the “User Guide”.
The functionality of the resources option is the same for all types of appointments (services, courses, patch tests).
To begin, select a course that has a resource category assigned:
Resources categories can be optional or mandatory.
When the resource is marked as mandatory (required) the system will not let you book the appointment until you have selected the resource required for the treatment form the “Appointment Resources” window.
When the resource is mandatory, the text “—THIS SERVICE/COURSE REQUIRES RESOURCES” will be displayed in red colour below the treatment.
When the resource is optional, the text “—THIS SERVICE/COURSE CONTAINS RESOURCES” will be displayed in blue colour below the treatment.
The resources for the appointment can be specified in the “Appointment Resource” window.
To access the “Appointment Resources” window click on the “RESOURCES” button:
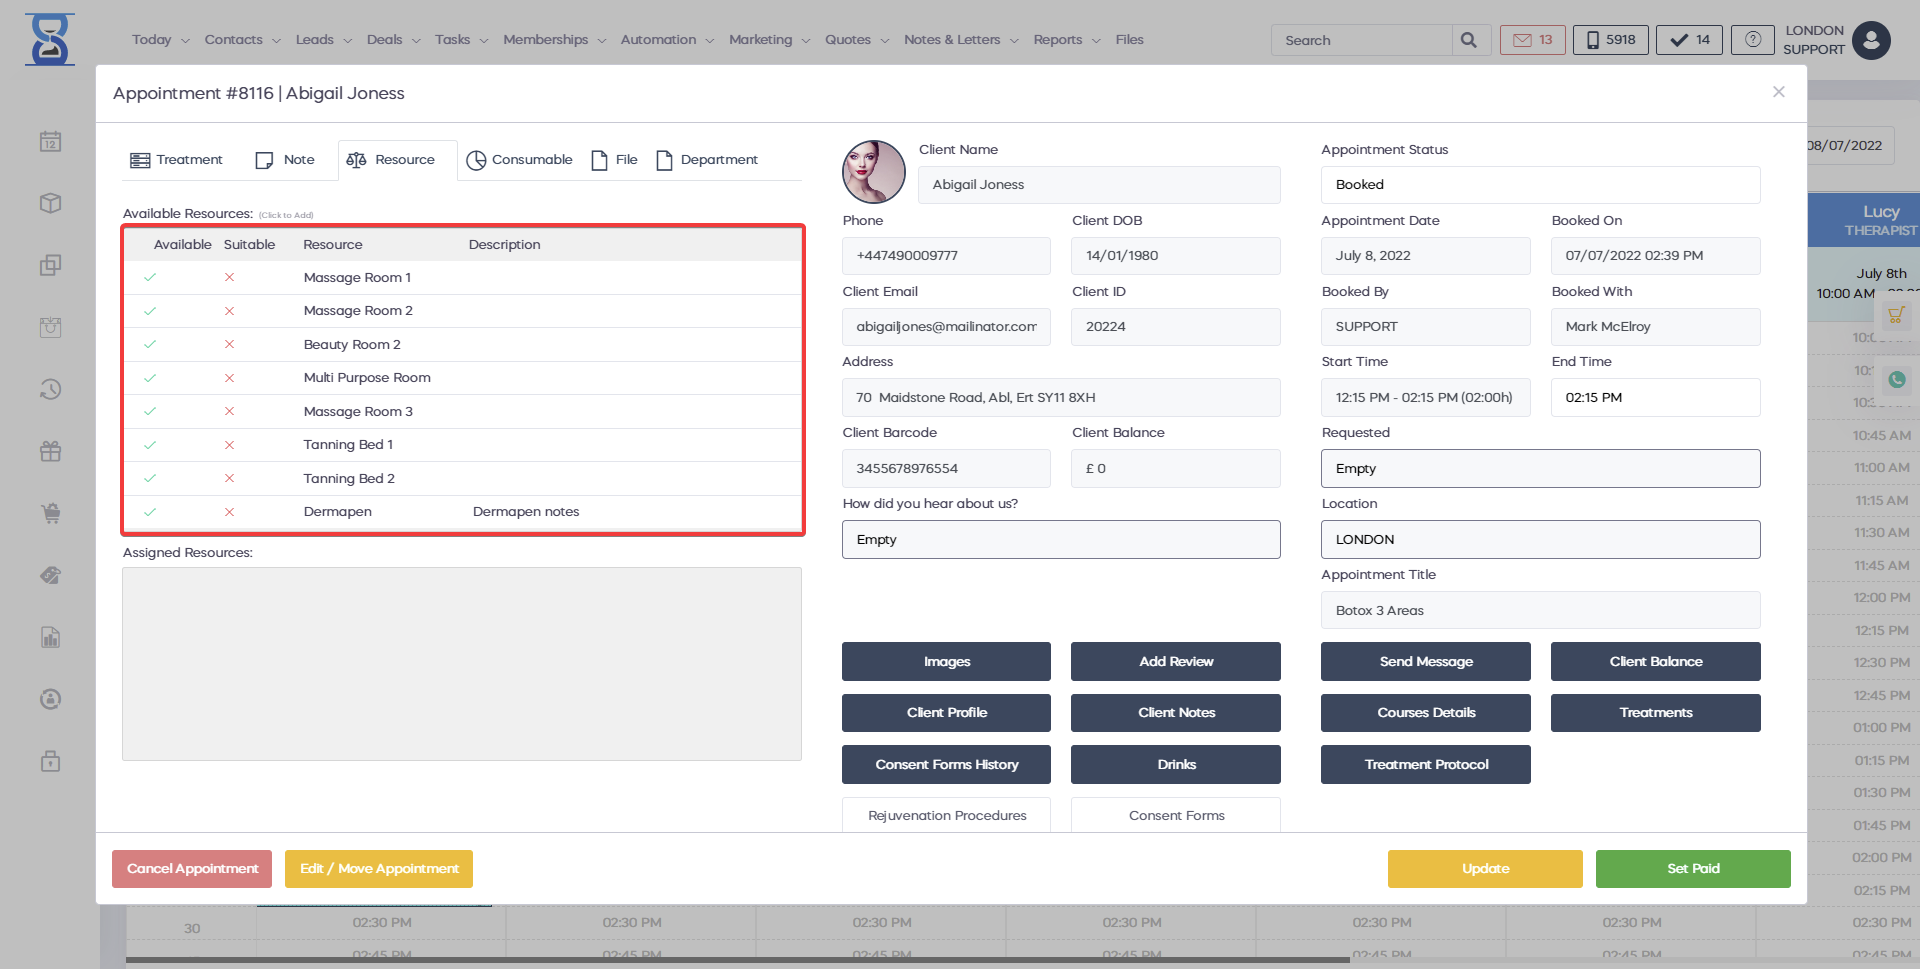
This window is divided into 2 sections:
- Salon/Clinic Resources
- Selected Resources
The “Salon/Clinic” Resources section will list all of the resources defined at the selected location.
This list can be searched and filtered to show only the resources that are available and suitable for the selected list of treatments.
By default, this list is filtered to show only the suitable services for the treatments list.
Resource availability and suitability
A resource is displayed as available (green checkbox) or unavailable (red cross) depending on the existence of another appointment that utilizes the same resource on the same date and time.
Booking of an unavailable resource will result in a conflict / shared resource and the conflicting appointments will be displayed with a diagonal stripe background on them.
A resource is displayed as suitable (green checkbox) if the category that the resource is part of is assigned to at least one of the selected appointment treatments (service/course).
Otherwise, it will be displayed as unsuitable (red cross).
Required resources
Resources marked as required are displayed in bold font and prefixed with “*”.
Resource abbreviation
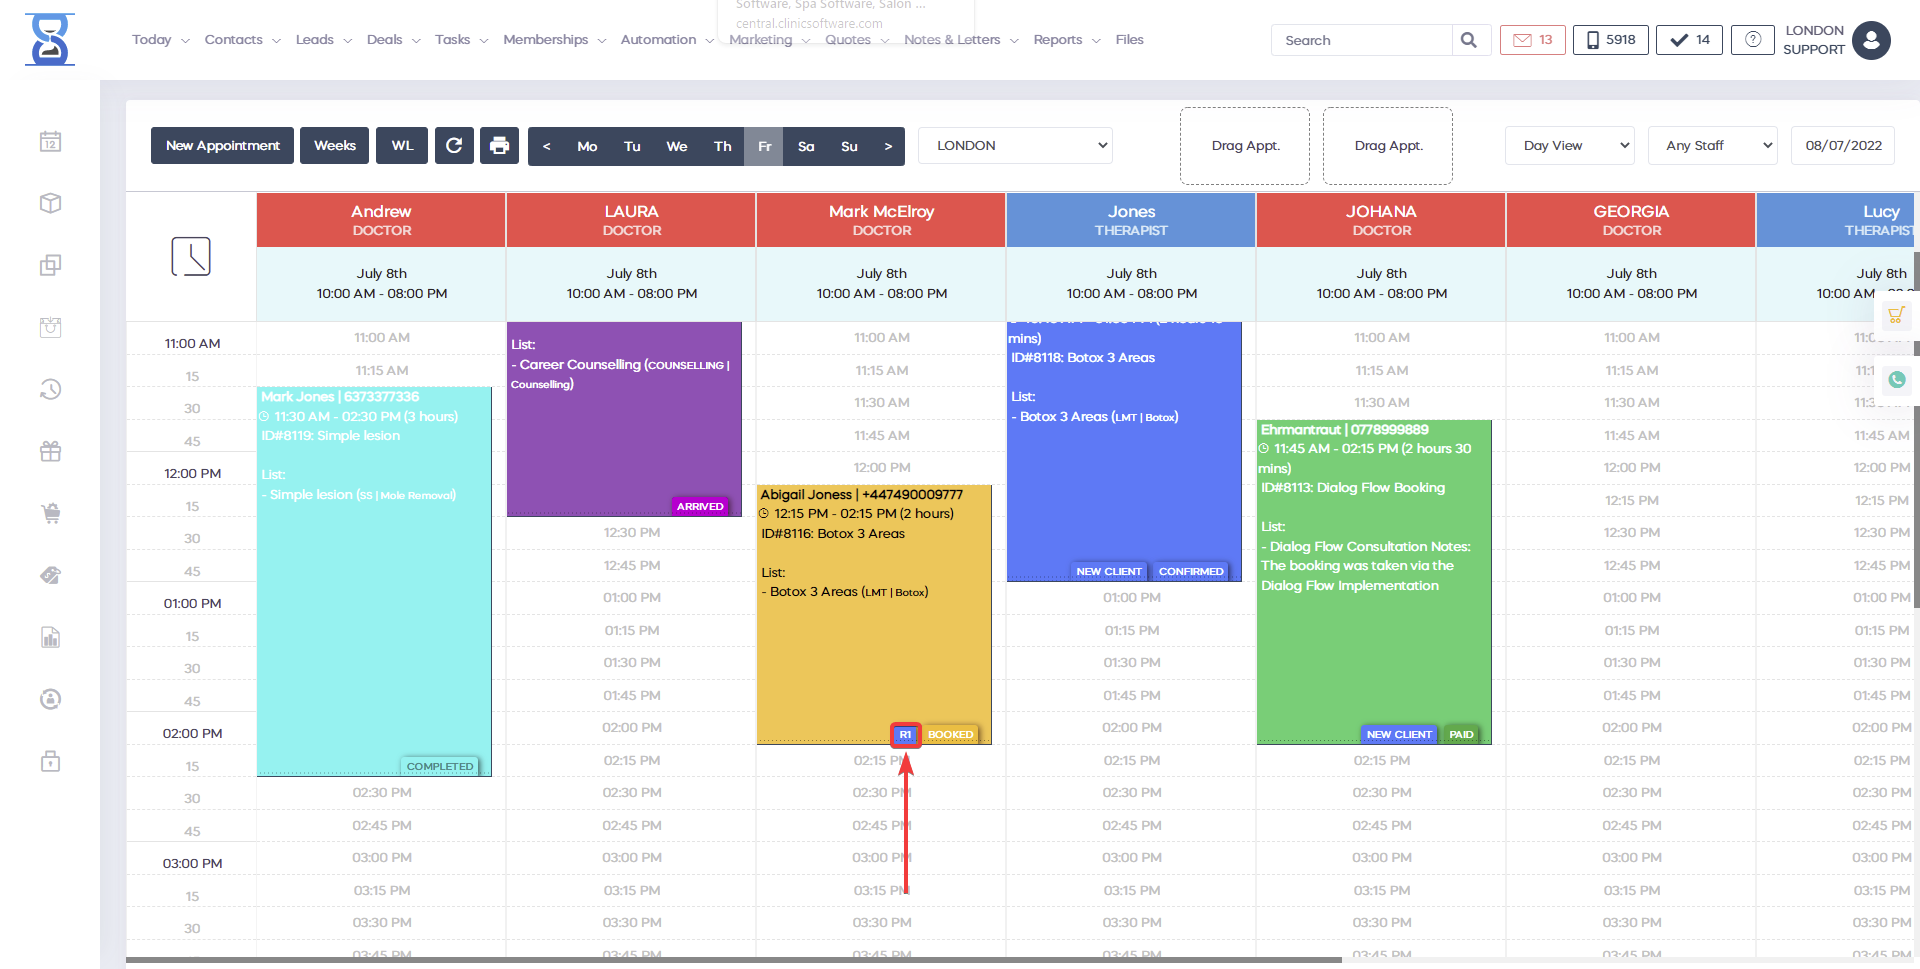
Resources also feature an abbreviation field that will be displayed in the Day Book for easy identification.
In the above image, “DP” is an abbreviation for “Dermapen” and it will be displayed in the Day Book.
Here we can see the “DP” abbreviation on the appointment for easy identification.
Appointment resources are also displayed on placing the mouse cursor over the appointment:
Resource notes
The resource notes field is displayed in the “Appointment Resources” window and included in the emails sent to the staff when the appointment status is changed if configured in the system.
The resources notes are configured in the “Admin Area”, more details in the “Admin Area” section of the User Guide.
Resource “Details” button
The resource details button will open a window from which you can view the relation between the resource and the appointment treatment that is requesting it.
It will show the treatment and the resource category used to link the resource to the treatment.
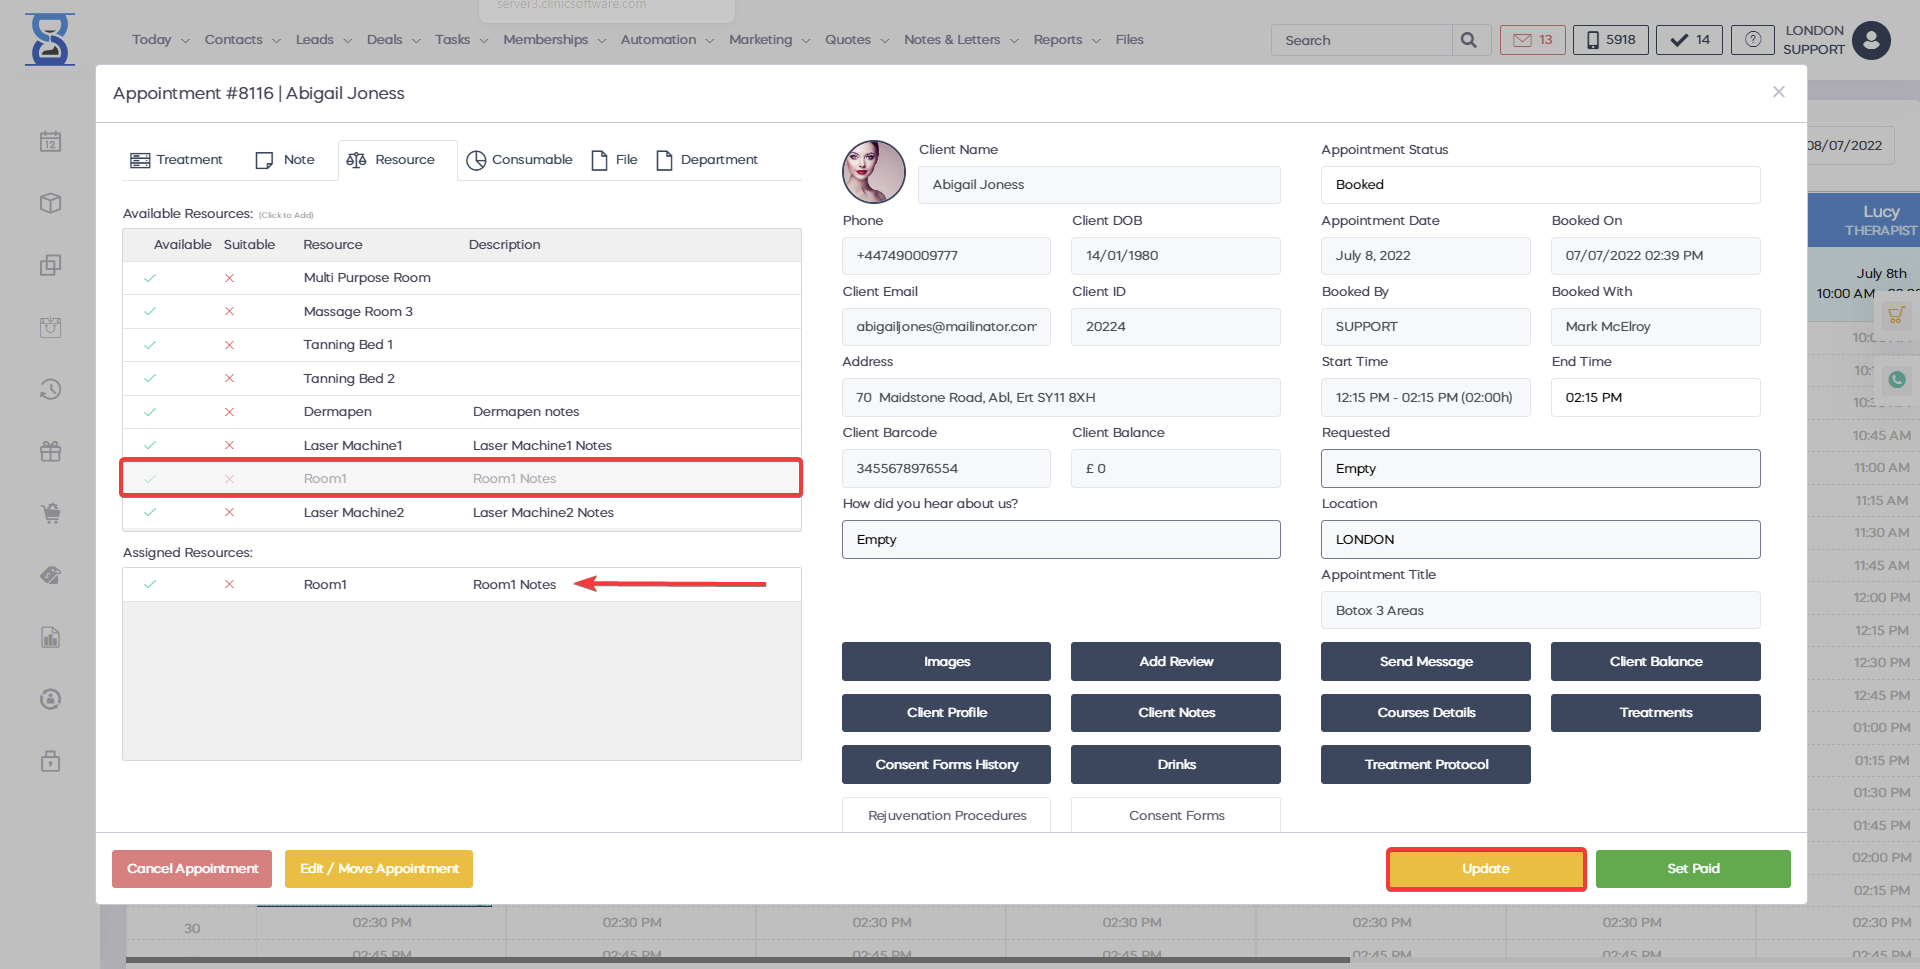
To add a service to the “Selected Resources” list, select the resource from the “Salon/Clinic Resources” list by clicking on it (selected items will be displayed with a blue background) and then press the “ADD TO LIST” button.
Click on the resource:
Press the “ADD TO LIST” button:
If the resource is already in the “Selected Resources” list the system will display a warning message and not allow you to add it as a duplicate.
Searching for resources
You can search for the resource by using the “Filter list” filed.
The “Salon / Clinic Resources” list will be updated as you type.
After you have found the resource you can click on it then press the “ADD TO LIST” button or by using the keyboard’s arrow keys to select it then pressing the “Enter” key to add it to the list.
Click on the “Filter list” field:
Type in the resource name and then use the arrow keys and Enter key or press the “ADD TO LIST” to add the resource to the “Selected Resources” list.
To remove a resource from the “Selected Resources” list, select the resource that you wish to remove and then press the “REMOVE FROM LIST” button.
Click on the resource that you wish to remove:
Press the “REMOVE FROM LIST” button:
To clear the “Selected Resources” list, press the “CLEAR LIST” button.
After you have completed selecting the resources for this appointment press the “CLOSE” button and then finalize the booking of the appointment by pressing the green “ADD” button.
The “Ignore” checkbox
When we try to add a resource that is unavailable (e.g. already booked for the selected time, displayed with a red cross) the system will prompt you to confirm adding the resource to the “Selected Resources” list:
When you confirm the adding of unavailable or unsuitable resources the “Ignore” checkbox will be automatically set to “checked” (you have given consent to use share the resource).
The system will not let you book the appointment if a resource becomes unavailable while you are adding the appointment (e.g. it was booked from the online booking website meanwhile).
Shared resources
Appointments that share resources will be displayed with a striped background for easy identification.
The conflicting resource will be displayed in red colour, see the above image for details where the mouse cursor is pointing at.