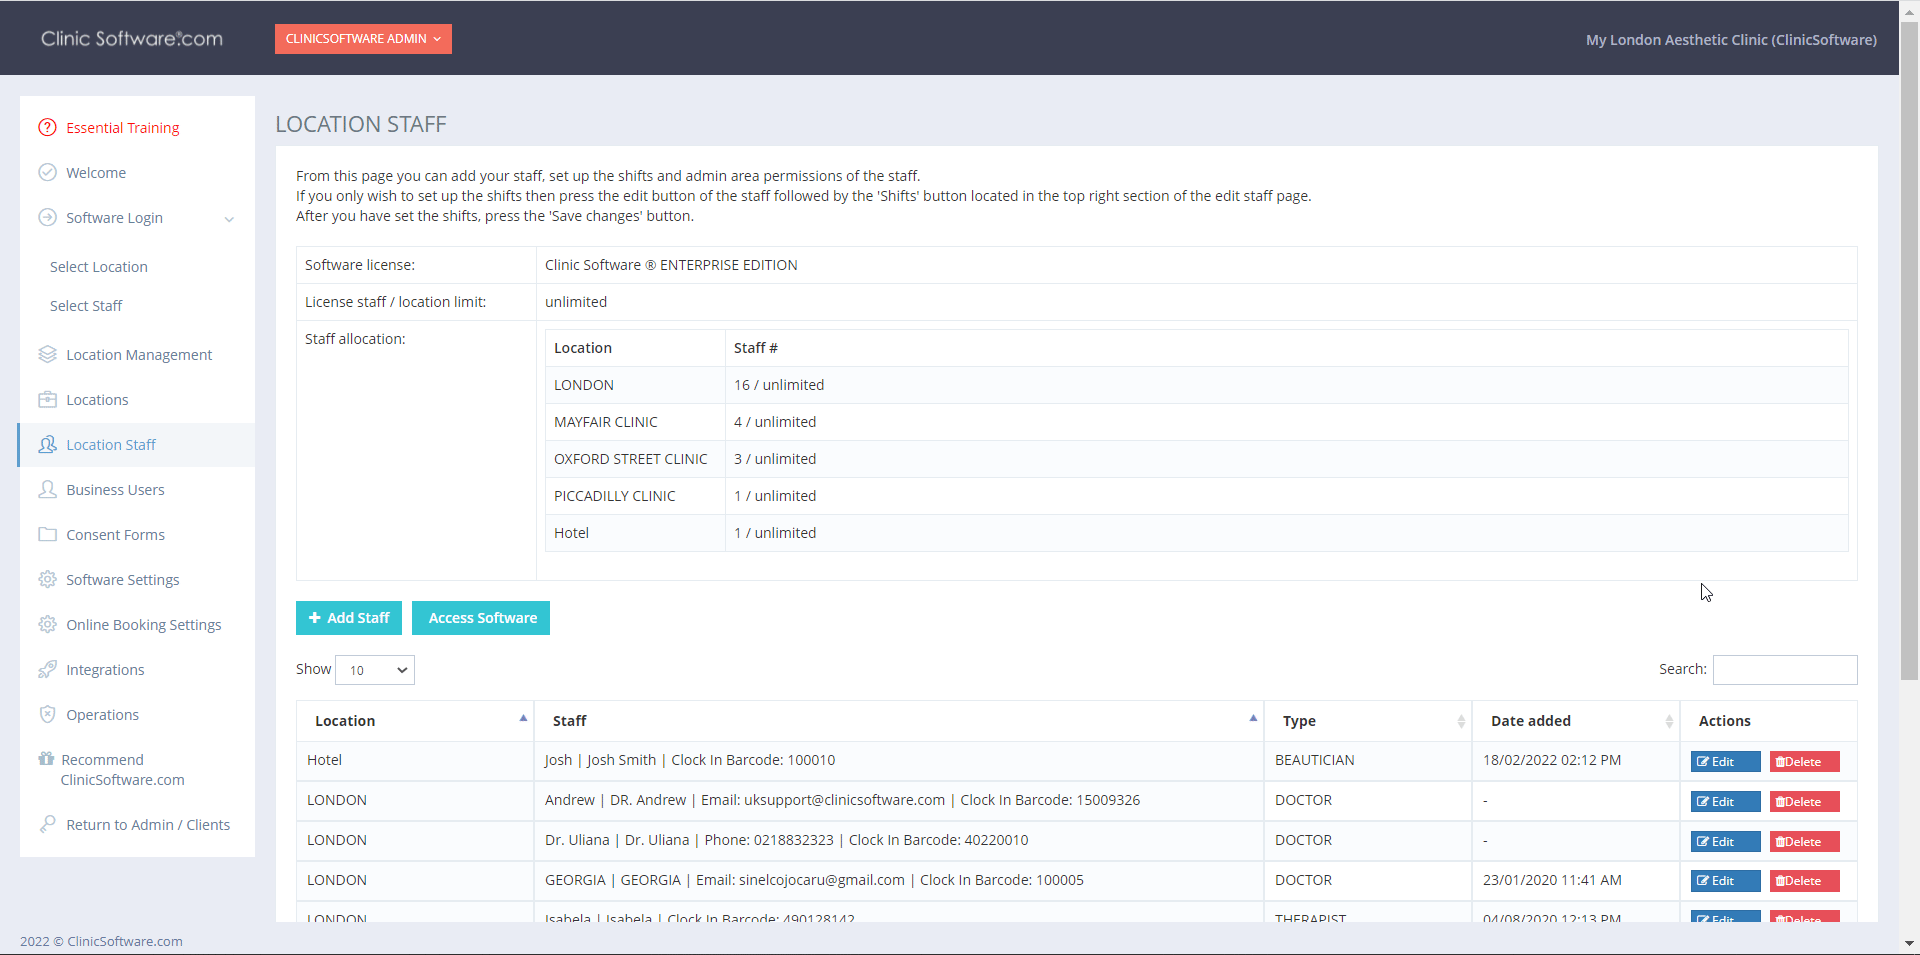
Today I would like to show you how to use the Location Staff feature.
From this page you can add your staff, set up the shifts and admin area permissions of the staff.
If you wish to limit the access for the locations (which locations each staff is able to access) and the admin area section of the software, update the staff permissions which are applied when logged in from a secondary business user account.
Please see below how to access the Permissions page.
If you only wish to set up the shifts then press the edit button of the staff followed by the 'Shifts' button located in the top right section of the edit staff page.
After you have set the shifts, press the 'Save changes' button.
Please see below how to access the Shifts page
From this section you can view and change the status and notes of appointments, add busy time and set the shifts for the selected staff.
This is not a substitute for the main software which can be accessed from your computer at the salon / clinic that offers a wide range of fully comprehensive features for 360° degrees view of your business.
For each staff of the selected location there we display 3 tabs:
- Day Book
- Add Busy Time
- Set Shifts
Day Book Tab:
From the Day Book tab we can view and change the appointments status and notes, book appointments or add busy time in the selected free time slots.
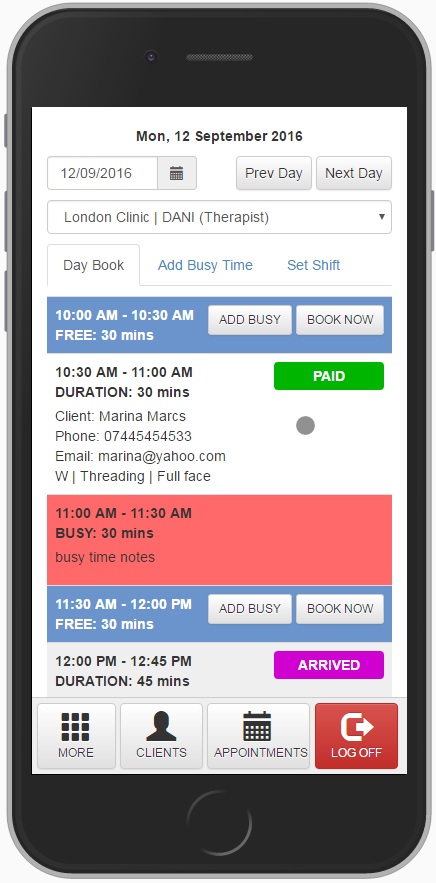
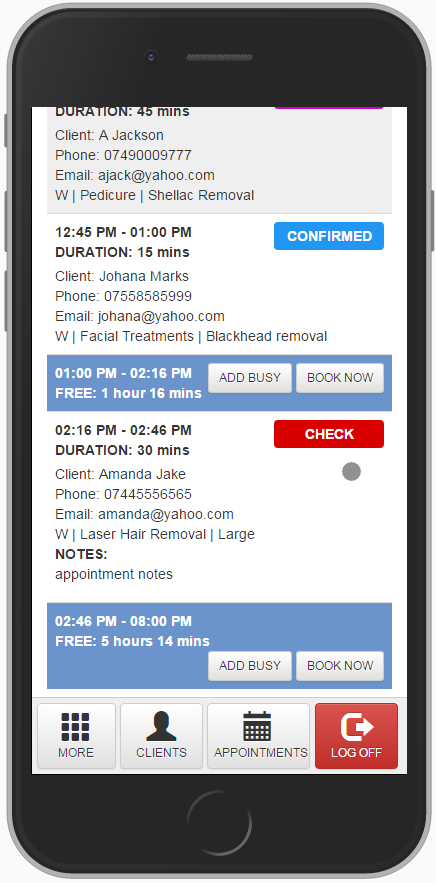
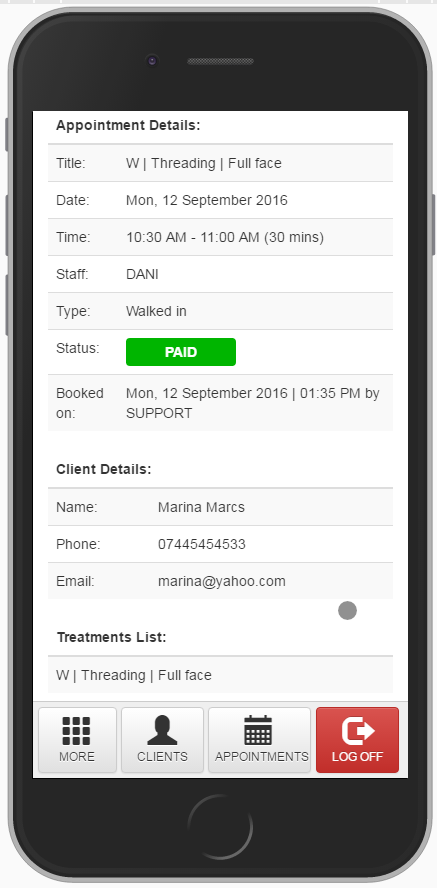
To view the details of an appointment tap the screen on the appointment title.
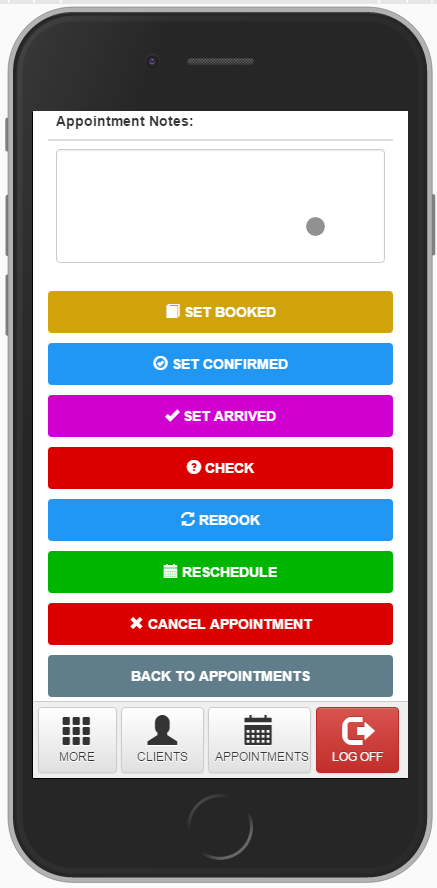
From here you can update the appointment notes and change its status by pressing one of the buttons from the bottom section of the page (e.g. “Set CONFIRMED”, “SET ARRIVED”).
To only update the notes press on the set <status type> button for the corresponding status the appointment already has.
You can also rebook (add the appointment’s services to the cart), reschedule and cancel the appointment by using the “REBOOK”, “RESCHEDULE” and “CANCEL APPOINTMENT” buttons.
To return to the appointments list press one of the “BACK TO APPOINTMENTS” buttons located on both the top and bottom section of the page.
Mobile view of the selected appointment details (scroll down to see the status buttons):
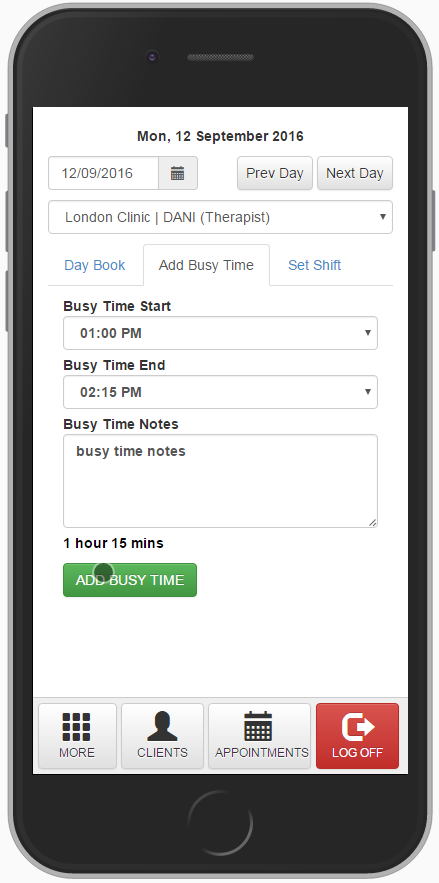
Add Busy Time Tab
From this tab you can add busy time in the Day Book of the selected staff.
Select the start time and end time, fill in the notes if required and then press the “ADD BUSY TIME” button.
You can also tap on “ADD BUSY TIME” button of an empty slot from the Day Book tab to open this tab with the time interval preselected.

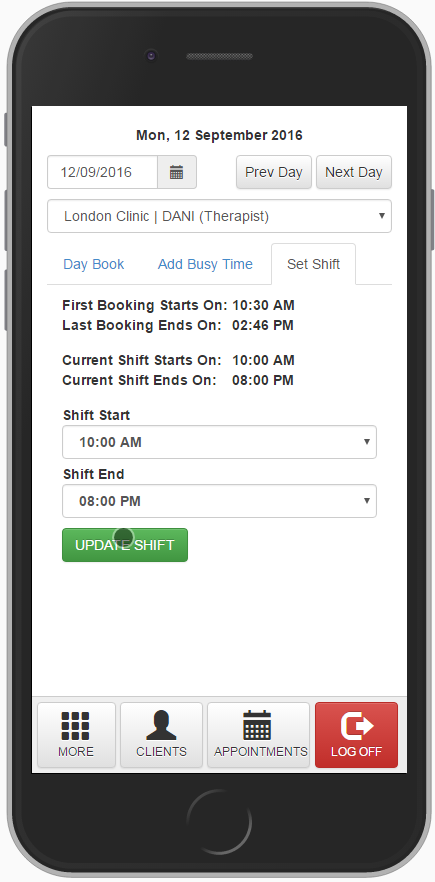
Set Shift Tab
From this tab you can add or update the staff shift for the selected day.
Select the shift start and end times and then press the “UPDATE SHIFT” button.