There are three types of appointments: service type , course type and as a client
01. BOOKING A SERVICES TYPE APPOINTMENT
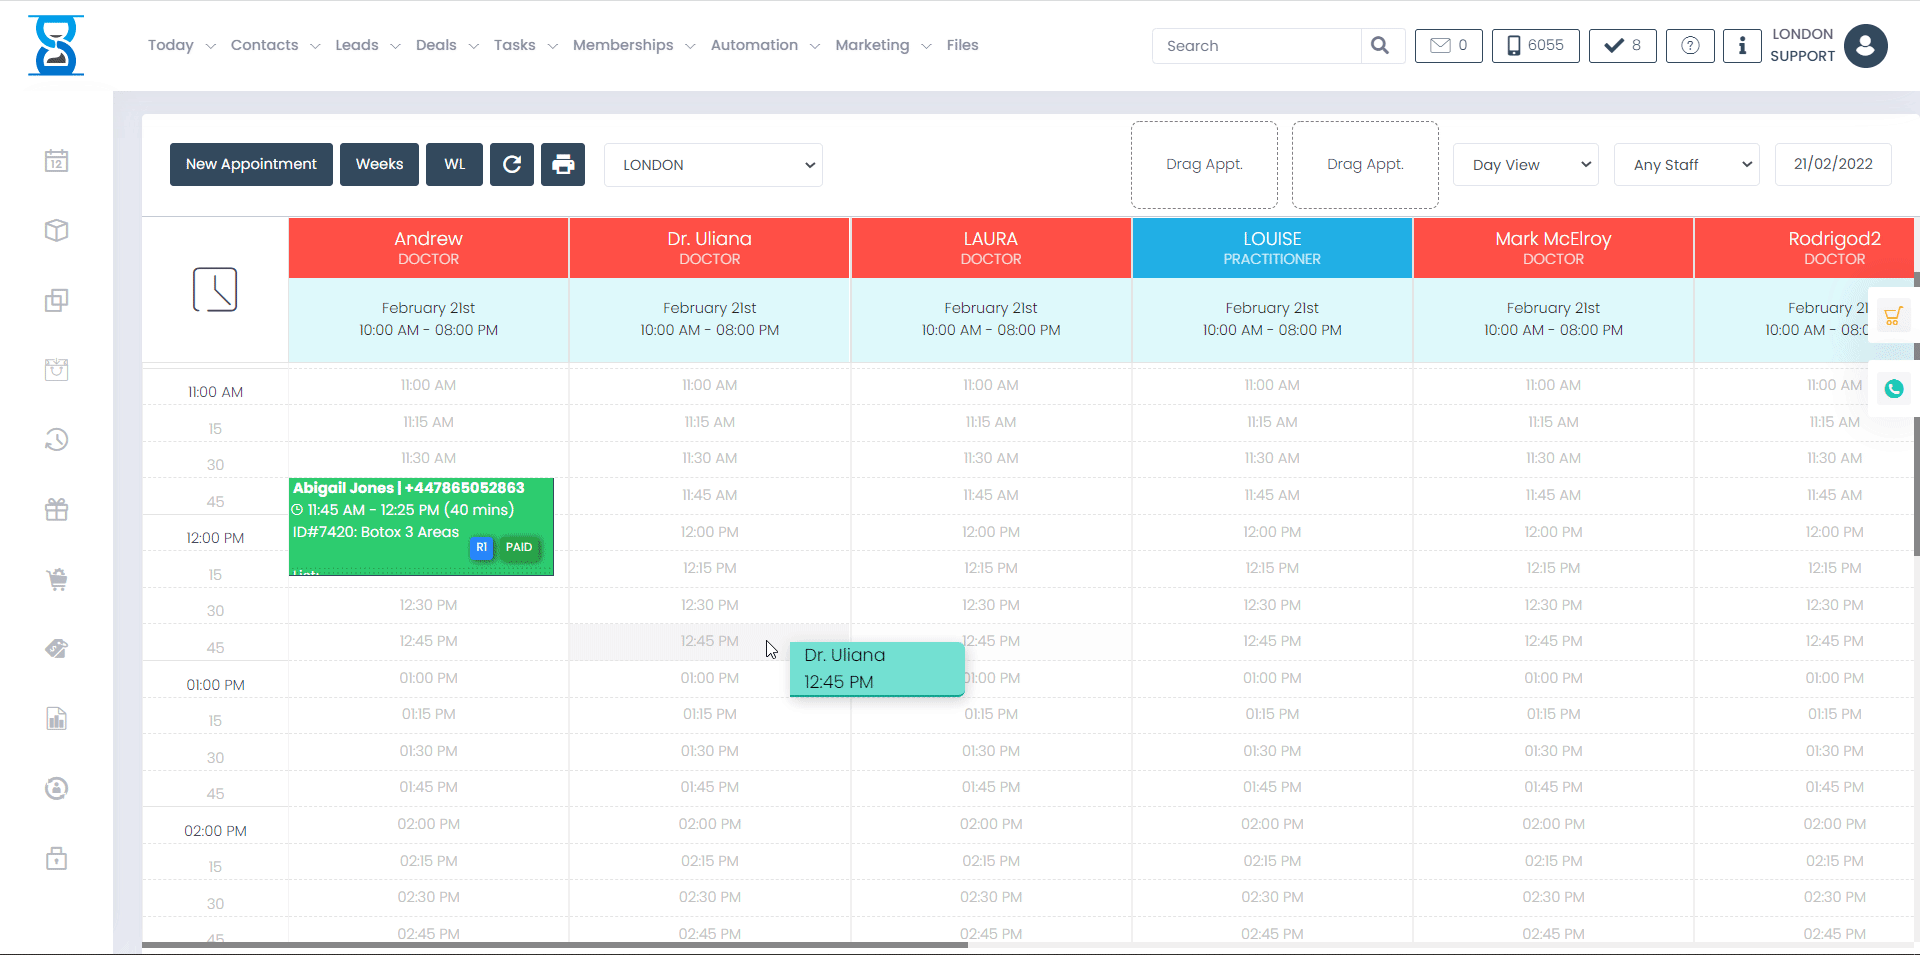
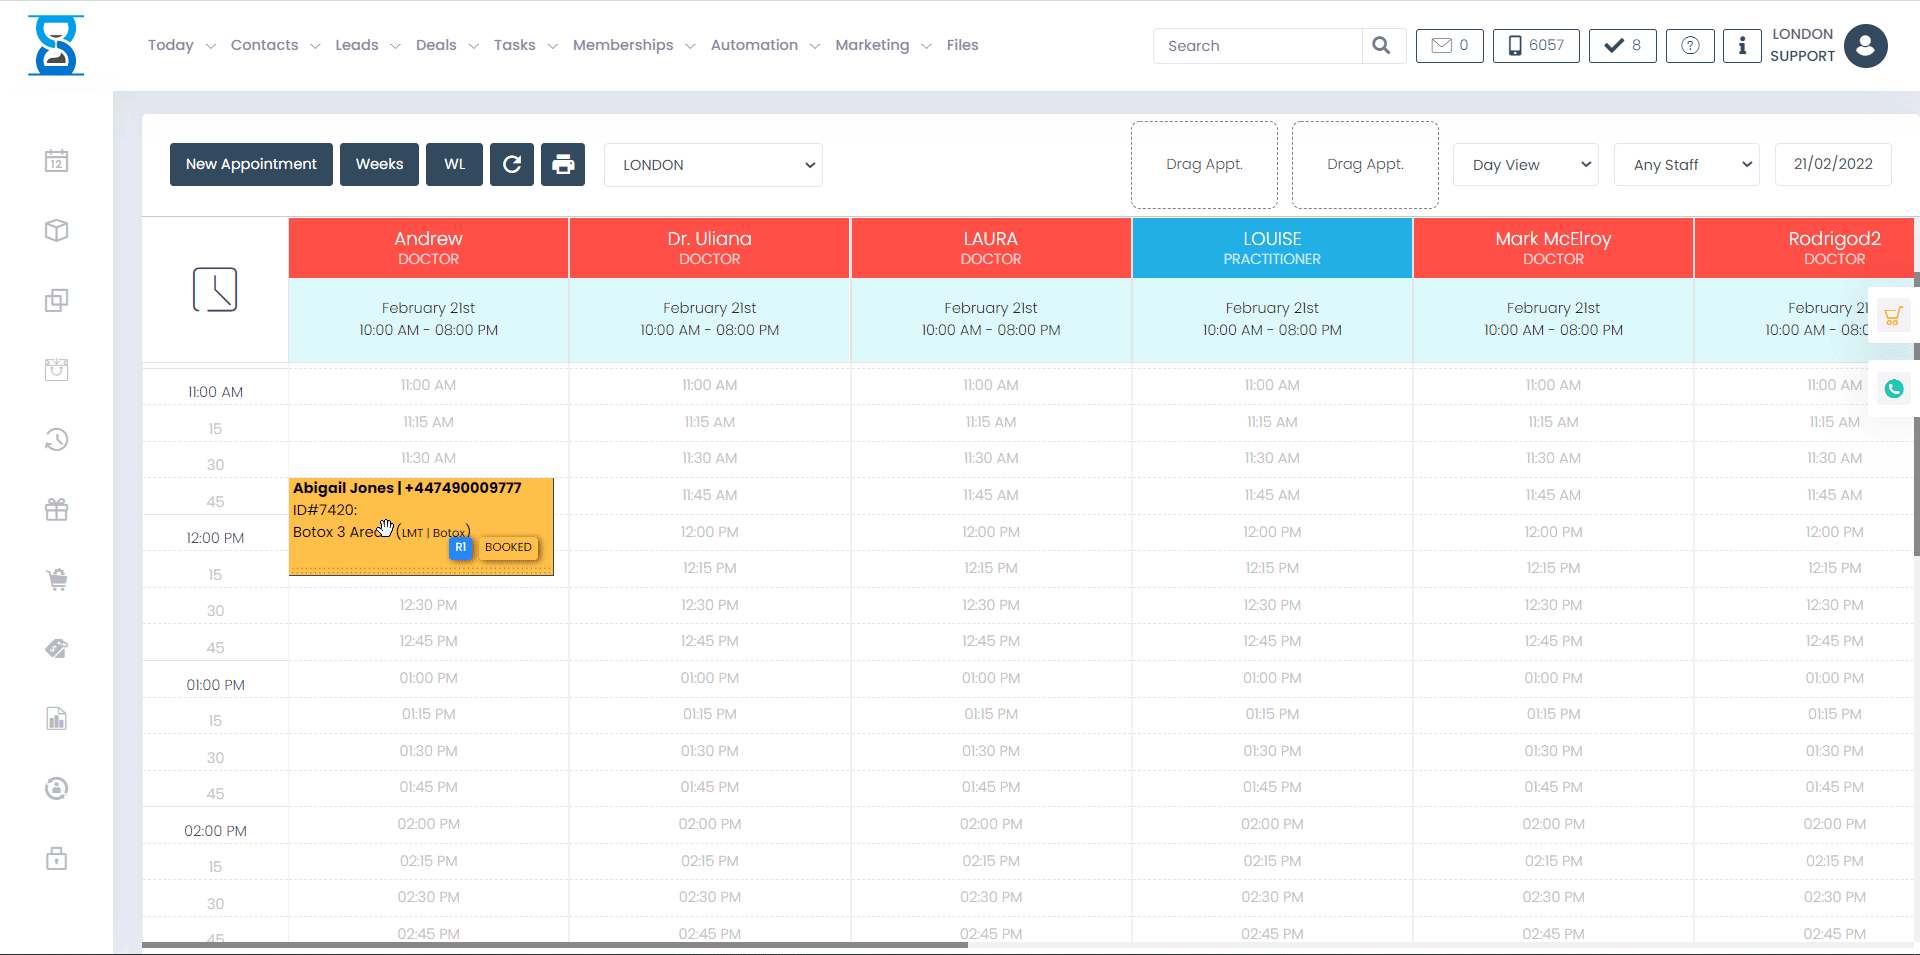
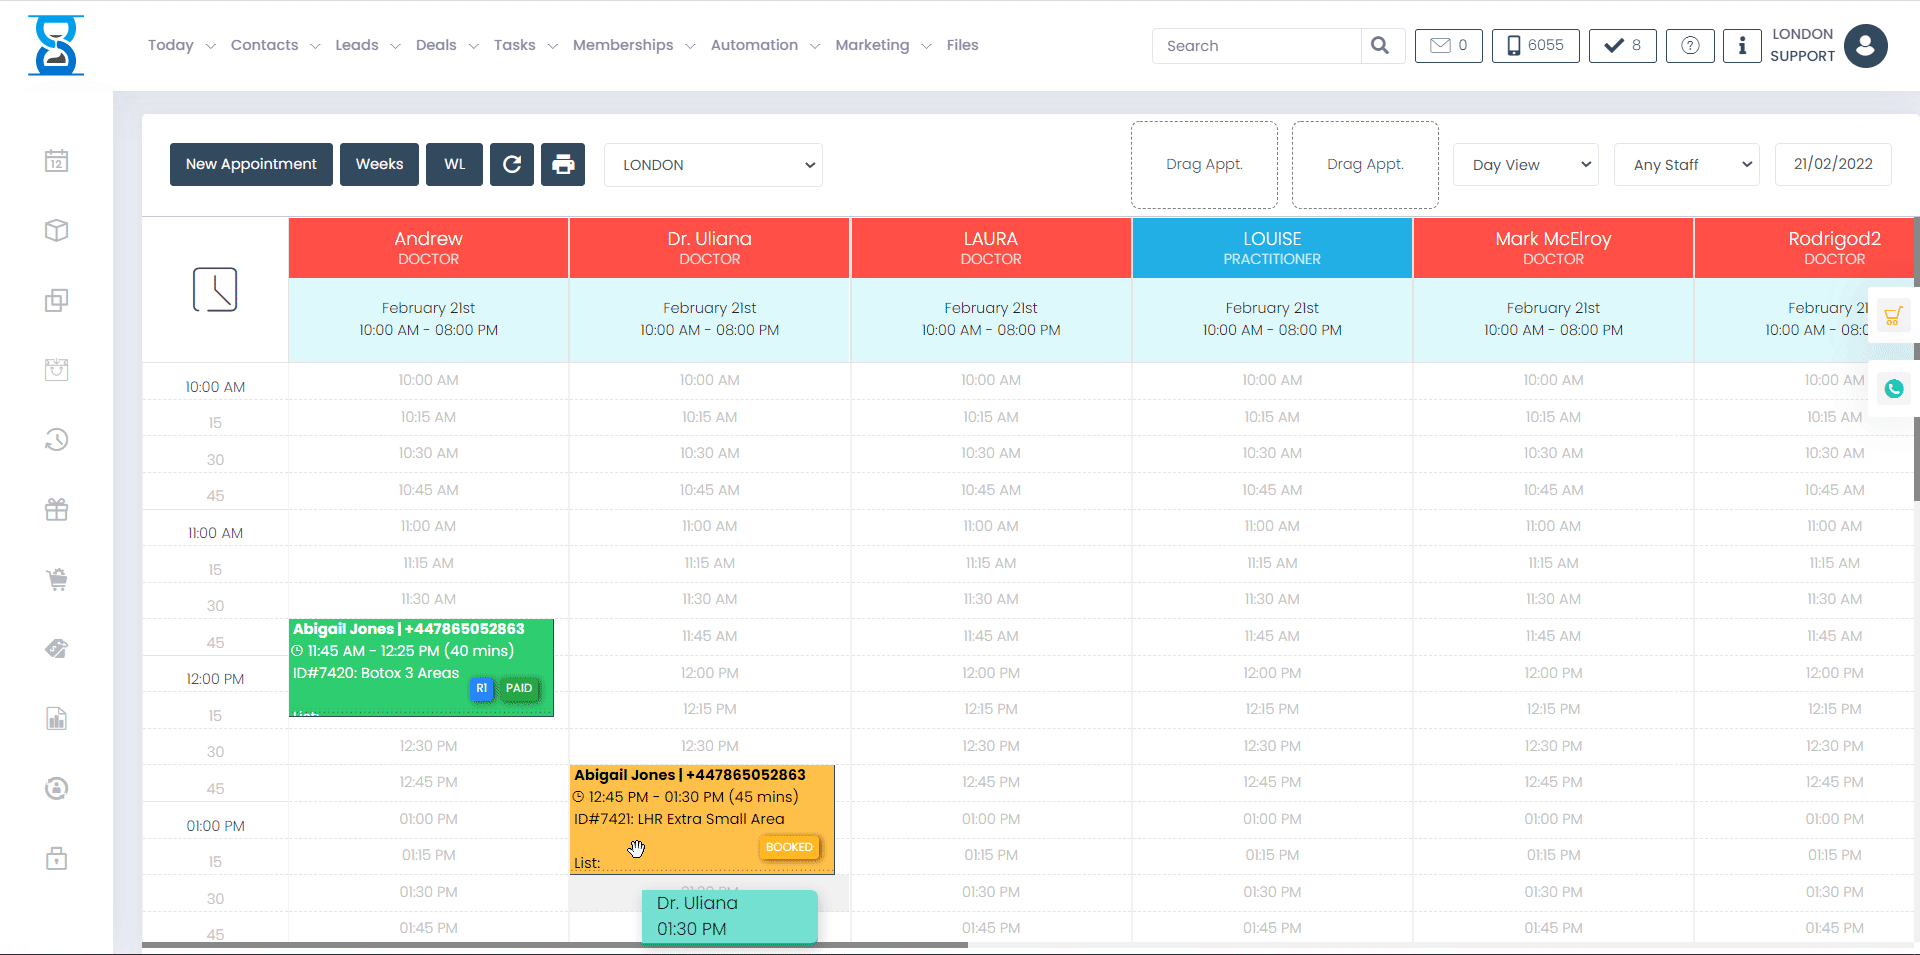
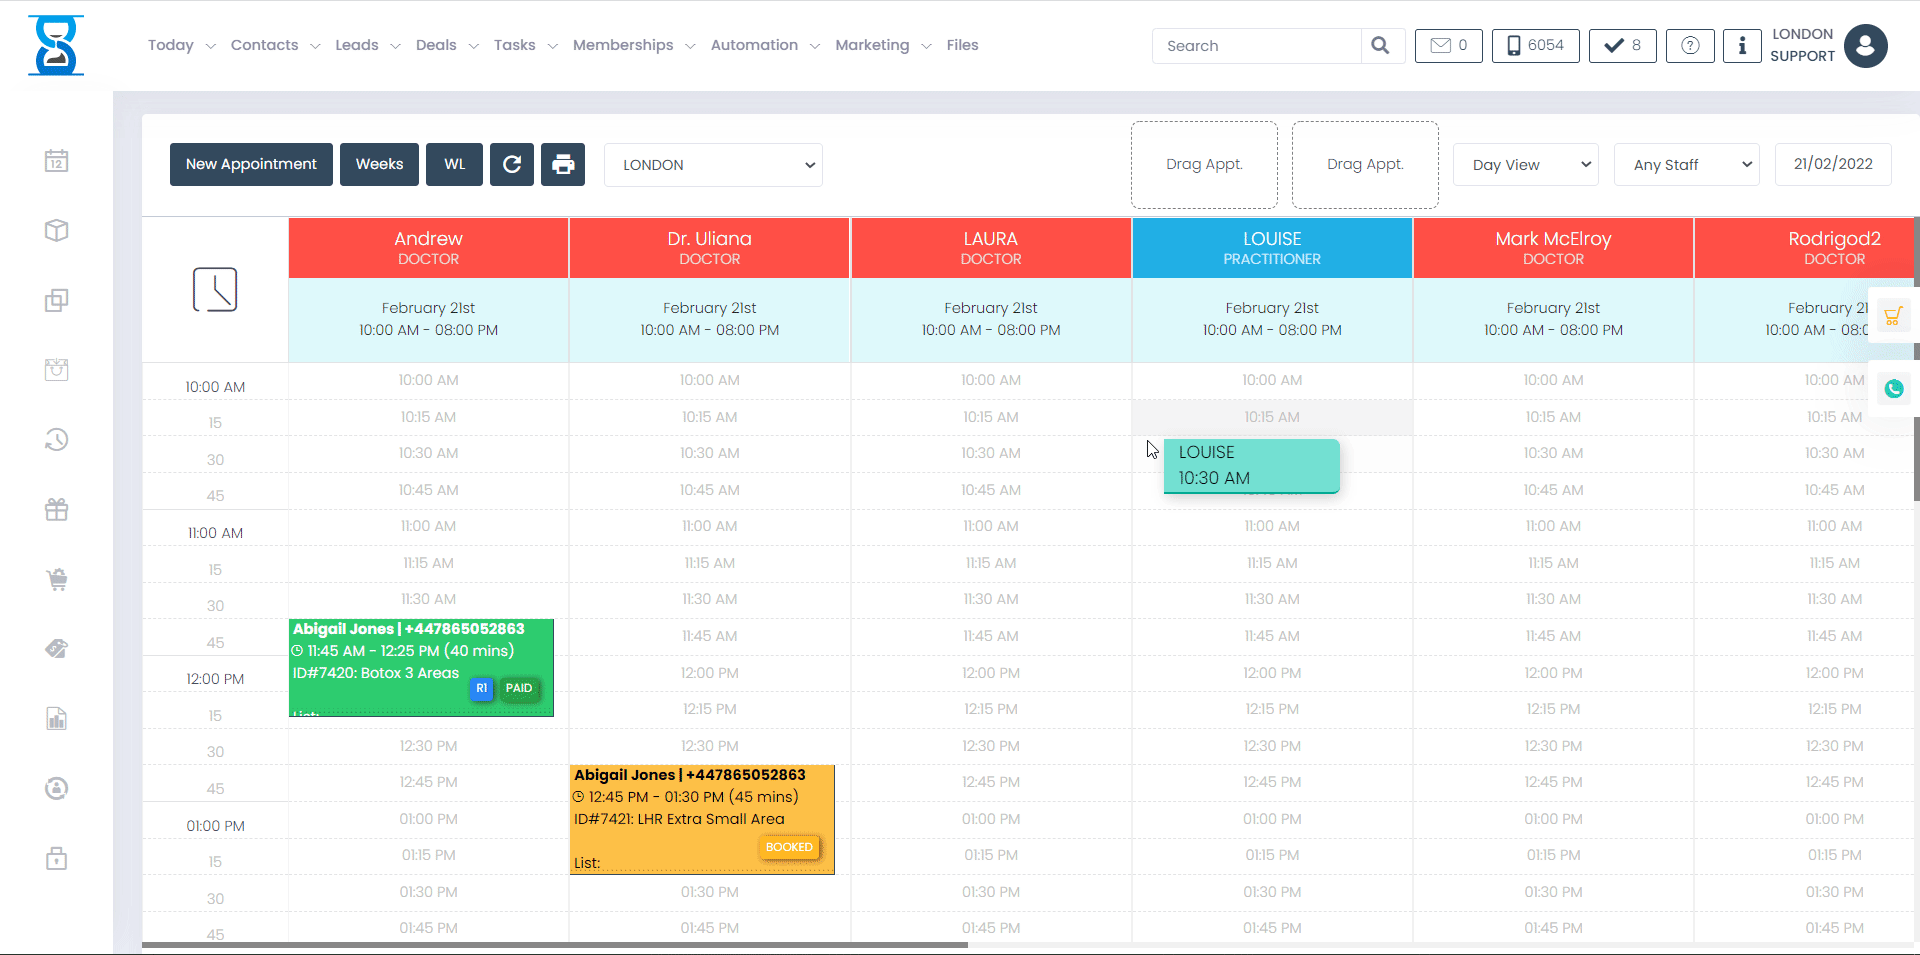
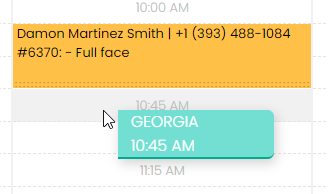
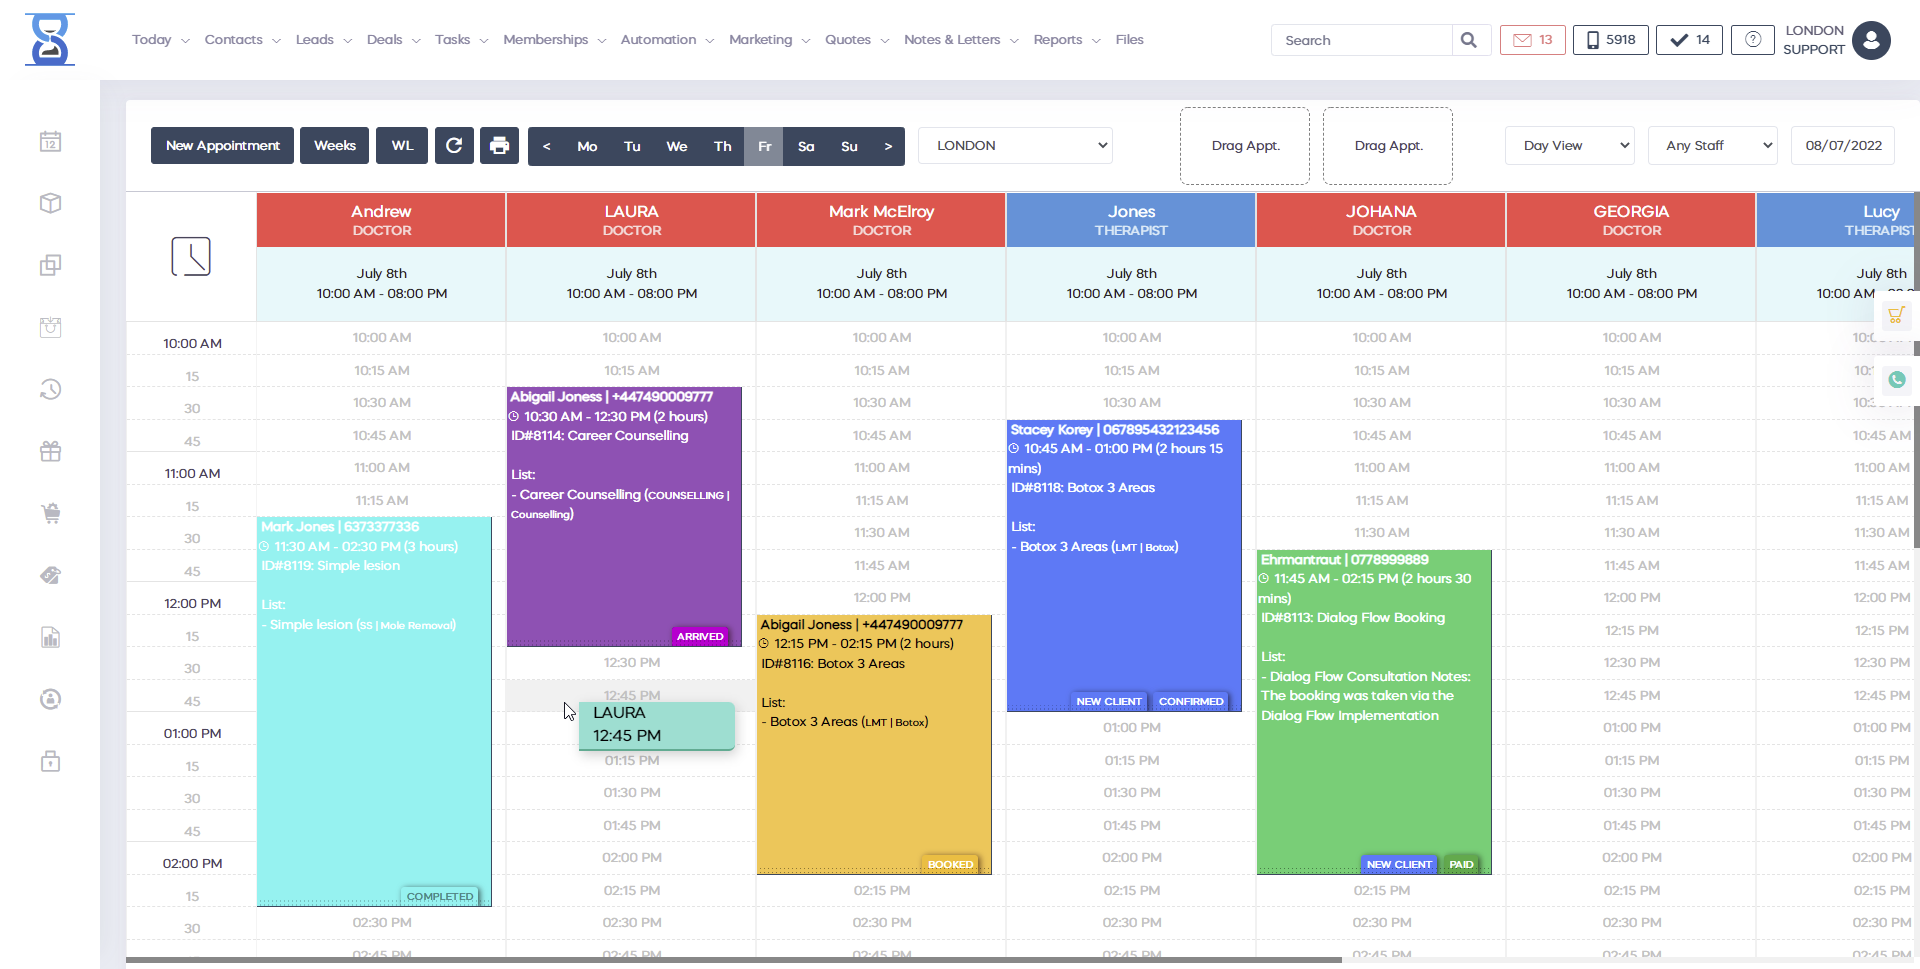
Click on an empty time slot on the Calendar for the desired Staff and choose the “Add Appointment” option from the window that opens up (this will automatically select the staff and time in the New Appointment window) or press the “New Appointment” button from the top section of the page.
- Select a service
After you have chosen the service or services for the appointment, the next step is to select the client.
- Select a client
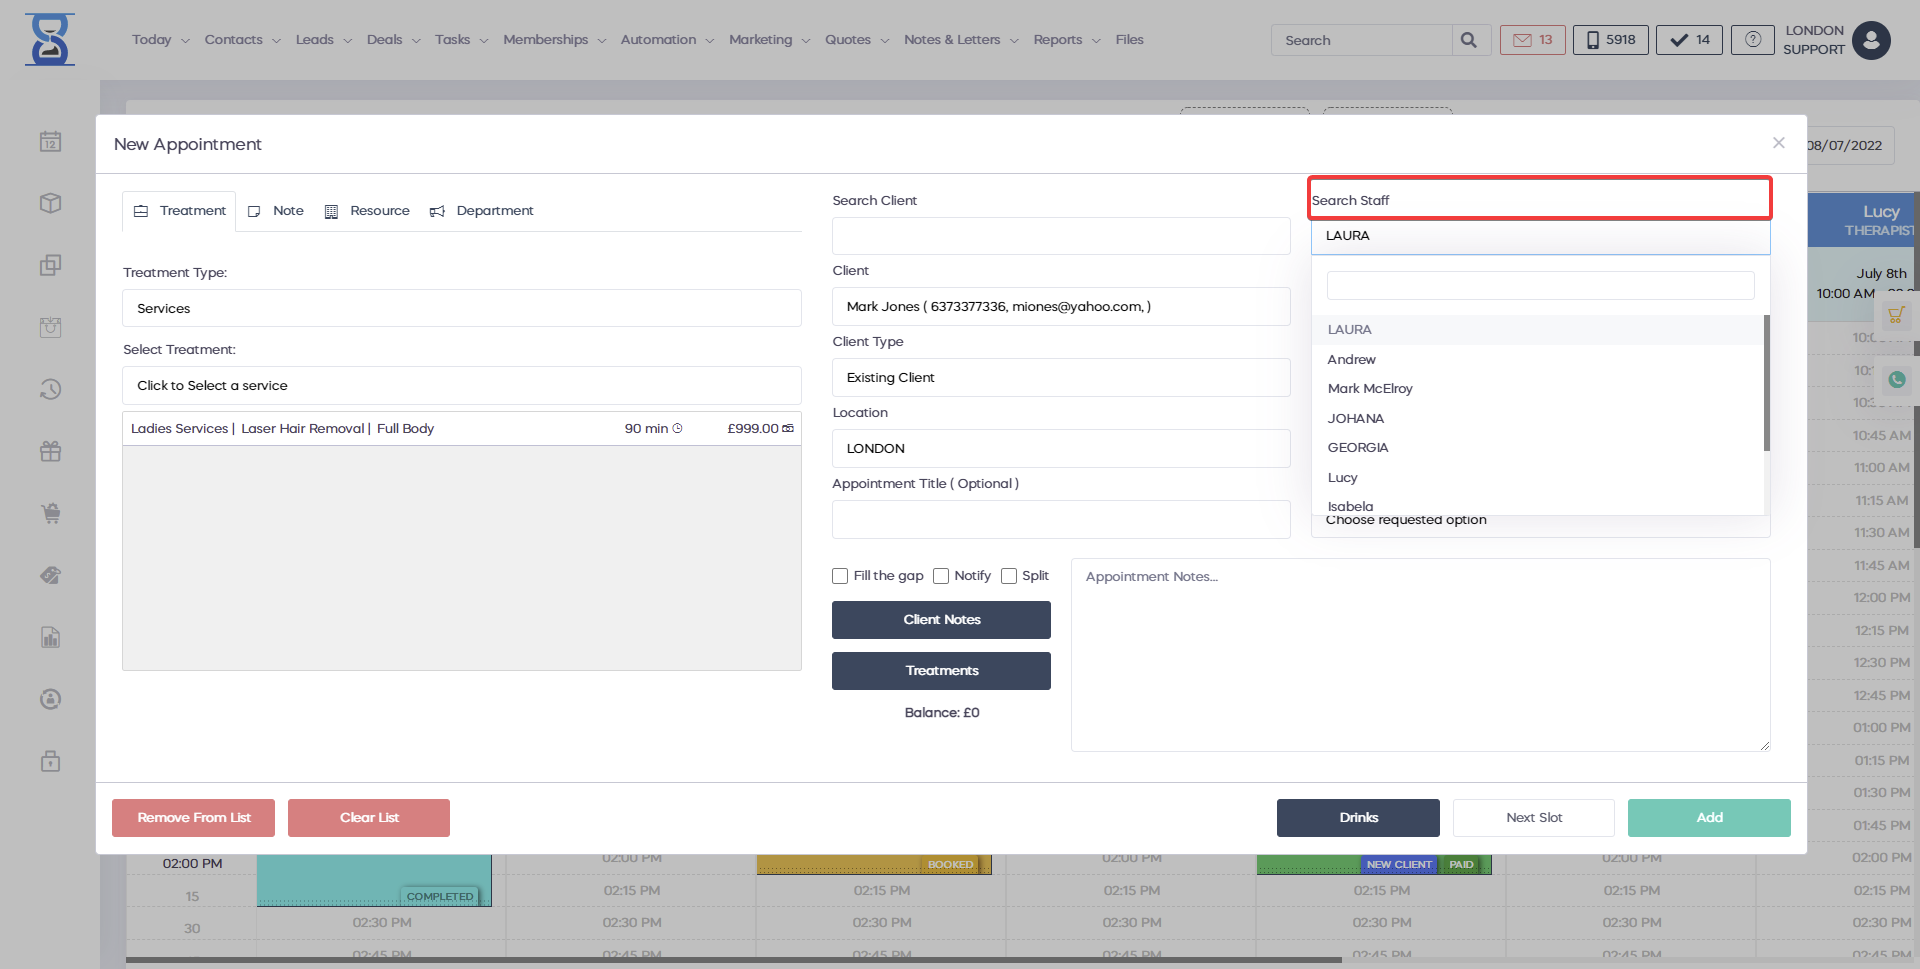
The client can be selected by searching the client details from the “Search Client” field.
Clients can be searched by name, phone (mobile or home/work), email address and postcode.
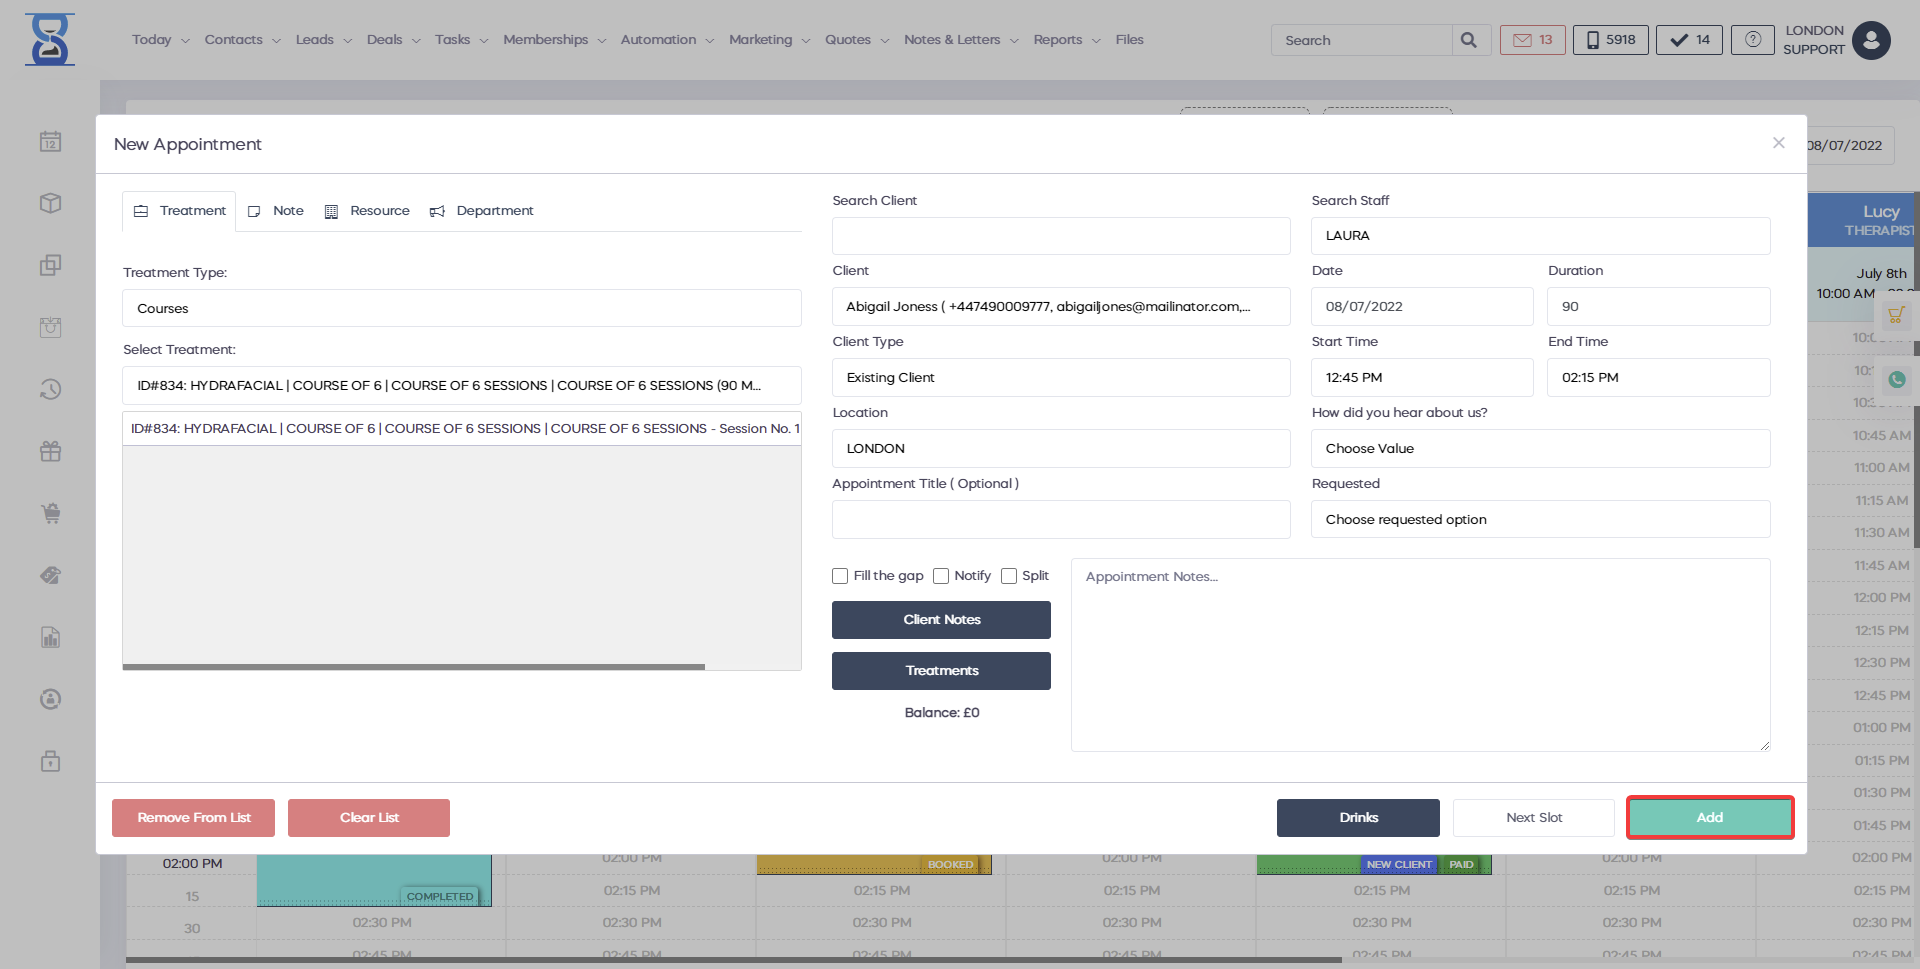
To finalize the creation of the appointment press the green “ADD” button.
Change the Appointment Status
In the software, you will encounter different appointment statuses. Each status has its own colour as follows:
- Booked
- Confirmed
- Arrived
- Being Seen
- Completed
- Paid
- Check
- No-show
- No-Sale
Add Notes
Add medical notes directly from the appointment window using ready made clinic note templates.
Take the payment
In order to take the payment, open the appointment window, then click the "Set Paid" green button. Finalize the order by using the CASH / CARD buttons.
In the knowledge base we have specially created a section called "Calendar" that will show you how to book an appointment, change the appointment status, take notes and create a receipt.
To book a service type appointment:
1) Click on an empty time slot on the Day Book for the desired Staff and choose the “Add Appointment” option from the window that opens up (this will automatically select the staff and time in the New Appointment window) or press the “New Appointment” button from the top section of the page.
Example of booking an appointment by clicking on an empty spot:
You can also add a new appointment by pressing the “New Appointment” button located on the top section of the page:

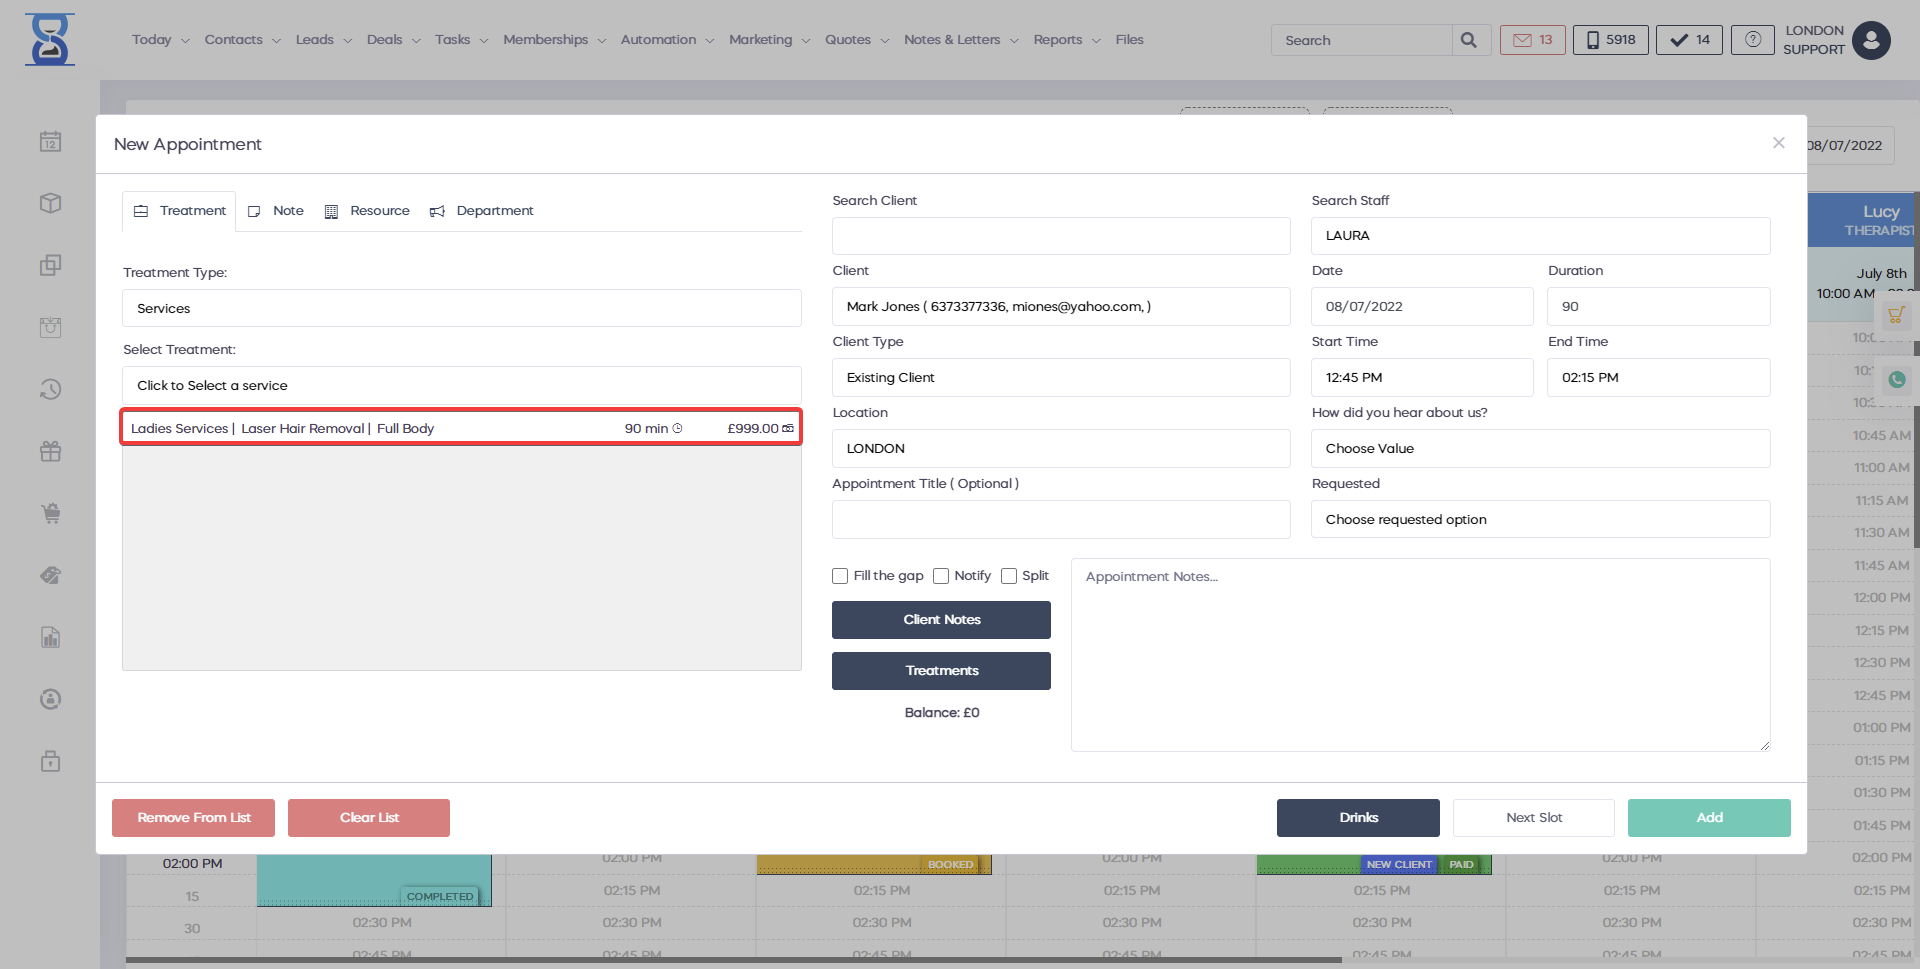
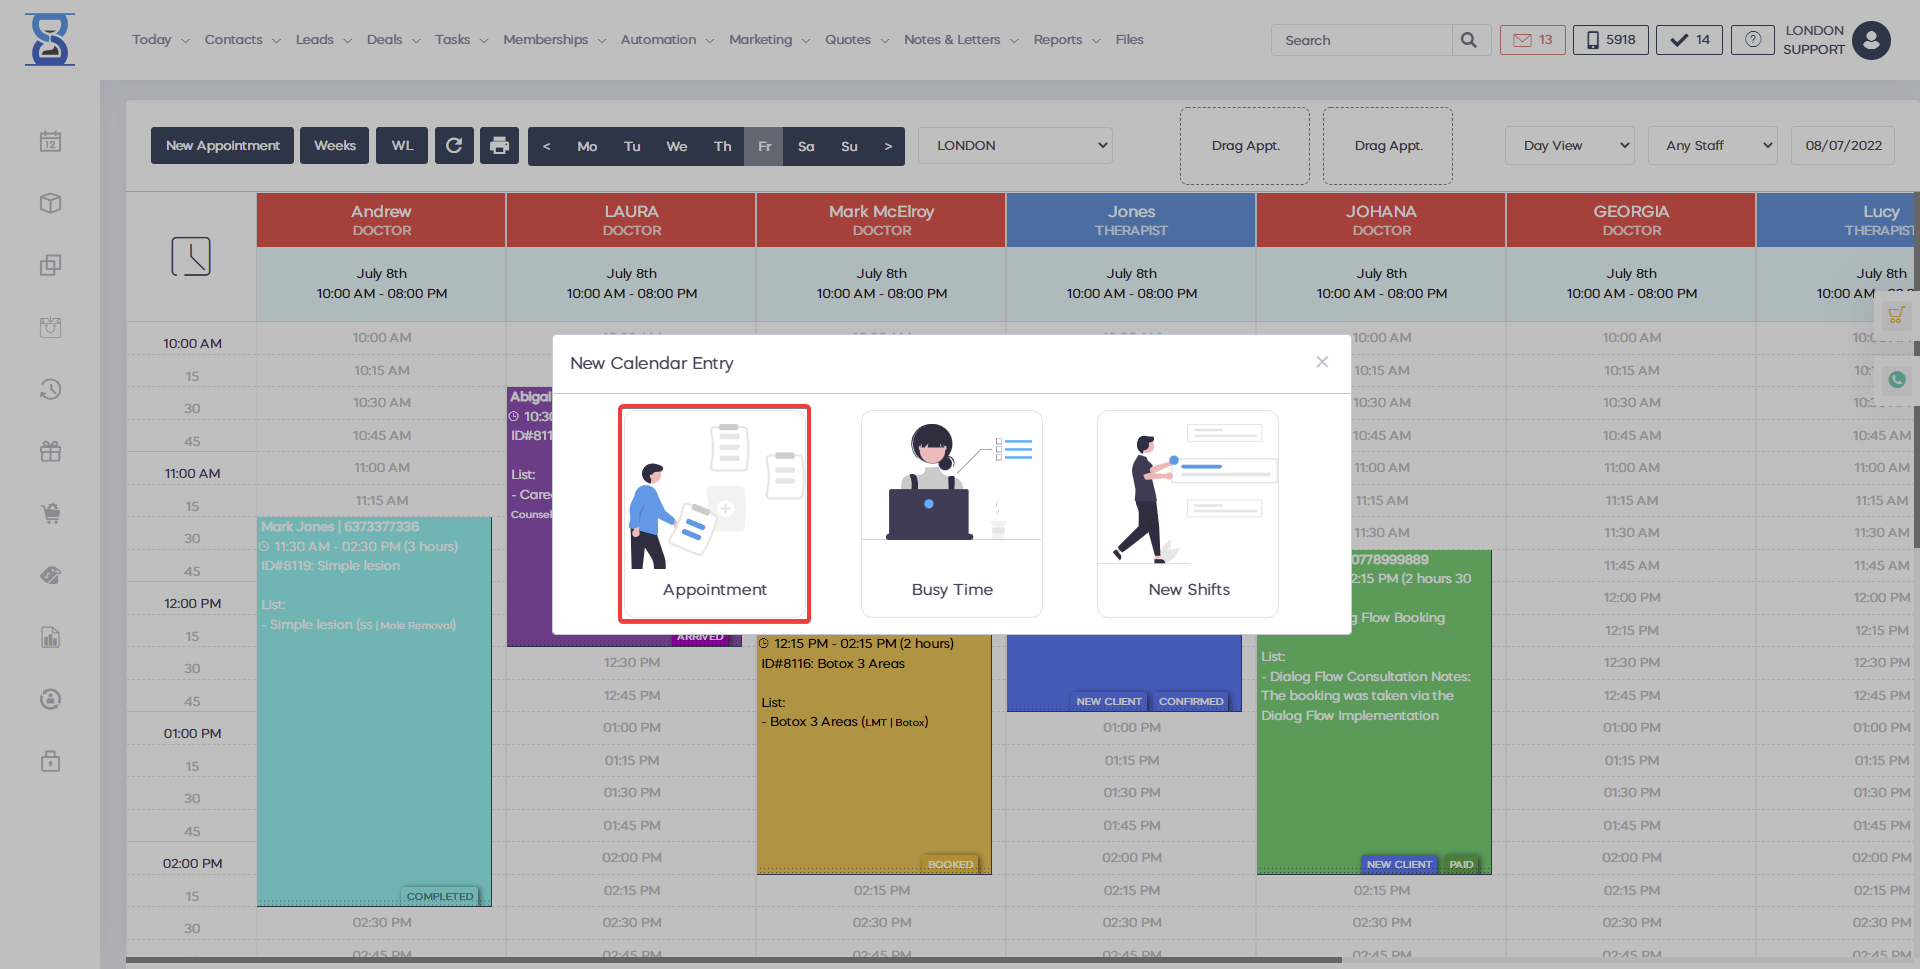
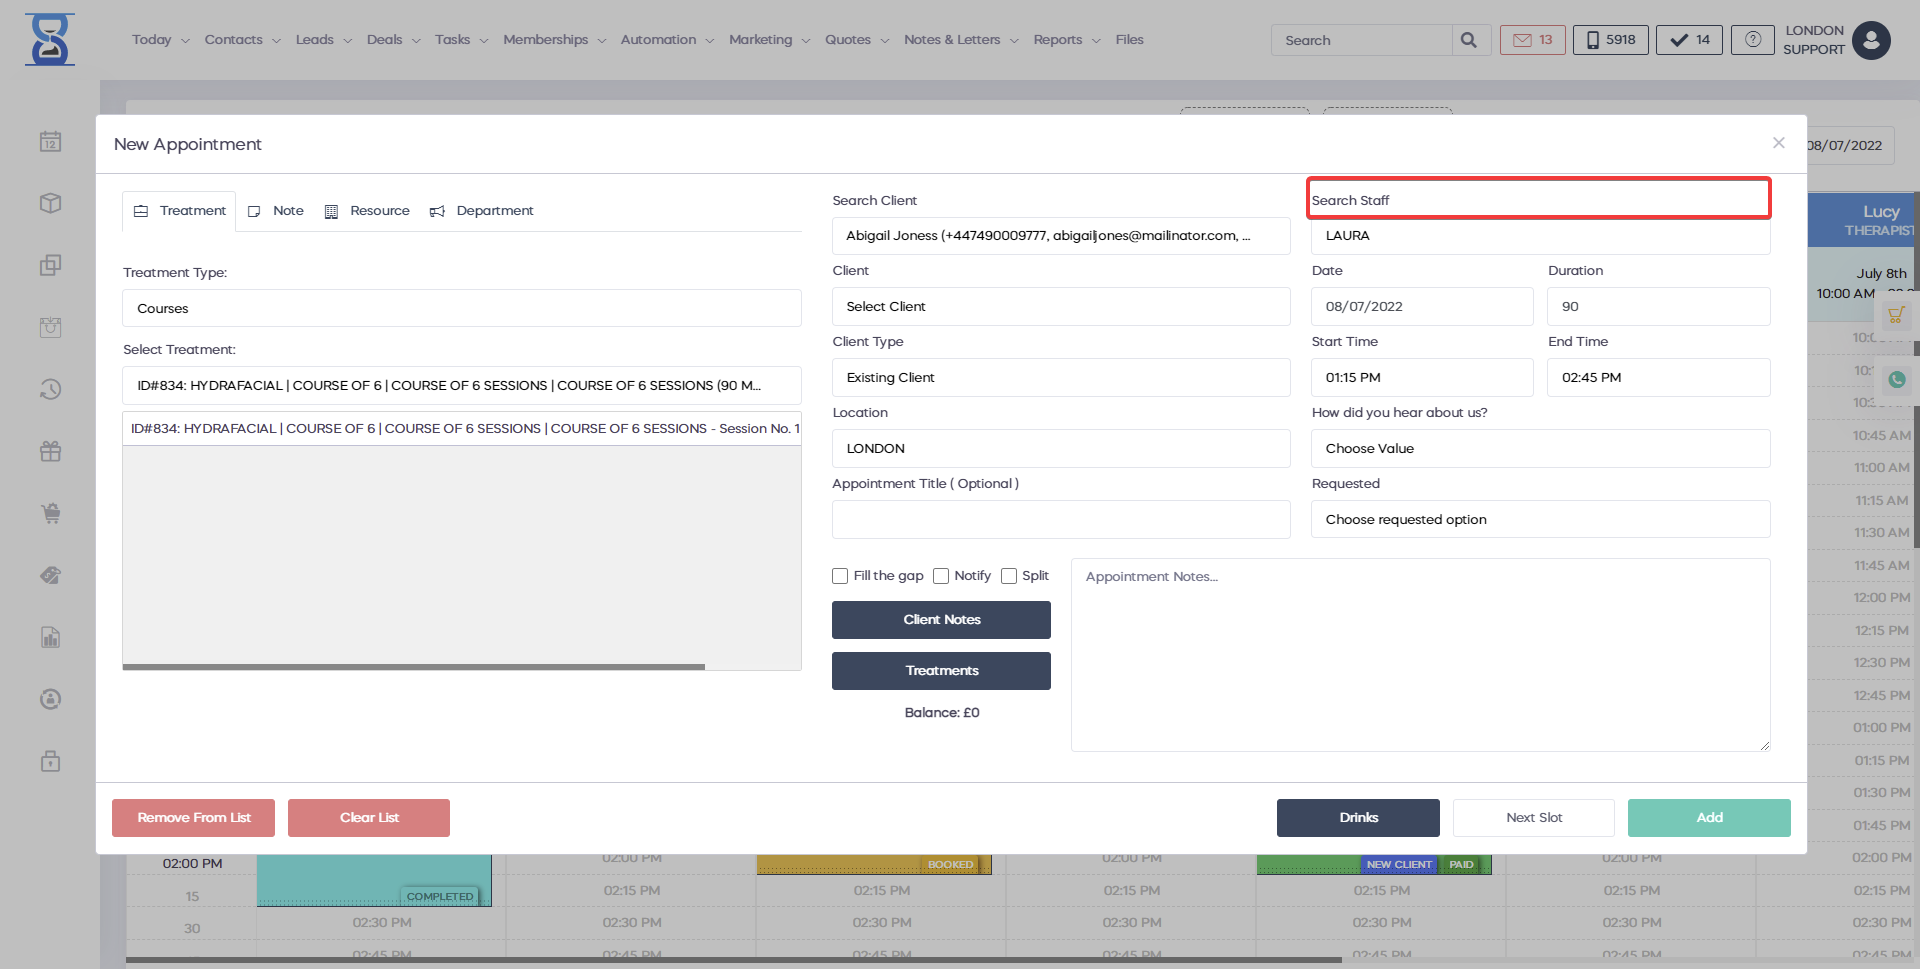
After you have pressed the “Add Appointment” or “New Appointment” buttons, the “New Appointment” window will open up:
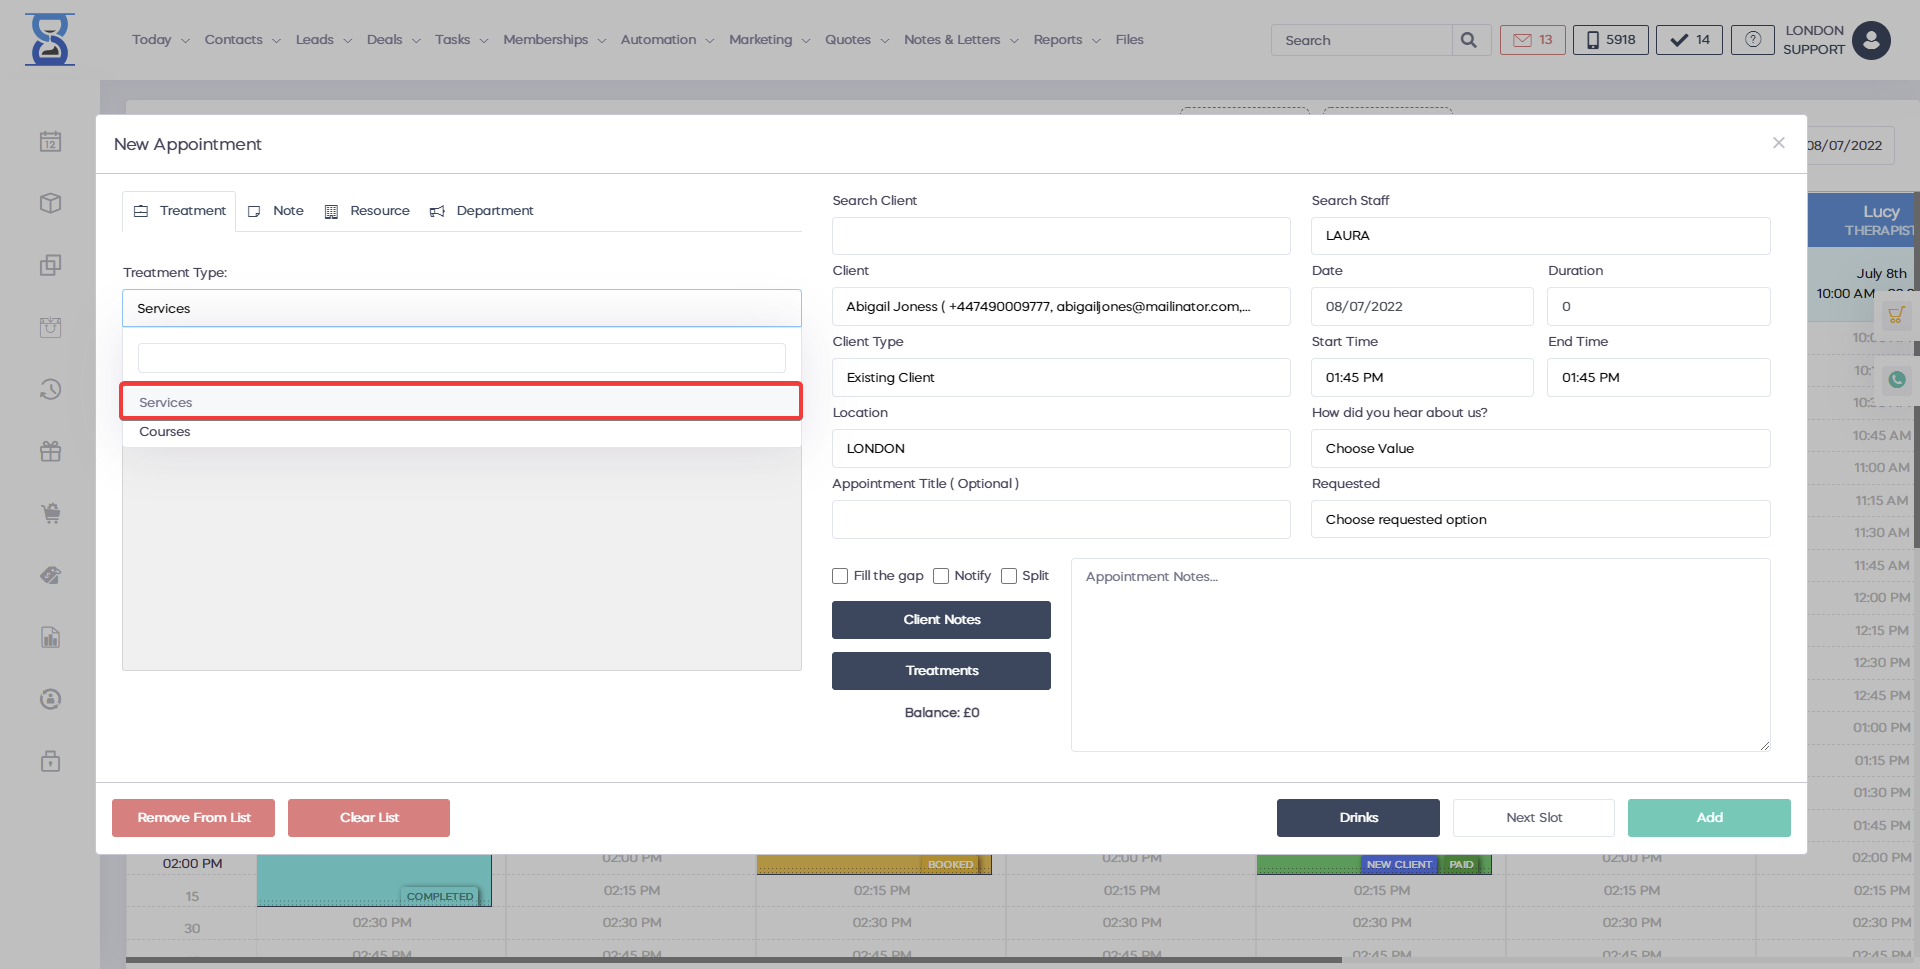
This window is divided into 2 columns:
- The left column from which you set the appointment parameters (salon, type, date, time, staff, client, title and notes.
- The right column from which you specify the services that the appointment will contain.
The “DRINKS” and “RESOURCES” options are covered in their corresponding User Guide sections below the “BOOKING A PATCH TEST TYPE APPOINTMENT” section.
The “Services” type appointment is the default selection of the “Appointment type” field when adding an appointment.
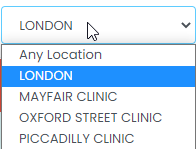
If you have multiple branches and wish to change the location at which the appointment is created, you can use the “Salon:” drop box (top left) to select a different location.
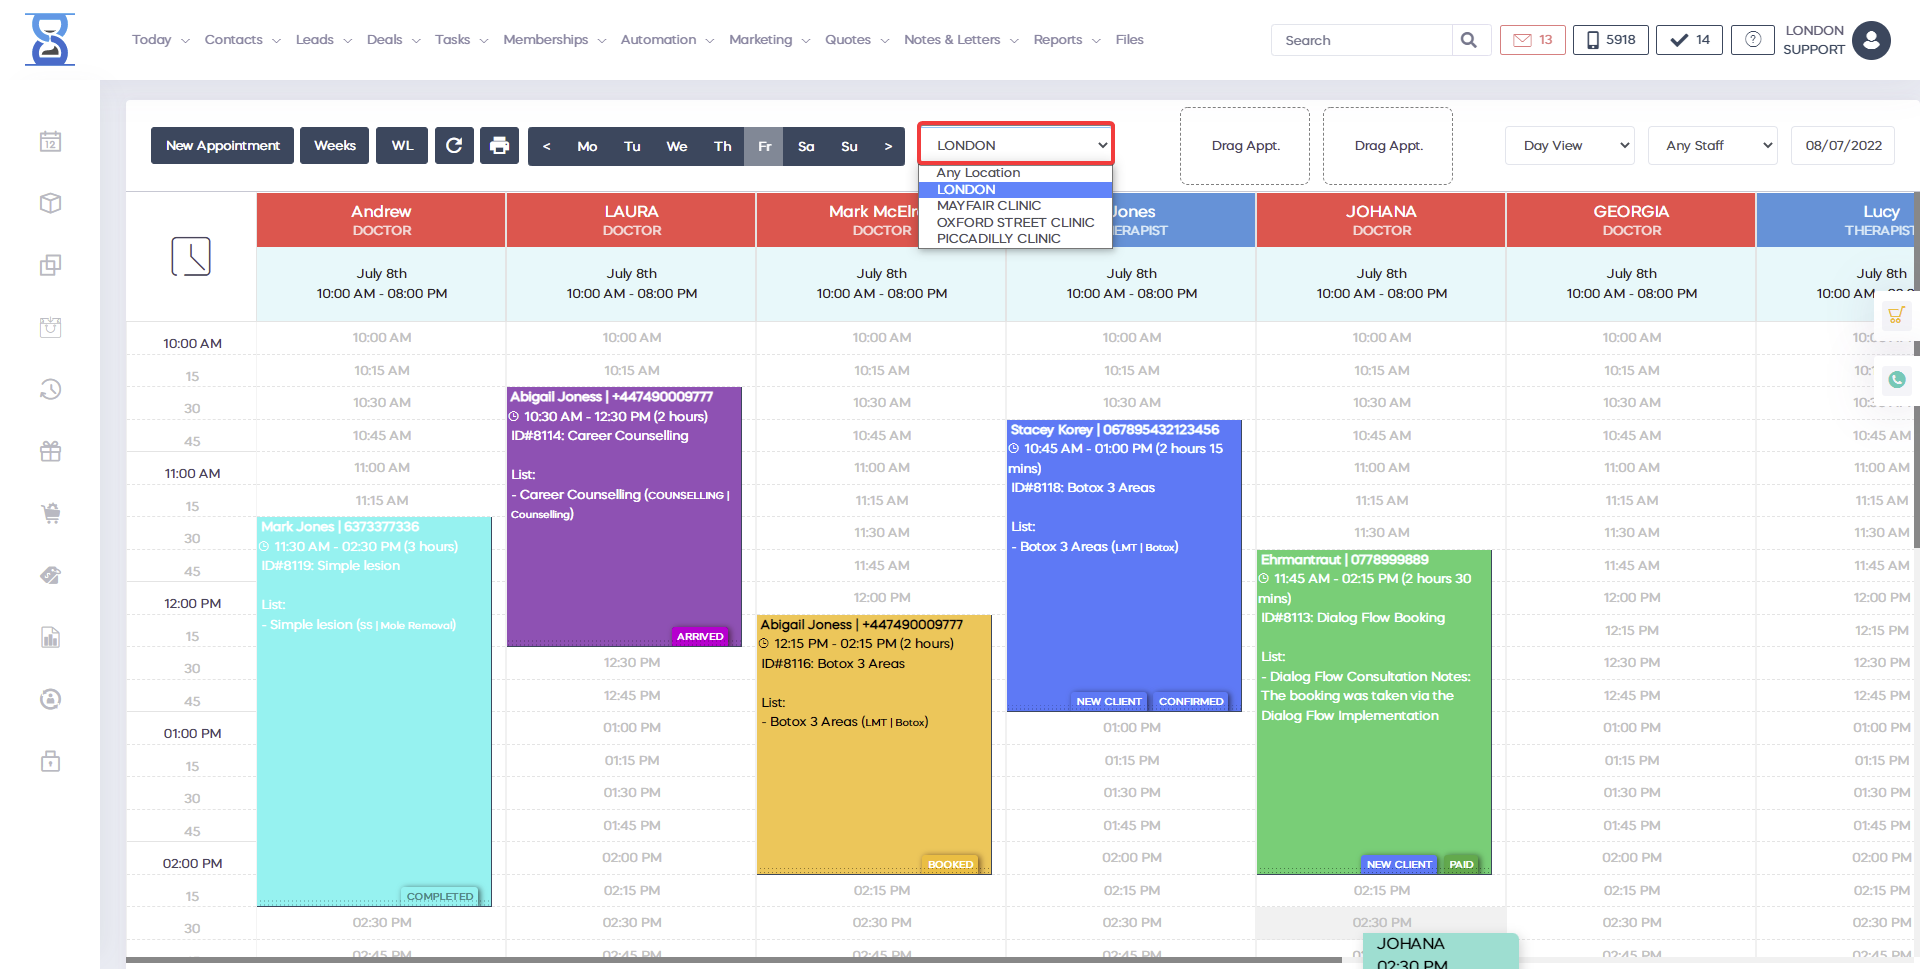
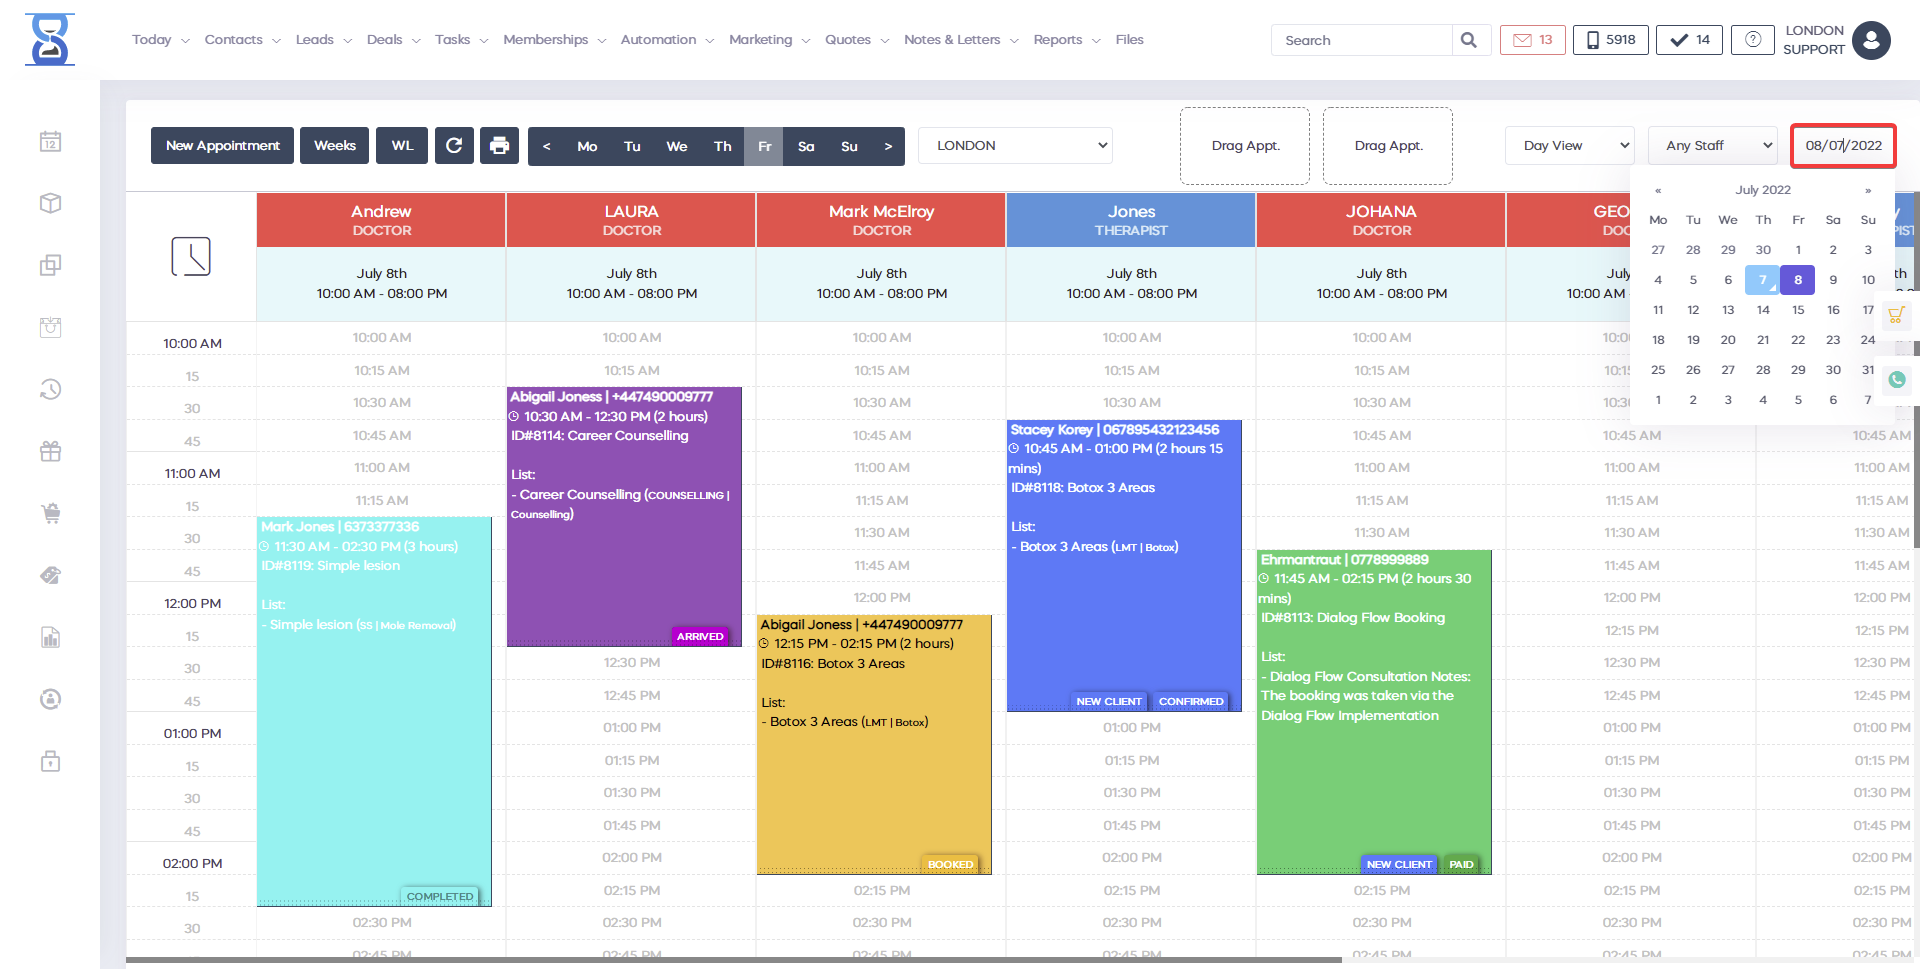
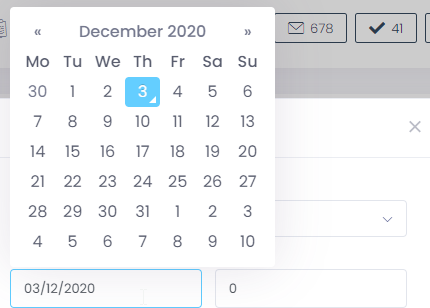
If you wish to change the date at which the appointment is created (defaults to selected Day Book day) you can change it from the “Date:” field (top left); click on the field and select the date from the calendar.
On the right column we have the services list of the appointment.
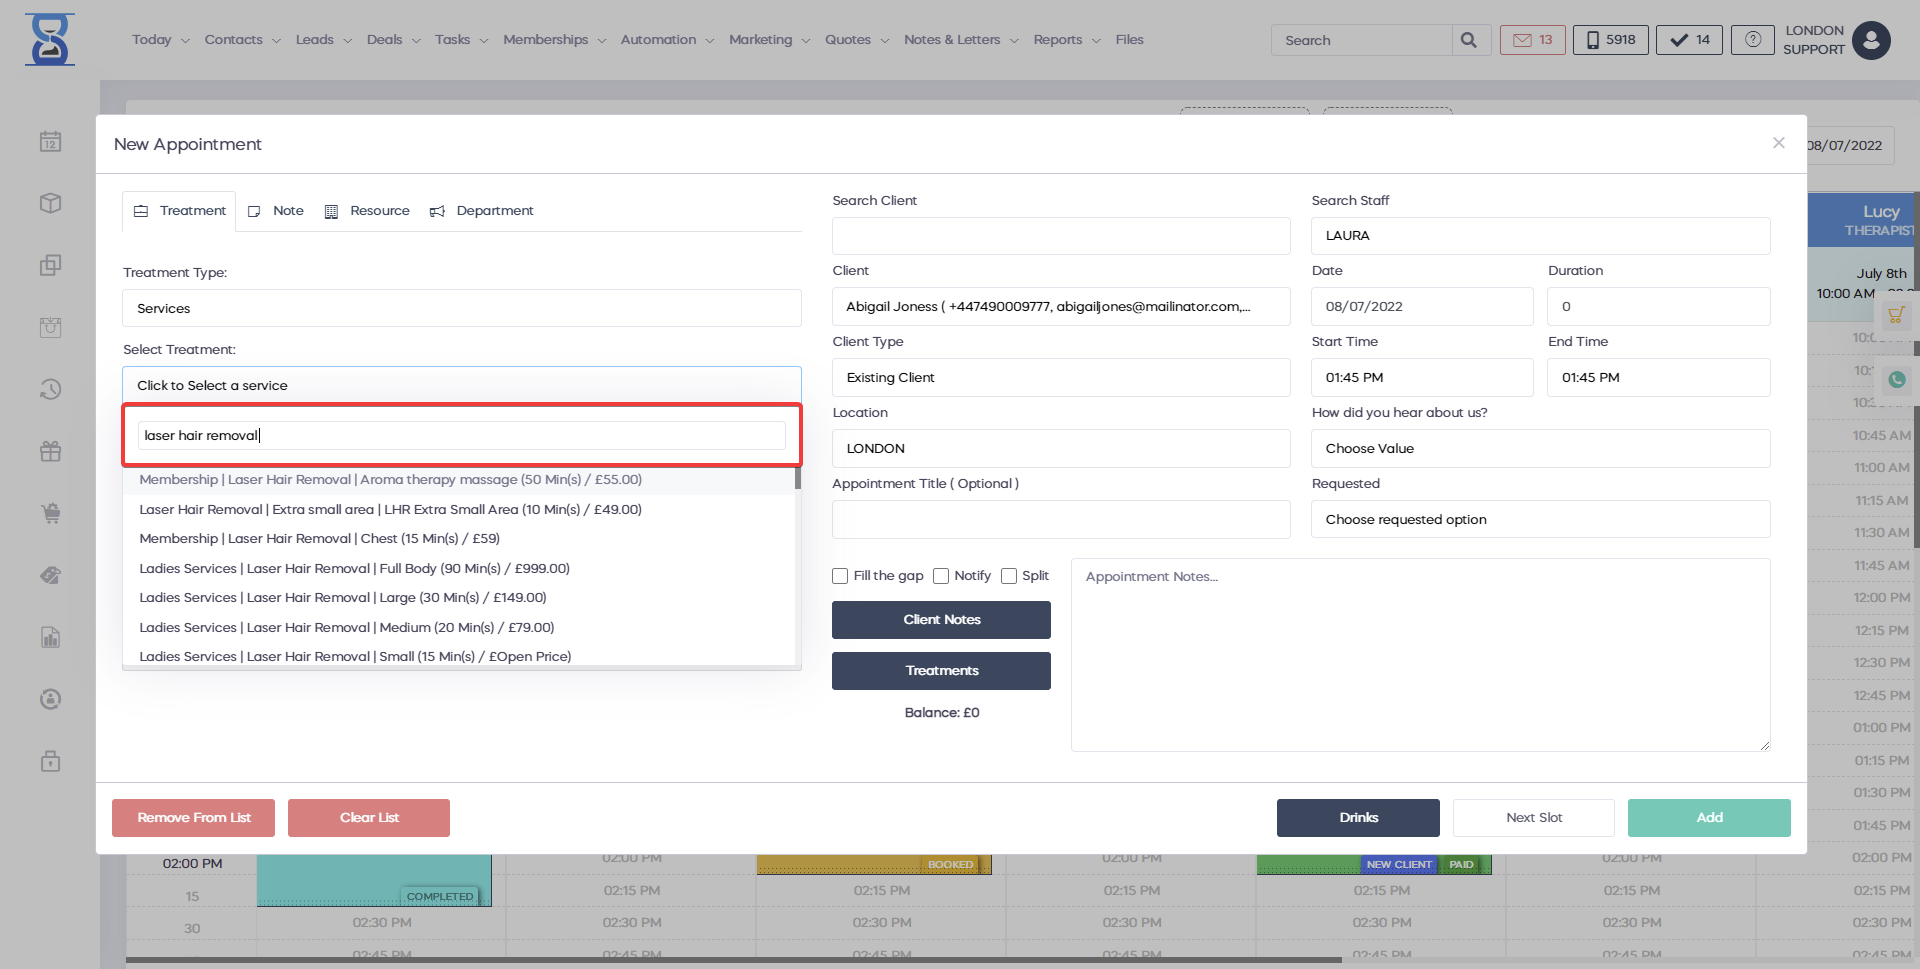
The services are selected through the “Select Service” select box.
By default when the “New Appointment” window opens, the select service will be opened and focused so you type directly the service name.
When you have found the service, press the Enter key or click on the service to add it to the list.
You can also navigate through the search results by using the up and down arrow keys on the keyboard.
The “ADD TO LIST” adds the service that is already selected in the “Select Service” select box.
This is useful when you wish to add the service a second time in the list; the system will prompt you to confirm that you wish to add the service a second time to prevent adding it by accident.
When adding services that have 0 as price (open price) the system will prompt you to enter the price for the service that you wish to add to the list.
When adding a groupon service the system will ask you to specify a valid groupon code for the service.
The code is marked as used when the appointment is created, groupon codes can only be used one time.
To select a service from the services list, click on it.
The selected service will be displayed with a blue background.

The “REMOVE FROM LIST” will remove the selected service from the services list.
If no service is selected in the list then pressing this button will result in the removal of the last item from the list.

The “CLEAR LIST” button will remove all services from the list.
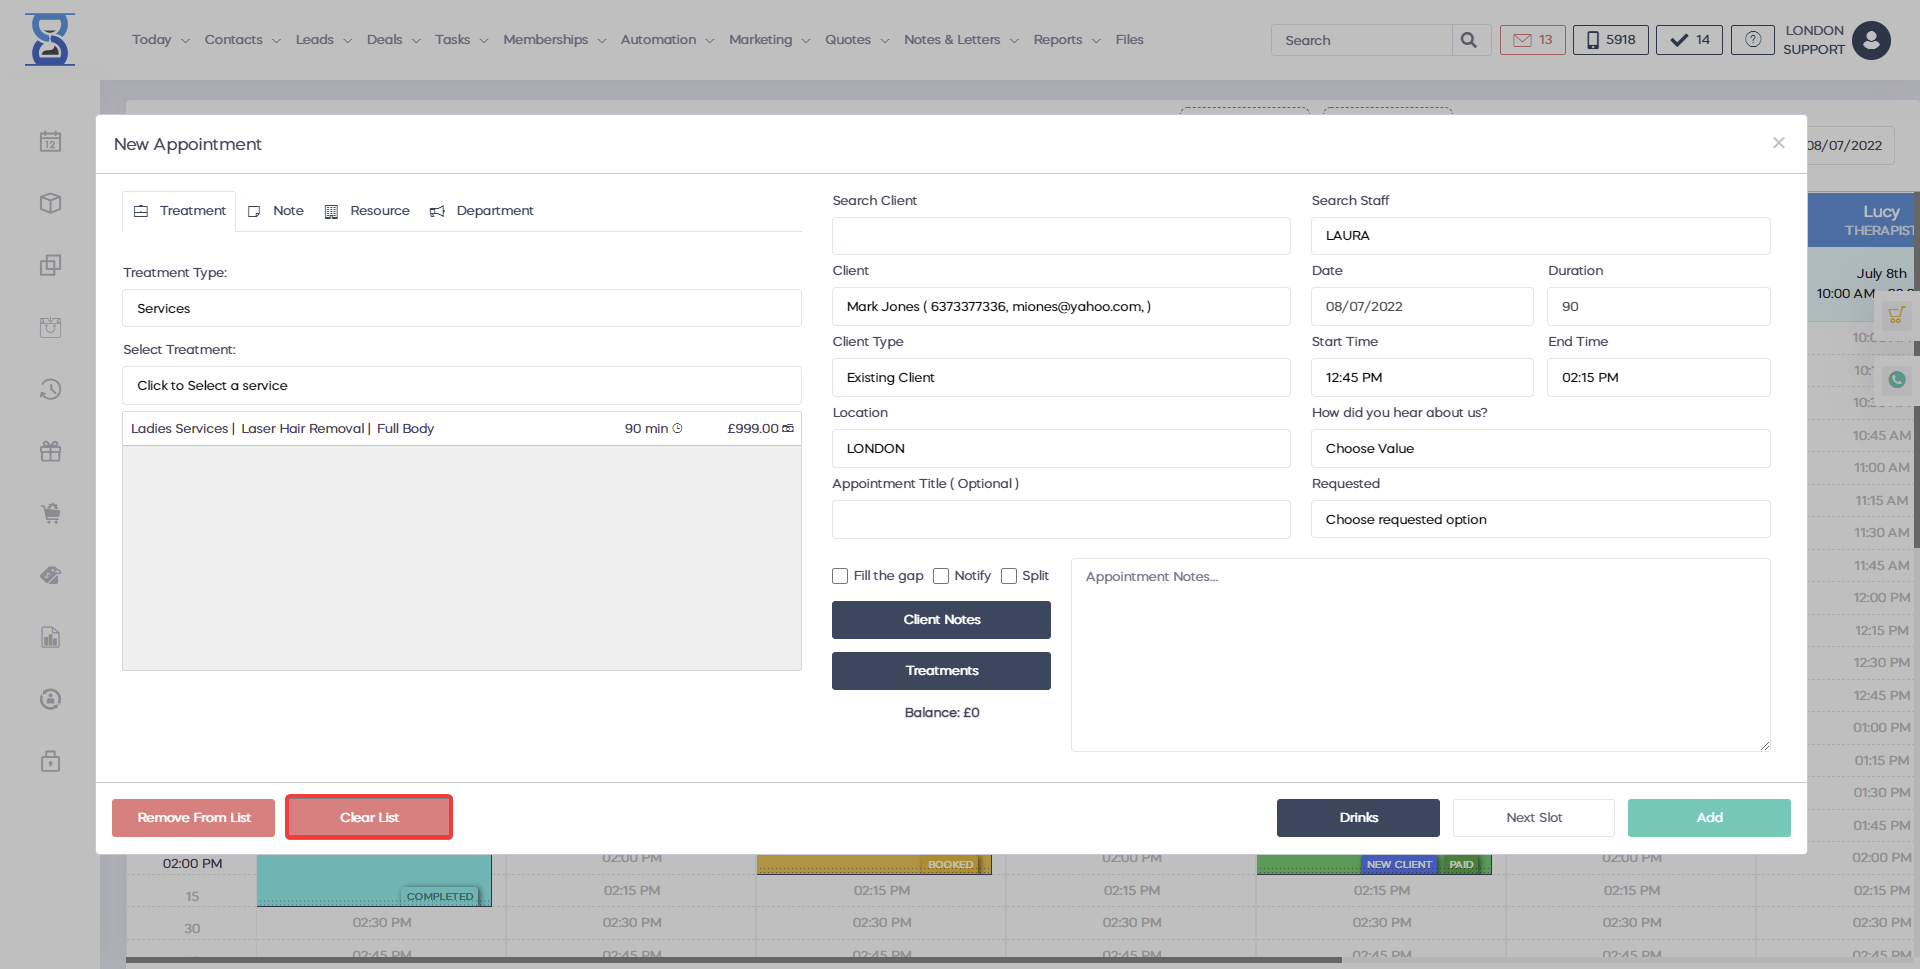
When the services list is modified by the addition or removal of services the system will display the number of services, calculate the total duration of the appointment and load the staff list that are authorized to perform all the services and are available for booking (have a free time slot available for the duration of the appointment).
The system will maintain the chosen staff if the new appointment window was opened by clicking on an empty slot in the Day Book but, if it cannot find a free time slot for the desired staff then it will automatically select the first available staff that can perform all the services from the list.
After you have chosen the services for the appointment the next step is to select the client.
The client can be selected by searching the client details from the “Search Client” field.
Clients can be searched by name, phone (mobile or home/work), email address, postcode and the courses card barcode.
Upon typing in the “Search client” field the client will show up below the search box; click on it to add it to the “Select client” drop box, the client will be selected automatically after it has been added to the list.
The “Select client” drop box lists the most recent clients with activity, if the client you are looking for is not present in the list then you have to use the “Search client” field to add it to the list.
Example:
Search for the client and click on his/her name in the results below the search box.
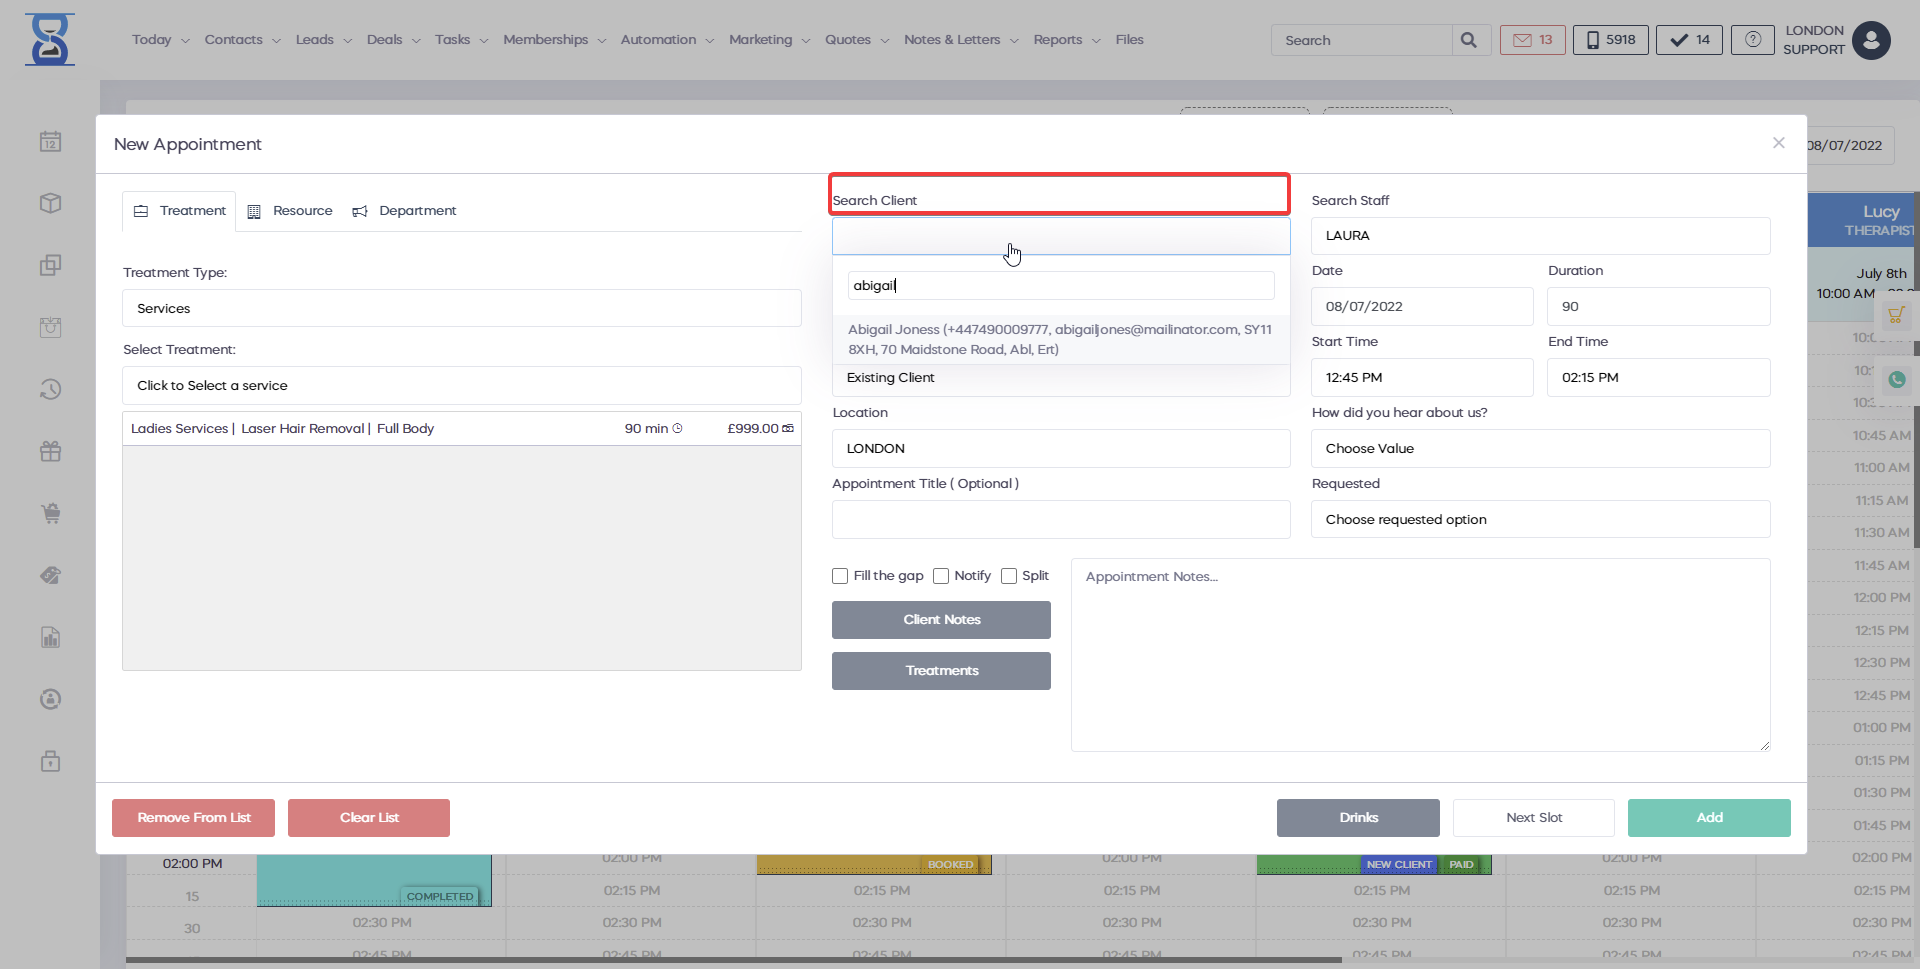
After the client has been added from the above example it will also be automatically selected in this drop box.
After a client has been selected the system will also show the “Client Notes” and “Clinic Notes” buttons which will both open the windows discussed in the client profile section of the User Guide.
https://central.clinicsoftware.com/images/Tutorial/02.%20BOOKING%20A%20SERVICES%20TYPE%20APPOINTMENT/10.png
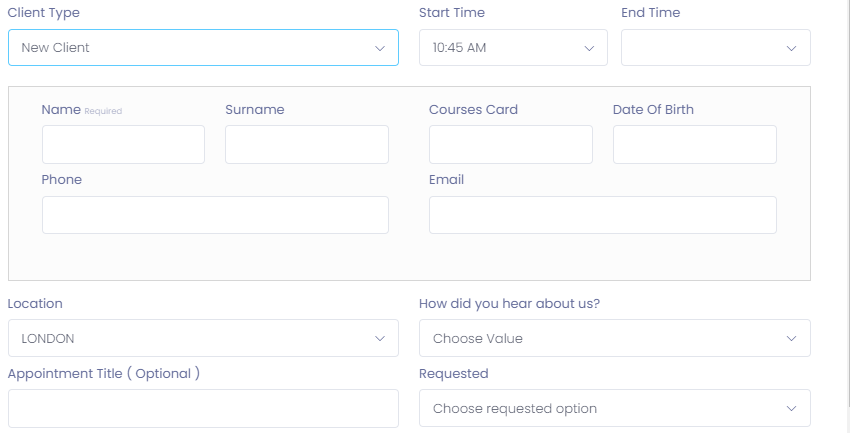
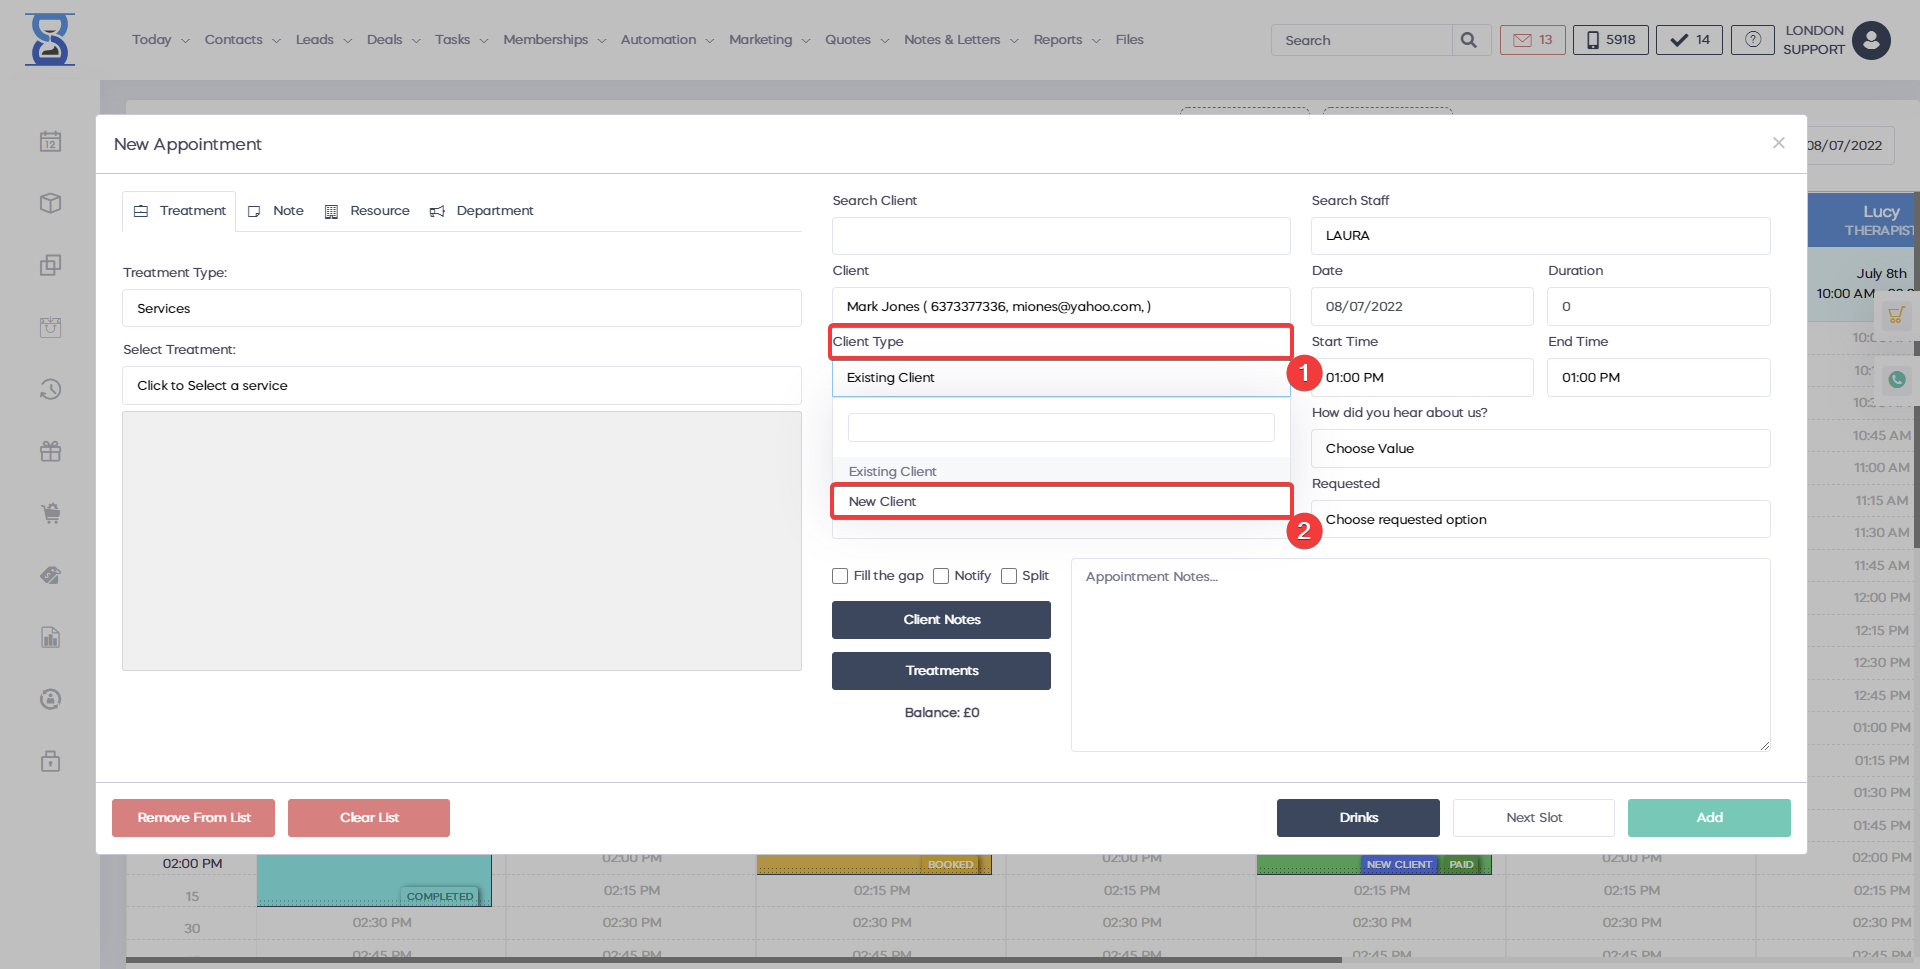
If the client that you wish to add an appointment for is not present in the system (new client) then you can add the client directly from here:
To do this select “New Client” from the “Select client:” drop box and enter the client details.

The appointment title field can be used to specify the title that you wish the appointment to have.
If left blank it will behave in 2 ways:
- If there is only one service in the list then it will take the name of that service
- If there are more than 1 service in the list the title will be <X> Services where <X> is the number of services in the list
You can also select the “Type” field (e.g. Walked in, Email, Phone) to help you identify your appointment sources in the reports.
The values present in the “Type” field are managed from within the admin area.
Please refer to the Admin Area / Appointment Type section of the User Guide for more details on how to add or remove entries for the “Type” field.
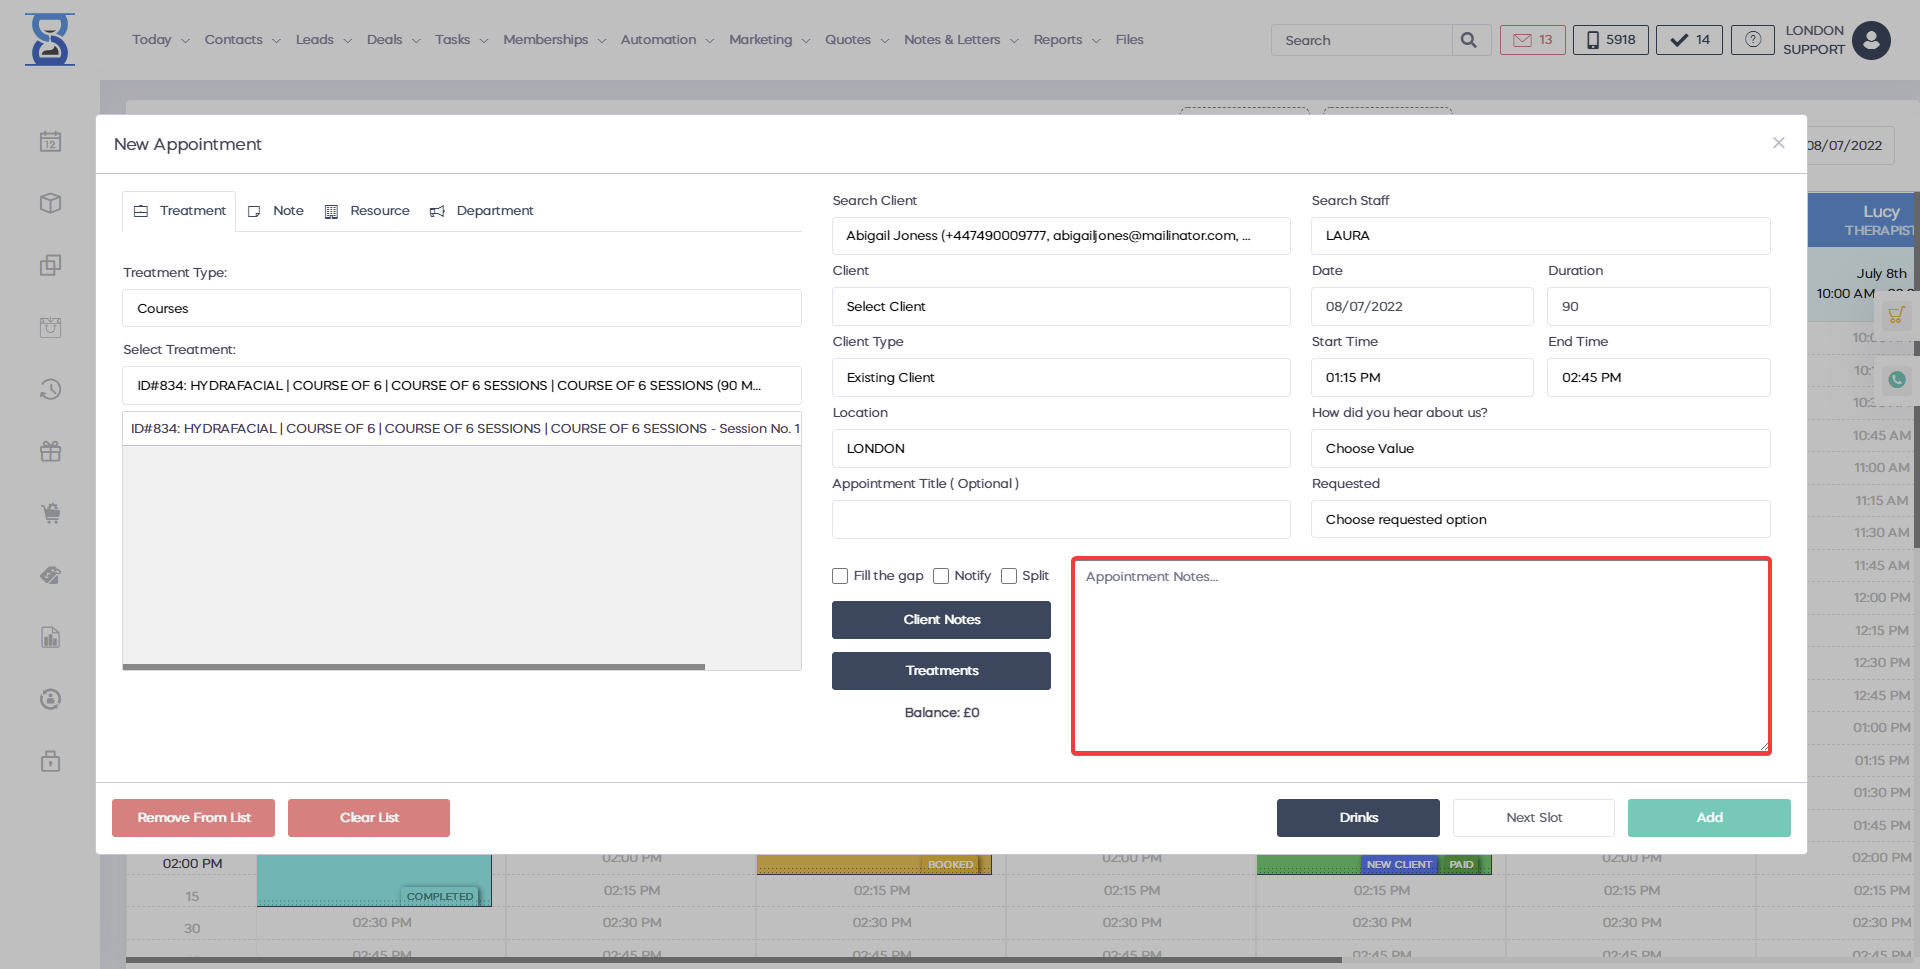
You can also specify notes that will appear in the appointment details window by filling in the “Appointment Notes” field.
To finalize the creation of the appointment press the green “ADD” button.

02. BOOKING A COURSE TYPE APPOINTMENT
1) Click on an empty time slot on the Day Book for the desired Staff and choose the “Add Appointment” option from the window that opens up (this will automatically select the staff and time in the New Appointment window) or press the “New Appointment” button from the top section of the page.
Example of booking an appointment by clicking on an empty spot:
You can also add a new appointment by pressing the “New Appointment” button located on the top section of the page:
After you have pressed the “Add Appointment” or “New Appointment” buttons, the “New Appointment” window will open up:
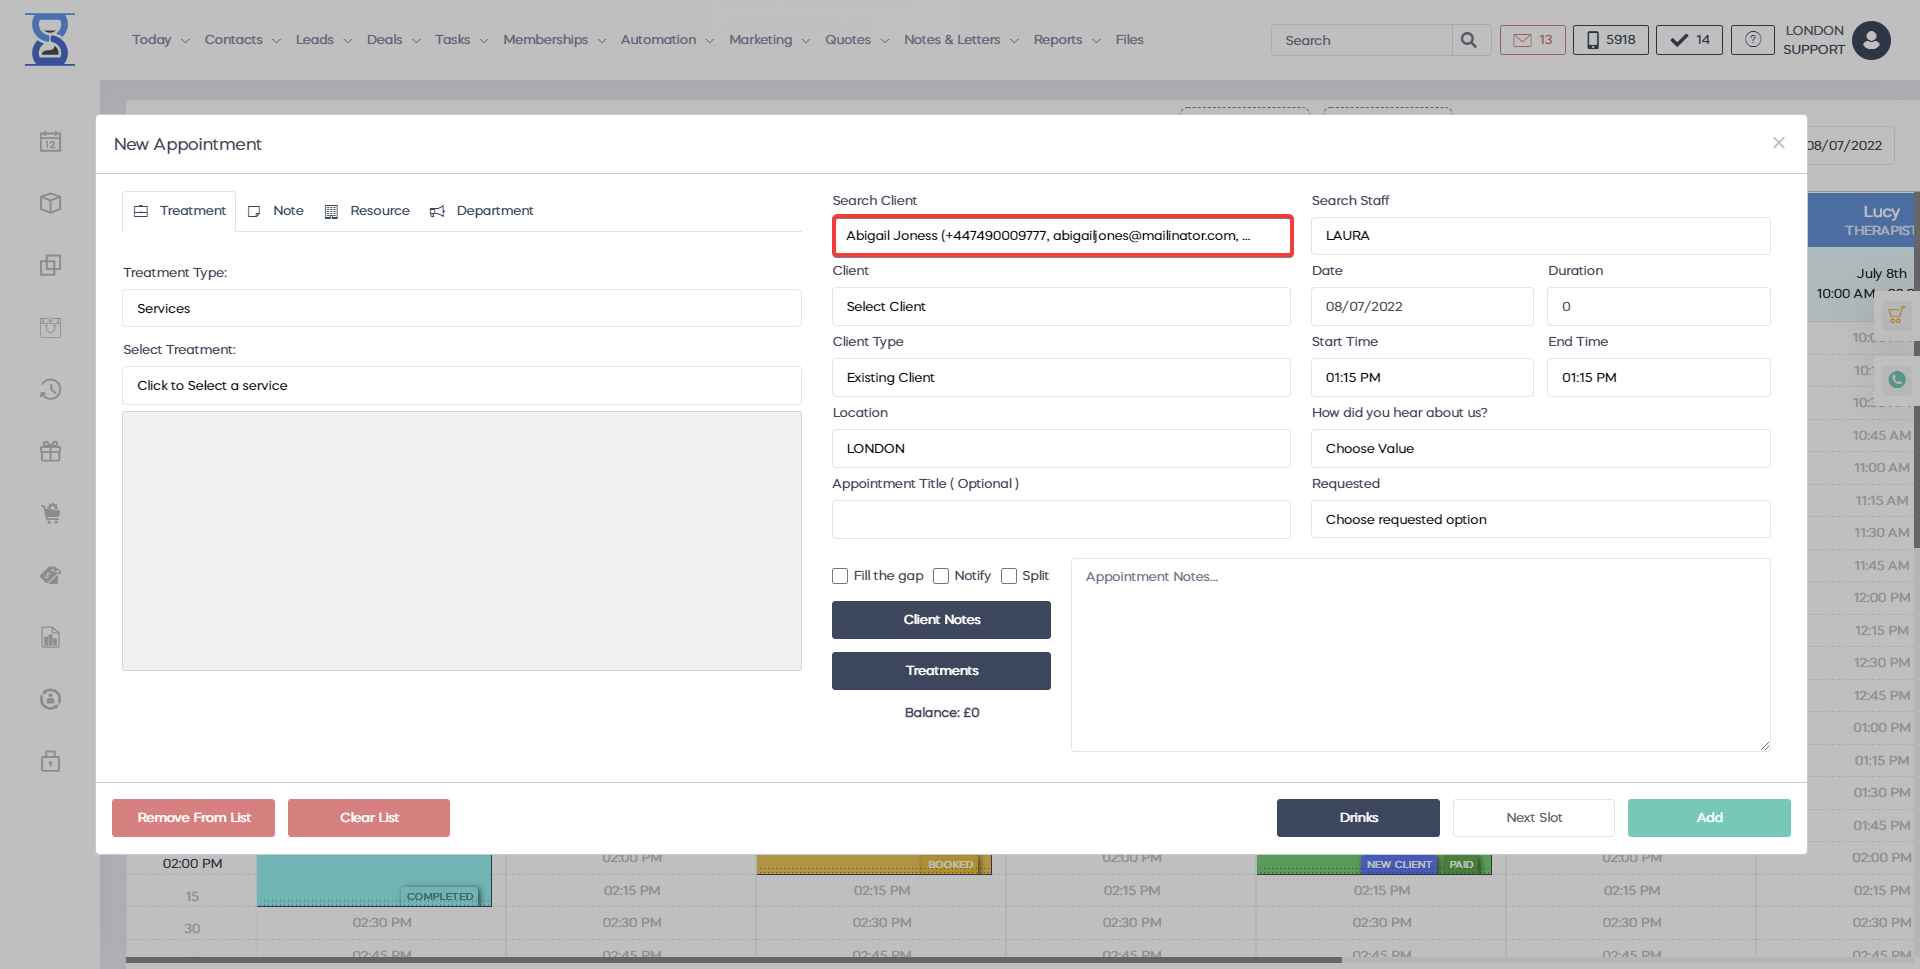
Next we have to change the “Appointment type” selection to “Courses” as illustrated below:
After the selection, the window will update to courses mode:
This window is divided into 2 columns:
- The left column from which you set the appointment parameters (salon, type, date, time, staff, client, title and notes.
- The right column from which you specify the courses that the appointment will contain.
The “DRINKS” and “RESOURCES” options are covered in their corresponding User Guide sections below the “BOOKING A PATCH TEST TYPE APPOINTMENT” section.
If you have multiple branches and wish to change the location at which the appointment is created, you can use the “Salon:” drop box (top left) to select a different location.
If you wish to change the date at which the appointment is created (defaults to selected Day Book day) you can change it from the “Date:” field (top left); click on the field and select the date from the calendar.
Comparing to booking services:
- When we book courses the first step is to select the client so that we can load its available courses list (courses that are not fully booked).
- The “Select Client” will now load all clients with available courses instead of the list of clients with the most recent activity.
Clients can be selected from the “Select Client” drop box or by searching in the “Search Client” field.
Clients can be searched by name, phone (mobile or home/work), email address, postcode and the courses card barcode.
Upon typing in the “Search client” field the client will show up below the search box; click on it to select it automatically in the “Select client” drop box.
For courses type appointments we can only select existing clients because we are booking sessions or minutes of courses already bought.
If you need to add a new client you must add it from the clients page.
Please refer to the “CLIENTS” section of this user guide on how to add clients.
If the client needs a new course then we must first order it from the “COURSES / SESSIONS” page before we can book its services or use its minutes for minutes type courses.
Please refer to the “COURSES / SESSIONS” section of this user guide for details on how to order a new course.
After the client has been selected, the window will update the client’s available courses list (right column):
After a client has been selected the system will also show the “Client Notes” and “Clinic Notes” buttons which will both open the windows discussed in the client profile section of the User Guide.
There are 2 types of courses in the system:
- Sessions based courses
- Minutes based courses
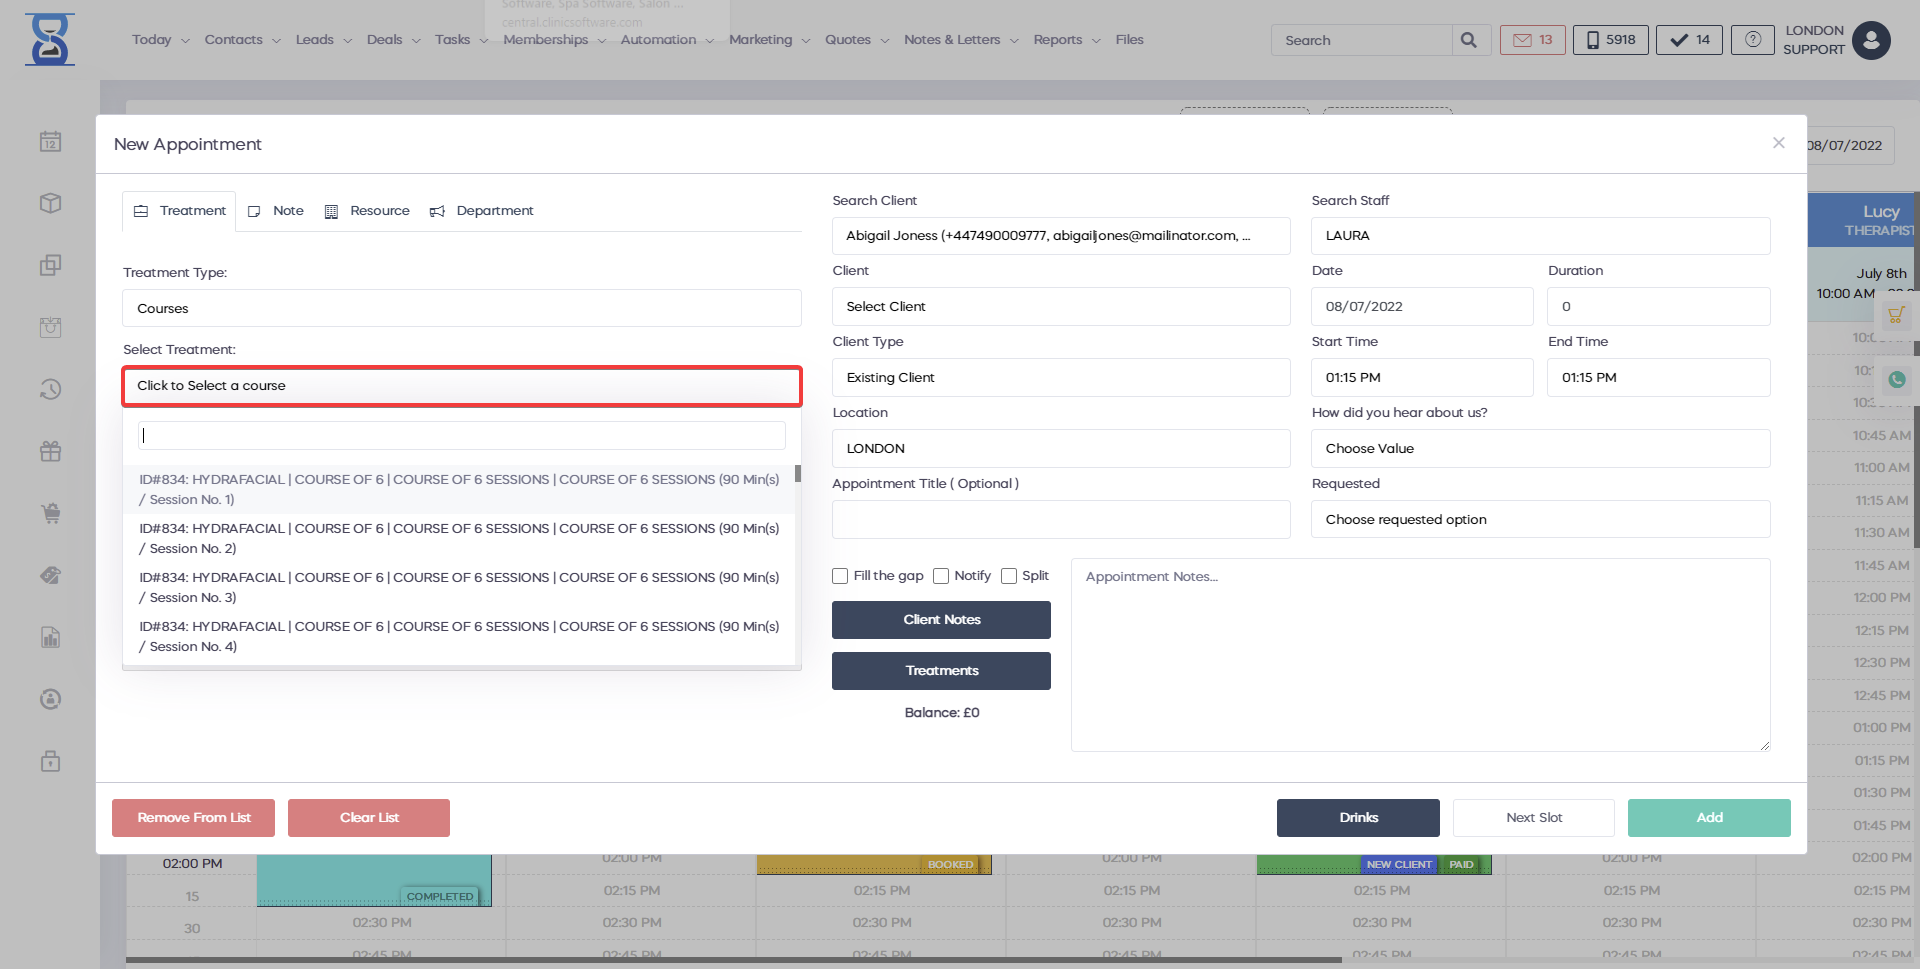
For sessions based courses we book each session of the course (E.g. for a course of 6 sessions we can create 6 appointments for sessions 1 to 6).
We also indicate whenever the course session that you are trying to book is marked as used in the track sessions page with an “| N” or “| Y” suffix as in the image below:
For minutes based courses we book minutes from the course’s total minutes until the count reaches 0. (E.g. for a course of 30 minutes we can create one appointment of 10 minutes and another of 20 minutes).
In this example, the total minutes of the course when bought were 60 of which only 45 minutes are left for booking.
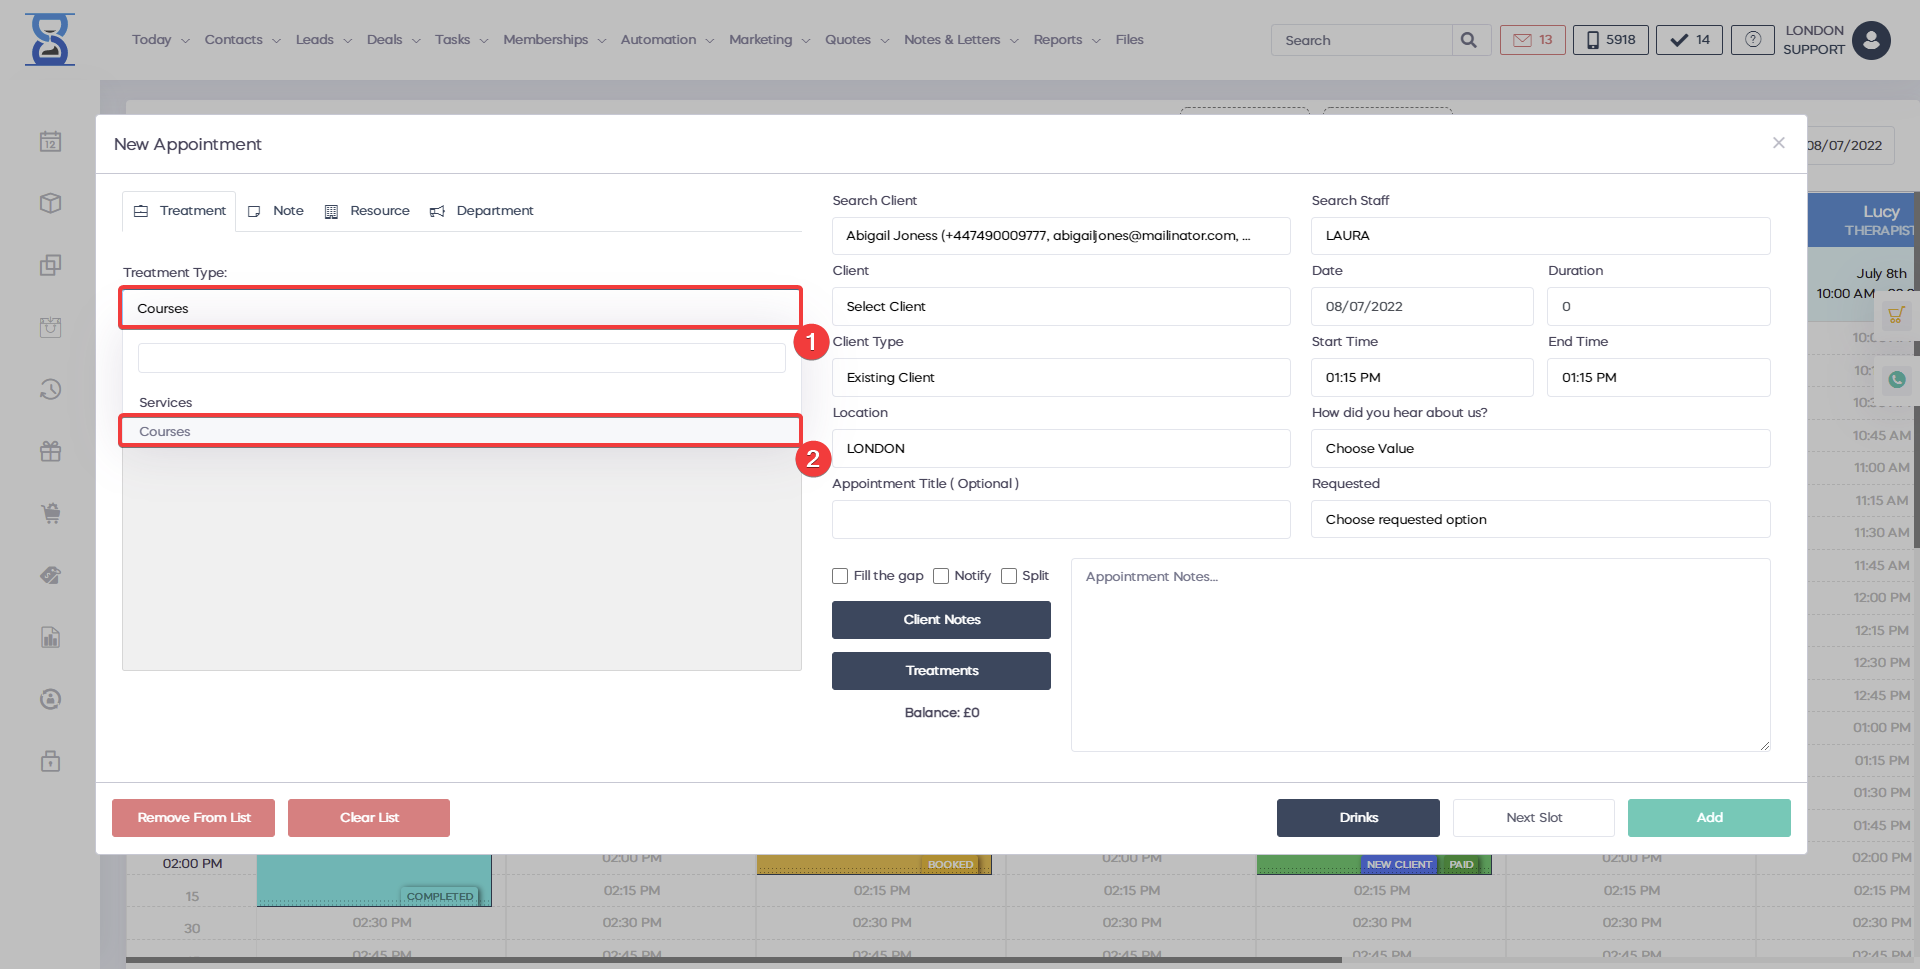
The courses are selected through the “Select client course” select box.
We can also access the client’s courses track sessions page by pressing the “TRACK SESSIONS” button.
More details in the TRACK SESSIONS (COURSES / SESSIONS SUBPAGE) section of the User Guide on how to use the track session page.
By default when a client is selected, the “Select client course” drop box will be automatically opened and focused so you type directly the course / course session you are looking for.
When you have found the course, press the Enter key or click on the course to add it to the list.
You can also navigate through the search results by using the up and down arrow keys on the keyboard.
The “ADD TO LIST” adds the course that is already selected in the “Select Service” select box.
The system will not allow you to add the same course session a second time into the list:
When adding a minutes type course to the list the system will ask you how many minutes of the course you wish to book:
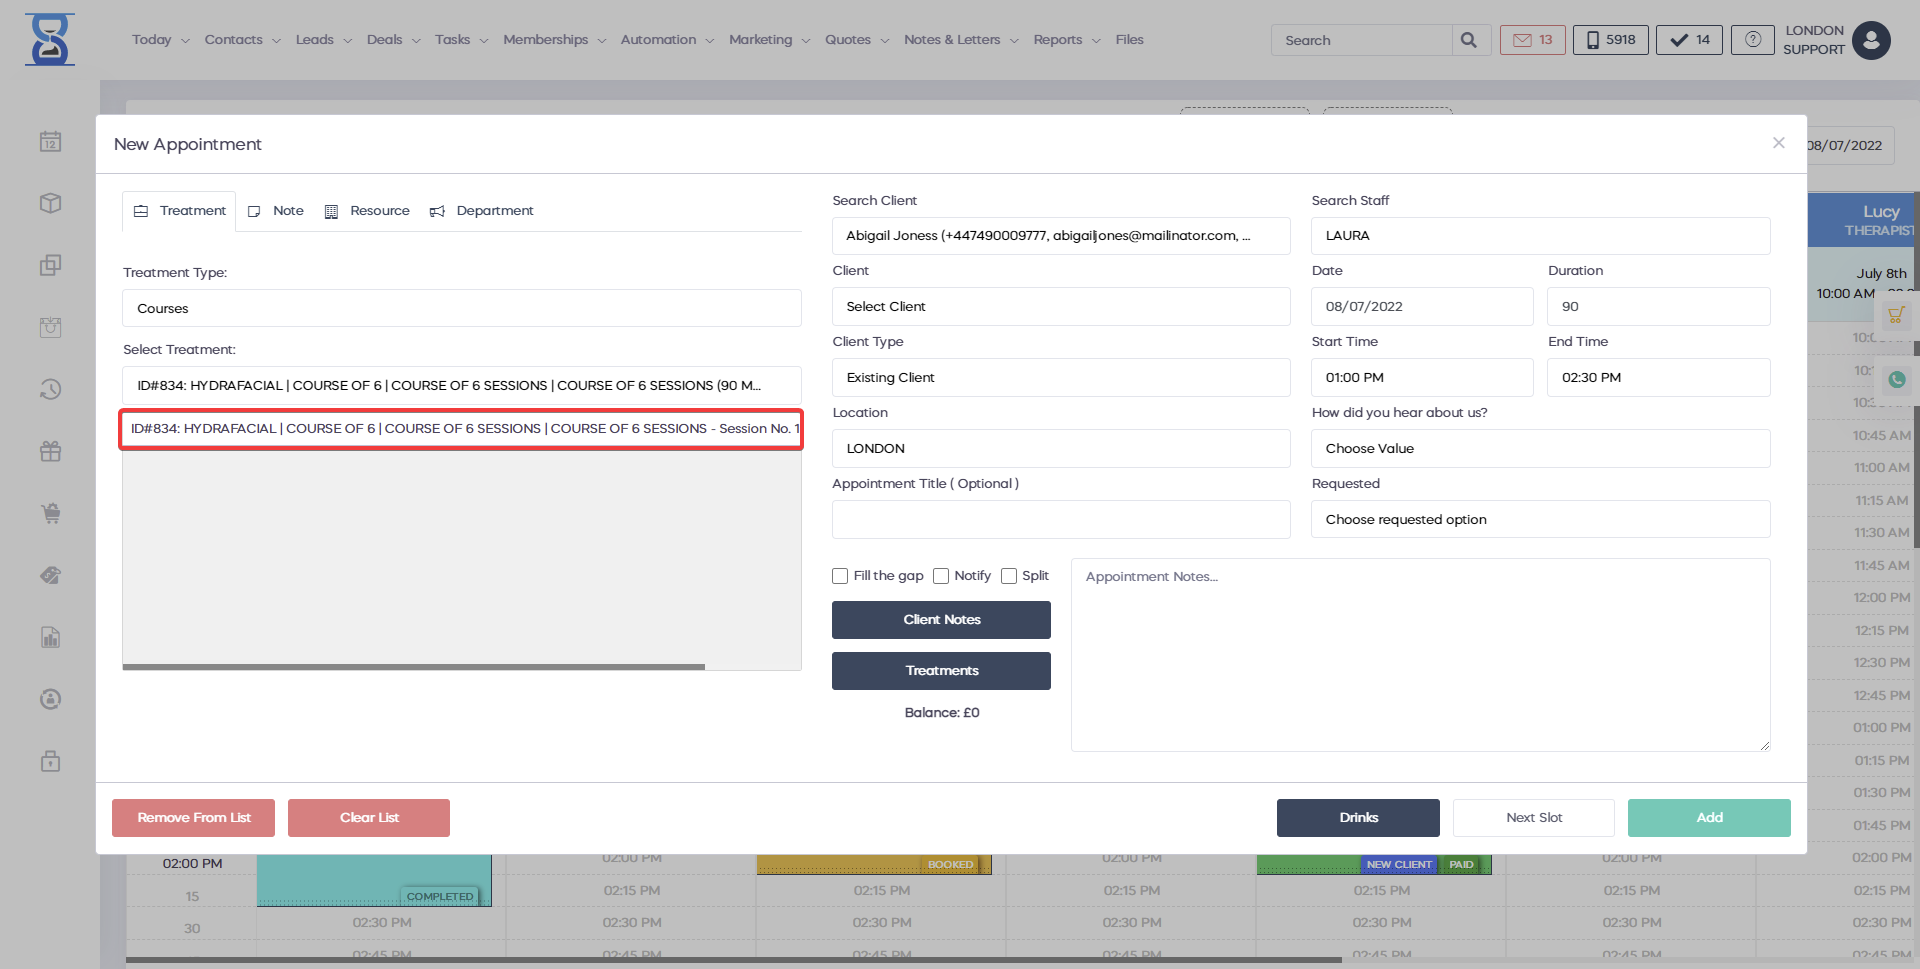
To select a course from the courses list, click on it.
The selected course will be displayed with a blue background.
We also include payment (installments and total amount paid) and utilization data (sessions marked as used, minutes left of total) in each course in the list for easy identification (E.g. in the above example “2 / 8 sessions used and 3 / 4 installments paid).
The “REMOVE FROM LIST” will remove the selected course from the courses list.
If no course is selected in the list then pressing this button will result in the removal of the last item from the list.

The “CLEAR LIST” button will remove all courses from the list.
When the courses list is modified by the addition or removal of courses, the system will display the number of courses, calculate the total duration of the appointment and load the staff list that are authorized to perform all the courses and are available for booking (have a free time slot available for the duration of the appointment).
The system will maintain the chosen staff if the new appointment window was opened by clicking on an empty slot in the Day Book but, if it cannot find a free time slot for the desired staff then it will automatically select the first available staff that can perform all the courses from the list.
The appointment title field can be used to specify the title that you wish the appointment to have.
If left blank it will behave in 2 ways:
- If there is only one course in the list then it will take the name of that course
- If there are more than 1 course in the list the title will be <X> Sessions where <X> is the number of courses on the list
You can also select the “Type” field (e.g. Walked in, Email, Phone) to help you identify your appointment sources in the reports.
The values present in the “Type” field are managed from within the admin area.
Please refer to the Admin Area / Appointment Type section of the User Guide for more details on how to add or remove entries for the “Type” field.
You can also specify notes that will appear in the appointment details window by filling in the “Appointment Notes” field.
To finalize the creation of the appointment press the green “ADD” button.
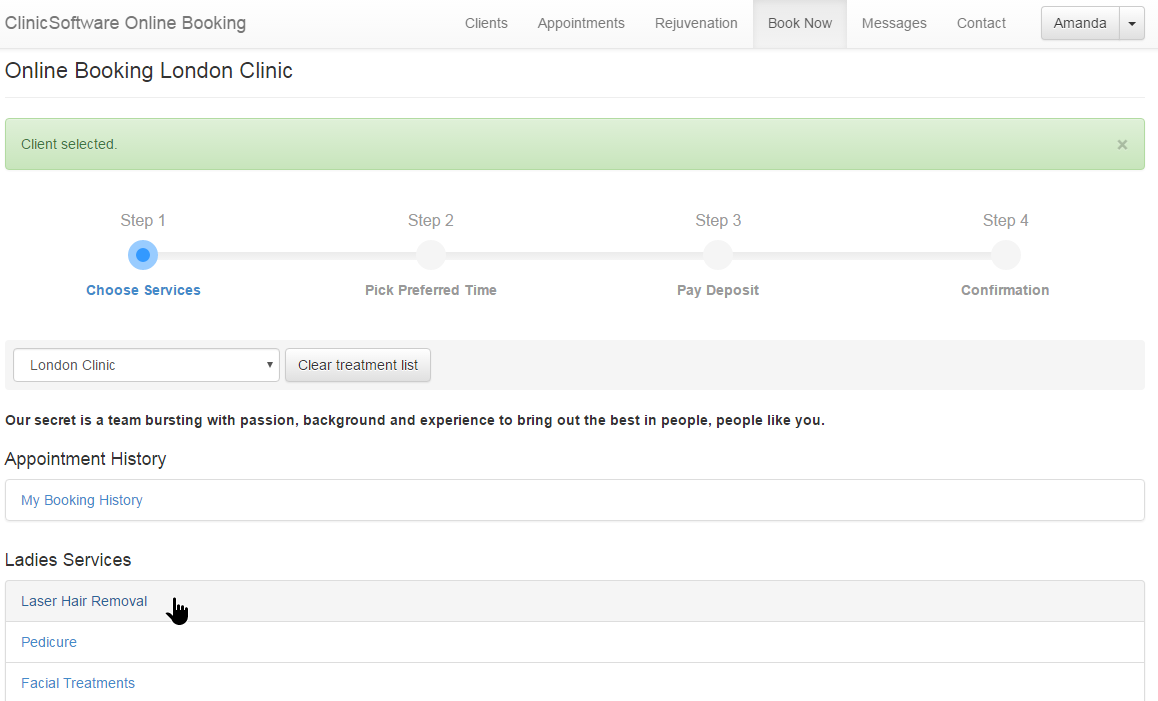
03.BOOKING AN APPOINTMENT AS CLIENT
In order to open your own online booking platform, please click the online booking link that you have received from us.
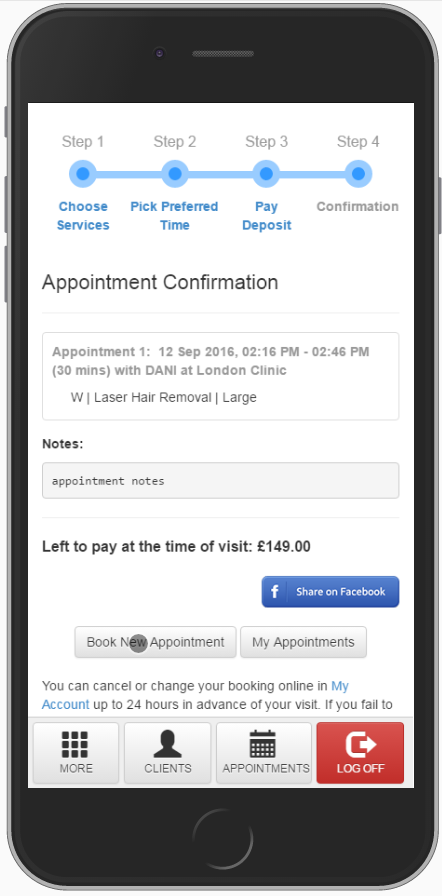
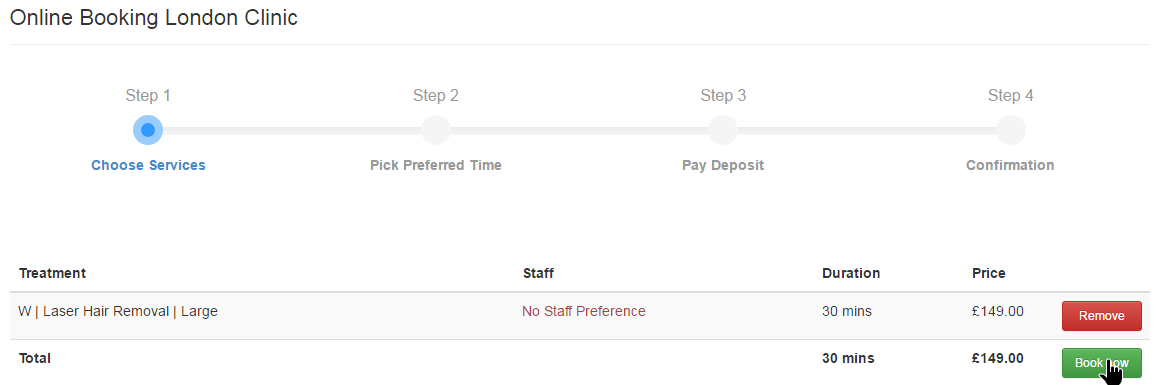
When booking an appointment there are 4 steps:
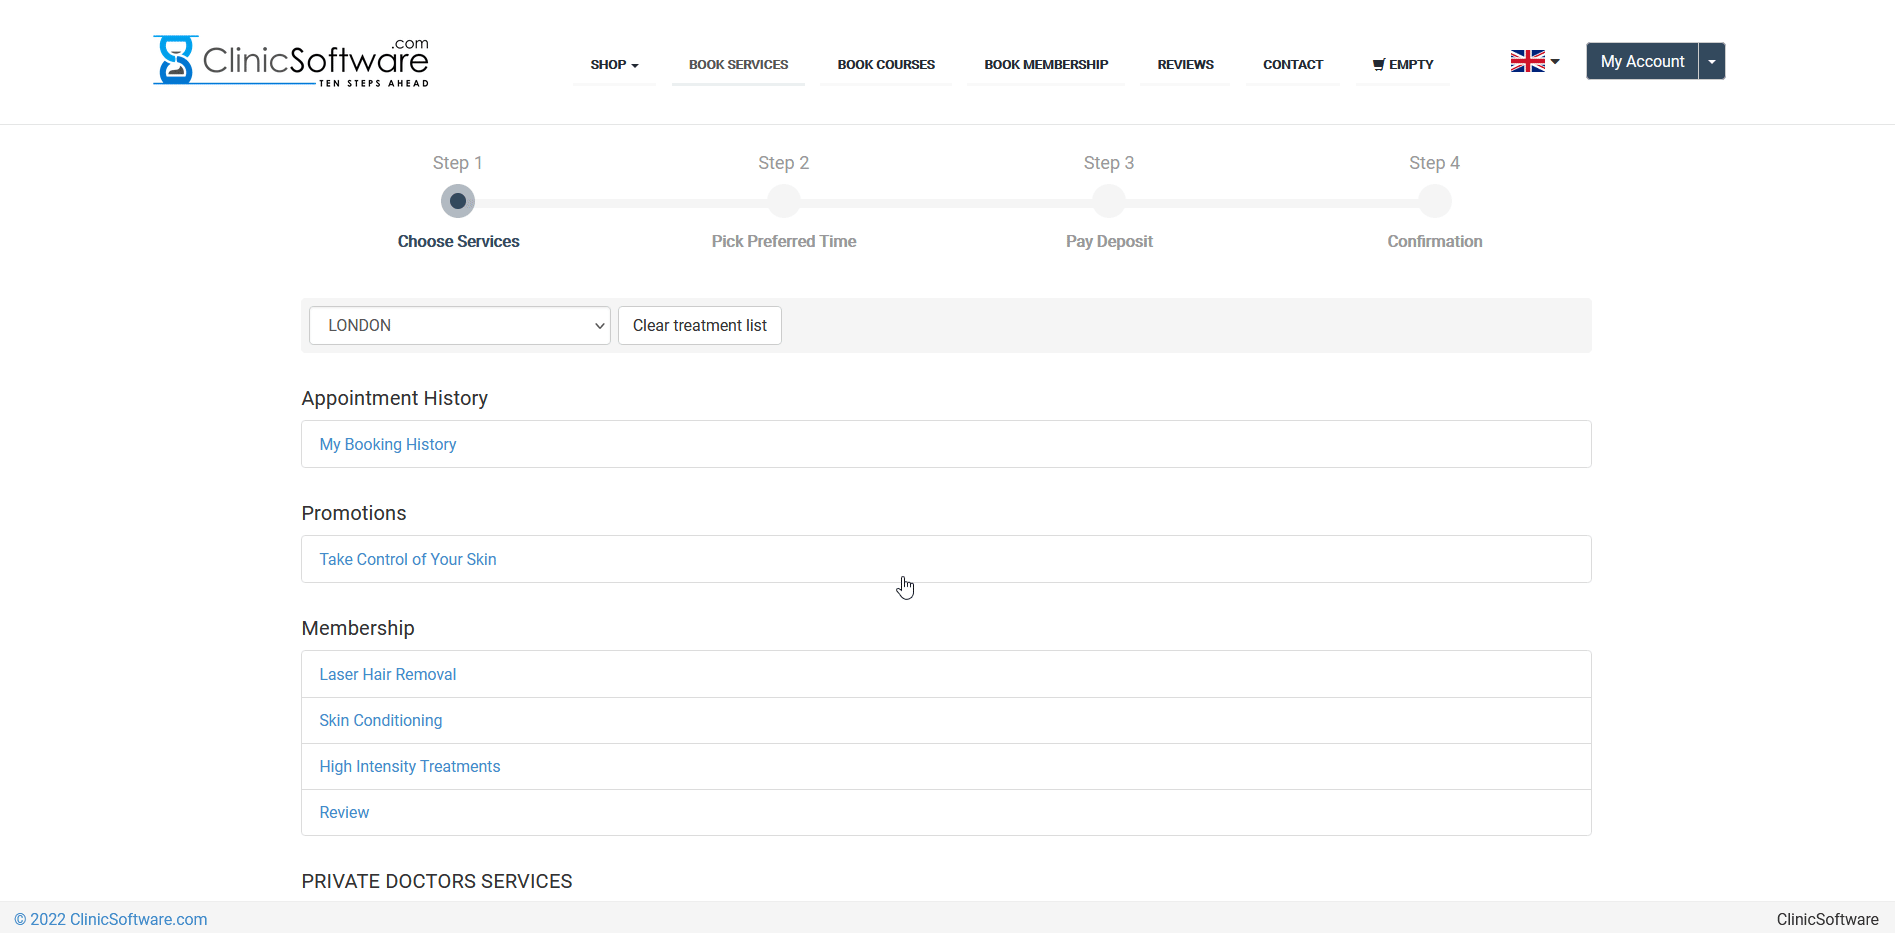
Step 1: Choose Services
In this step we add the services / courses to the cart and select the staff that will perform the services.
Step 2: Pick Preferred Time
In this step we select the date and choose a time slot from the list of available time slots.
Step 3: Pay Deposit (last step that requires user action).
In this step we finalize the booking by paying a deposit or in full for the selected services / courses.
When logged in as staff, no payment is required, the “Pay at salon” option will be activated.
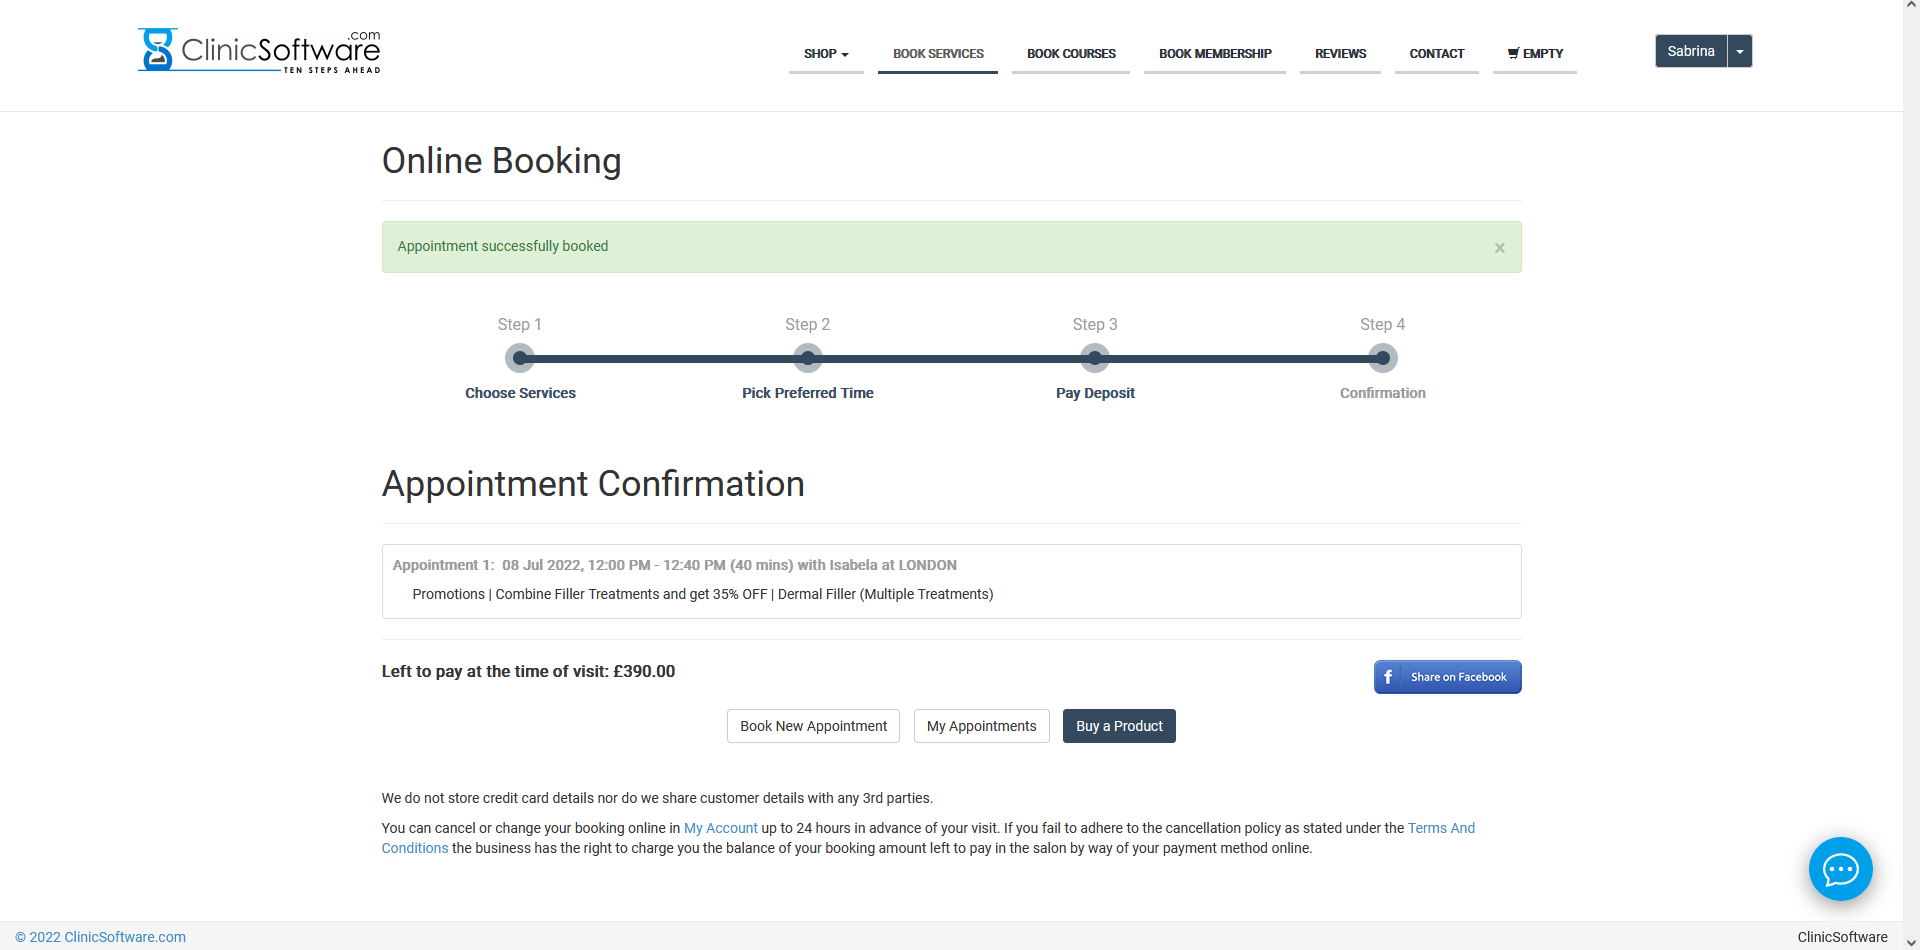
Step 4: Confirmation
In this step we display the booking confirmation message, left to pay at salon and social media share buttons. The confirmation is also sent to the client by email.
DONE. So simple...
Notifications / CRON
The Notifications / CRON page is an awesome tool for marketing your business. It’s easy, it’s efficient, it’s inexpensive and if you go through our feature, you will find out how easily you can activate and deactivate notifications.
After creating an appointment, an automatic email/SMS text confirmation is sent.
Even more, a 48 hours reminder notification is sent completely automatically to the clients, ensuring they are reminded of their appointment date and time.
Also, the clients can view the status of their appointments through their own online account.
Confirmations and Reminders
(For Clients and Staff Members)
After creating an appointment, an automatic email/SMS text confirmation is sent.
Even more, a 48 hours reminder notification is sent completely automatically to clients, ensuring they are reminded of their appointment date and time.
Also, the clients can view the status of their appointments through their own online account.
After the client has been selected the system will automatically redirect you to the booking page from which you can book an appointment as the client normally does through the online booking website.
The appointment will also contain a reference to the staff that performed the operation.
Mobile view of the booking page:

When booking an appointment there are 4 steps:
- Step 1: Choose Services
In this step we add the services / courses to the cart and select the staff that will perform the services. - Step 2: Pick Preferred Time
In this step we select the date and choose a time slot from the list of available time slots. - Step 3: Pay Deposit (last step that requires user action).
In this step we finalize the booking by paying a deposit or in full for the selected services / courses.
When logged in as staff no payment is required, the “Pay at salon” option will be activated. - Step 4: Confirmation
In this step we display the booking confirmation message, left to pay at salon and social media share buttons. The confirmation is also sent to the client by email.
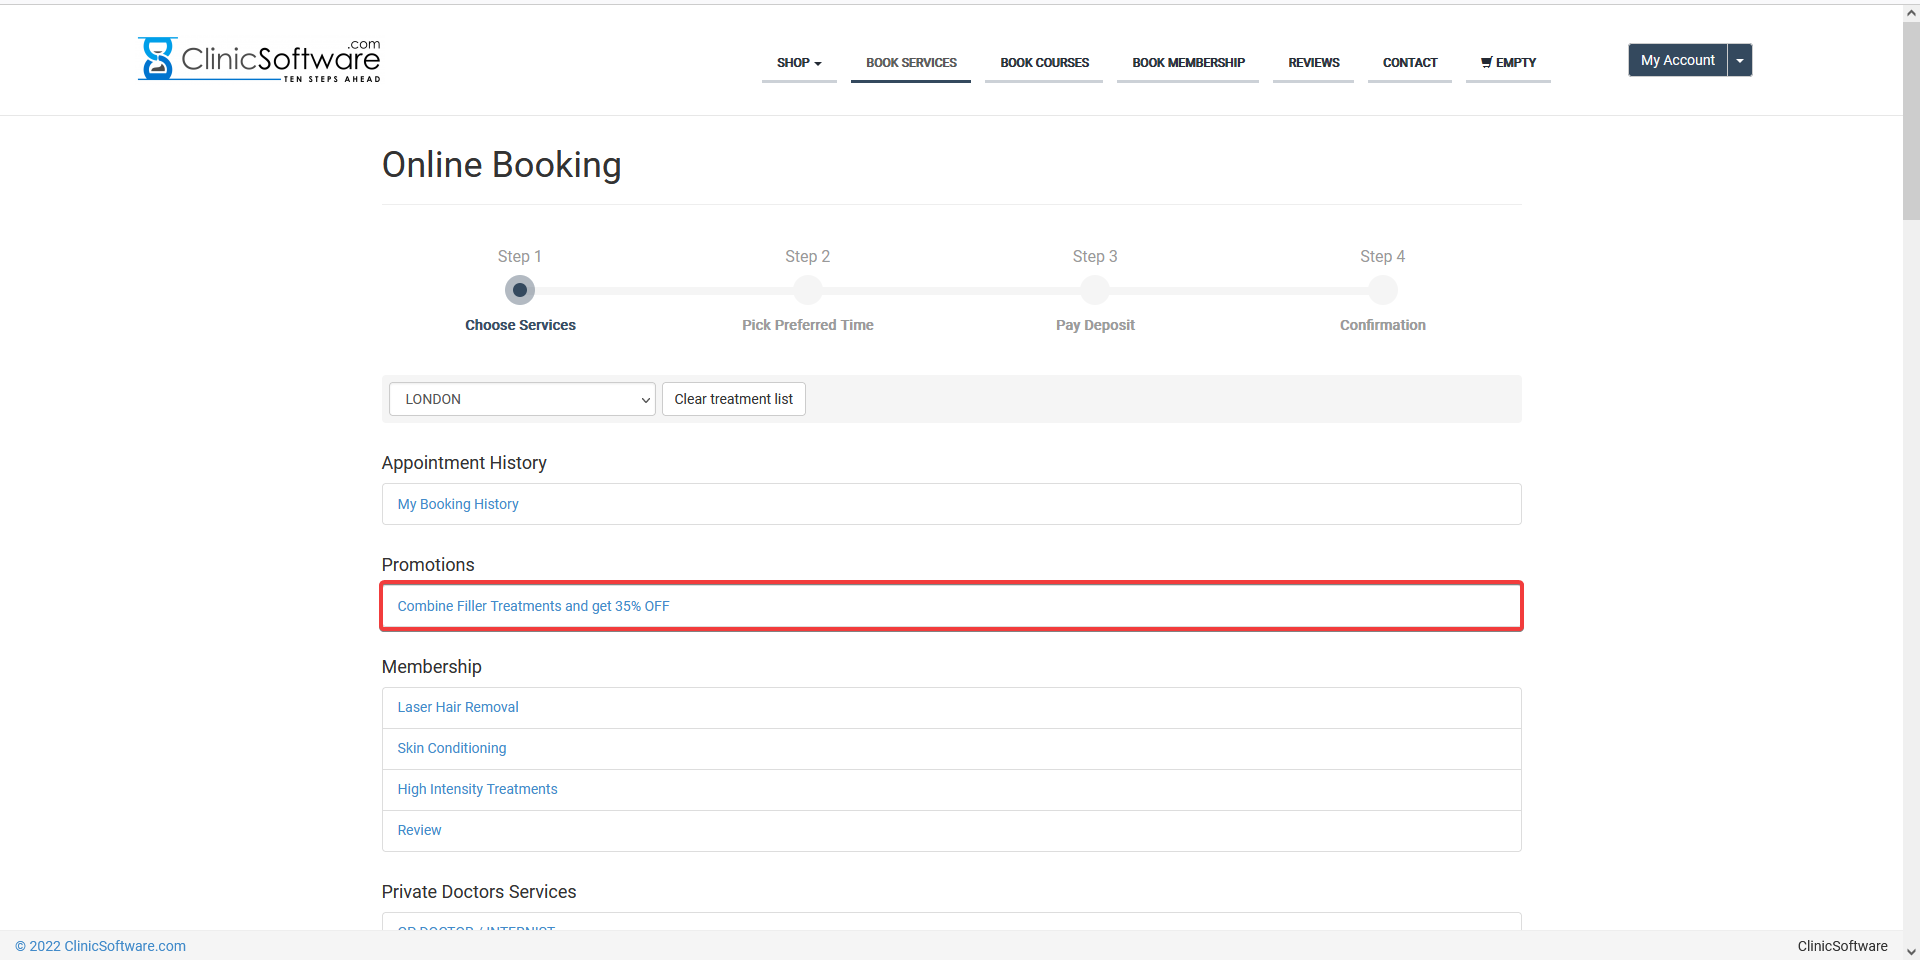
STEP1: CHOOSE SERVICES
The booking page from Step 1 is divided into:
- Appointments History (“My Booking History” button)
- Services section and their categories from which we add new services to the cart
- Courses section
- Client existing courses from which we can book their remaining course sessions or minutes (“My Courses” button)
- Book new course section from which we add a new course to the cart
The “My Booking History” history will open the client “my account” / appointments page.
From this page we can cancel, rebook (add same services/courses to the cart) and reschedule the selected client’s appointments.
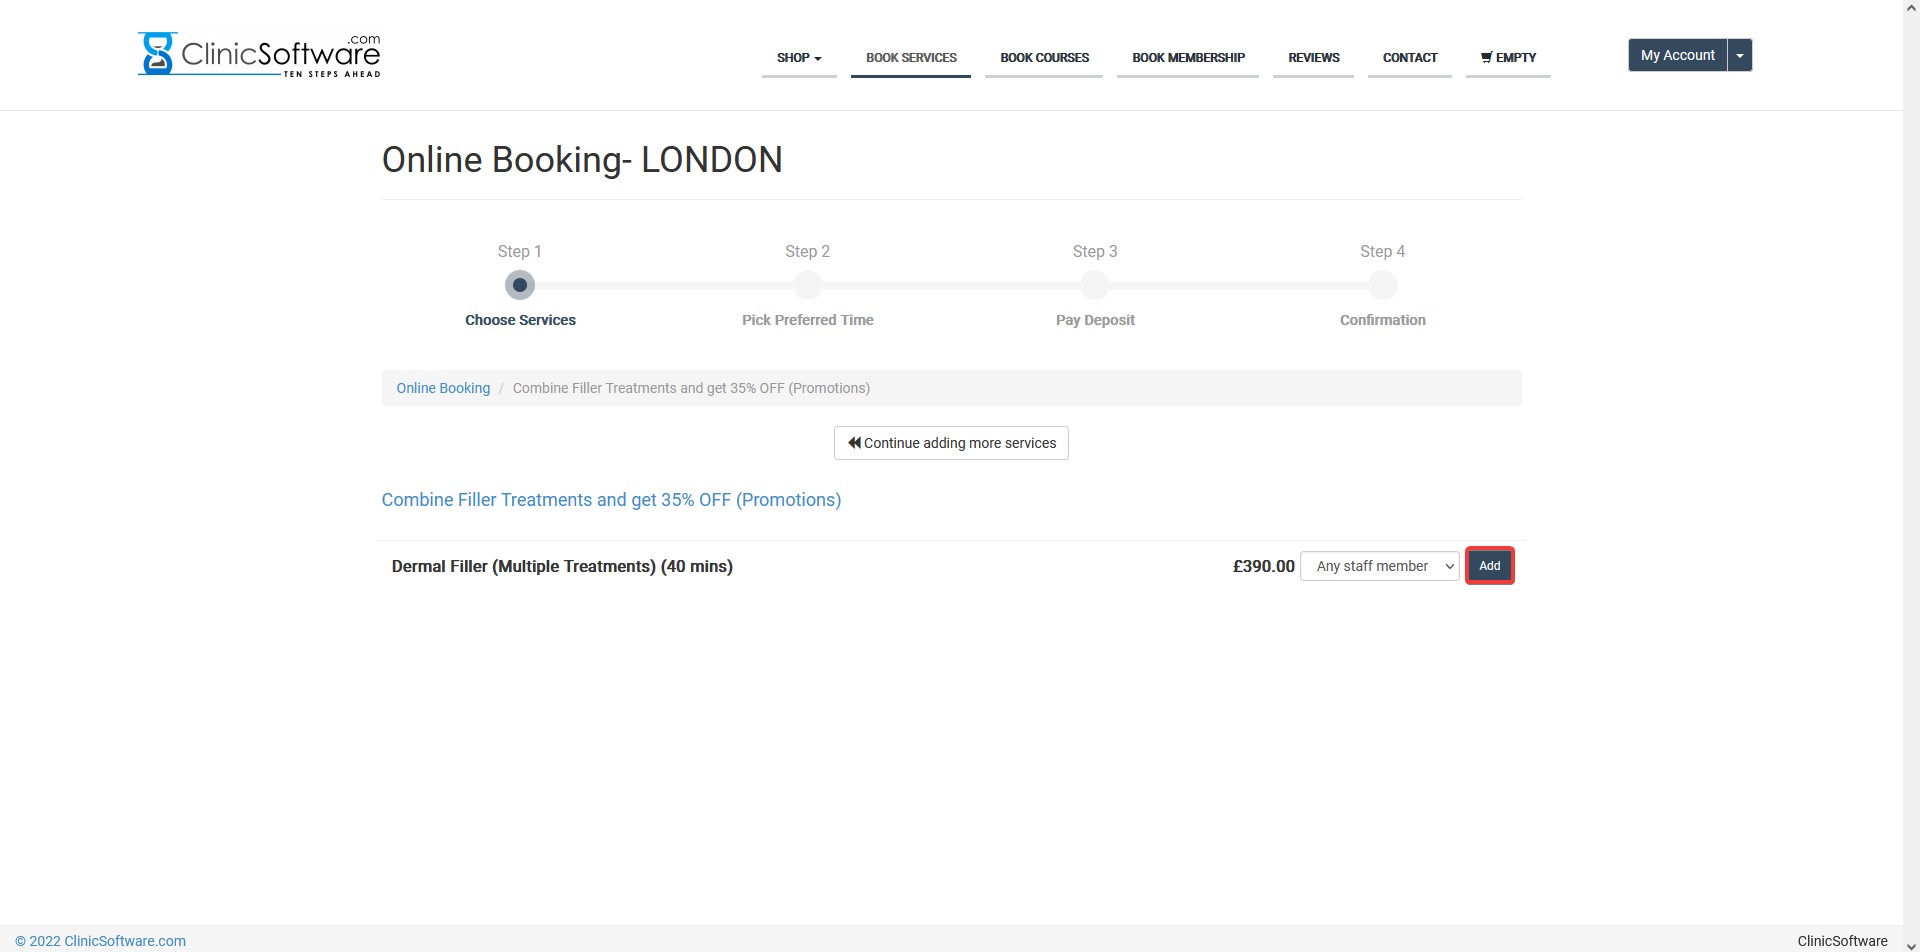
Adding a service to the cart
To add a service to the cart we must first select the services category from the main booking page (Step1).
Mobile view of the services list inside the selected category:
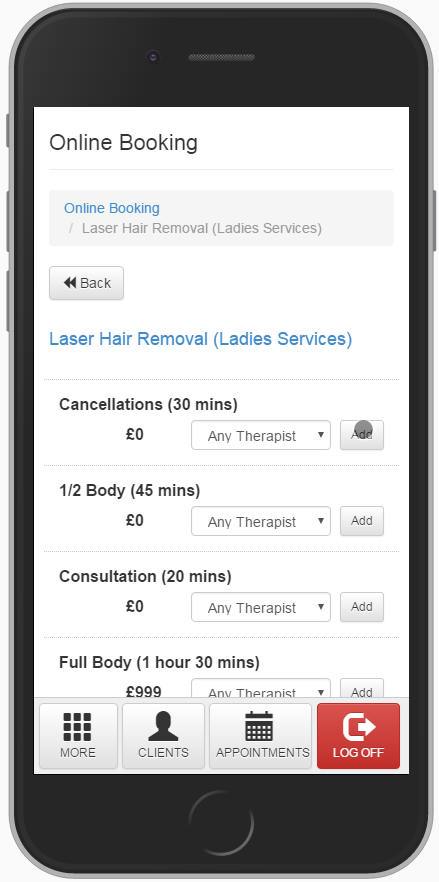
From the services list, select the staff that will perform the service and then press the “Add” button.
If you leave the default “Any Therapist” selected the system will automatically select the first available staff able to perform the service.

After the service has been added, it will appear in the cart.
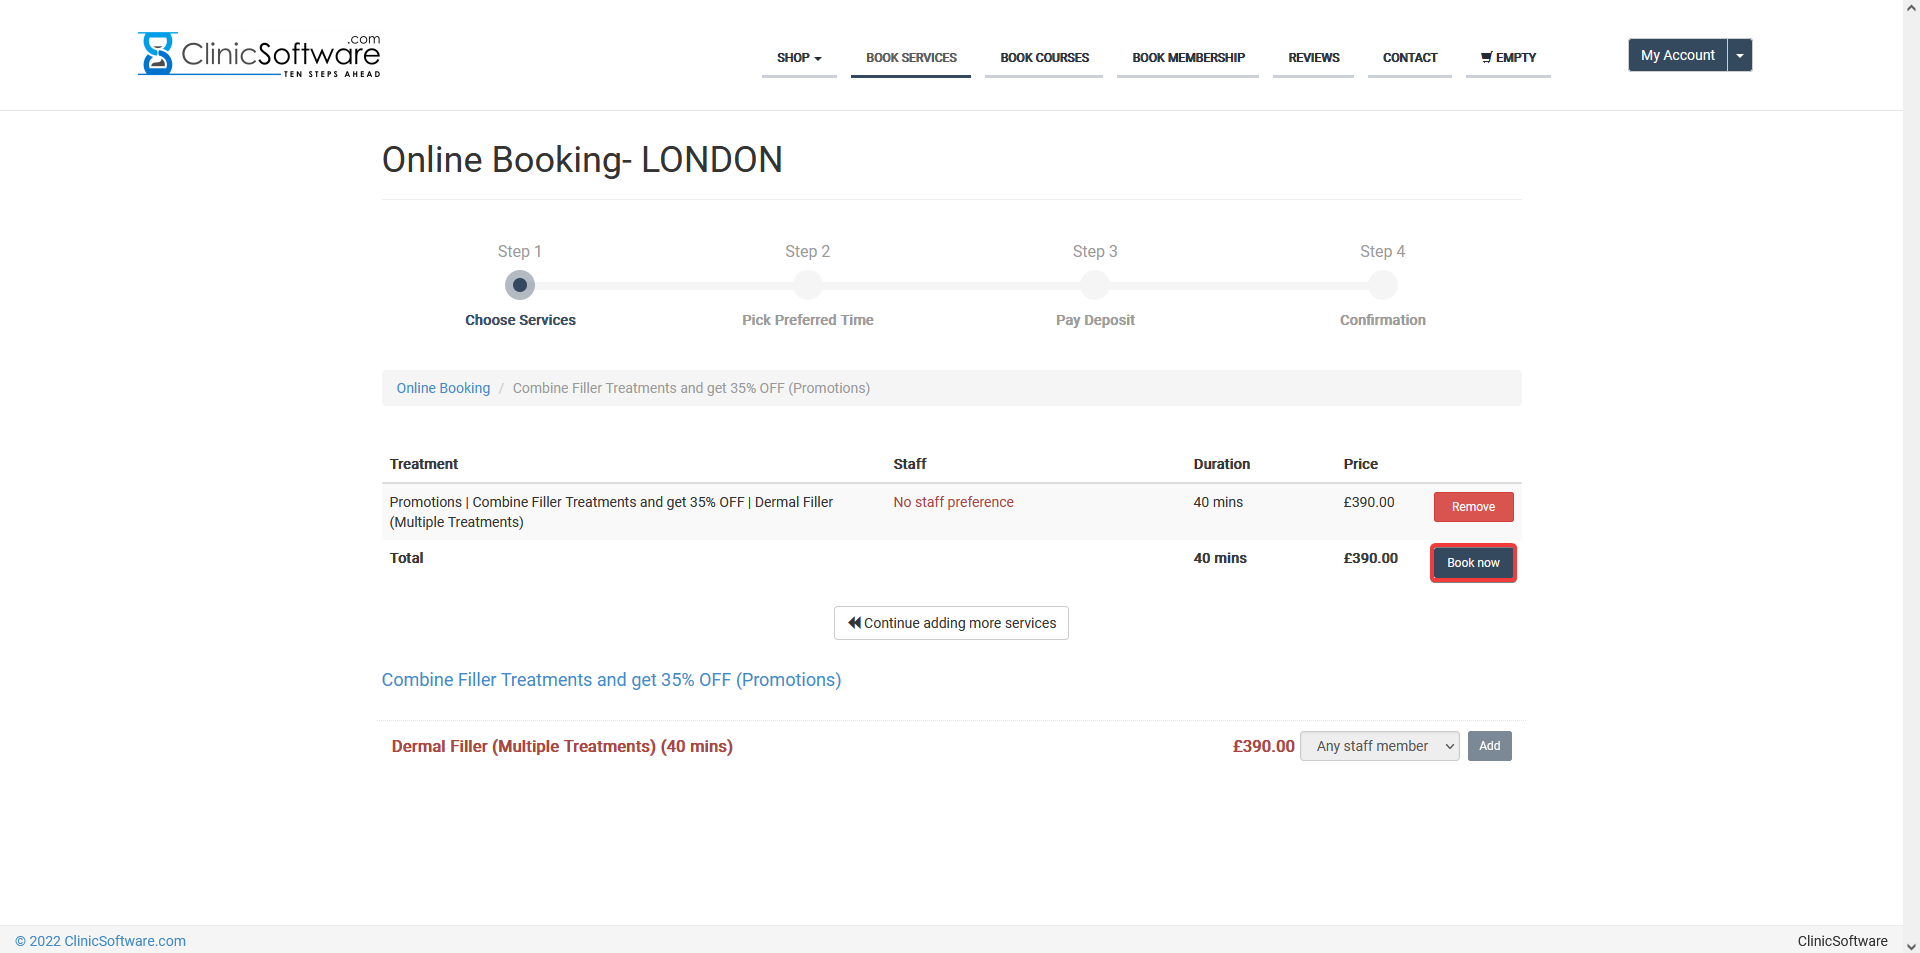
To remove the service from the cart, press the “Remove” button of the service.
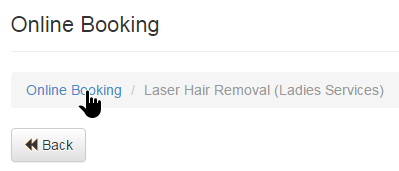
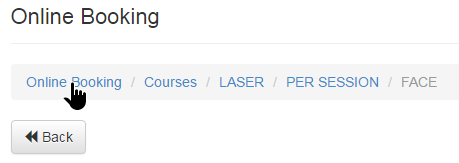
To add a service from a different category press the “Back” button from the top section of the page to return to the services categories list page.
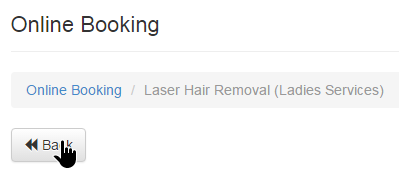
You can also use the bread crumbs navigation to go back to the services categories page (Step1, main booking page).
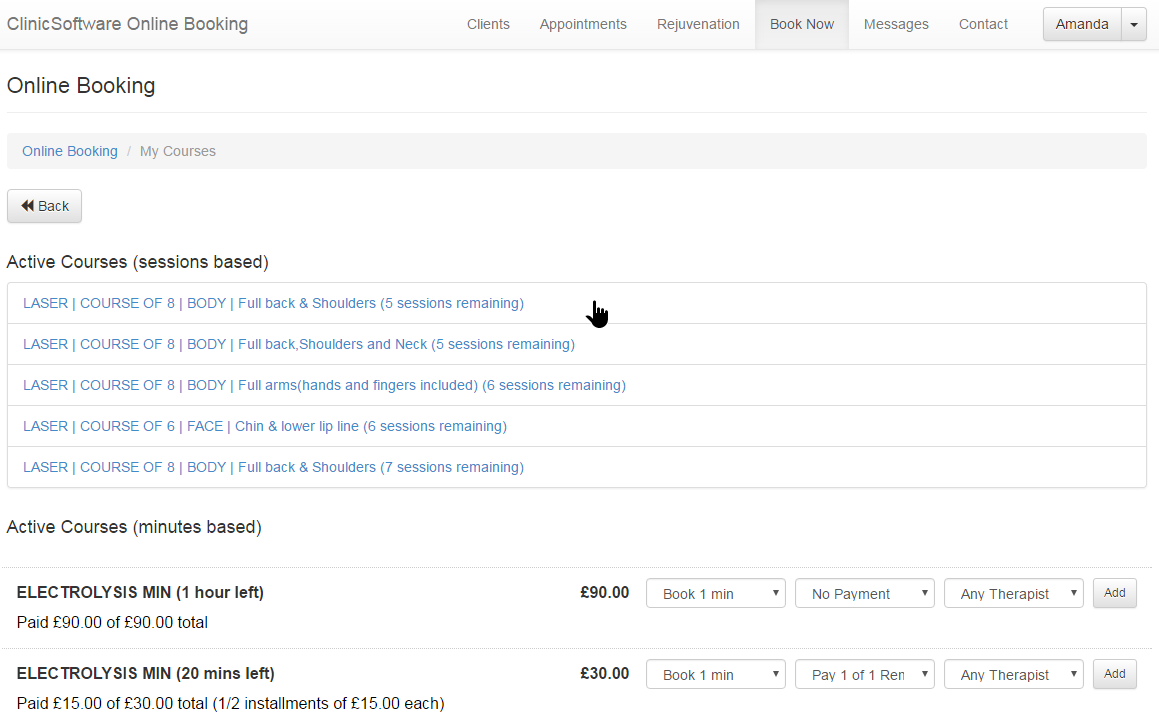
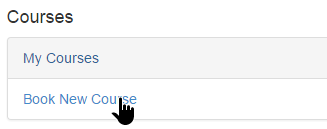
Booking remaining client course sessions
To add an existing client course session to the cart we first select the “My Courses” option under the “Courses” section of the main booking page (Step 1, scroll down to the bottom of the page).
This option will only appear if a client is selected.
Mobile view of the selected client courses page:
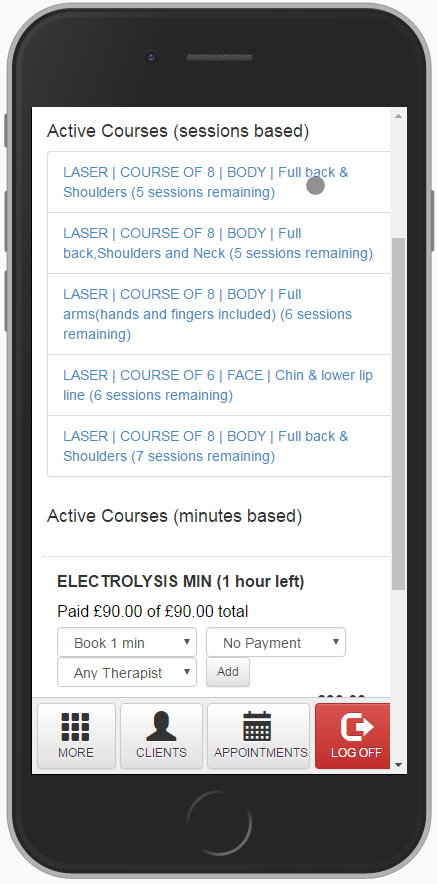
There are 2 types of courses in the system:
- Sessions based courses
- Minutes Based courses
For sessions based courses only the courses with remaining sessions (sessions that are not booked) will be listed under the “Active Courses (sessions based)” section of the page.
To add a session from an active course to the cart we first select the course form the list.

Next we select which session of the selected course we wish to book.
When adding a course session to the cart we can select which therapist we wish to book the session with and if an instalment payment will also be performed.
If “No Payment” is selected (default option) the instalment will be paid at the salon / clinic after the session has been performed.
If payment of an instalment is selected then it will be marked at paid and a receipt issued in the system only if full payment is selected at “Step 3” of the booking process otherwise the value selected here will be used to calculate the required deposit at “Step 3”.
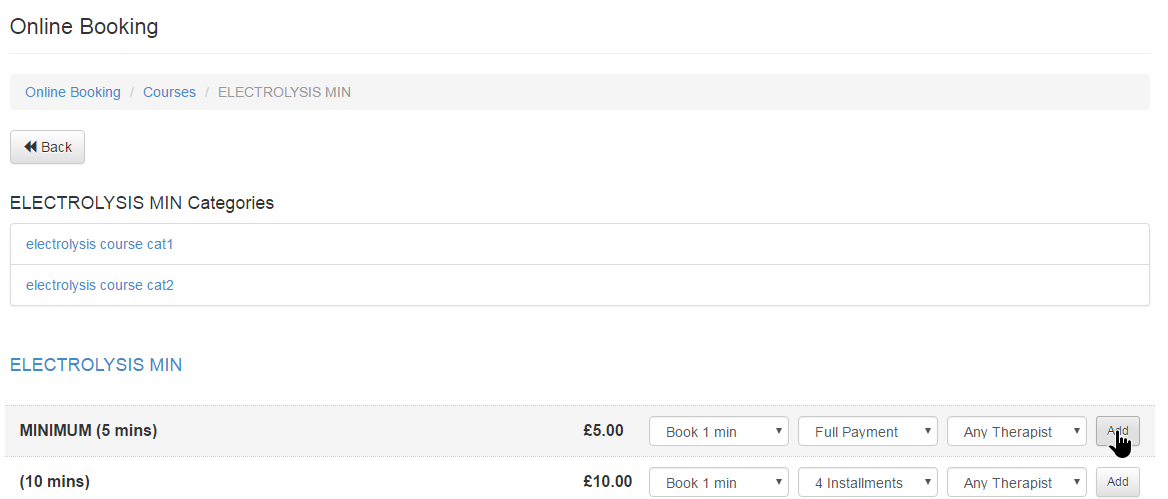
Booking remaining client course minutes
For minutes based courses we book the remaining minutes of the courses listed under the “Active Courses (minutes based)” under the main “My Courses” page.
Minutes based courses are booked directly from the “My Courses” page.
Select the number of minutes to book from the selected course, the therapist and the payment plan (pay x instalments or no payment / pay at salon) and then press the “Add” button.

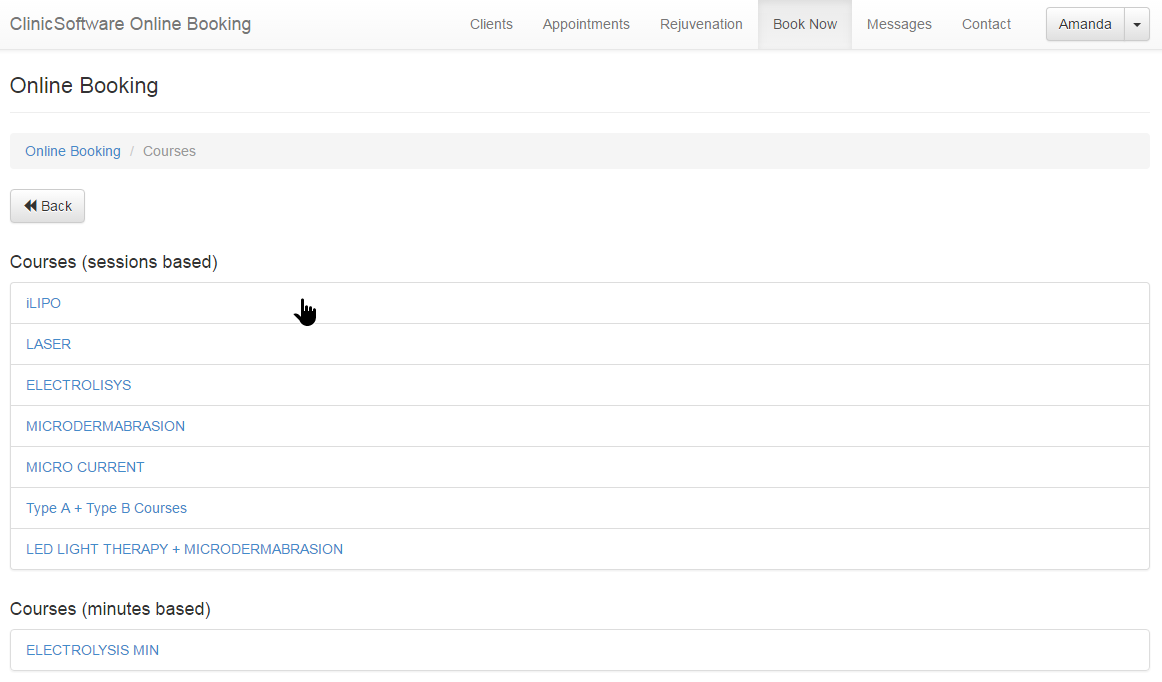
Booking new sessions based courses
To book a new sessions based course, from the main booking page, select the “Book New Course” option (scroll down to bottom of the page).
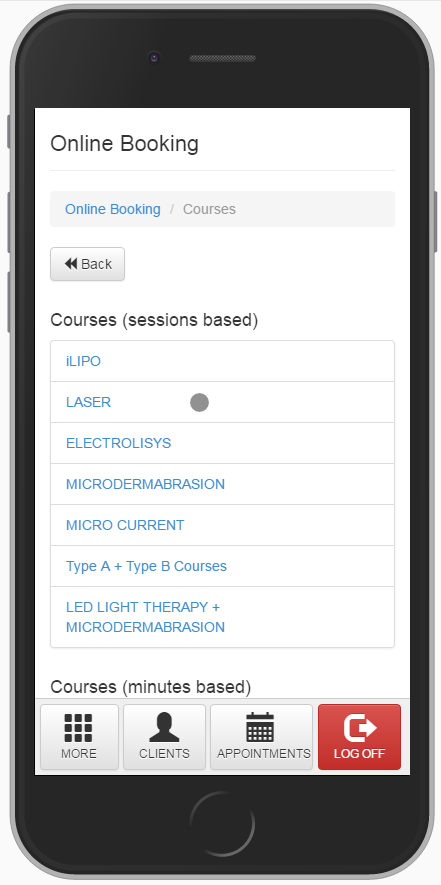
Mobile view of the courses page (“Book New Course” option):
Select the course directory under the “Courses (sessions based)” section of the page:

Next select the number of sessions from the modules section.
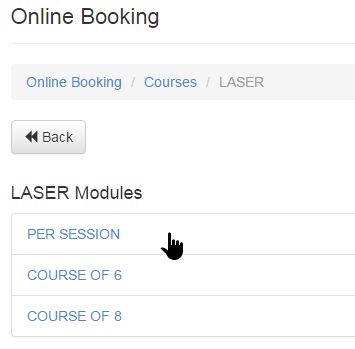
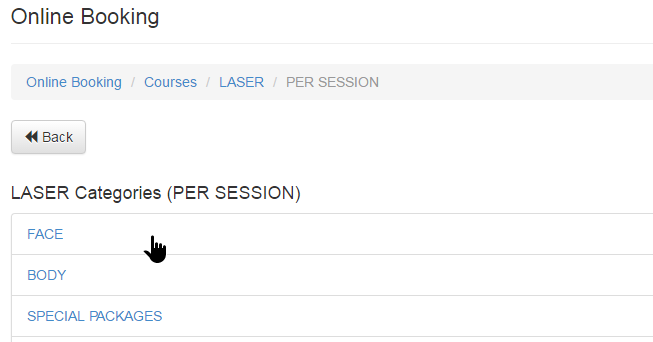
Next select the category of the course.
If the courses are not categorised they will be displayed directly on this page.
Finally, select the course and the therapist that will be performing the first session of the course and press the “Add” button.
After the course has been added to the cart you can go back to the previous page by using the “Back” button from the top section of the page or by using the breadcrumb navigation.
Booking new minutes based courses
To book a new minutes based course, from the main booking page, select the “Book New Course” option (scroll down to bottom of the page).

Next, select the course directory from the “Courses (minutes based)” section of the page.


If the course is categorised we also need to select the category and then the course otherwise the courses will be directly listed in this page.
Select how many minutes of the course you wish to book and the therapist and then press the “Add” button of the course.
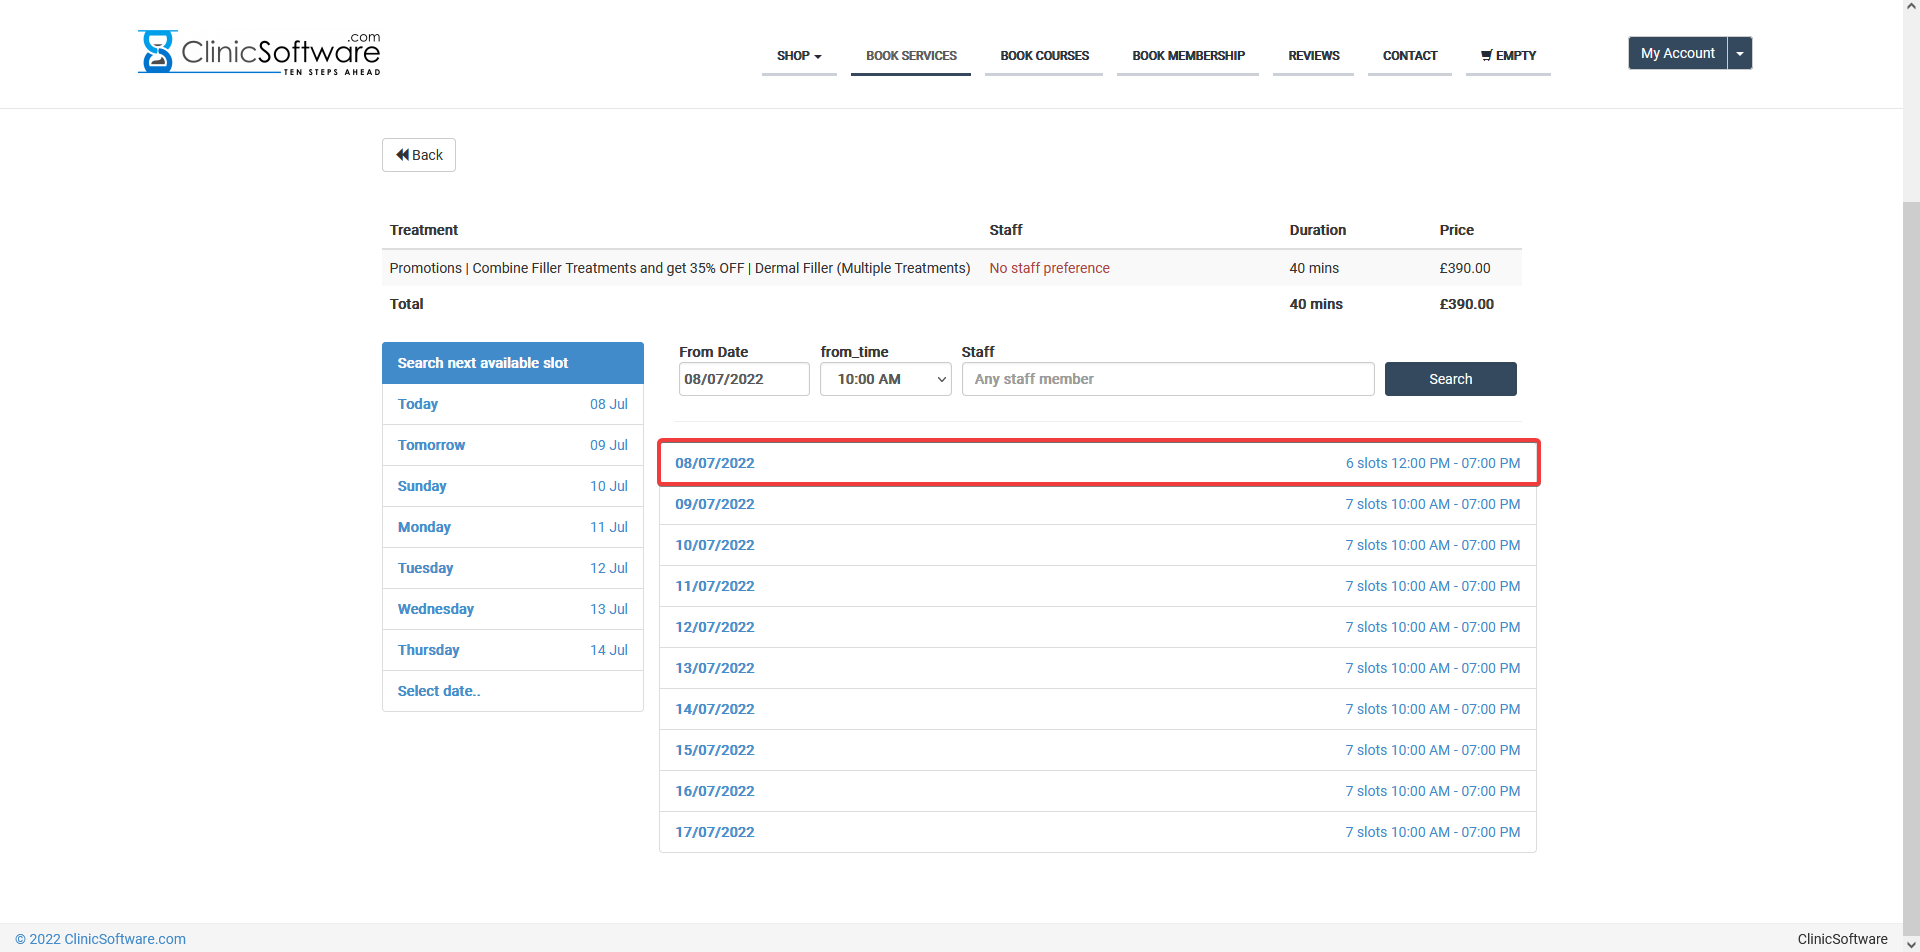
STEP 2: PICK PREFERRED TIME
To proceed to the next step in the booking procedure, press the “Book now” button from the services cart.
The cart is displayed on every page of the booking section if there are items present in it (services, courses).
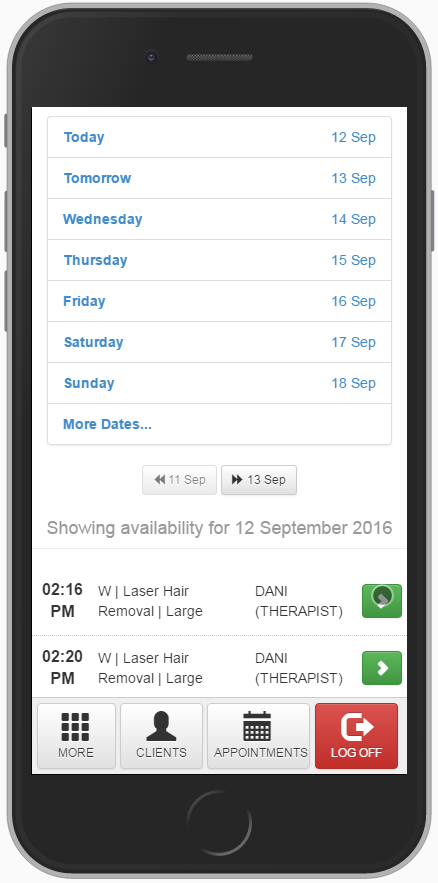
Next we need to select the day we wish to book the appointment from the left column of the page.
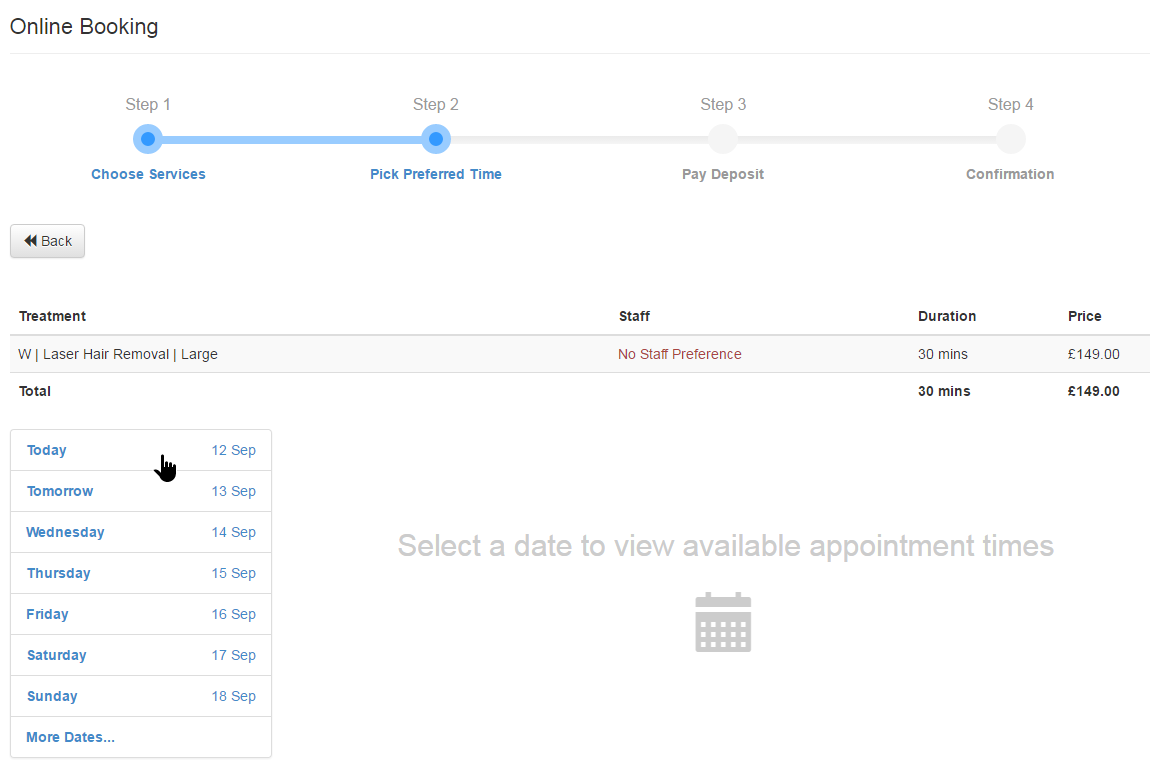
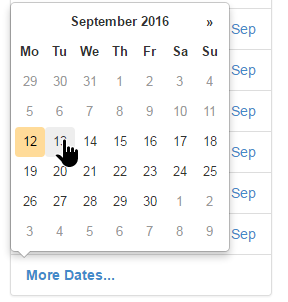
To list the dates of every day of the current week and a calendar that can be opened by pressing the “More Dates…” button.
After we select the date, the available time slots will load in the right column (and below the date selection for the mobile view).
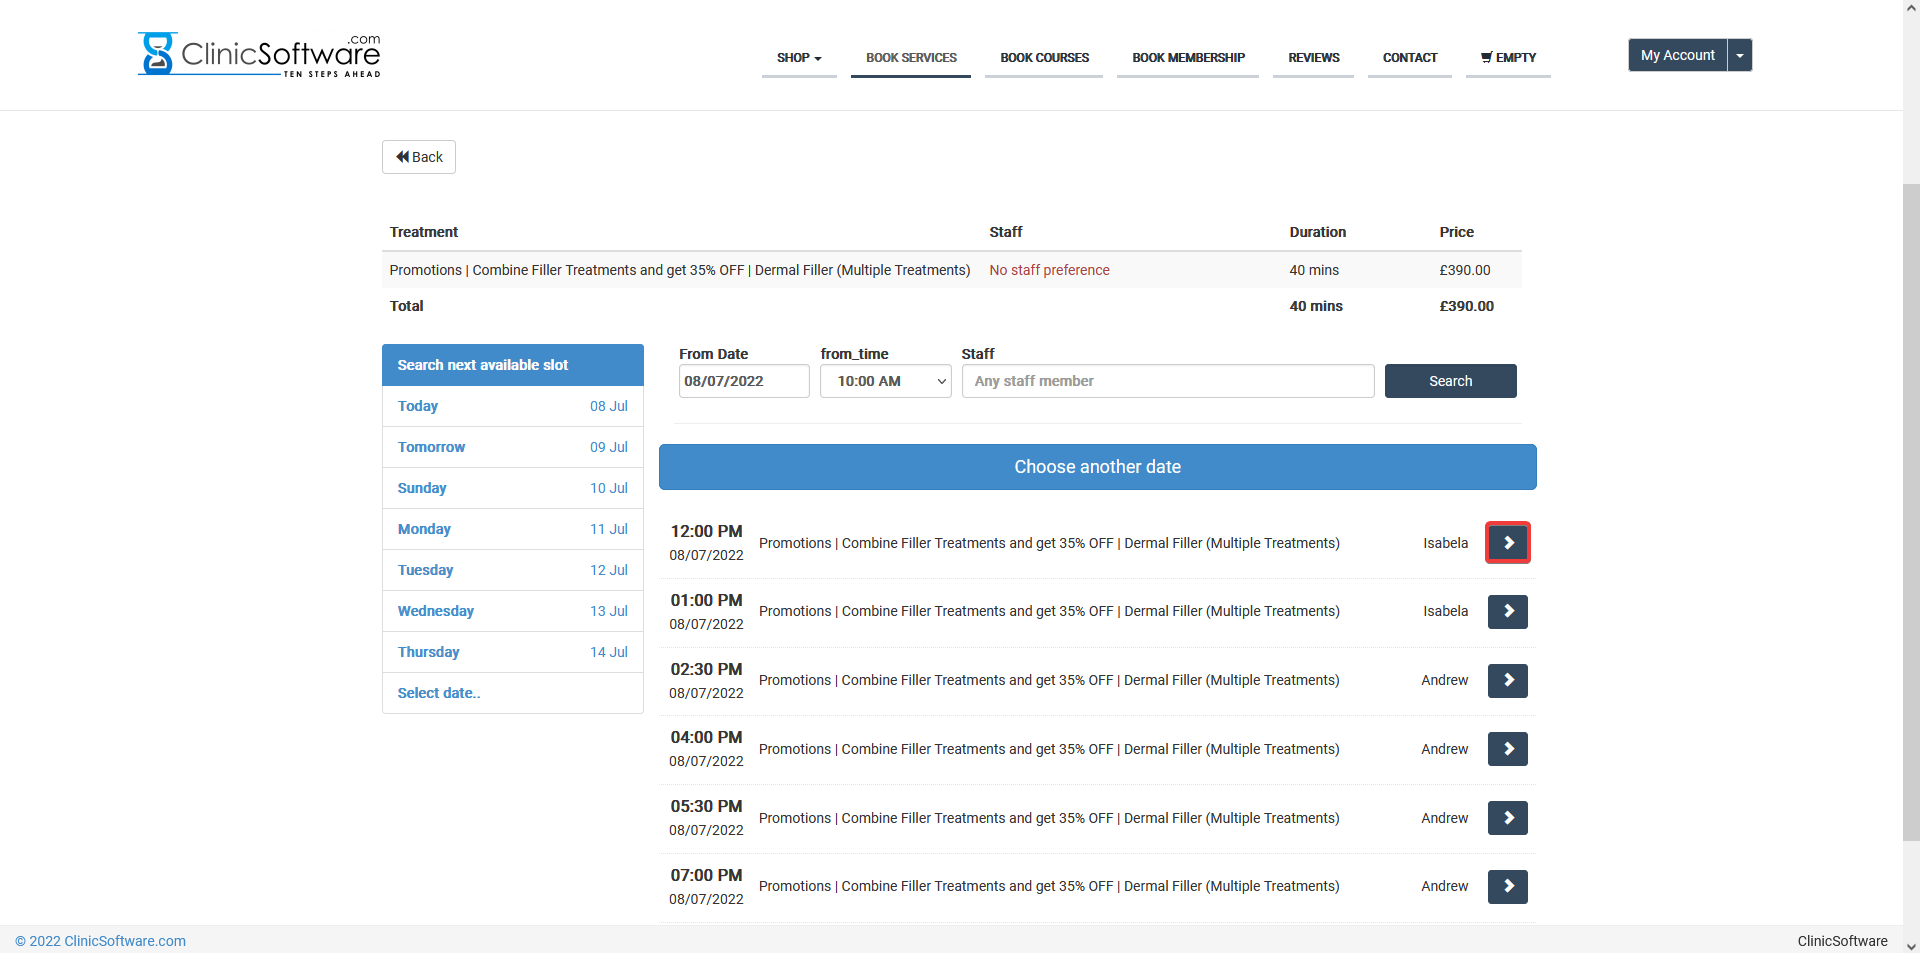
Pick the time slot by clicking on its right chevron green button; this will open the “Step 3 Pay Deposit” page with the selected time slot.
Mobile view of “Step 2: Pick Preferred Time” page:
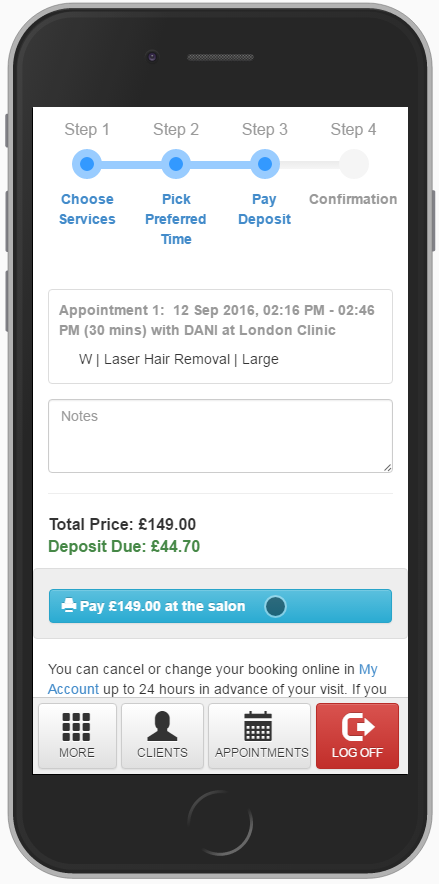
STEP 3: PAY DEPOSIT
This is the last step of the booking procedure in which the client pays the deposit to place the online appointment in the system.
While logged in as staff we activate the “Pay at salon” option which will place the online appointment directly.
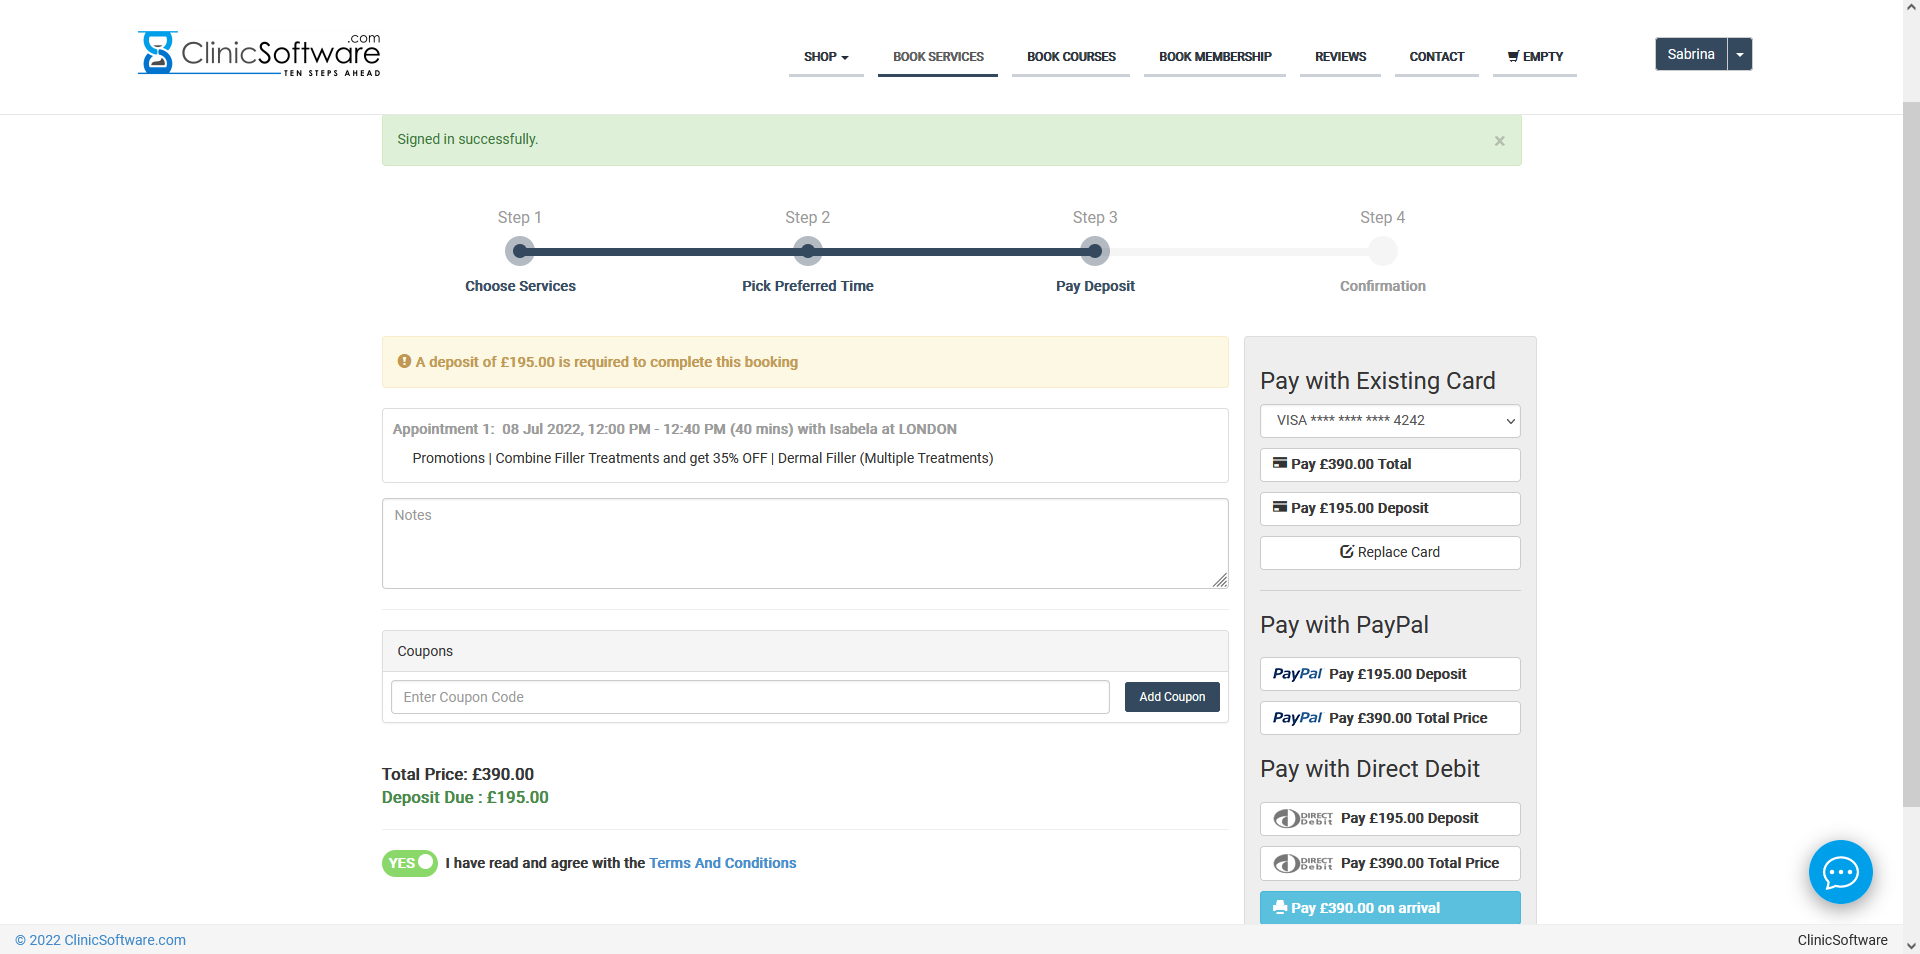
You can also add appointment notes by filling in the “Notes” field before pressing the “Pay at salon” button.
Mobile view the “Step 3: Pay Deposit” page:
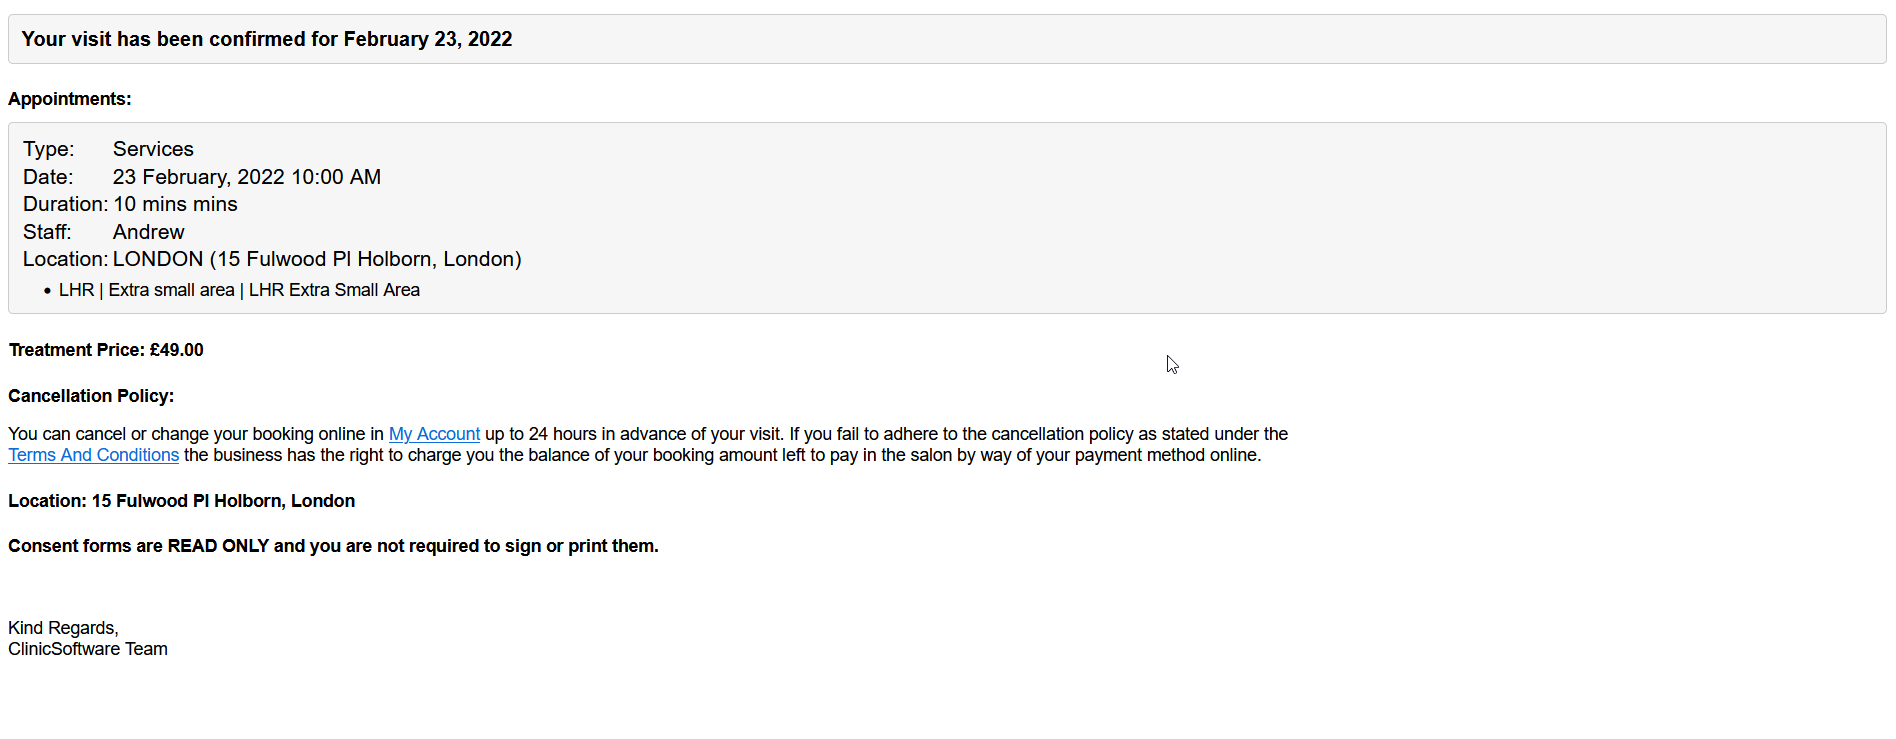
STEP 4: CONFIRMATION
After the online appointment has been placed by pressing the “Pay at salon” button, the booking confirmation page is displayed.
This page displays the booking confirmation message with details on time of visit and therapist, left to pay at the salon / clinic and social media share buttons. The confirmation is also sent to the client by email.
Mobile view of “Step 4: Confirmation” page: