To book a patch test type appointment:
1) Click on an empty time slot on the Day Book for the desired Staff and choose the “Add Appointment” option from the window that opens up (this will automatically select the staff and time in the New Appointment window) or press the “New Appointment” button from the top section of the page.
Example of booking an appointment by clicking on an empty spot:
You can also add a new appointment by pressing the “New Appointment” button located on the top section of the page:
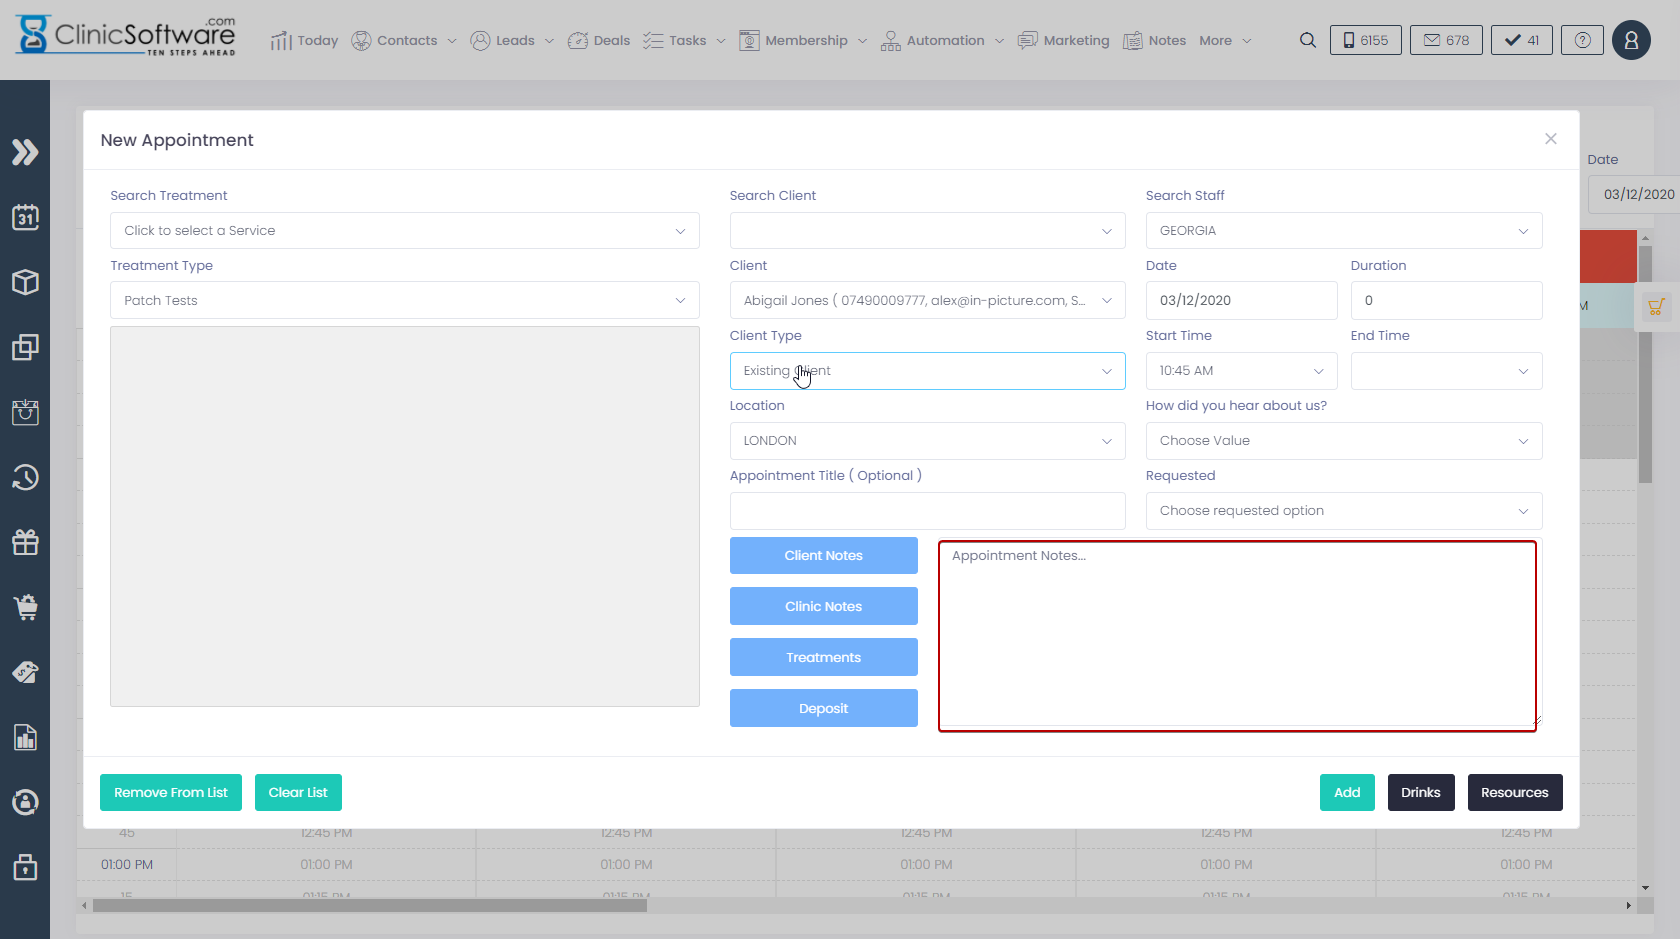
After you have pressed the “Add Appointment” or “New Appointment” buttons, the “New Appointment” window will open up:
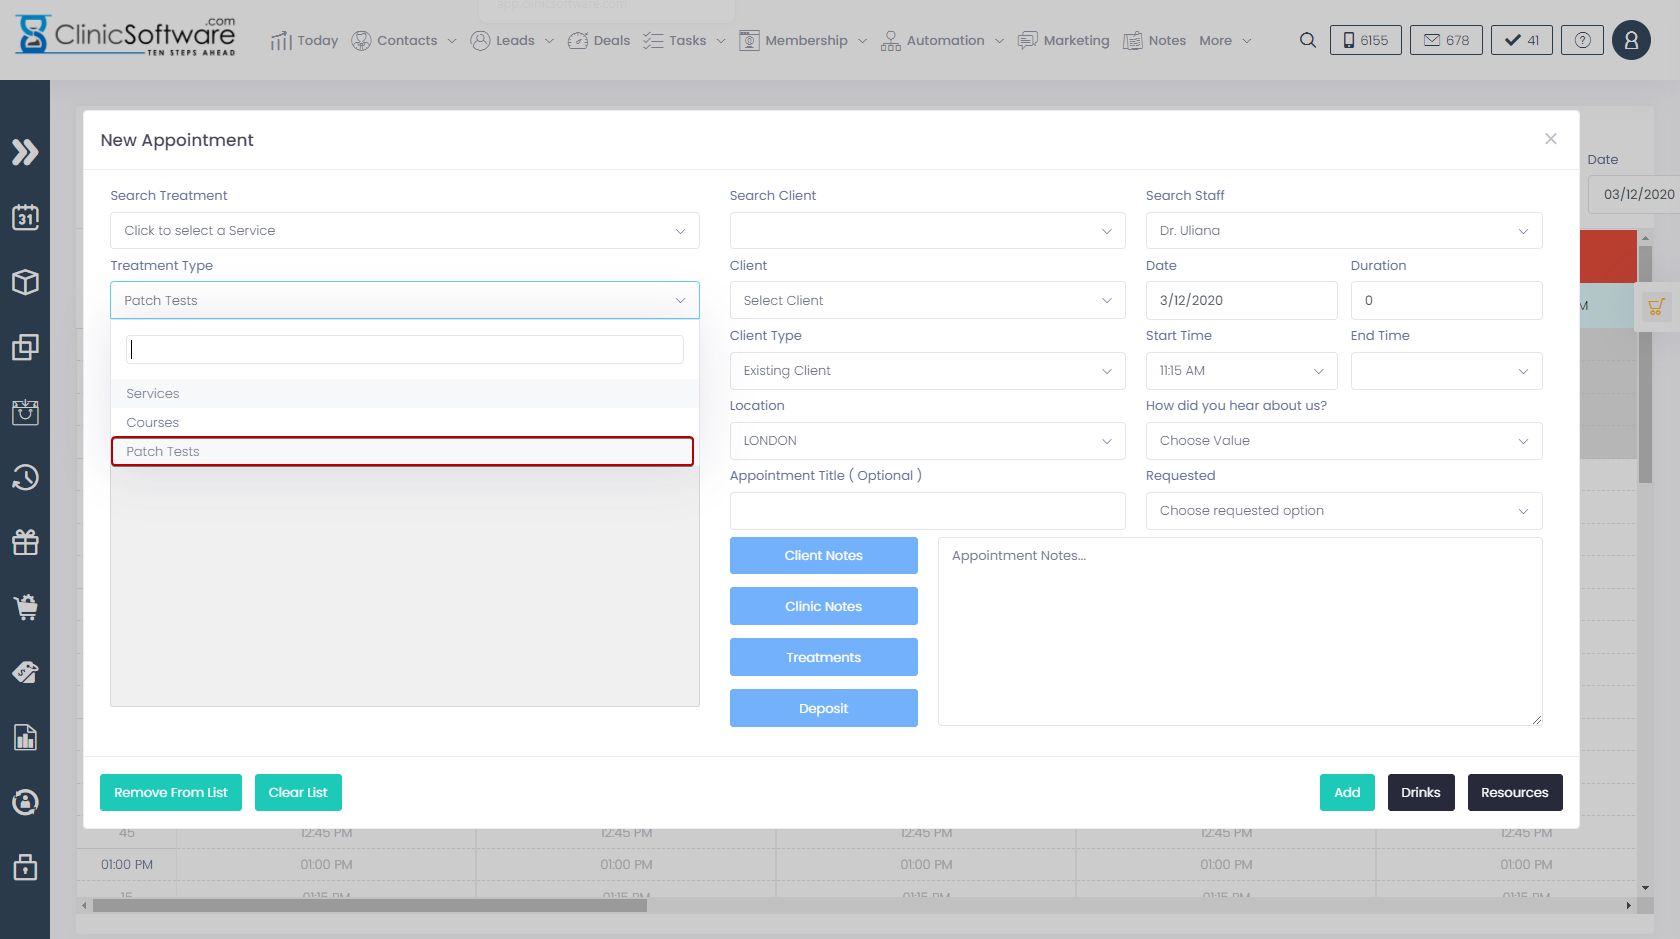
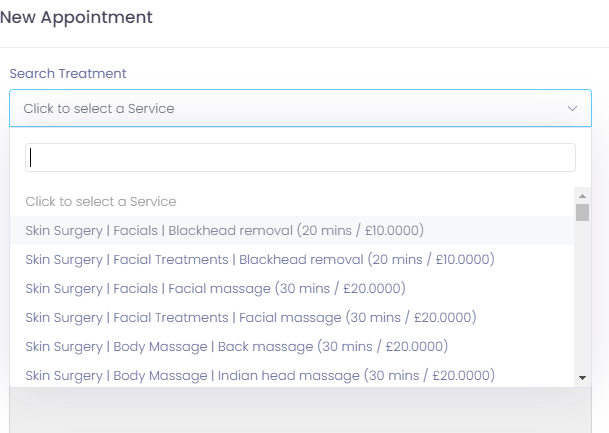
Next we have to change the “Appointment type” selection to “Patch Test” as illustrated below:
After the selection, the window will update to patch test mode:
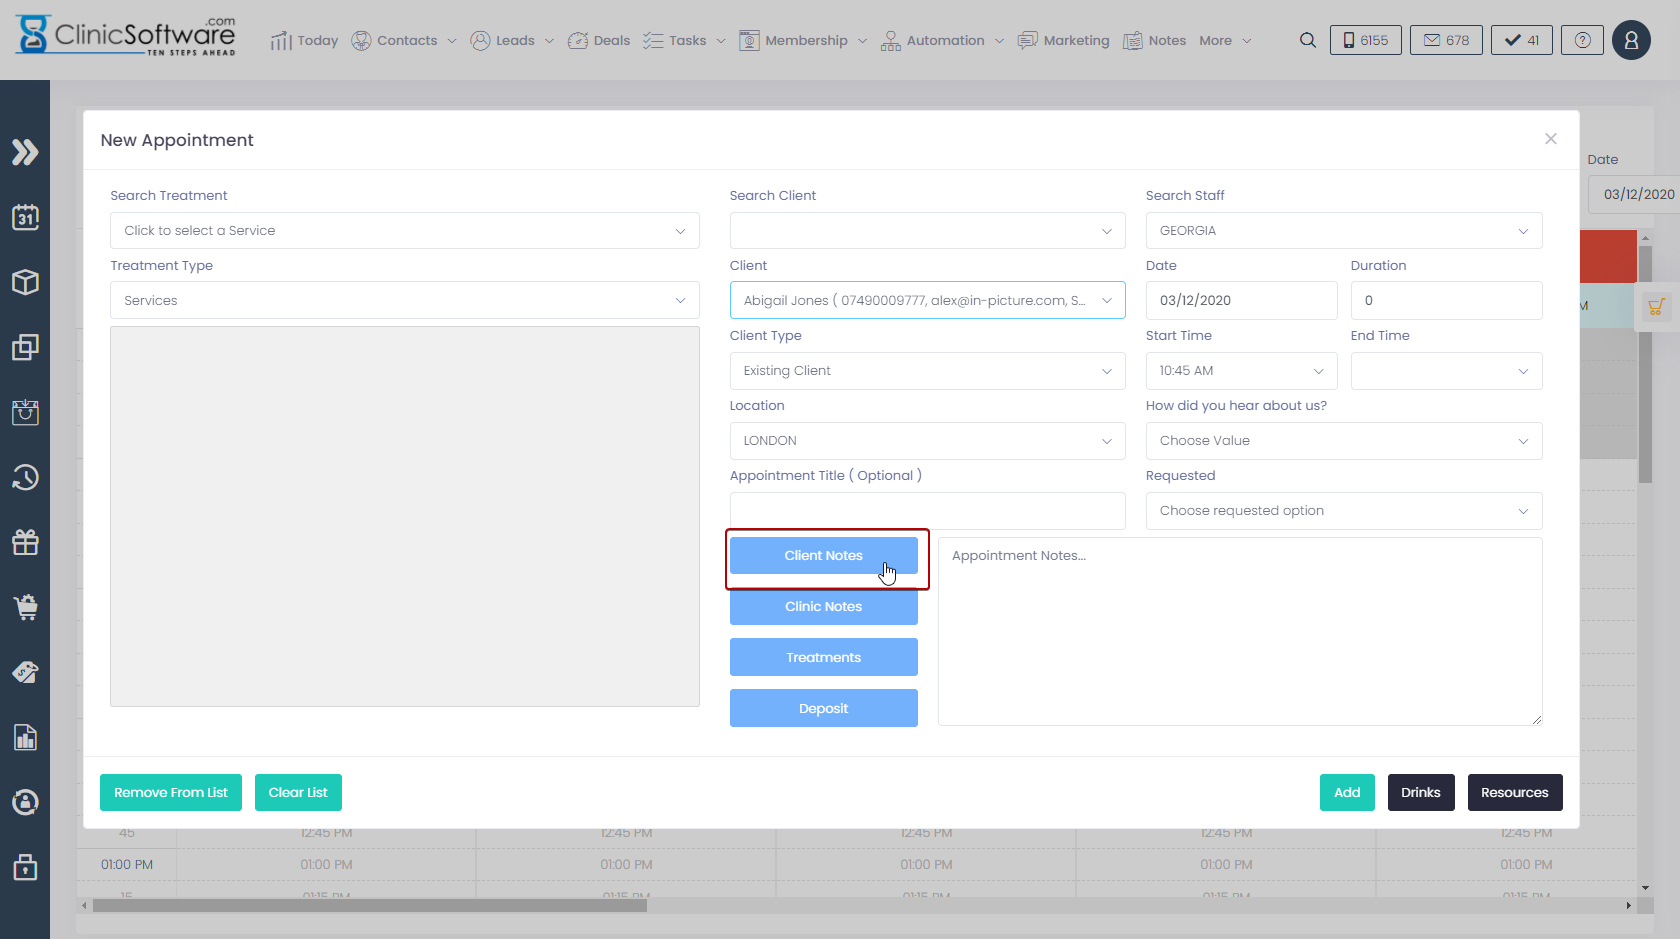
This window is divided into 2 columns:
- The left column from which you set the appointment parameters (salon, type, date, time, staff, client, title and notes.
- The right column from which you specify the patch test selection and options.
The “DRINKS” and “RESOURCES” options are covered in their corresponding User Guide sections below the “BOOKING A PATCH TEST TYPE APPOINTMENT” section.
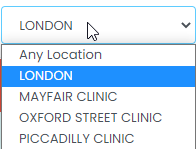
If you have multiple branches and wish to change the location at which the appointment is created, you can use the “Salon:” drop box (top left) to select a different location.
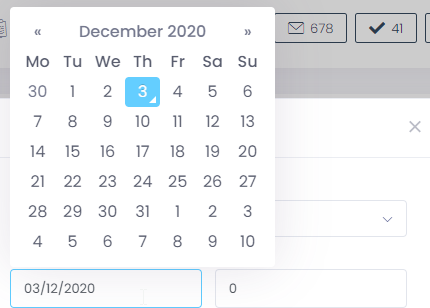
If you wish to change the date at which the appointment is created (defaults to selected Day Book day) you can change it from the “Date:” field (top left); click on the field and select the date from the calendar.
The next step is to select the client or add the client into the system.
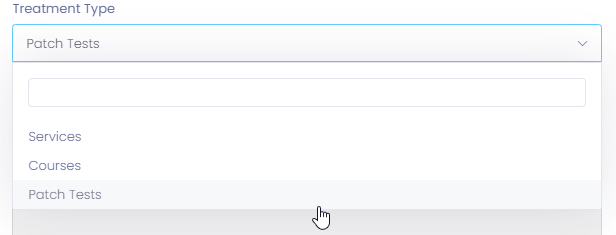
The client can be selected by searching the client details from the “Search Client” field.
Clients can be searched by name, phone (mobile or home/work), email address, postcode and the courses card barcode.
Upon typing in the “Search client” field the client will show up below the search box; click on it to add it to the “Select client” drop box, the client will be selected automatically after it has been added to the list.
The “Select client” drop box lists the most recent clients with activity, if the client you are looking for is not present in the list then you have to use the “Search client” field to add it to the list.
Example:
Search for the client and click on his/her name in the results below the search box.
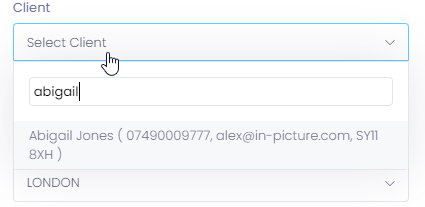
After the client has been added from the above example it will also be automatically selected in this drop box.
After a client has been selected the system will also show the “Client Notes” and “Clinic Notes” buttons which will both open the windows discussed in the client profile section of the User Guide.
If the client that you wish to add an appointment for is not present in the system (new client) then you can add the client directly from here:
To do this select “New Client” from the “Select client:” drop box and enter the client details.

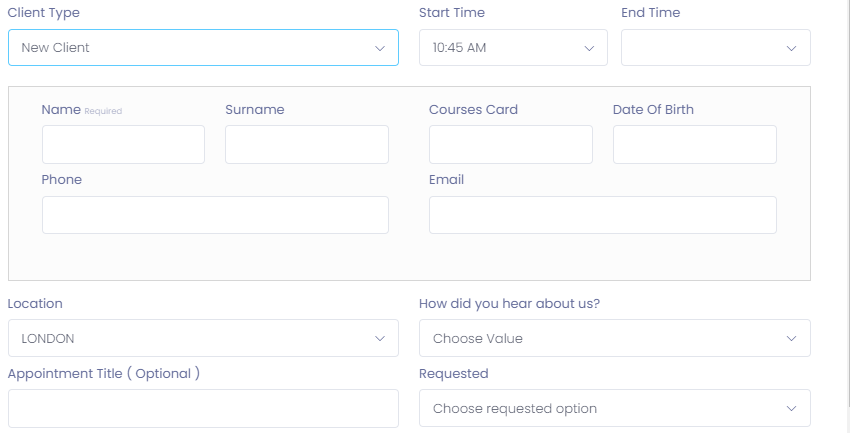
The “Courses Card” field represents the barcode on the courses card and it’s optional.
After the client has been selected, or the new client had its details entered in the new client section of the window the next step is to specify the Patch Test you wish to book:
If an existing client has been selected then the system will load its available patch tests.
Available patch tests are patch tests that have not been booked previously or added through the “PATCH TEST” page.
If a new client is added (“Client type” field set to “New Client” then all the patch tests will be listed in the “Select Patch Test” drop box).
When booking a patch test, the patch test will also be automatically added in the “PATCH TEST” page.
Please refer to the “PATCH TEST” section of the User Guide on details on utilizing the “PACTH TEST” page.
After a client has been selected the system will also show the “Client Notes” and “Clinic Notes” buttons which will both open the windows discussed in the client profile section of the User Guide.
Patch tests are added in the system as part of a course directory (E.g. for the “Laser” course directory we can have different laser patch tests for each laser type for example).
Please refer to the “Admin Area” section of the User Guide on how to configure patch tests.
When booking a patch test or adding it through the “PATCH TESTS” page we need to fill in the “Area Interested:” and “Course Recommendations:” fields.
When the patch test is selected, the system will load the staff list that is authorized to perform the patch test and is available for booking (have a free time slot available for the duration of the appointment).
The system will maintain the chosen staff if the new appointment window was opened by clicking on an empty slot in the Day Book but, if it cannot find a free time slot for the desired staff then it will automatically select the first available staff that can perform the selected patch test.
The appointment title field can be used to specify the title that you wish the appointment to have.
If left blank it will behave in 2 ways:
- If there is only one course in the list then it will take the name of that course
- If there are more than 1 course in the list the title will be <X> Courses where <X> is the number of courses in the list
You can also select the “Type” field (e.g. Walked in, Email, Phone) to help you identify your appointment sources in the reports.
The values present in the “Type” field are managed from within the admin area.
Please refer to the Admin Area / Appointment Type section of the User Guide for more details on how to add or remove entries for the “Type” field.
You can also specify notes that will appear in the appointment details window by filling in the “Appointment Notes” field.
To finalize the creation of the appointment press the green “ADD” button.