By activating an automation, you in fact power up the business and turn on the engine that moves triggers and actions from step by step until they reach the goal and the end of the sequence. An active automation runs 24/7 until you stop it or delete it.
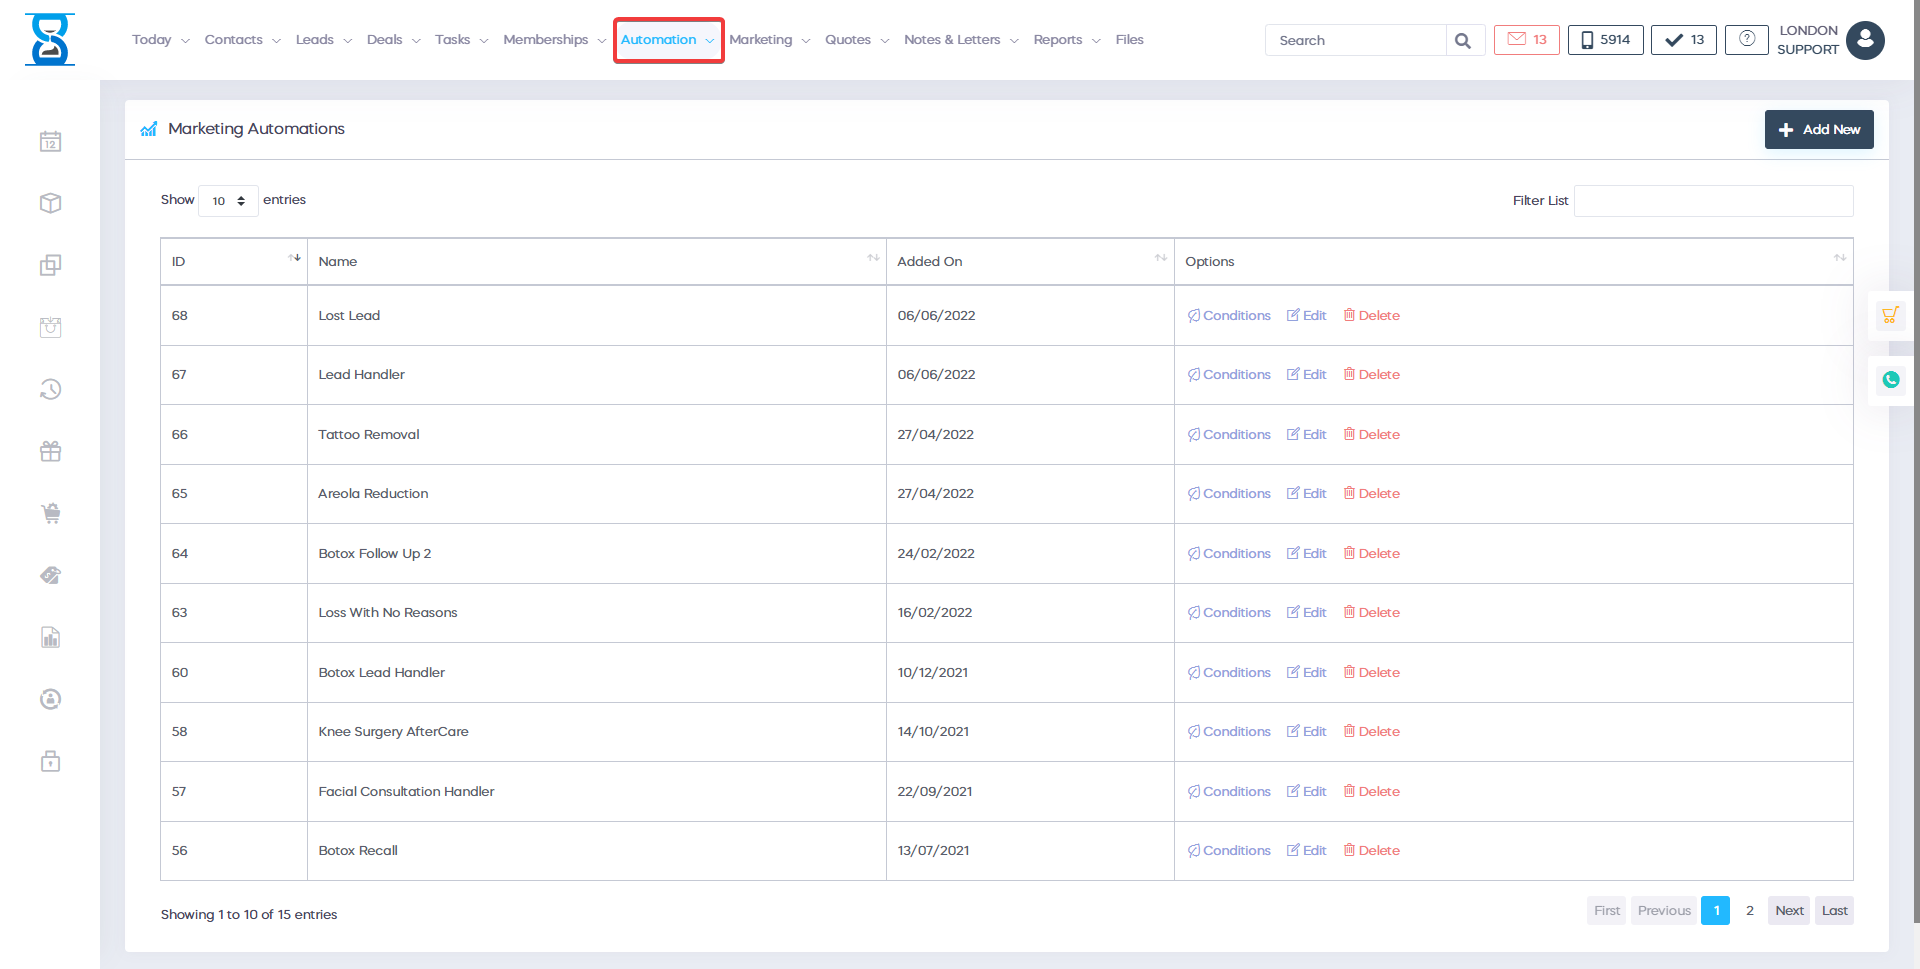
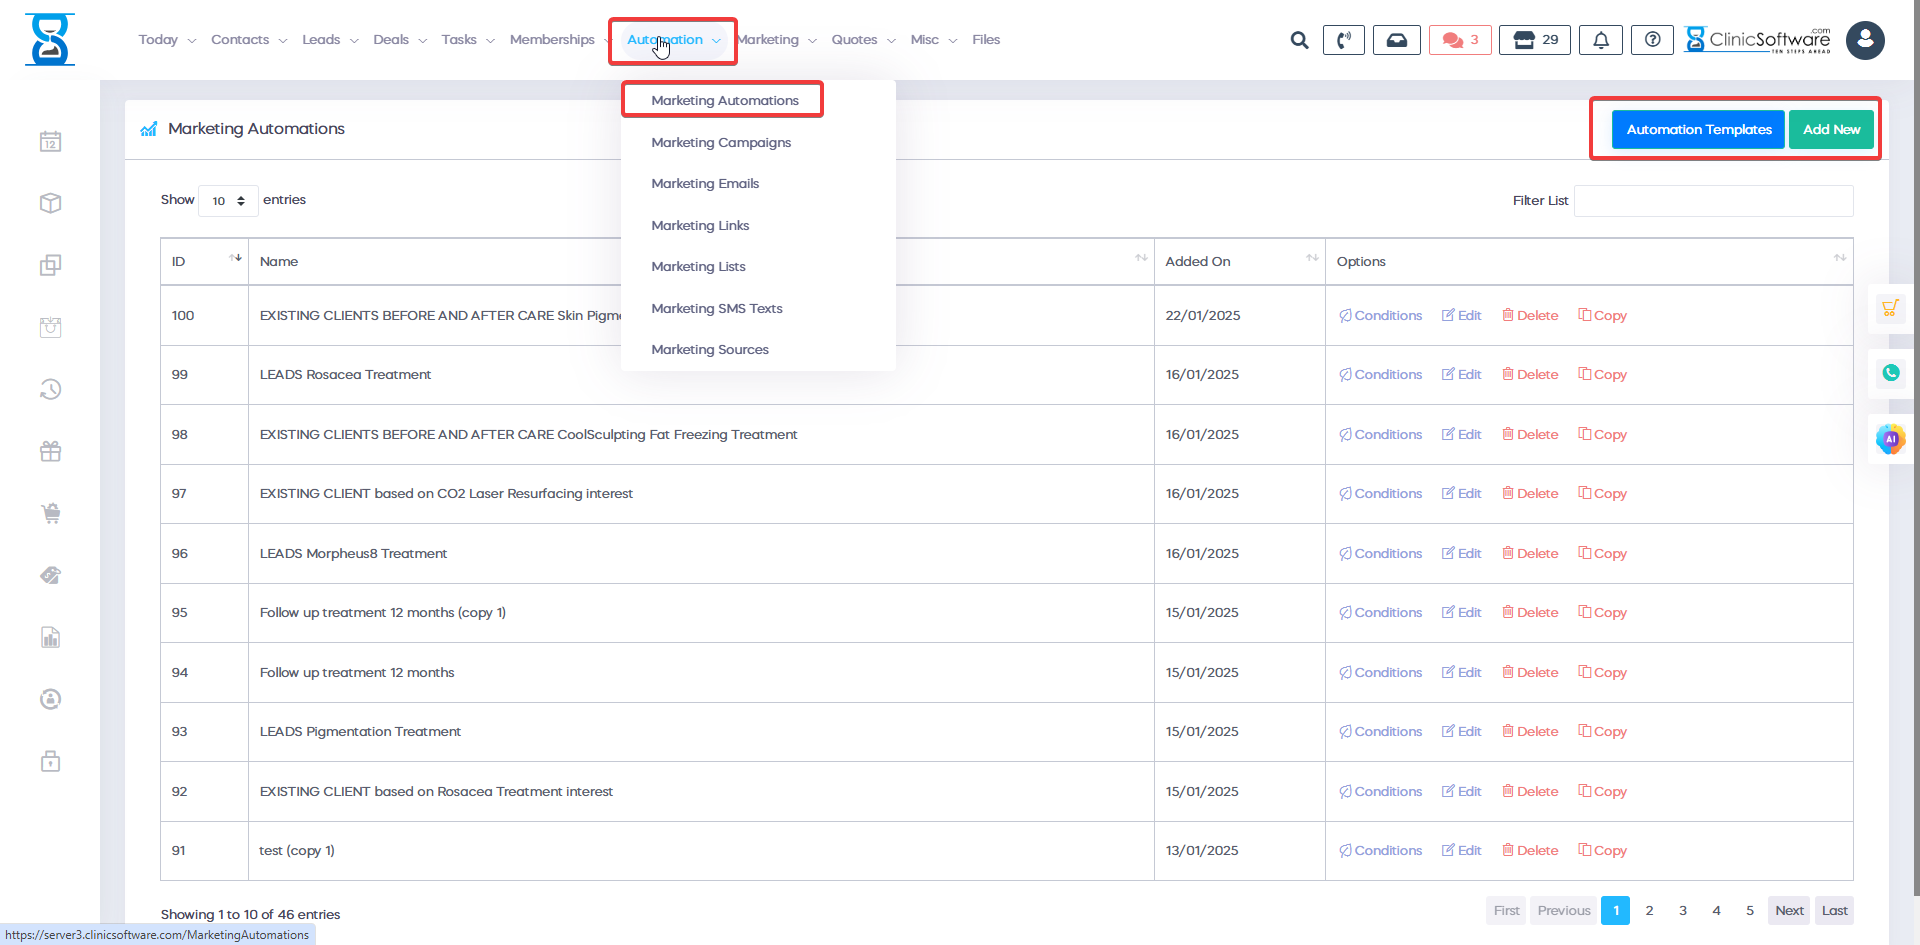
In order to create a Marketing Campaign you first need to create a marketing automation. To access the Marketing Automation you will need to click on the "Automation" button from the menu:
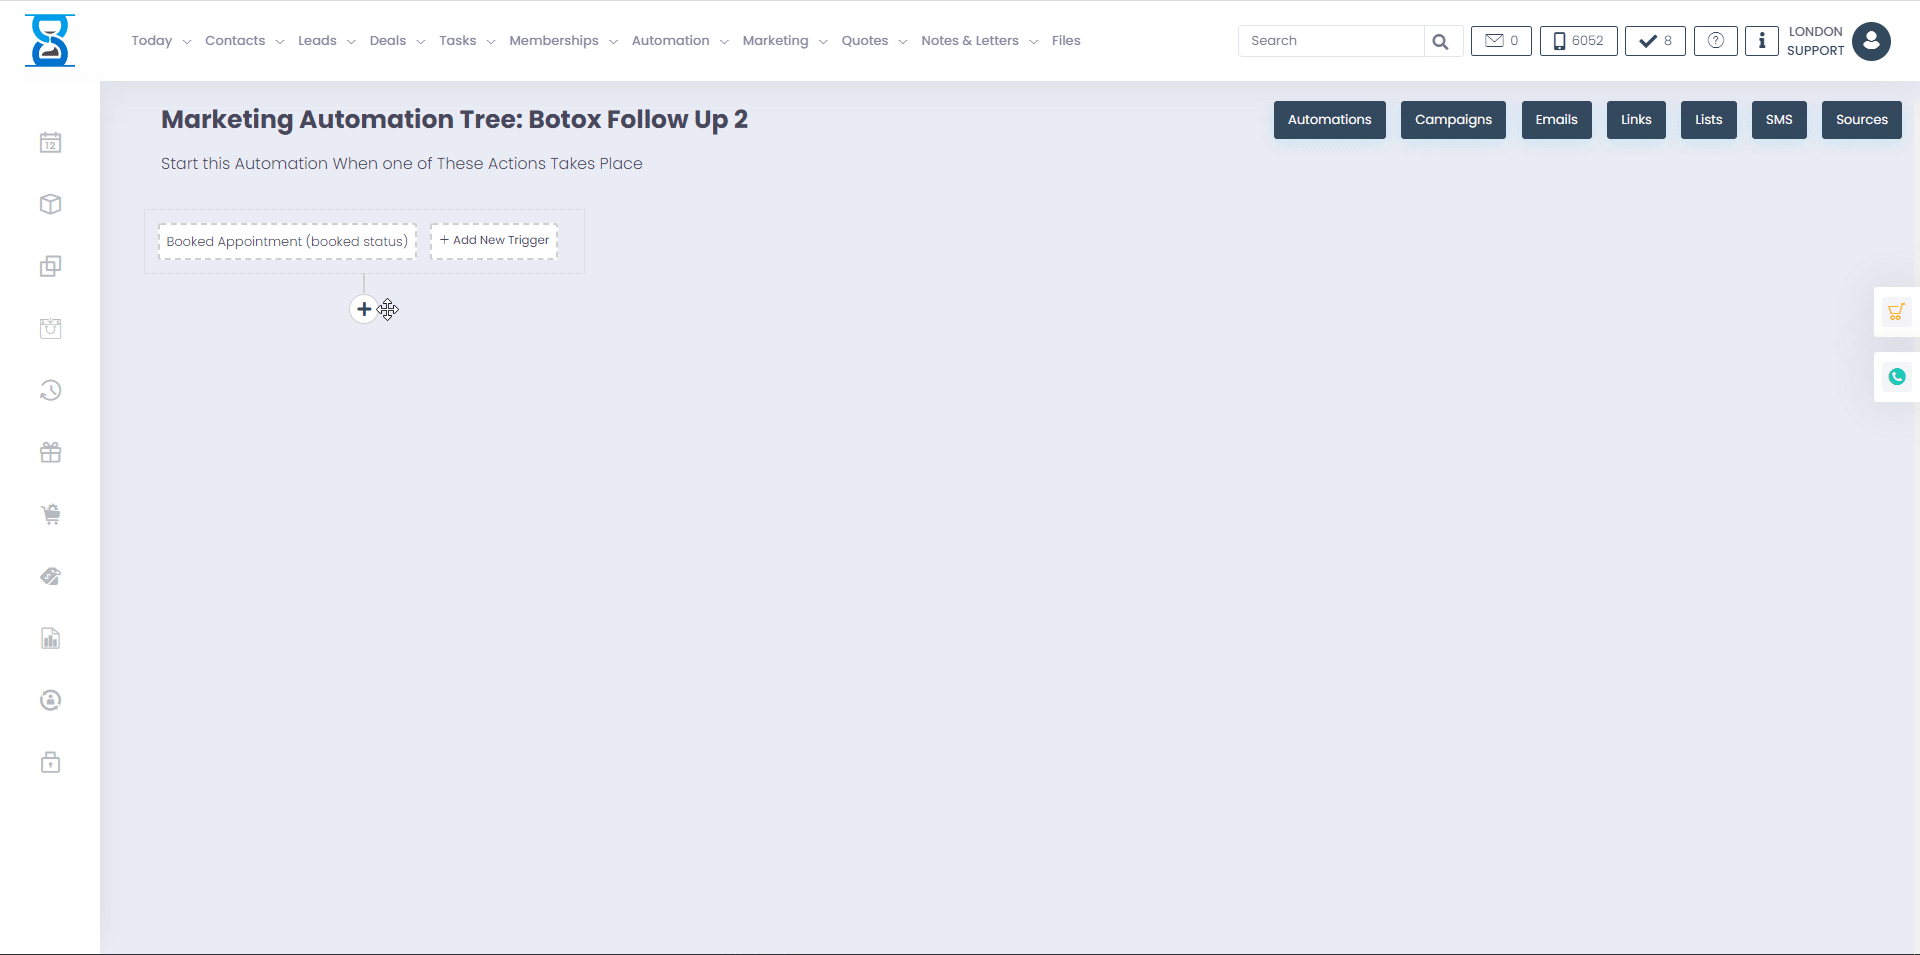
Each automation tree starts with a trigger. A trigger refers to when a certain action has been met. For example when a customer books an appointment. Clicking on "Booked Appointment (booked status)" will allow us to see the different triggers.
Once you have selected the services, scroll to the bottom of the page and press on the green button labelled "Add Trigger":
Moving on, the next step that you need to do is to press on the "+" button which will allow you to expand your automation tree. After you have pressed the button you should see this menu:

Below I will describe what each option does:
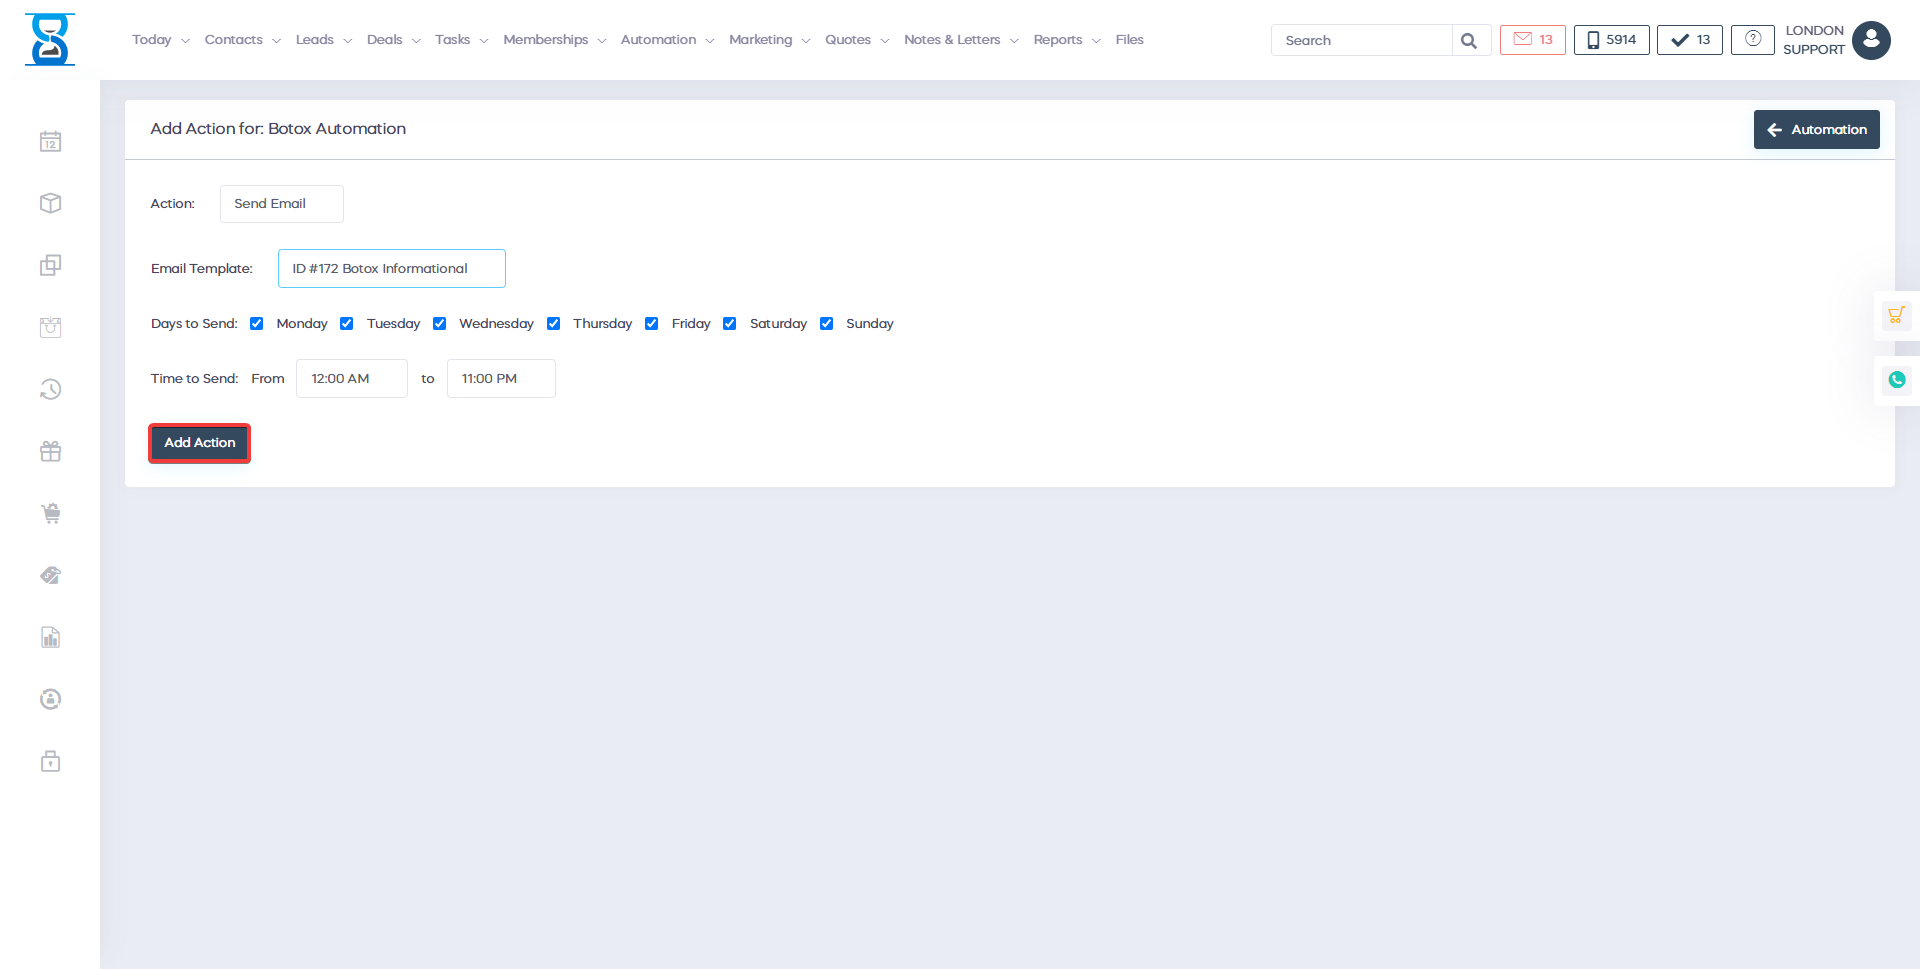
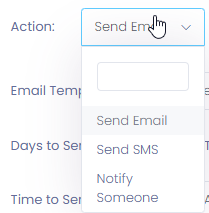
- Action: Selecting the "Action" button will allow you to: send an email, send an SMS or to notify someone.
If you select Send SMS you will be able to select an SMS template and from there you can select on which days to send the message as well as between what time to send the SMS. If you select "Send Email", follow the same process.
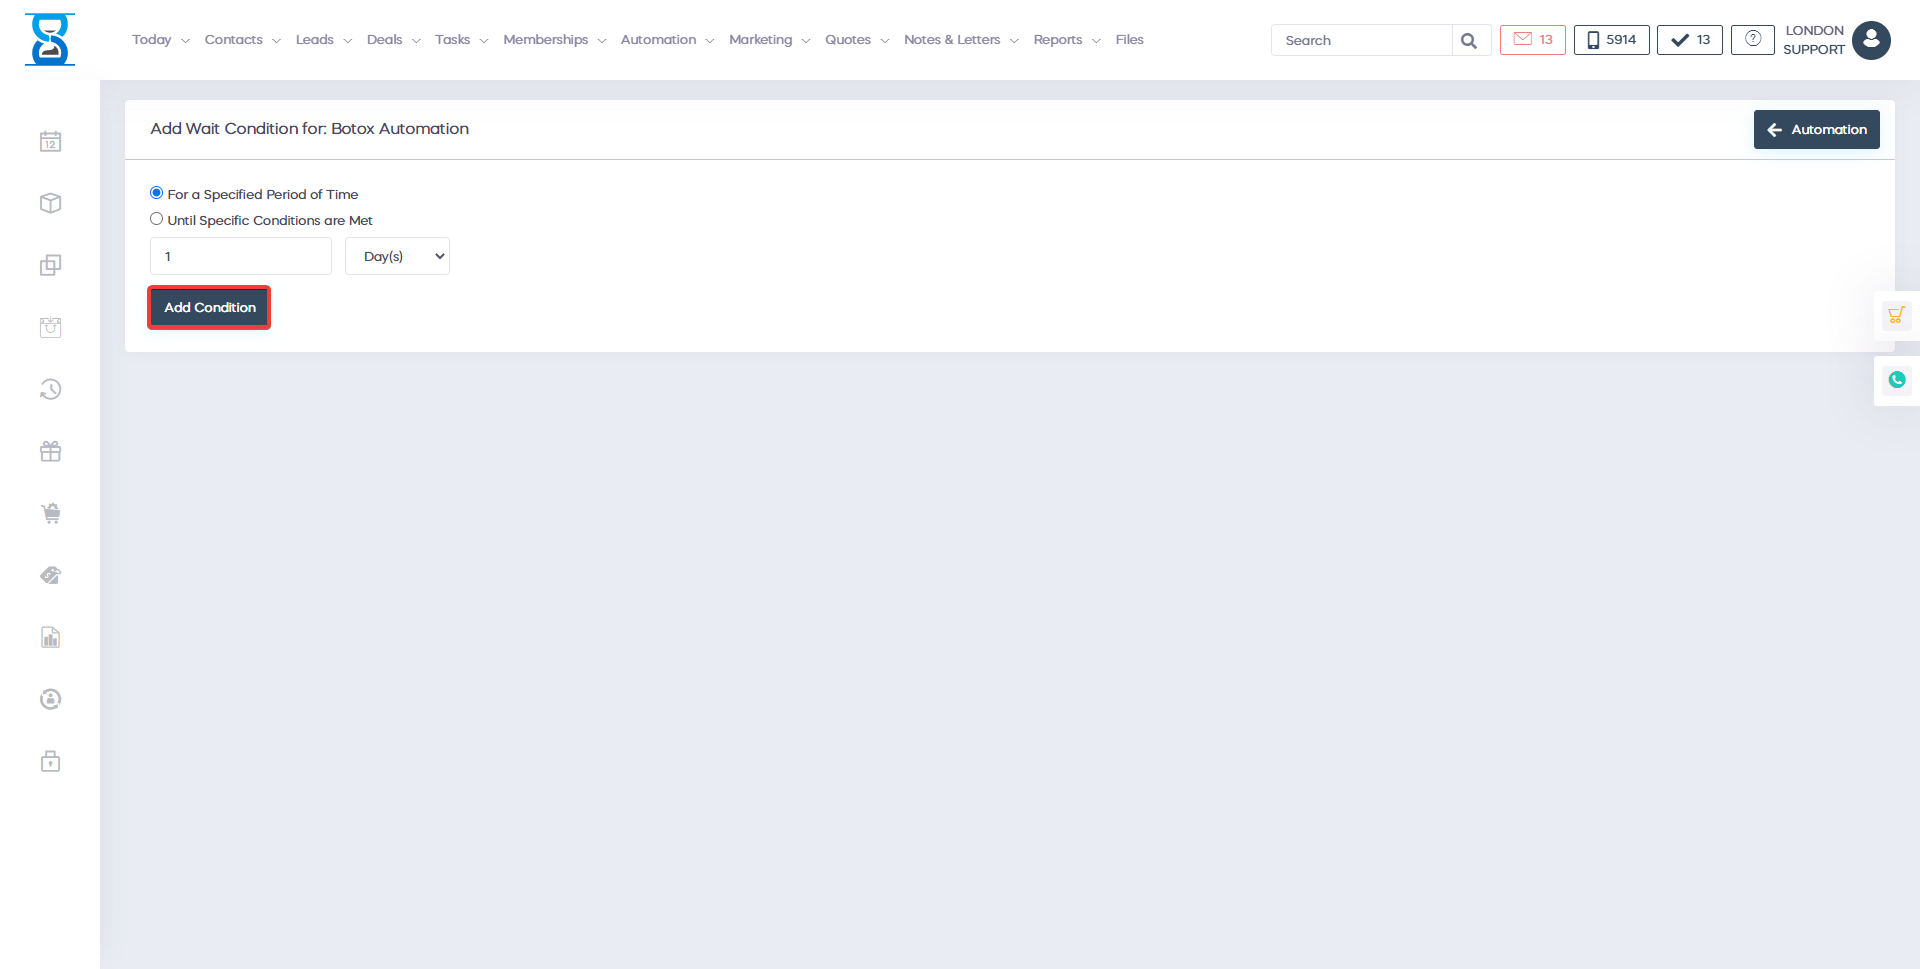
- Wait: Selecting the "Wait" option, simply tells the software to wait a set period of time before checking the next condition
- If/Else: Selecting the "If/Else" option will allow you to add certain conditions to your automation tree. For example, you can set your automation tree to check if customer's have booked an appointment or not. If they have book an appointment then you don't need to do anything. On the other hand, if they didn't book an appointment then you can send them and SMS reminder that they need to book an appointment. This is how you can set this up using the "IF/ELSE" option.
- Task: This option is used to automatically create a task for members of staff when certain condition have been met. Simply fill in the details and press add in order to create the task.
- Jump: Every action/step that we add to our marketing tree has its own Item ID.
Simply enter the Item ID and the software will move to a specific step that has already been created in your automation tree.
Once you have created the marketing automation tree, you can start it by adding a marketing campaign.
Even more, in the client's activity page, you can check how many times the client has opened an email.

With the great marketing automation technology we offer to handle much of the organizational grunt work, and tools to keep everything neat, a business can harness its inflow of bookings to start driving business results. Automated different activities it could save a lot of time to grow your business.
I want to make sure you're able to see how thousands of our customers have successfully grown their business and saved time.
So what's standing in the way of getting your first automation going. Whether it's setup questions or ideas for what to automate, we're here to help.
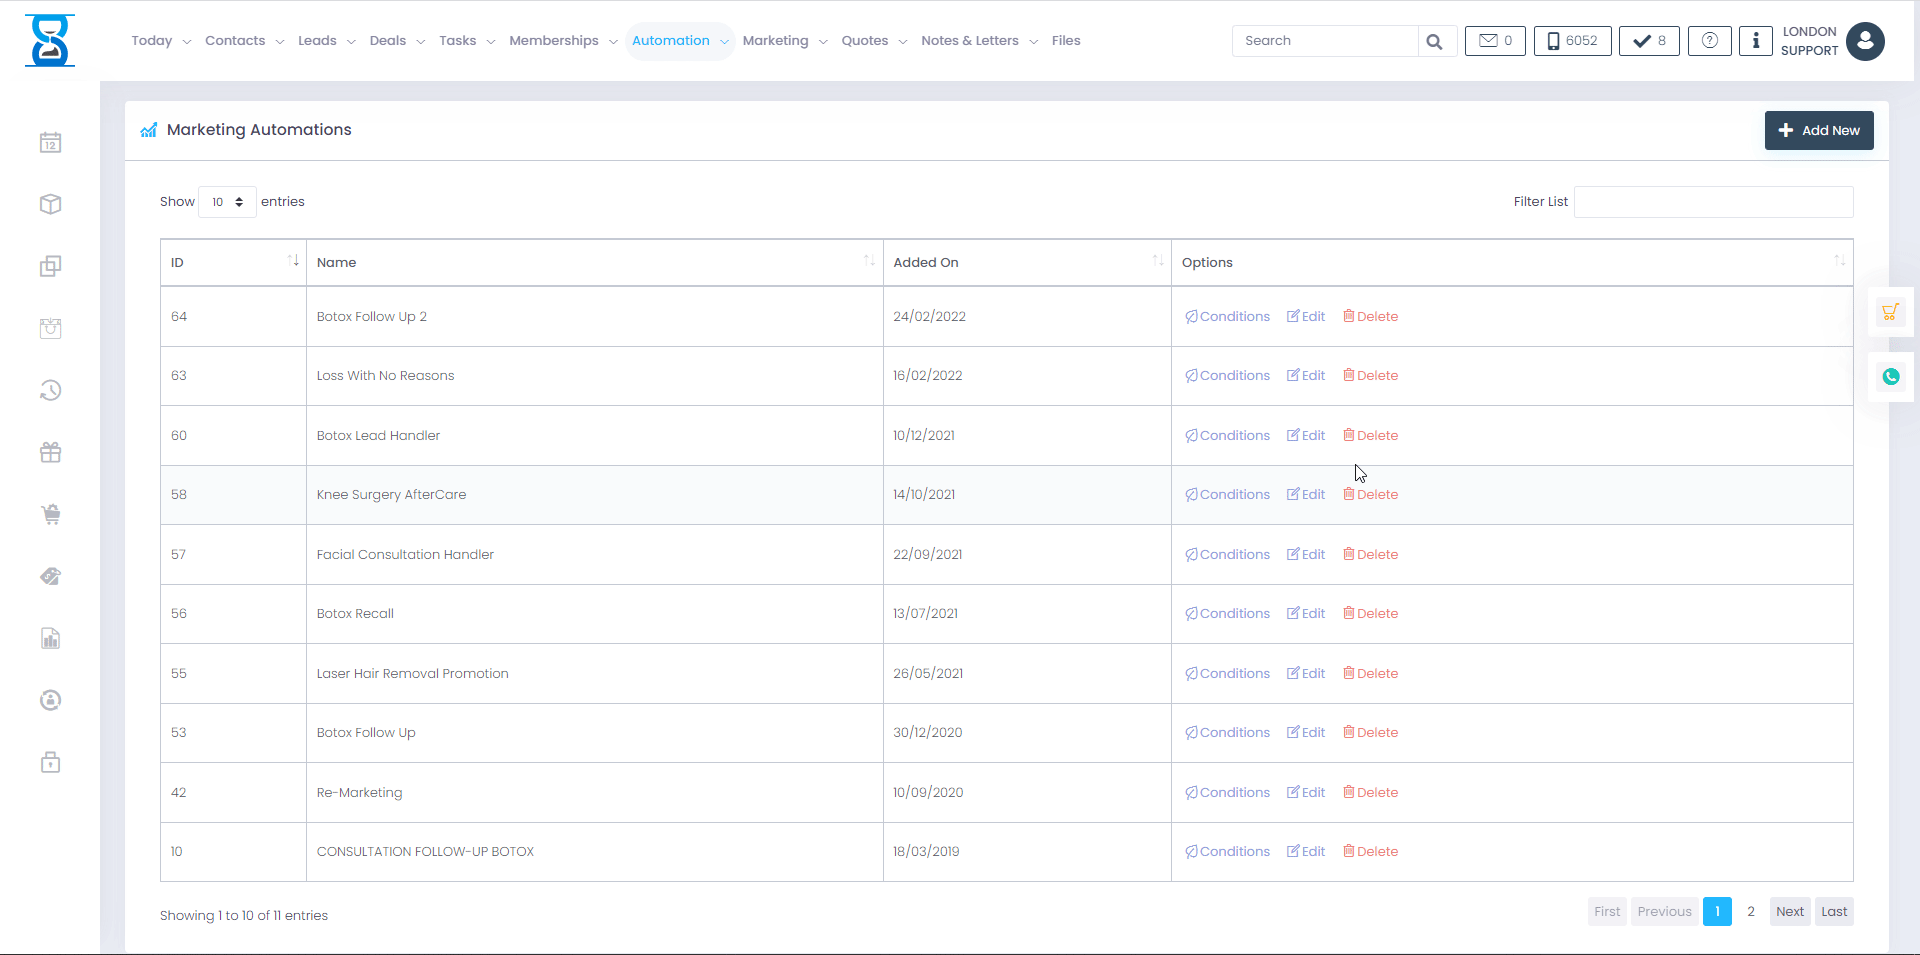
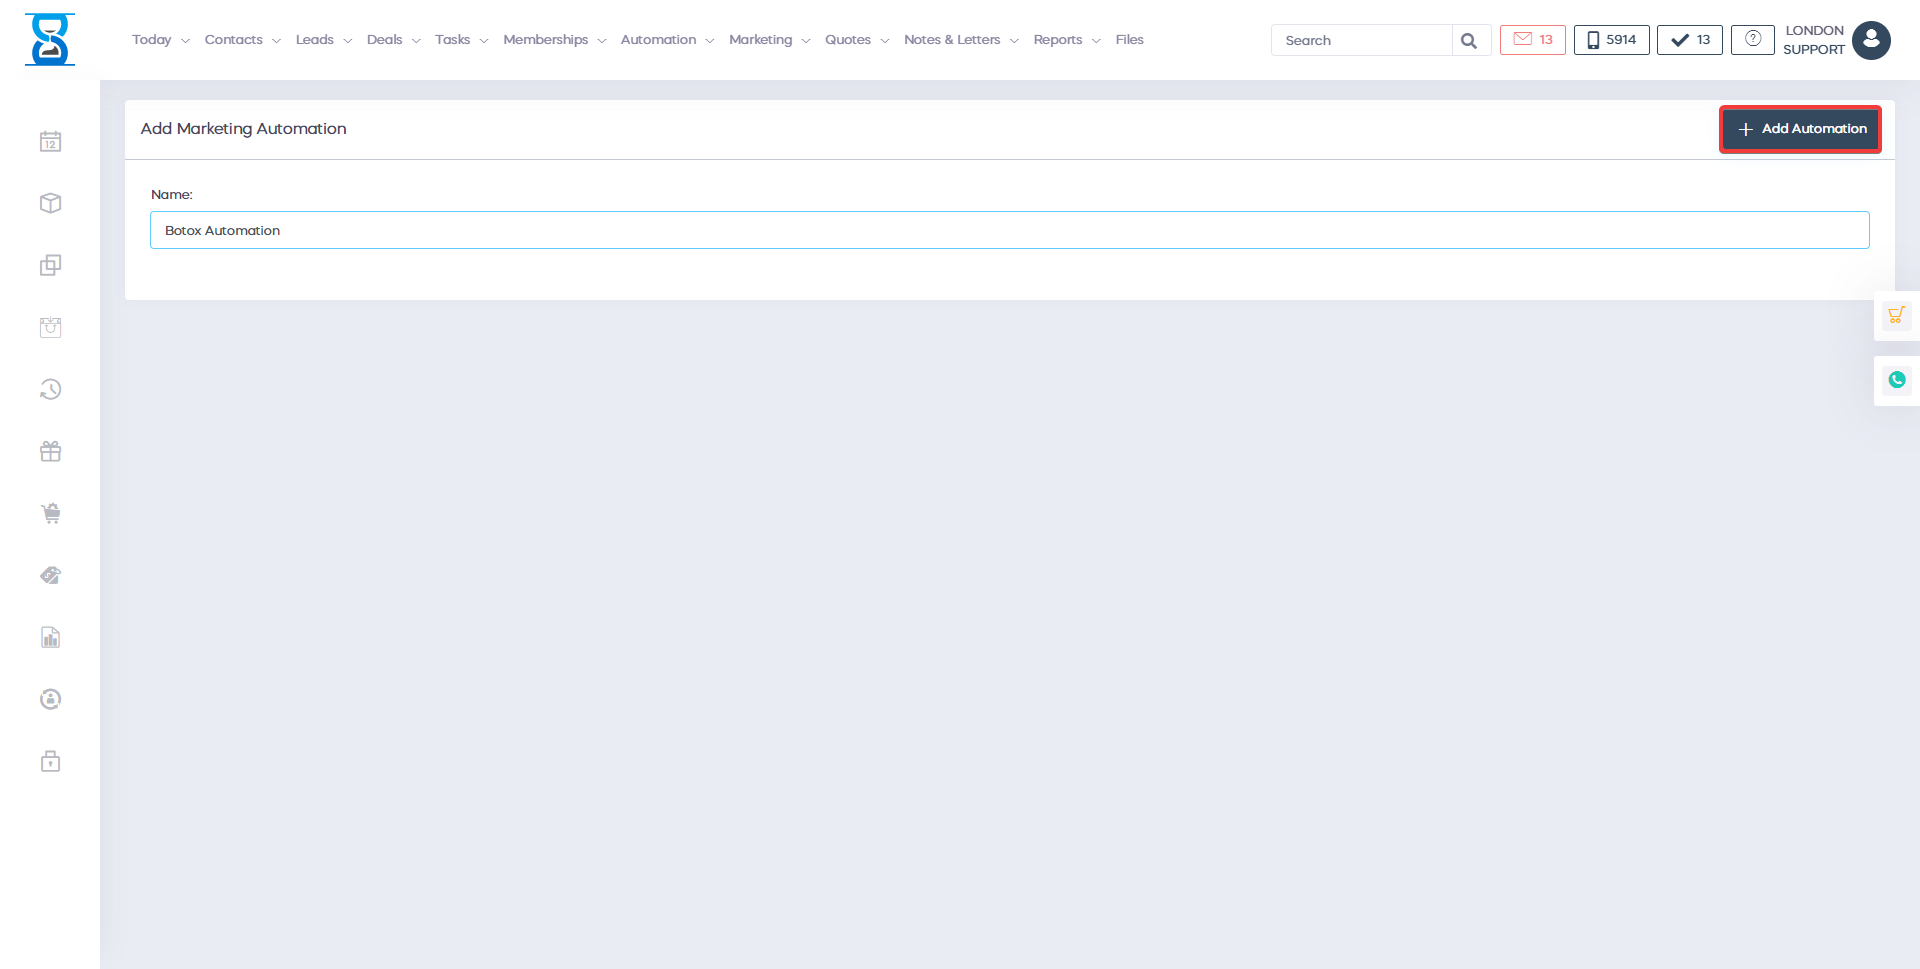
In order for you to create a marketing automation, click on the "Automation" button:
Once you have pressed the "Automation" button you will be redirected to this menu:
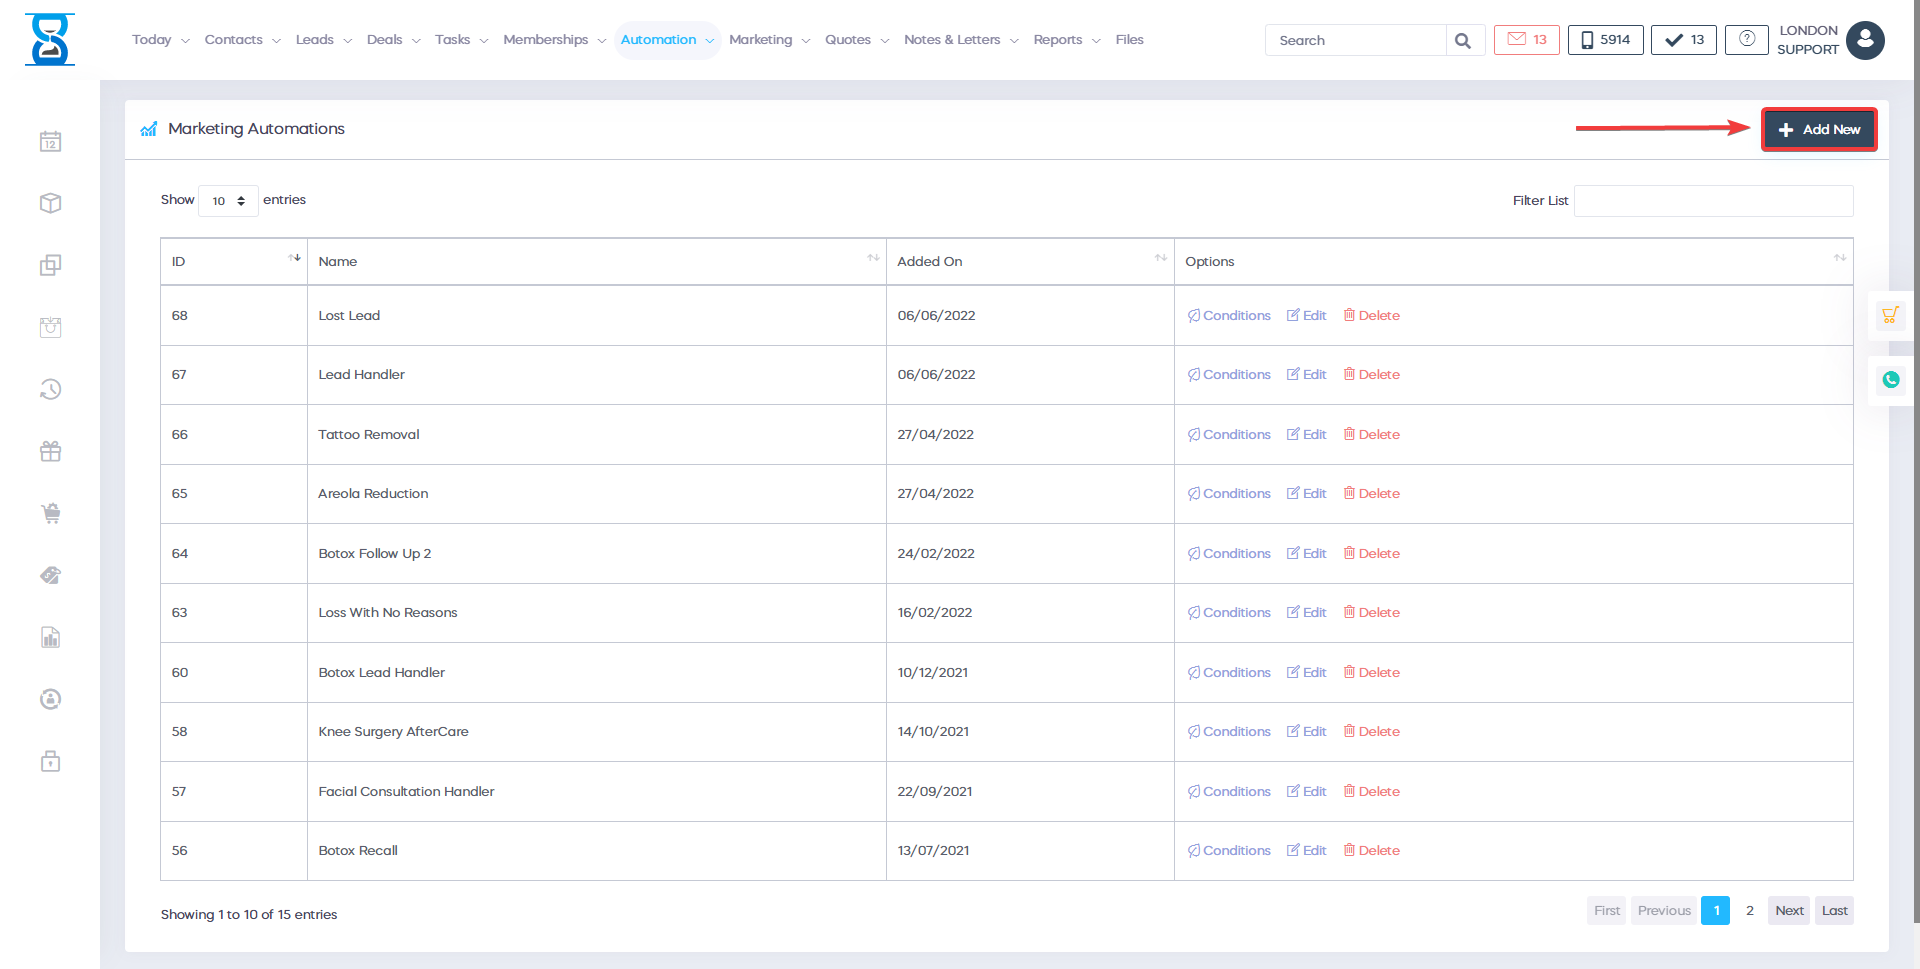
From there, in order to create a new marketing automation, please click on the green button labelled "New":
Once you have clicked on the "New" button you will be taken to a page where you need to enter the name of your marketing automation.
Enter the name in the "Name" field and click on the button labelled "Add Automation":
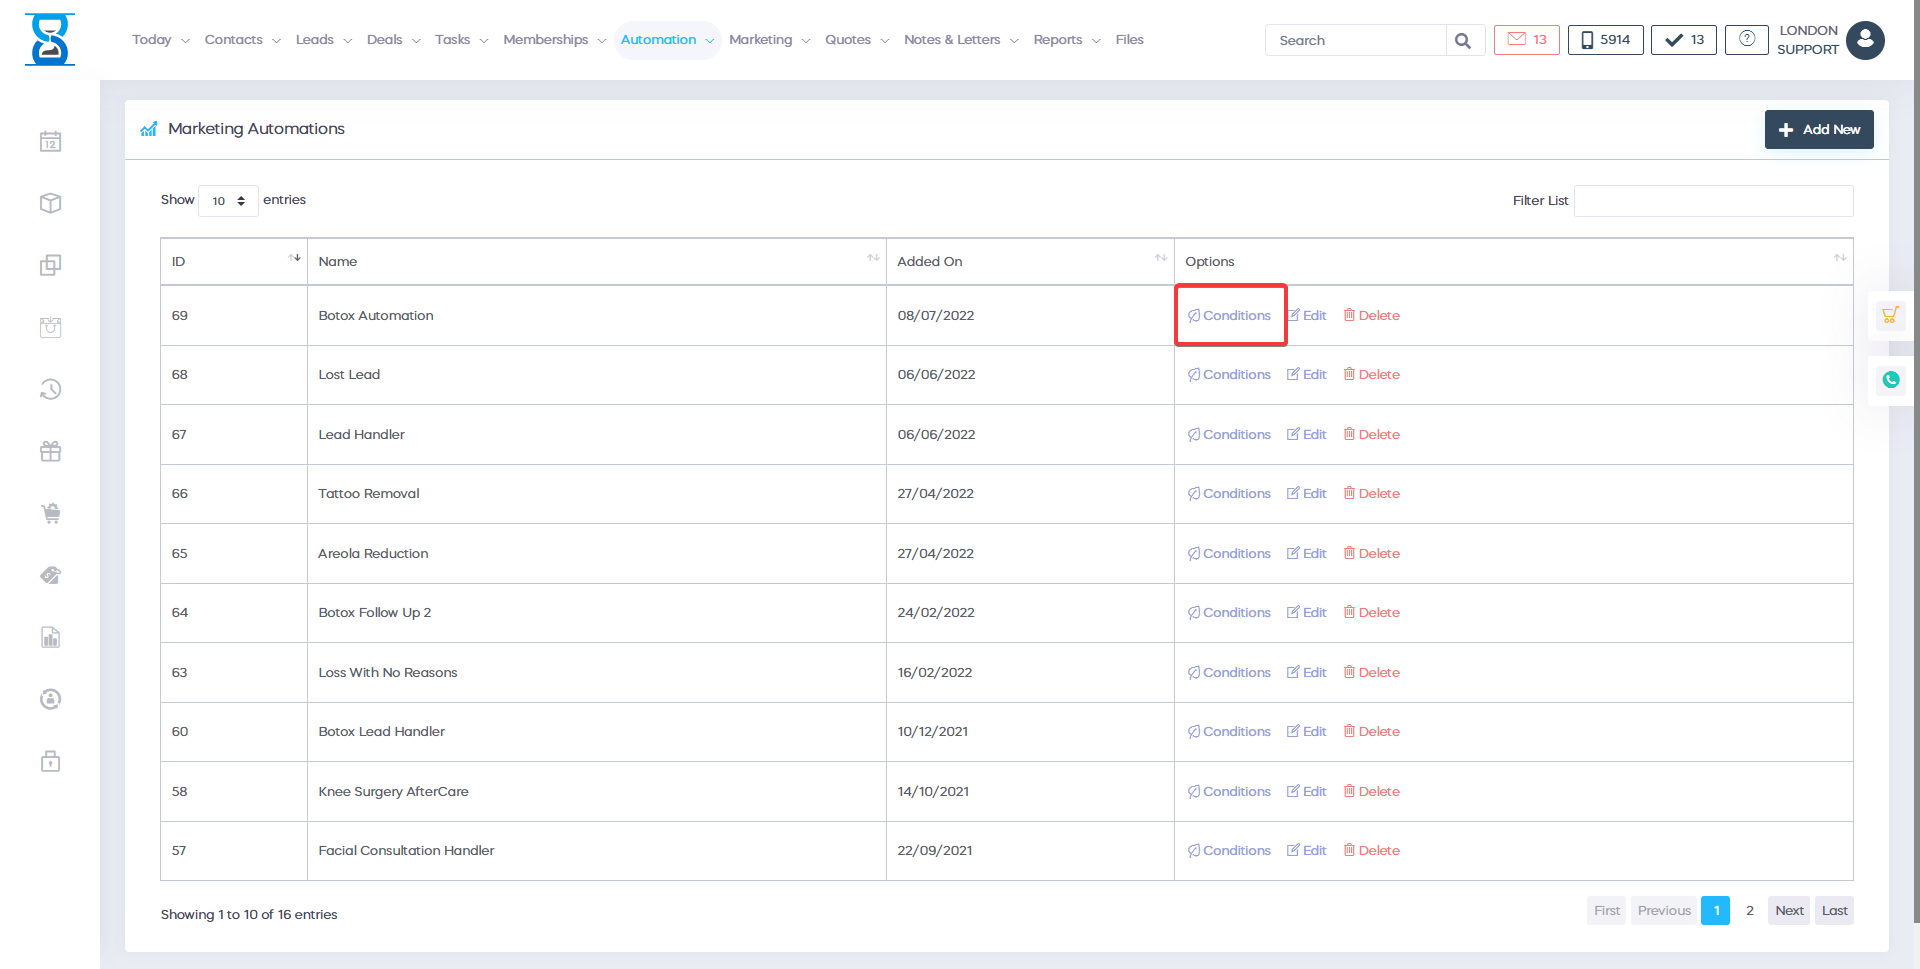
The next step that you need to do is to go back into "Automation" and now you should see at the top of the list the marketing automation which you have just created. Select the grey button labelled "Conditions":
Once you have pressed on "Conditions" you will be taken to this page:
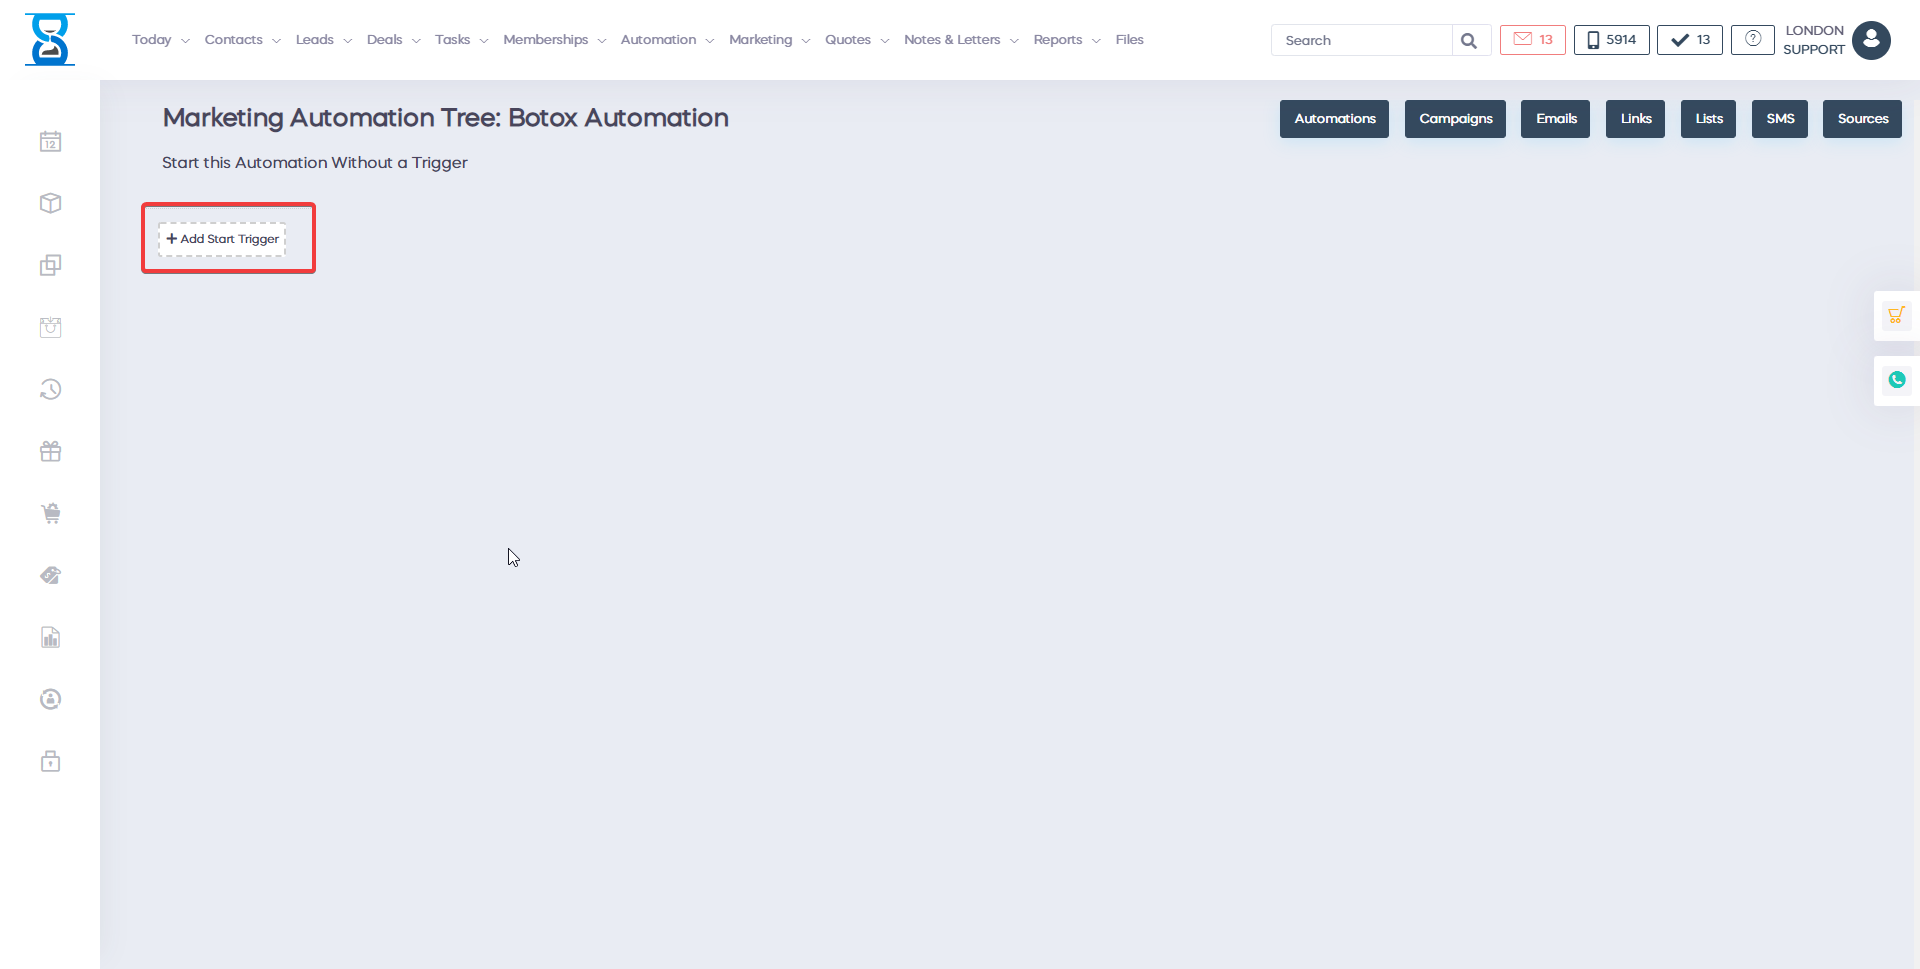
From here you are able to create your marketing automation tree. The first thing that you need to do is to add a start trigger. Press on the box which says "Add start trigger" and you will be taken here:
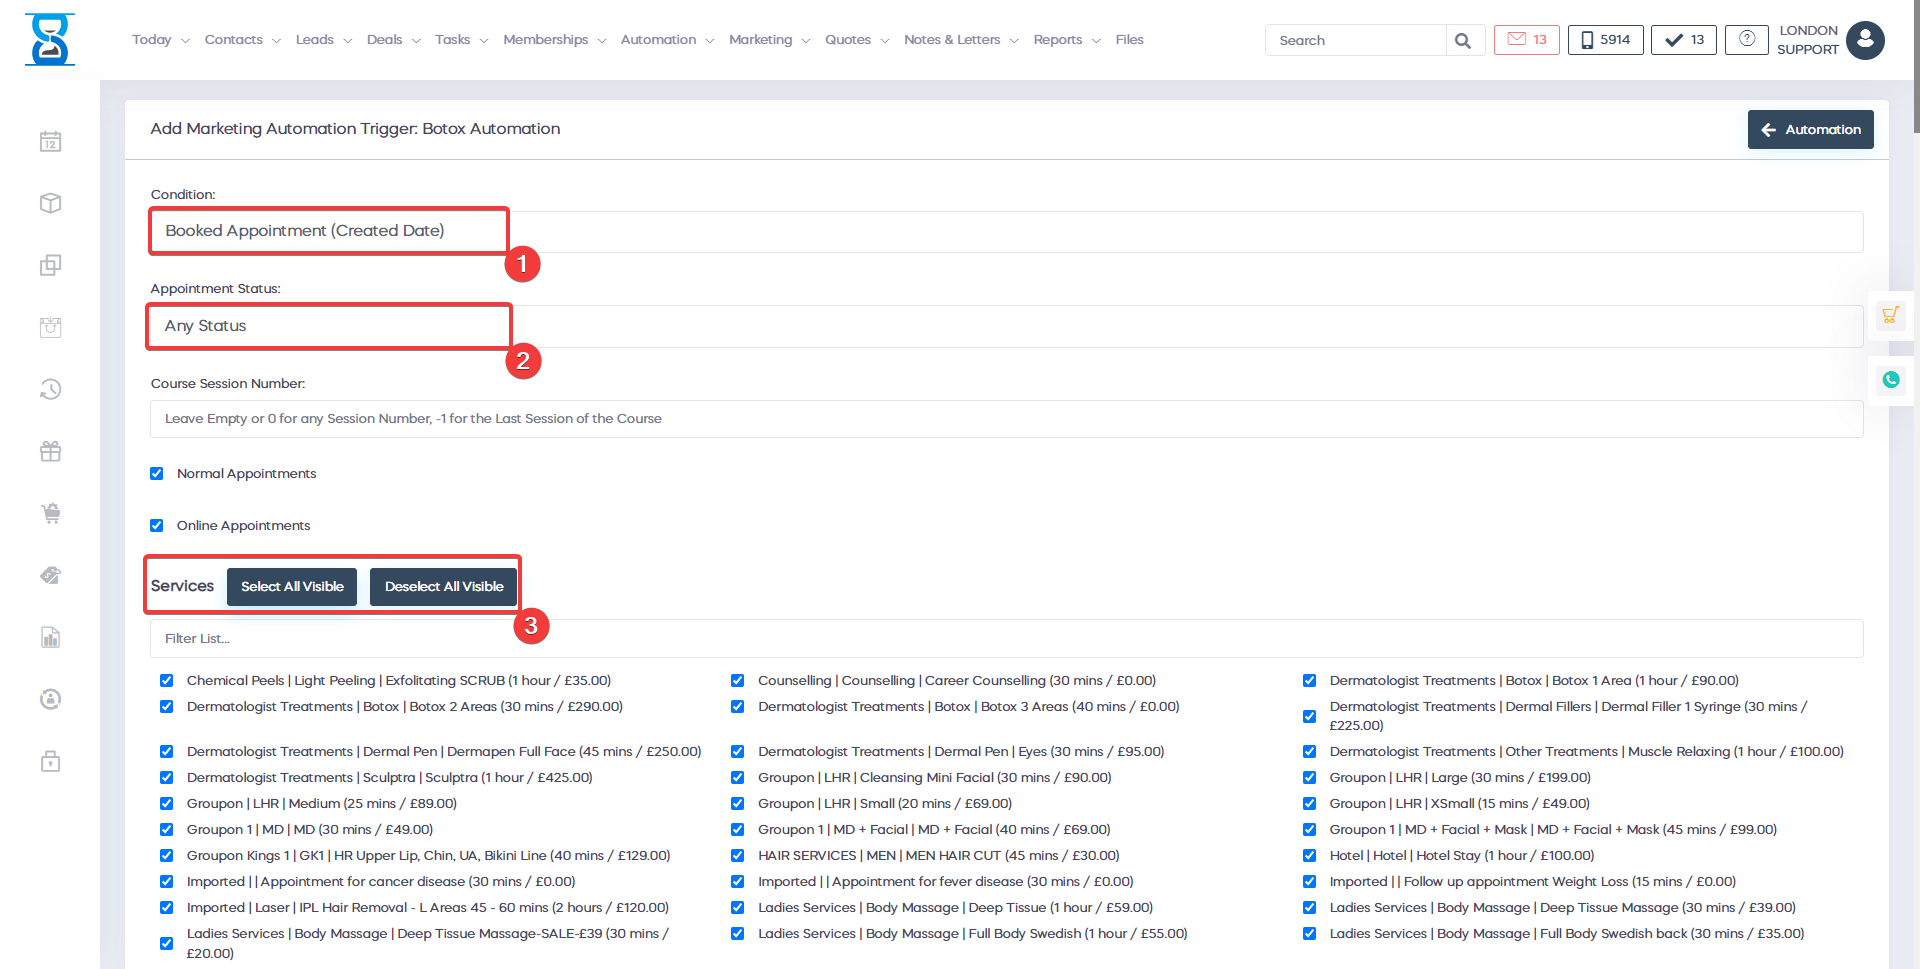
From here you will be able to select the start condition that will trigger your automation. Click on the condition field in order to access the drop-down menu:

In this example, we will use the first option ("Booked appointment (created date)"). You can also target appointments with a certain status by clicking on the "Appointment Status" field and selecting an appointment status. By default, it's set to any status.
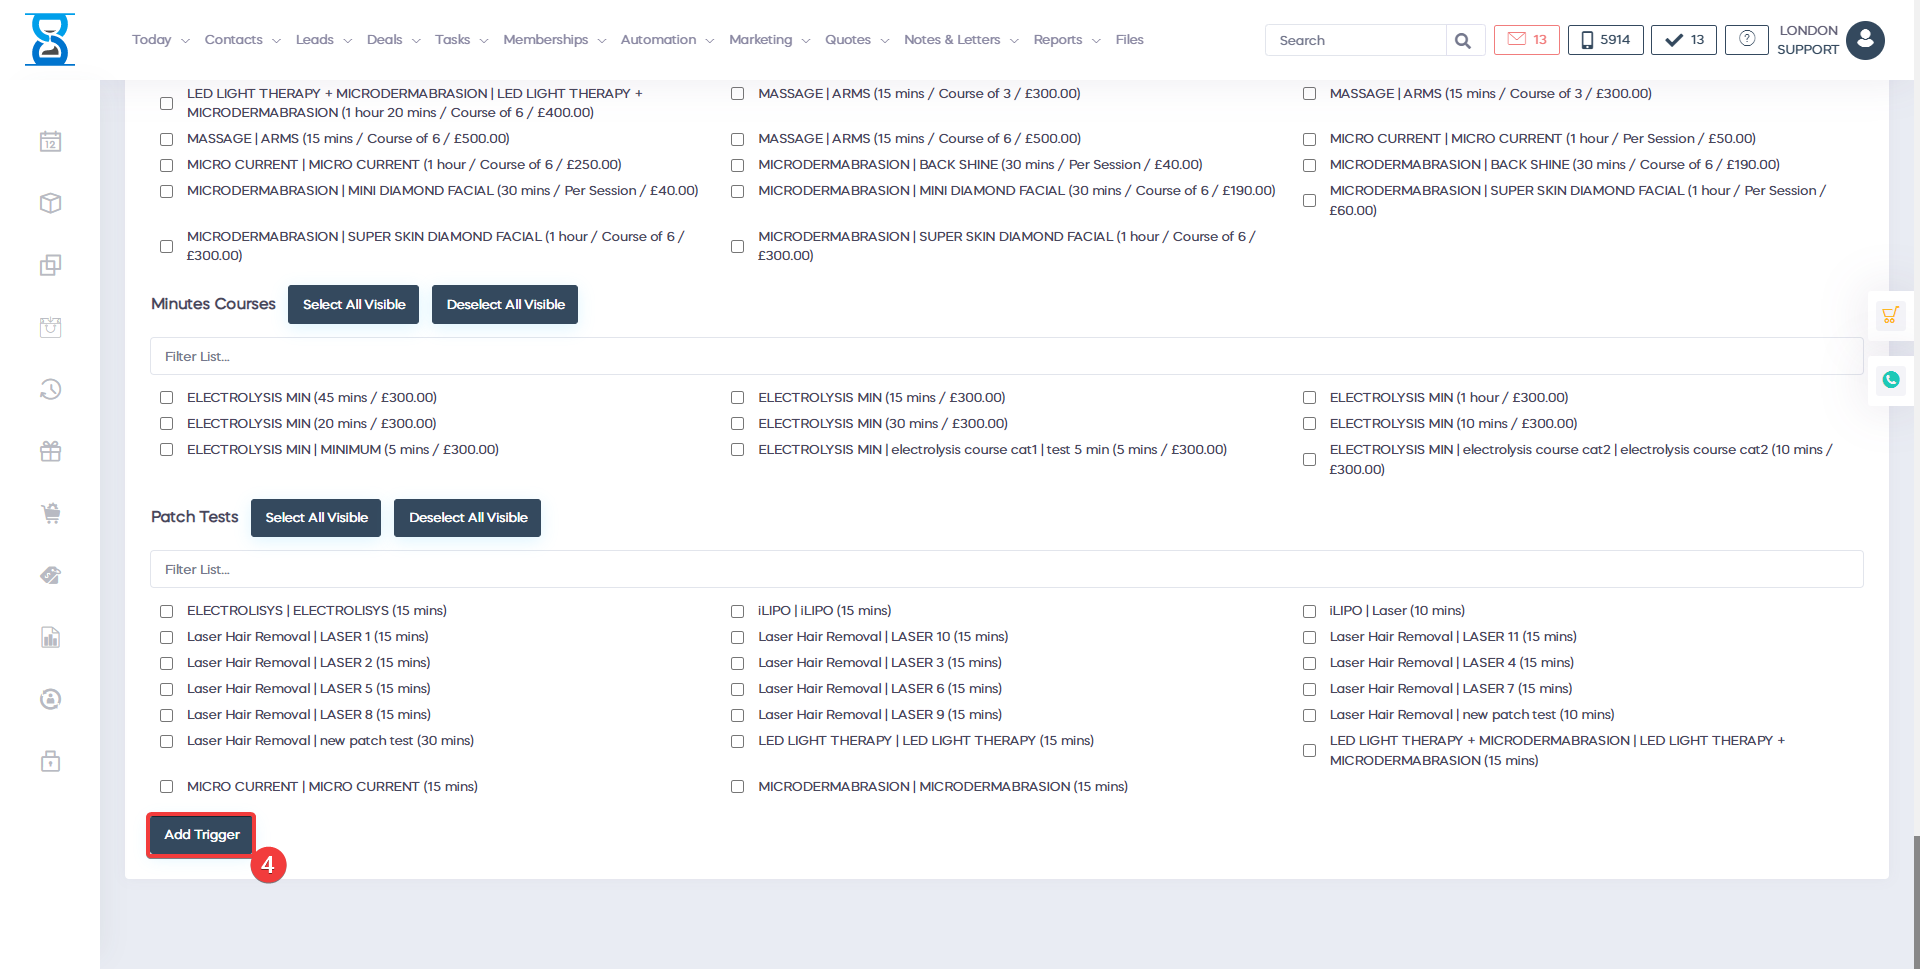
Once you have selected the condition, the next step that you need to do is to select the services that you want to apply to condition too. You can select the services from here:
Note that you also have the option to select all of the visible services by clicking on "Select all visible".

Once you have selected the services, scroll to the bottom of the page and press on the green button labelled "Add Trigger":
Once you press the "Add Trigger" button the starting trigger will be set (you can add multiple triggers at one by clicking again on "Add new trigger") and your page should look similar to this:

The next step that you need to do is to press on the + button which will allow you to expand your automation tree:
After you have pressed the button you should see this menu:
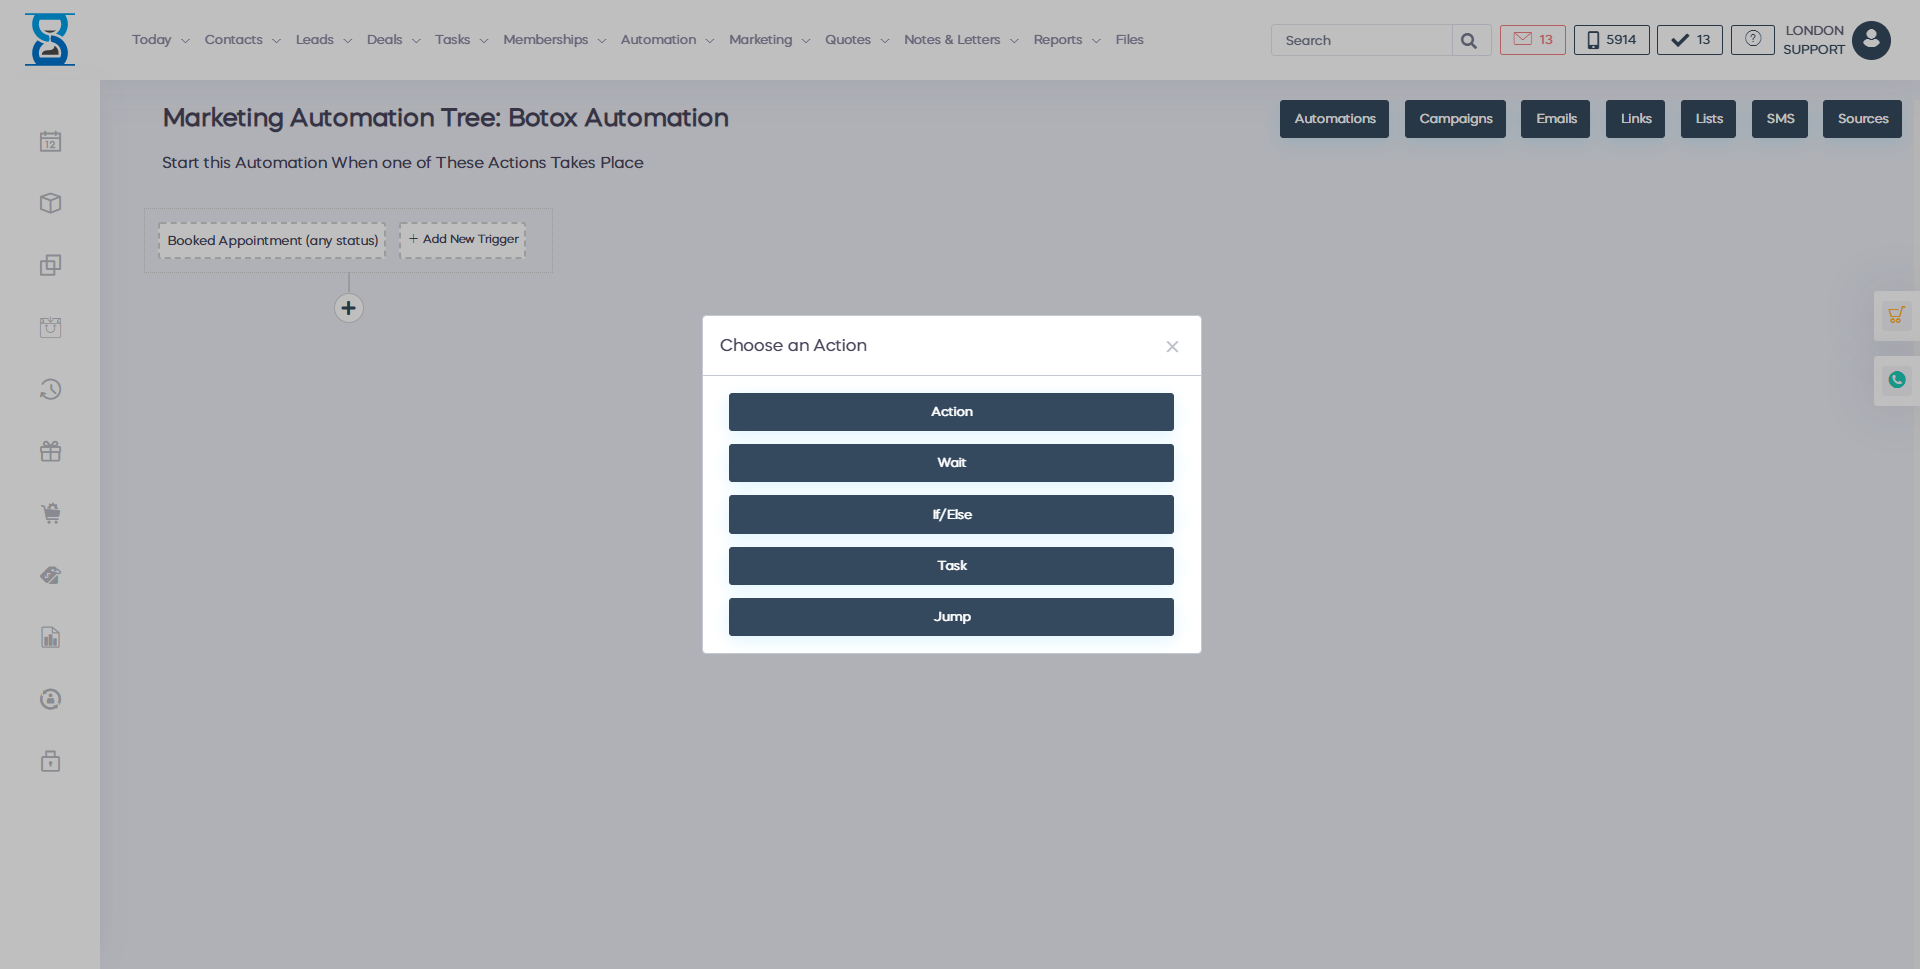
Below I will describe what each option does:
Action
Selecting the Action button will allow you to: send an email, send an SMS or to notify someone.
If you select Send SMS you will be able to select an SMS template and from there you can select on which days to send the message as well as between what time to send the SMS. If you select "Send Email", follow the same process.
Wait
Selecting the "Wait" option, simply tells the software to wait a set period of time before checking the next condition.
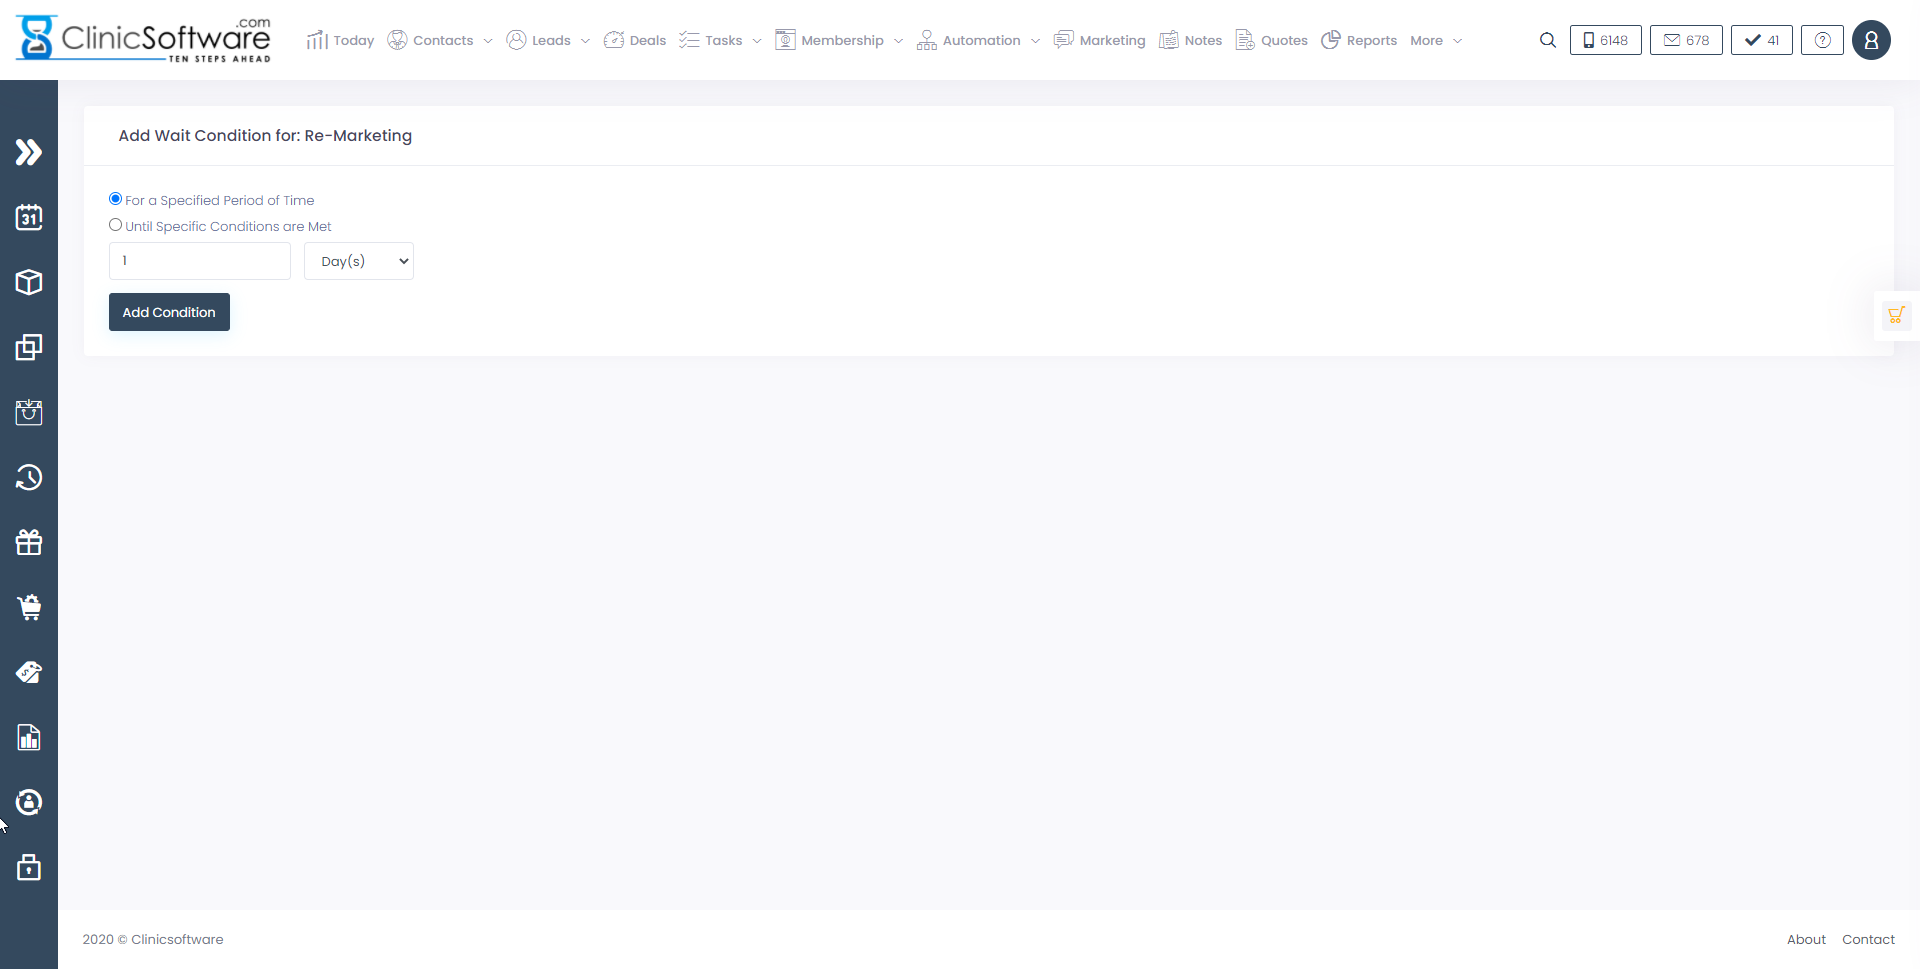
As you can see, you will be able to set the amount of time that the software should wait until checking the next condition.
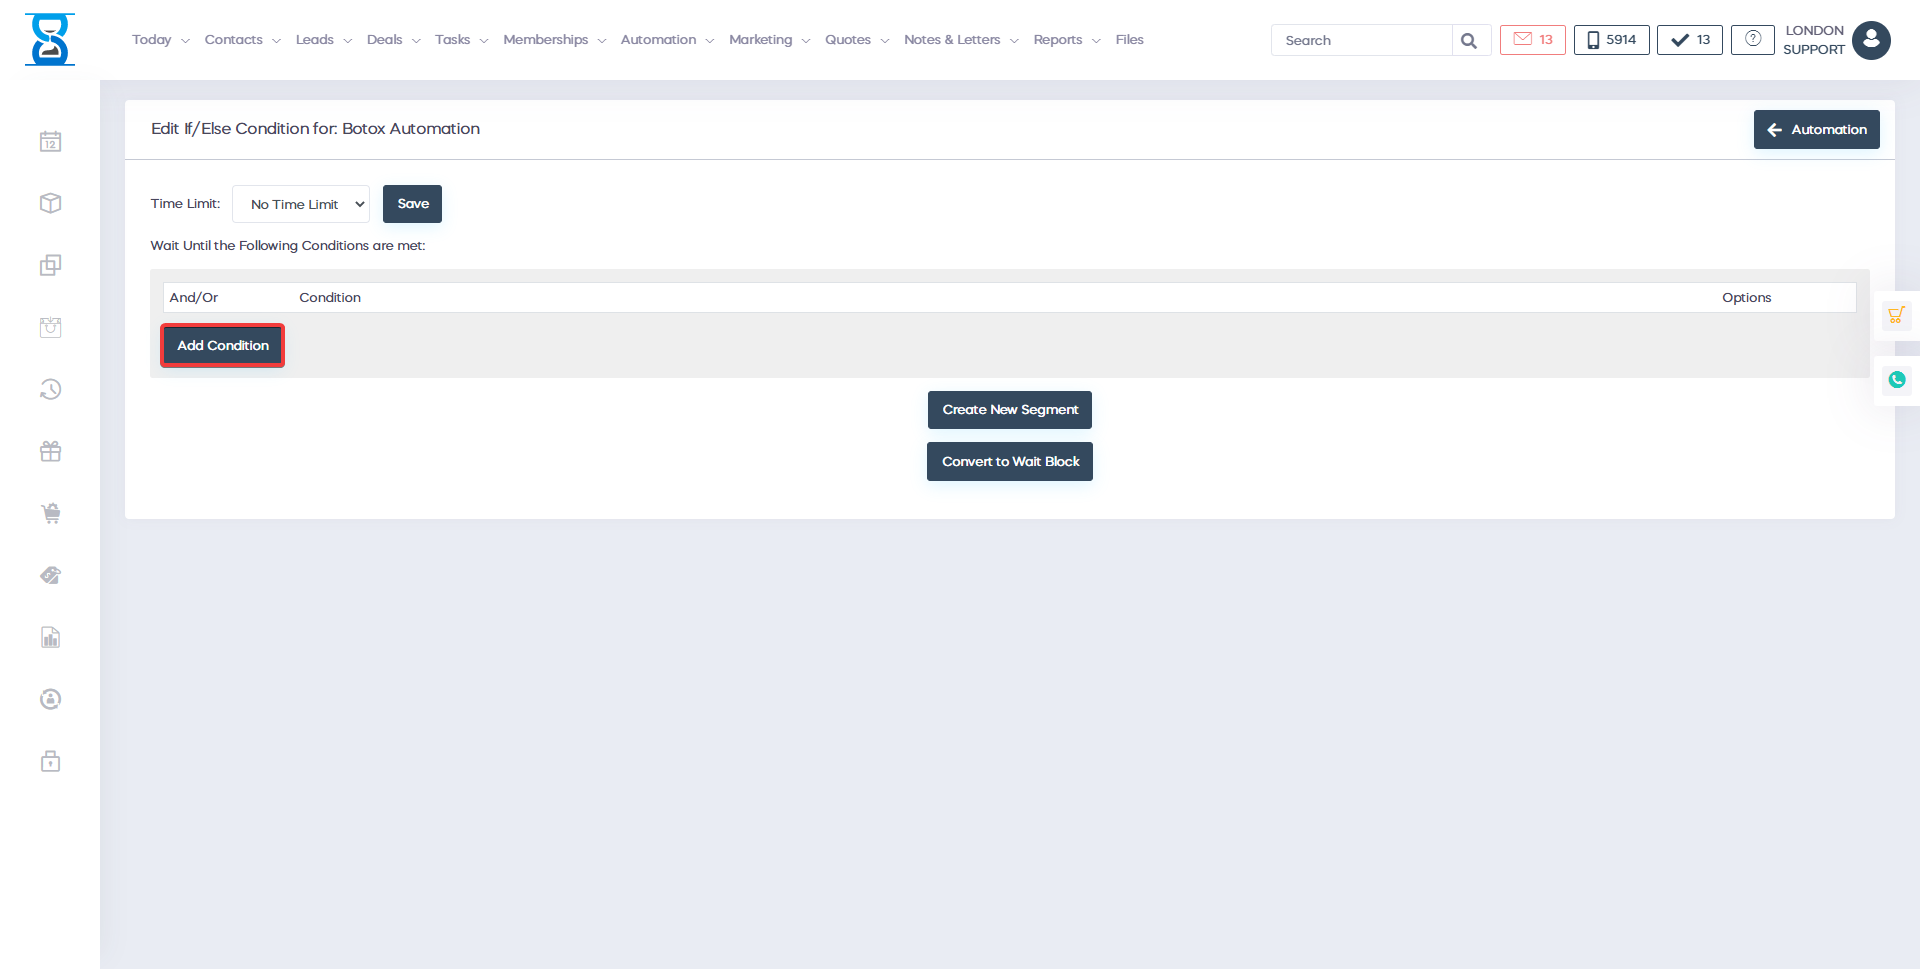
IF/ELSE
Selecting the "If/Else" option will allow you to add certain conditions to your automation tree. For example, you can set your automation tree to check if customer's have booked an appointment or not. If they have book an appointment then you don't need to do anything. On the other hand, if they didn't book an appointment then you can send them and SMS reminder that they need to book an appointment. This is how you can set this up using the "IF/ELSE" option.
The first thing that you need to do is to add a time limit:

Moving on, you now need a condition. In order to add a condition press on the green button labelled "Add condition":
Once you have pressed this button you will be taken to the same menu that you have seen before when you were setting up the trigger condition:
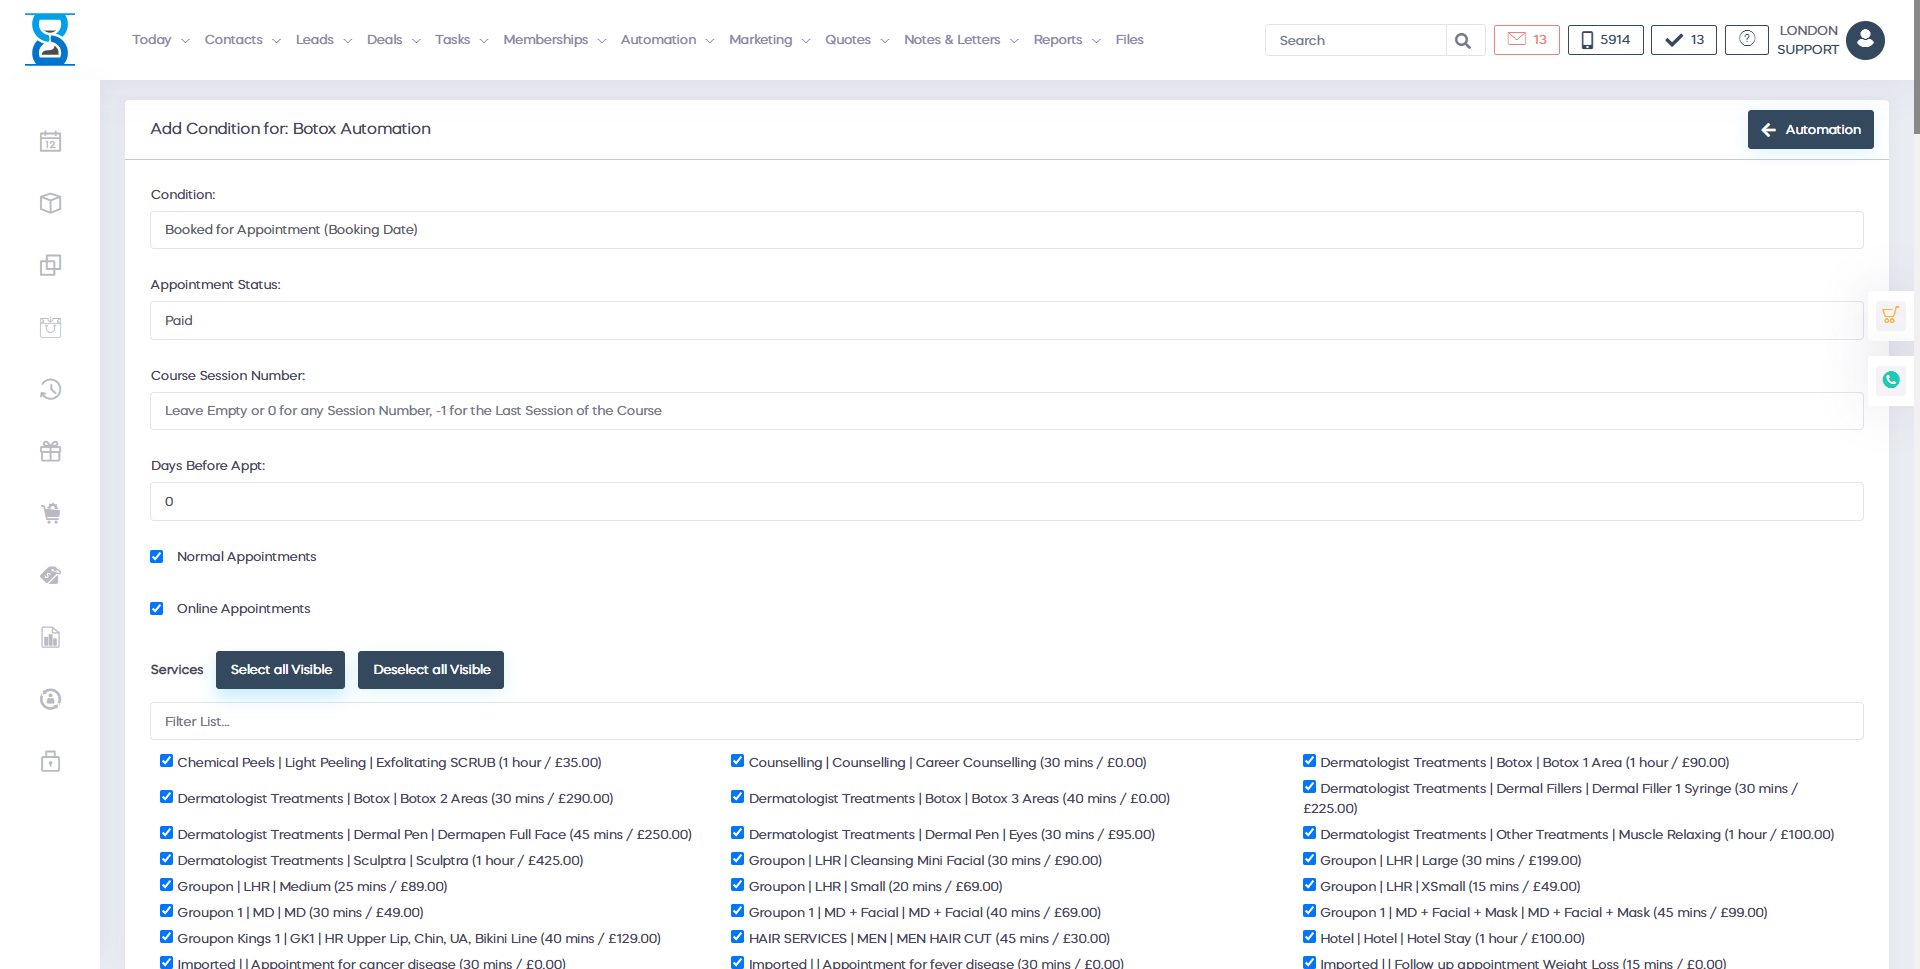
From here select the condition as well as for which services the condition should apply. Once you have selected that, scroll to the bottom of the page and click on the button labelled "Add":
As you can see, the condition has been added. From here you will be able to add another condition. Once you have added the condition press on "Create new segment":
Task
Selecting this option will tell the software to create a task:
This option is used to automatically create a task for members of staff when certain condition have been met. Simply fill in the details and press add in order to create the task.
Jump
Every action/step that we add to our marketing tree has its own Item ID :
We have added an ID to every action/step so that you can use the jump feature in order to jump from one step to another specific step in the tree.
Simply enter the Item ID and the software will move to a specific step that has already been created in your automation tree
Example
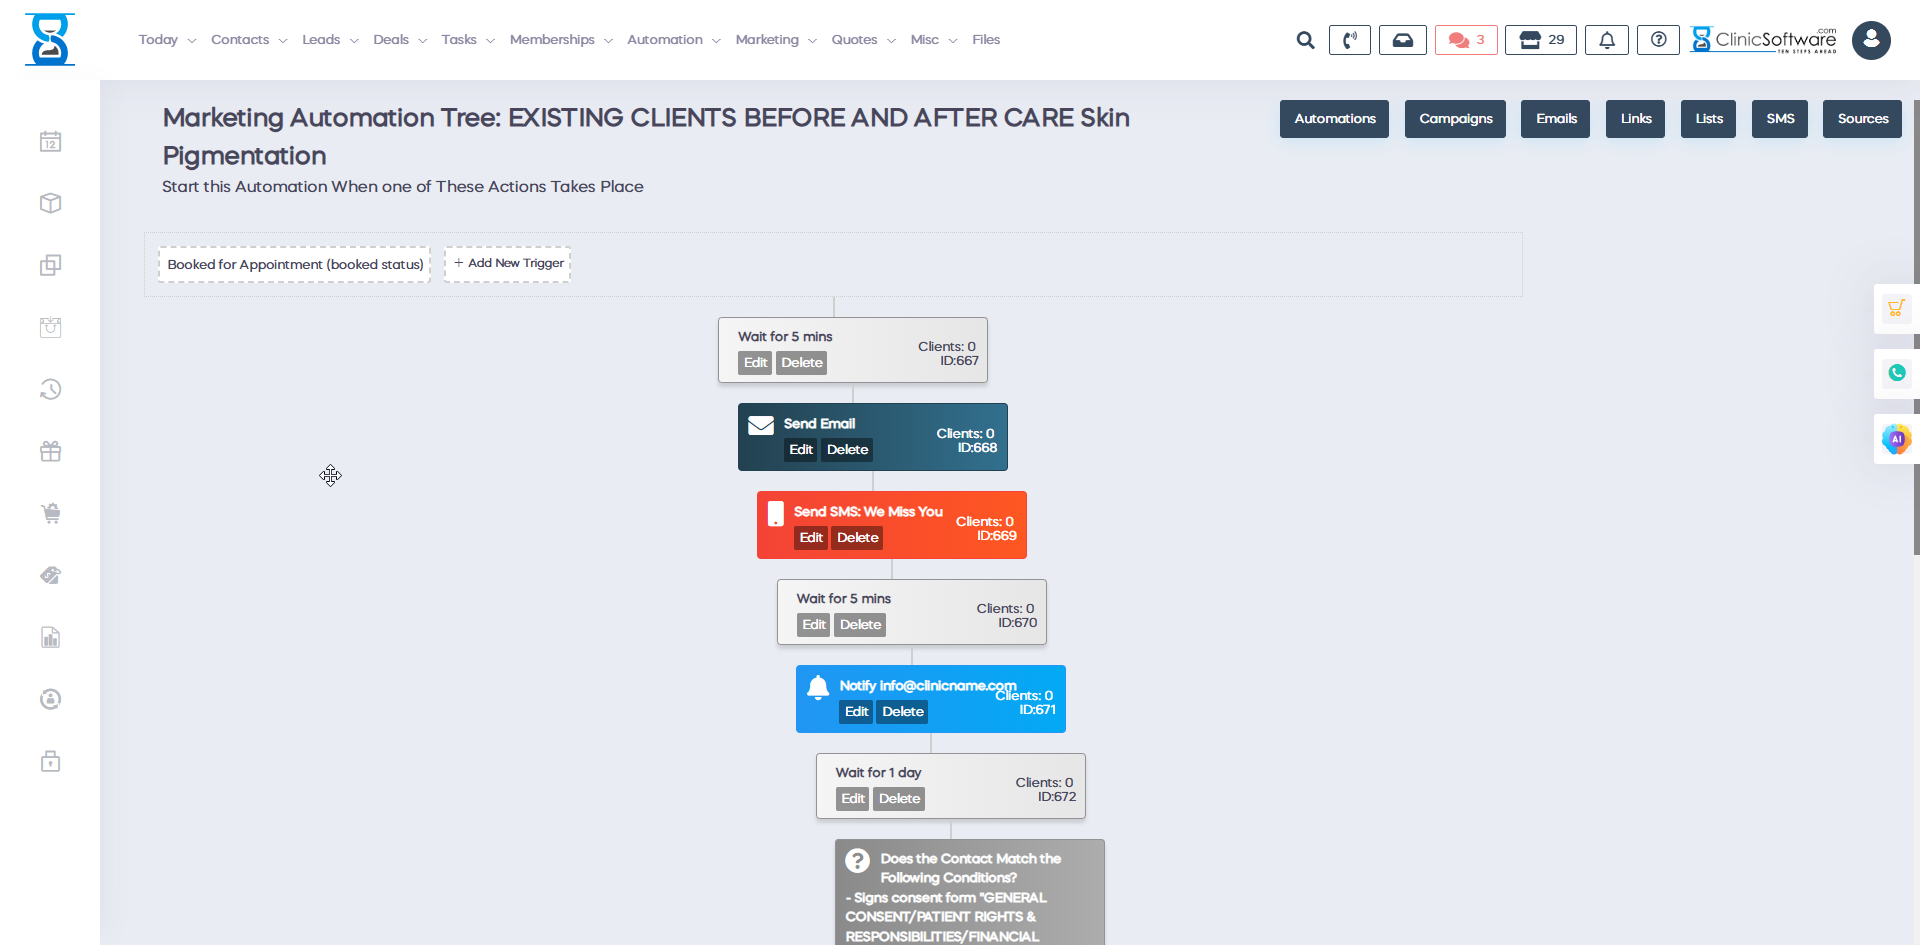
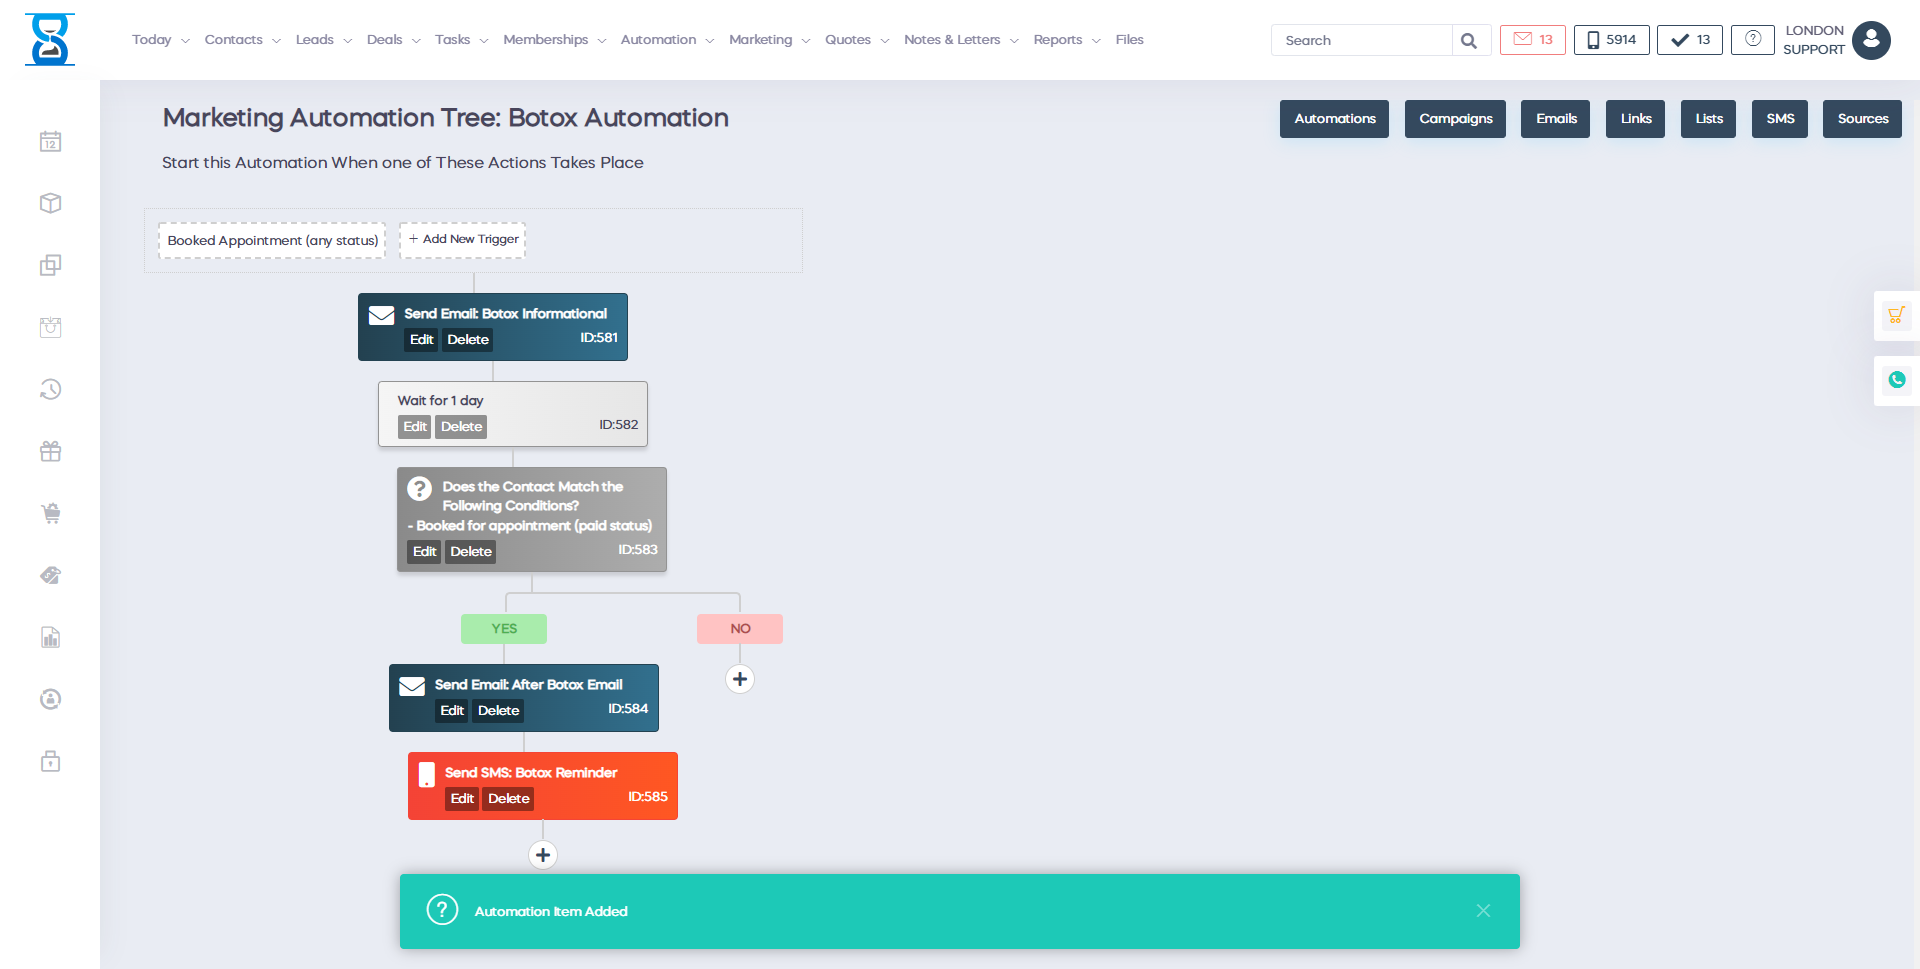
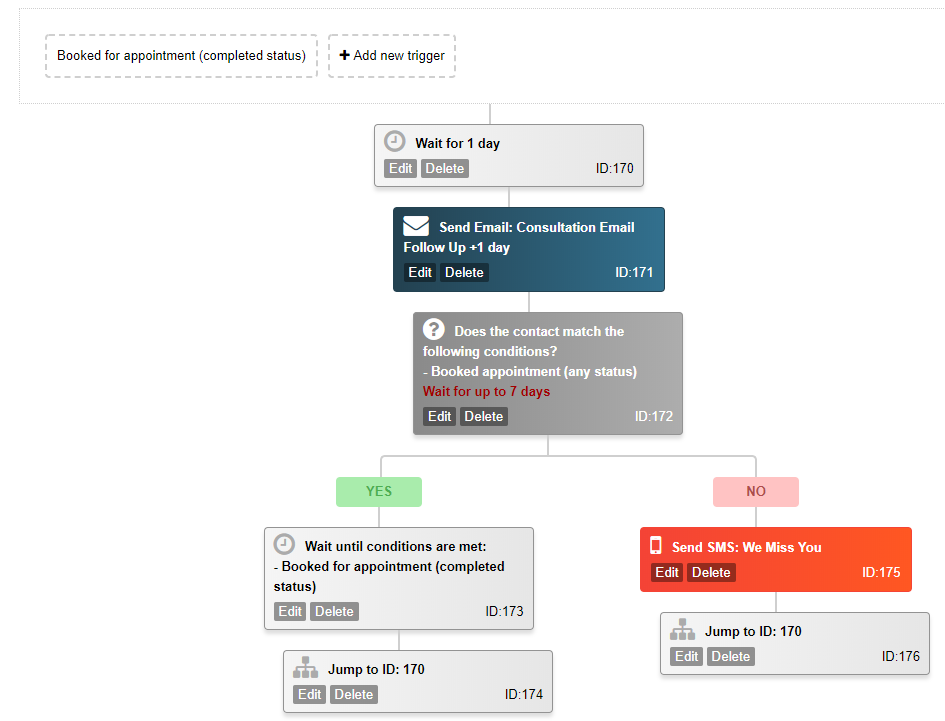
In this example, I will use all of the different options that I have mentioned earlier on. I will create a marketing automation that will be triggered when a client has booked any type of appointment. After that, the software will wait 1 day before sending a "Consultation Follow-Up" email. The software will then check if the client books an appointment in the next 7 days. If they do, then we go back at the beginning where we wait for 1 day since the appointment has been completed and we send the "Consultation Follow Up email". On the other hand, if the customer does not book an appointment in next 7 days, then the software will send them an SMS reminder and then it will go back to check if the customer will book an appointment. If they don't then the cycle repeats.
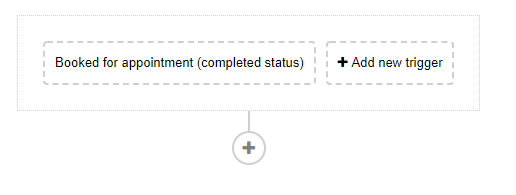
The first thing that I will do is to add the trigger condition:
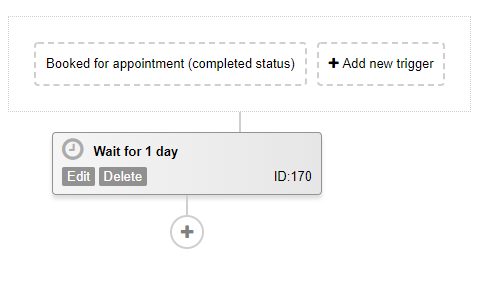
The next step that I am doing is selecting the "Wait" option so that the automation wait for 1 day before moving on:
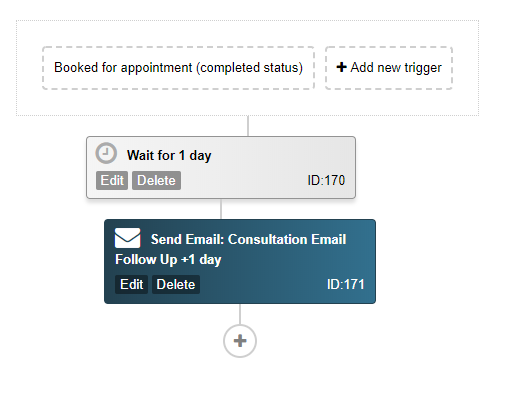
After 1 day has passed, I want the automation to send to the client a consultation email follow up. In order to do that, I press on the "+" button and from there I select the "Action" option.
Now my automation tree looks like this:
The next step that I want the automation tree to do, is to check if the customer books any appointment in the next 7 days. In order to do that , I press on the "+" button and I select the "if/else" option:
Now my automation tree looks like this:
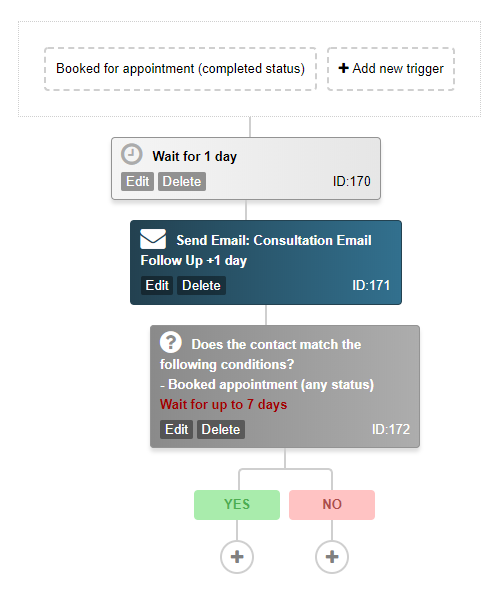
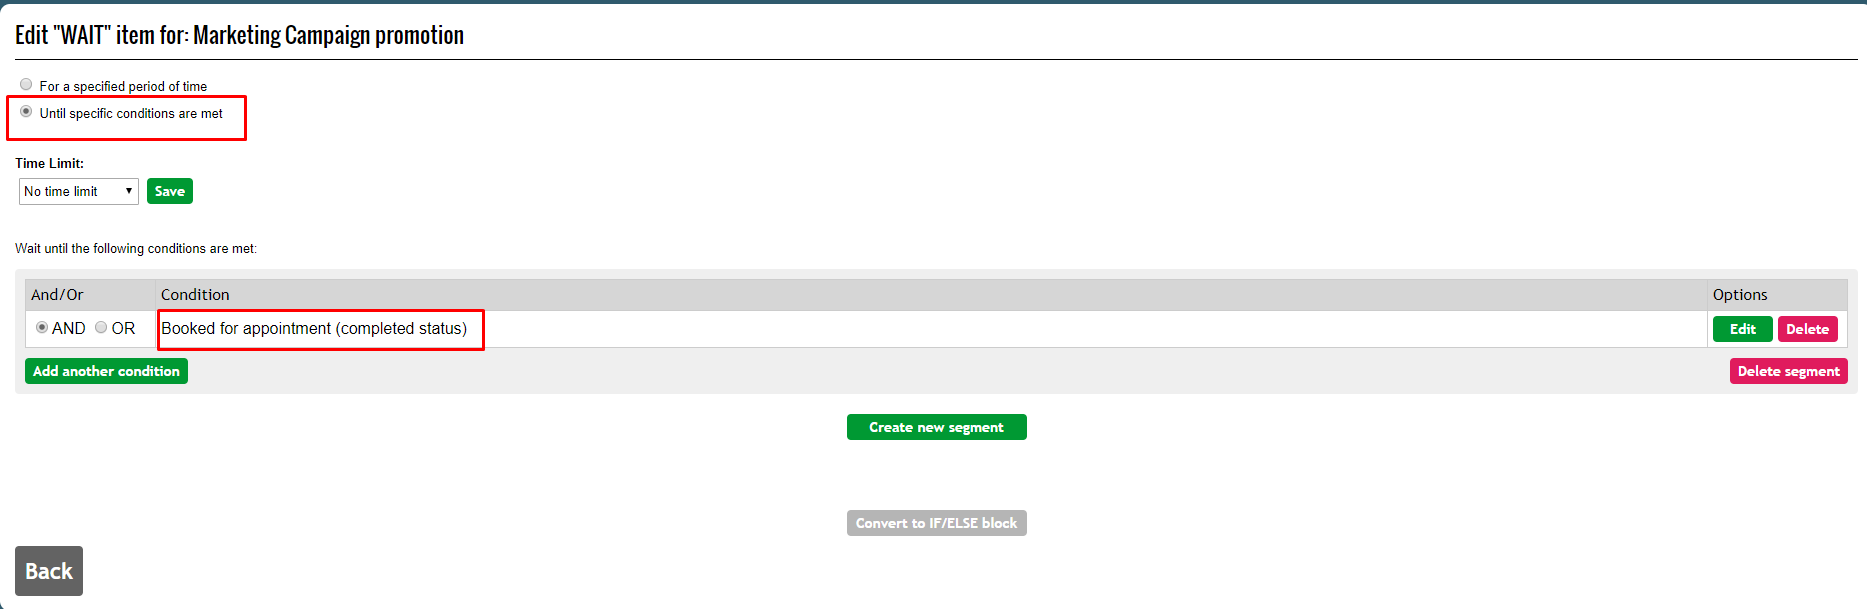
If the customer books an appointment, then I want the software to wait until that appointment has been completed. In order to do that I need to add a new wait condition.
Now my automation tree looks like this:
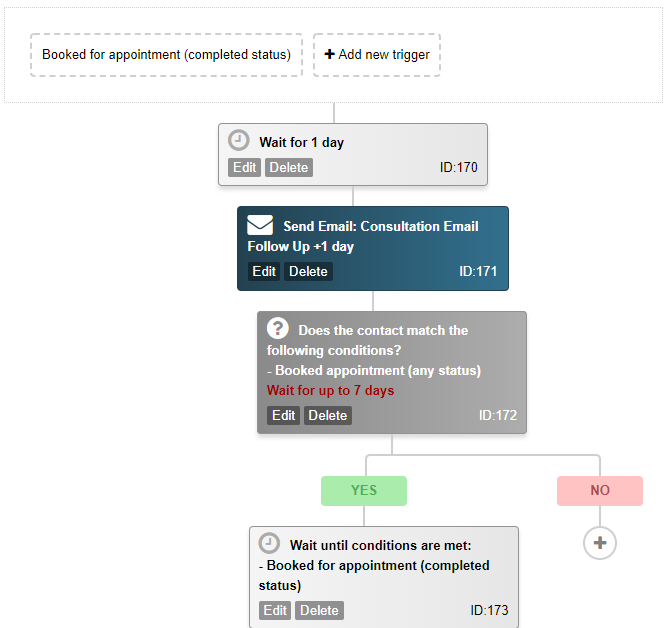
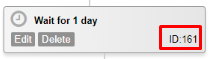
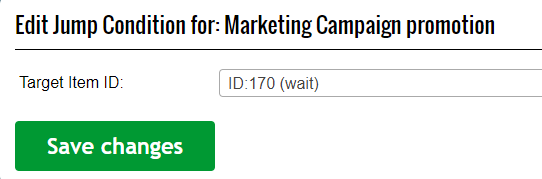
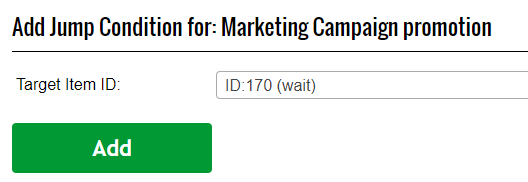
From here, I want software to repeat the same cycle so I will add a jump action which will go at the beginning of the tree to ID : 170 . This means that after the appointment has been completed, it will go to task 170 and wait 1 day. From there it will continue the cycle:
My automation tree now looks like this:
Now that the "Yes" branch of the tree has been completed, we need to create actions for the "No" branch (in case that the customer did not book an appointment). If the customer doesn't book an appointment, I want the software to send them an email reminder. In order to do that, I will press on the "+" button and from there I will select the "Action" button.

As you can see, I have selected the action to "Send SMS" and I have selected an SMS template which I have already created. Now my automation tree looks like this:
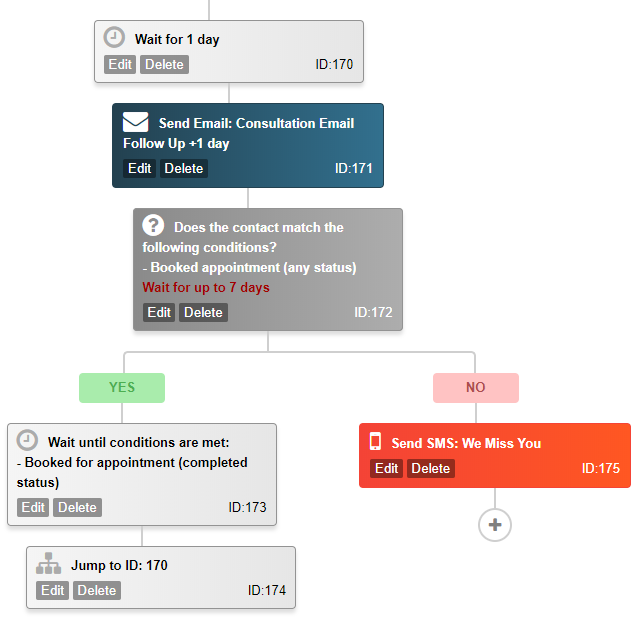
The last step that I need to add in order to complete the cycle is to make sure that after the software send the SMS reminder to the customer, it will go back to the task where it checks if the customer will book any appointments in the next 7 days (Item ID:172). In order to do that, again, I will press on the "+" button and from there I will select the "jump option". The target Item ID is 170:
The final version of my automation tree looks like this:
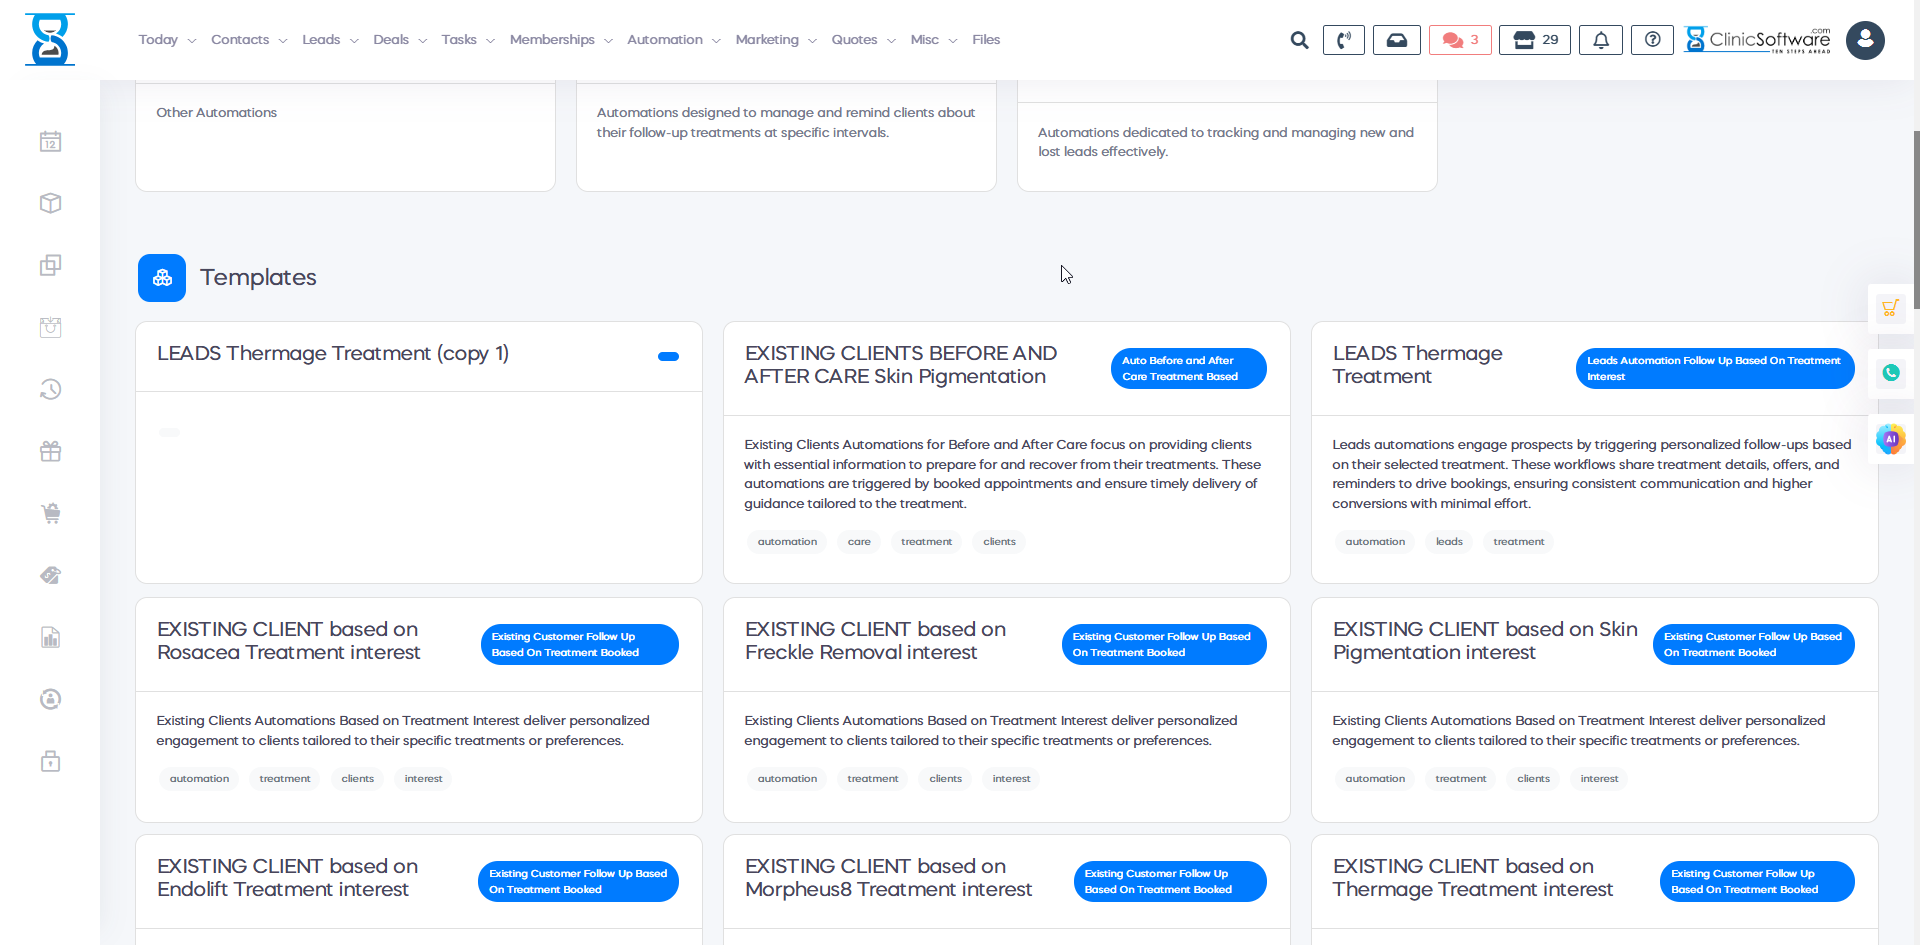
Marketing Automation Templates
The Marketing Automation Templates feature provides prebuilt automation solutions designed to streamline your business operations and enhance efficiency.
To access the marketing automation templates:
Navigate to the top menu and go to Automation > Marketing Automation > Automation Templates.
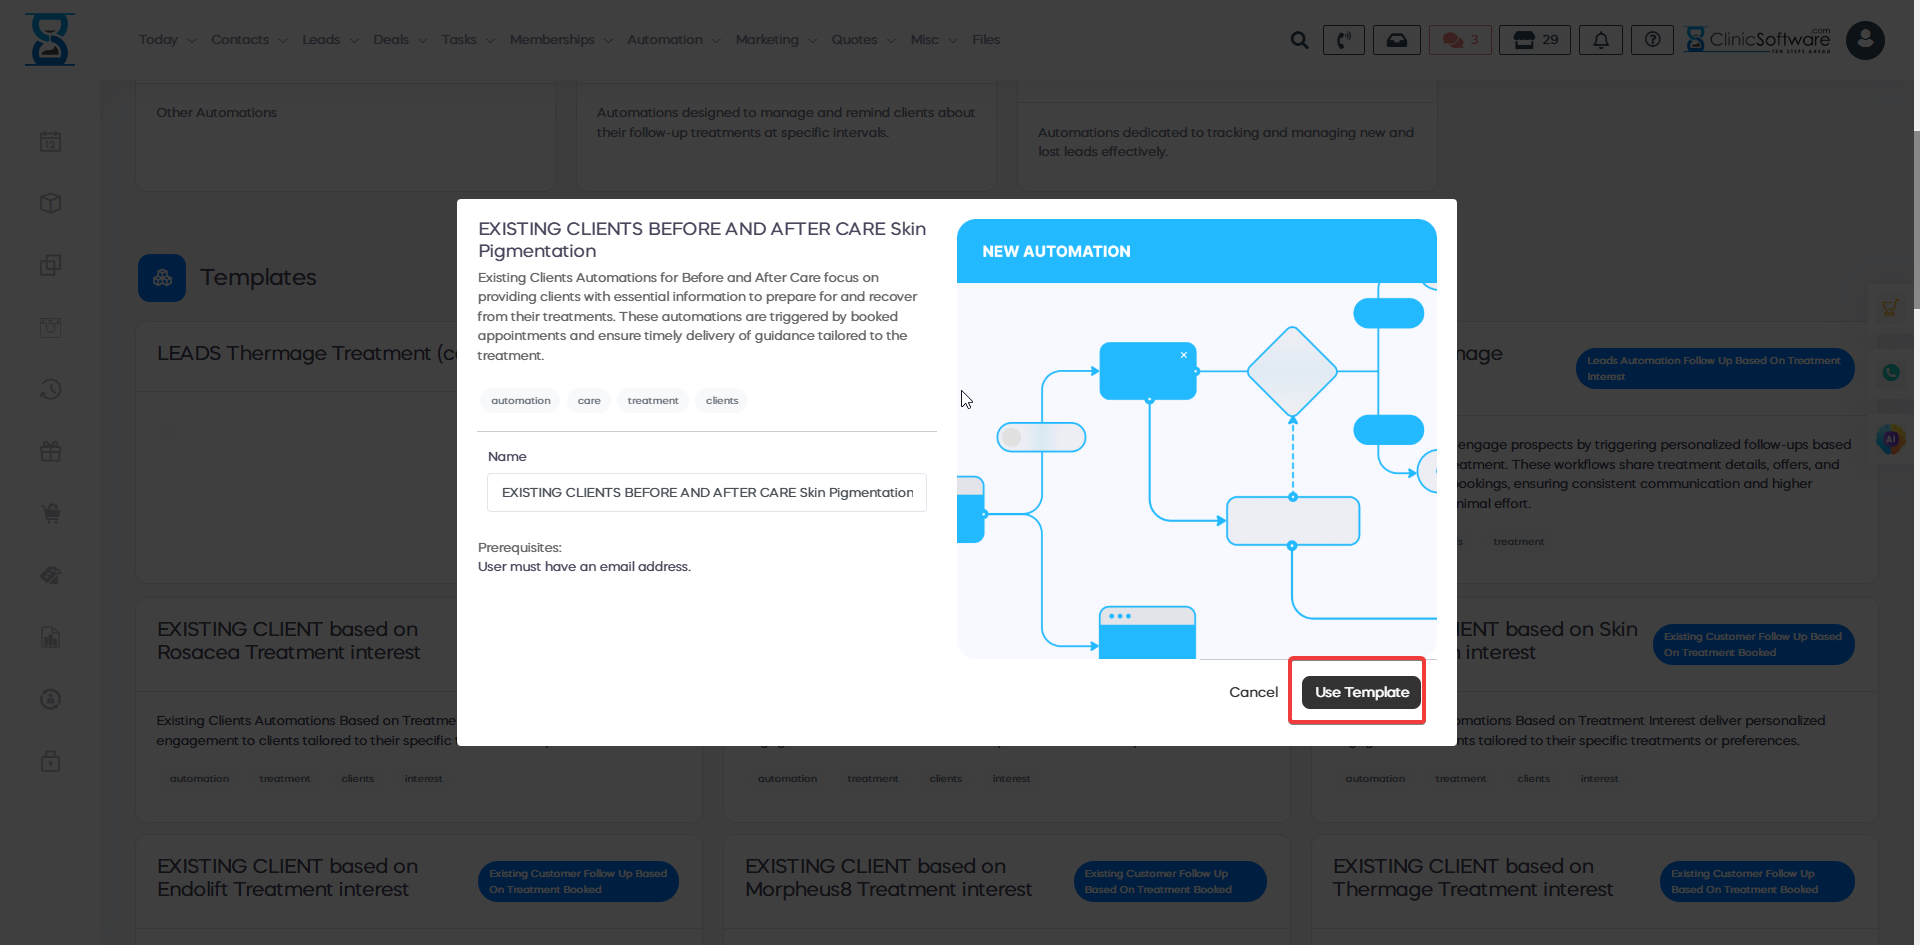
This will open a page where you can either create your own custom templates or select from a range of prebuilt templates to suit your business needs.
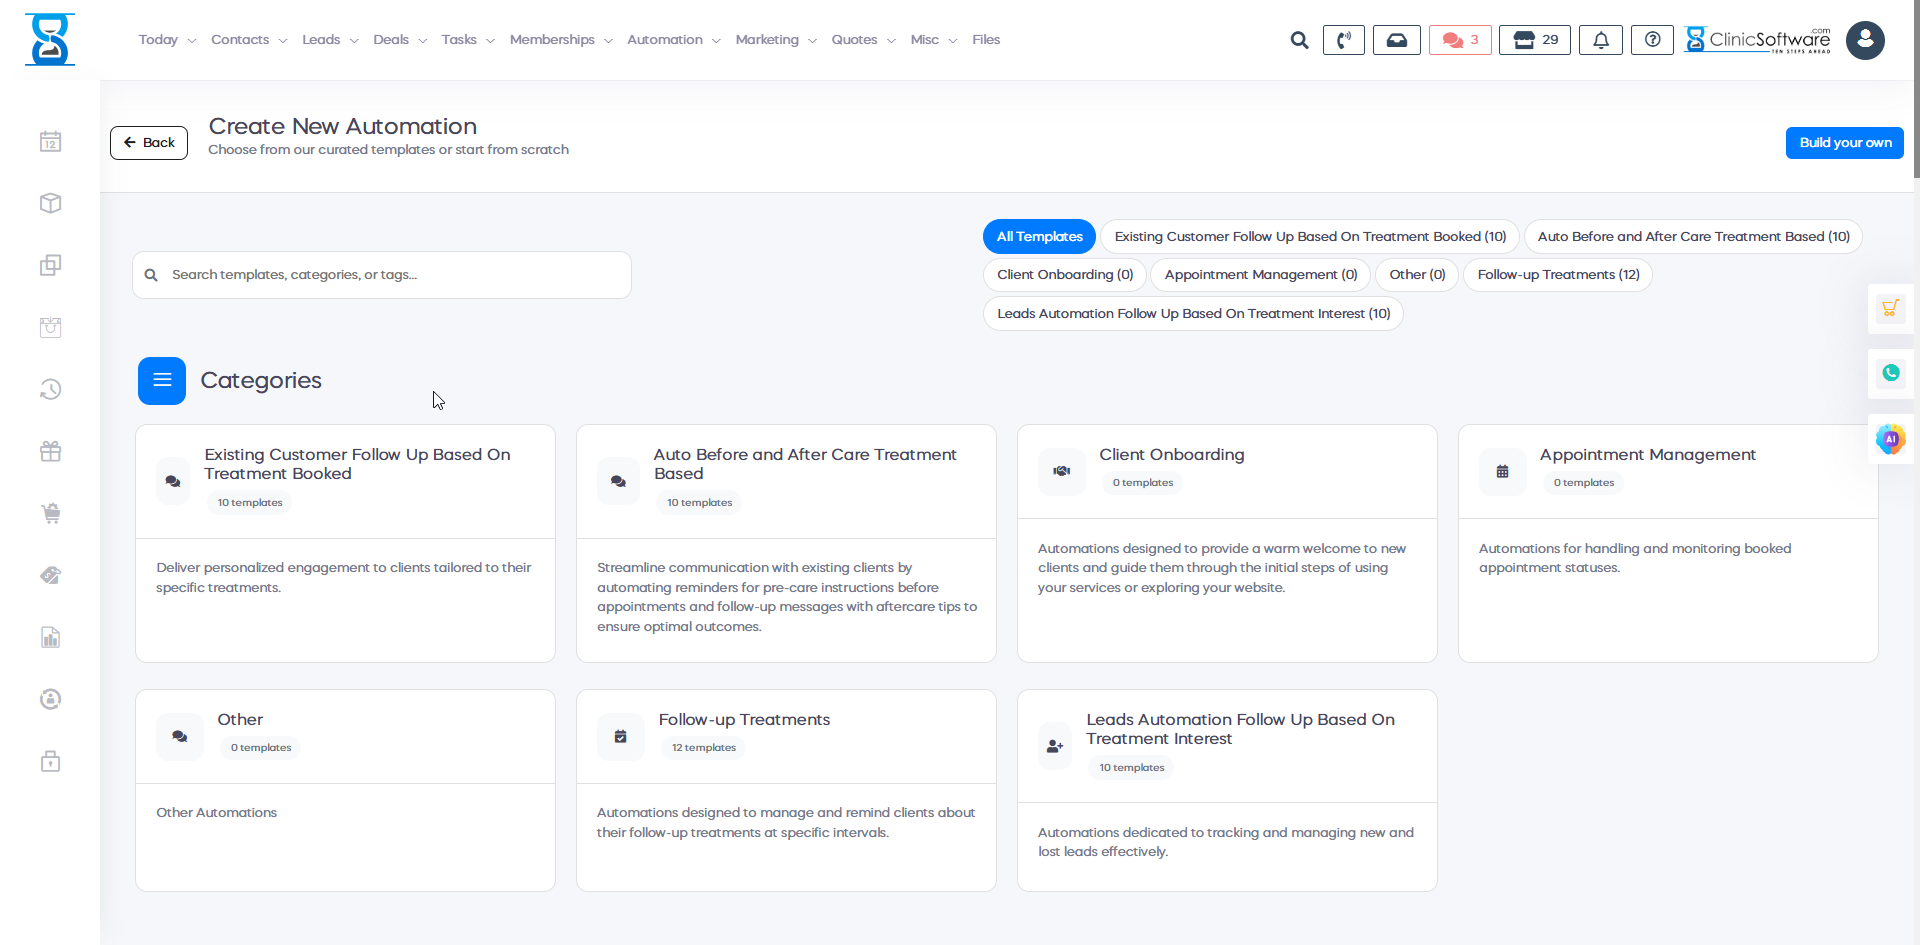
If you find a template that suits your requirements, simply click on it to open a preview. To proceed, click Use Template to select and customize it as needed.