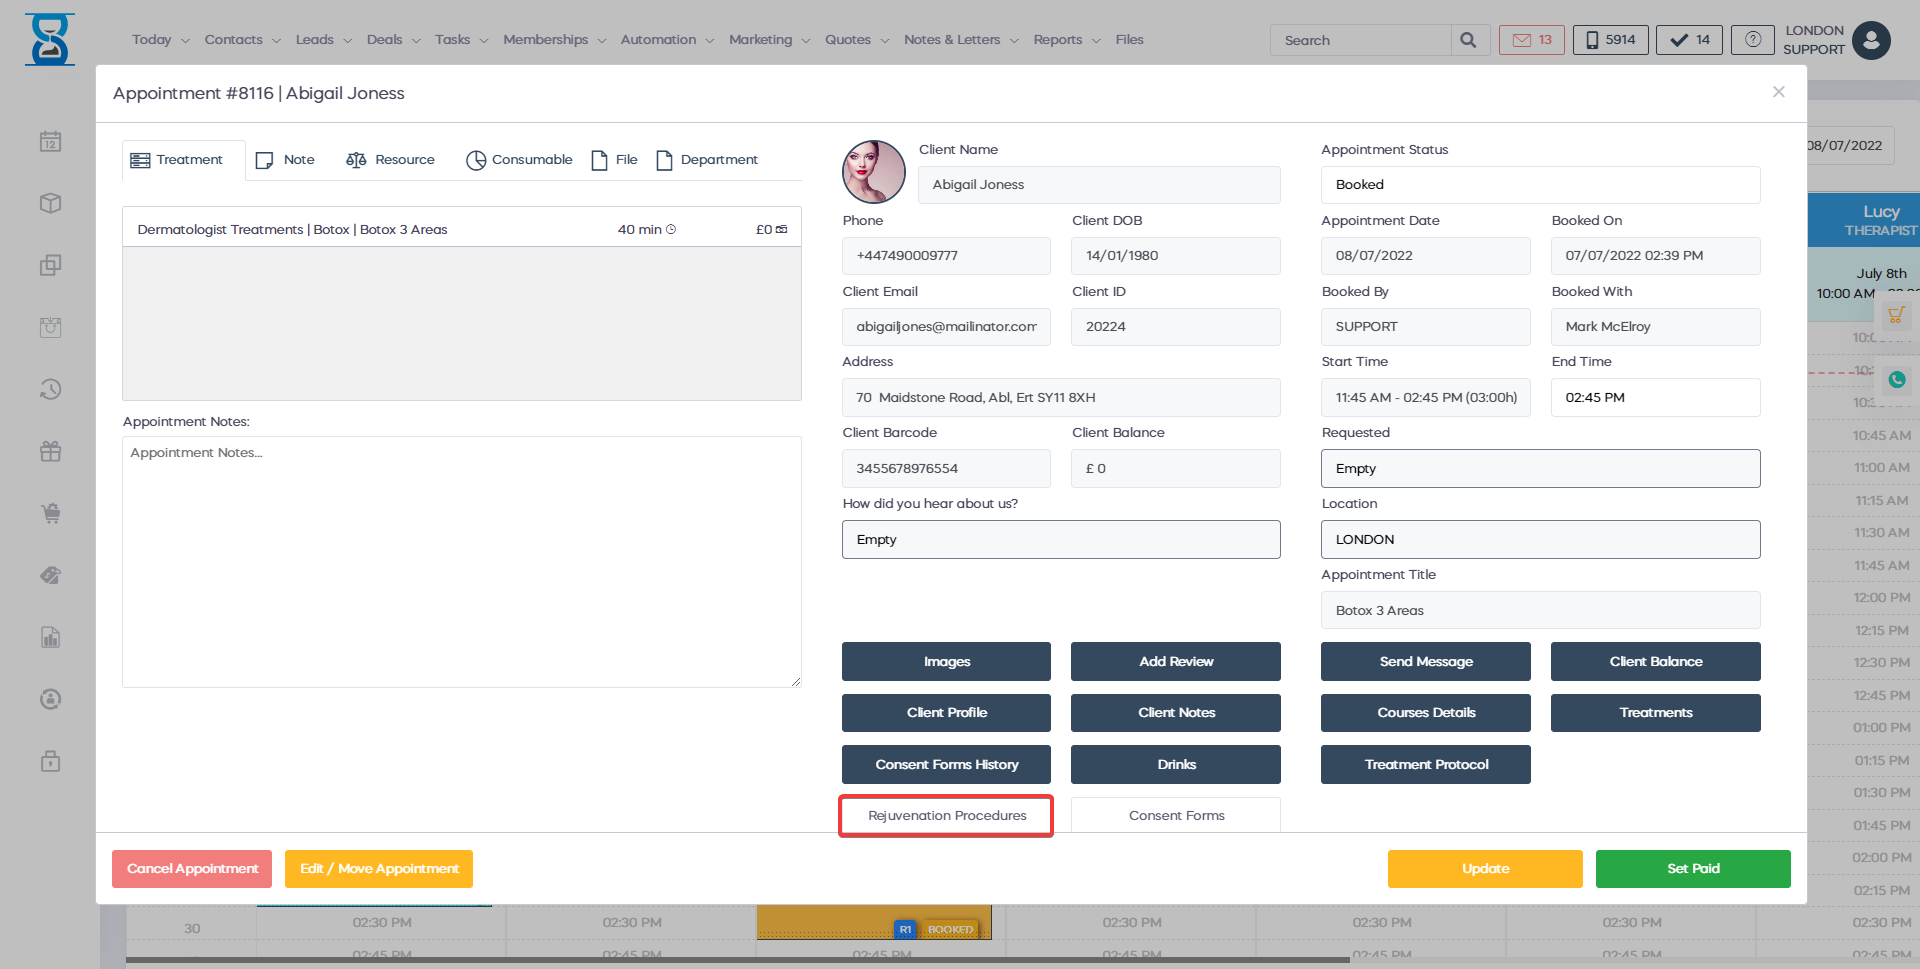
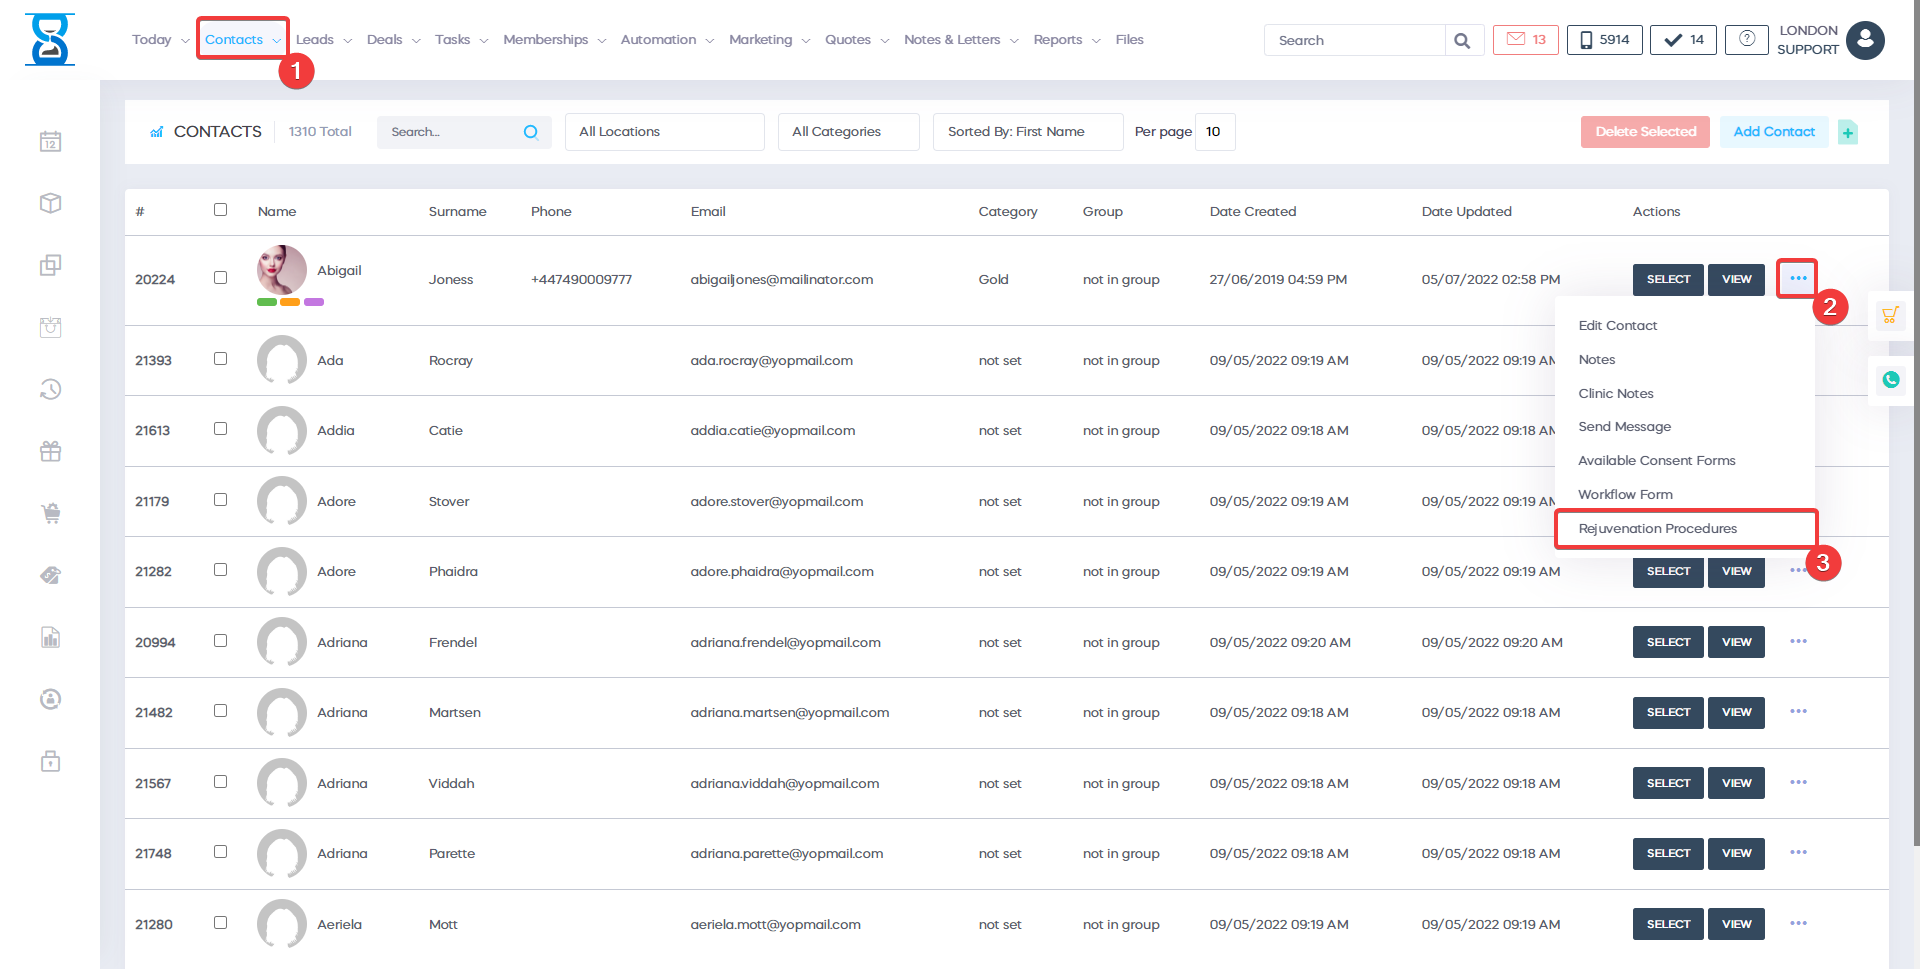
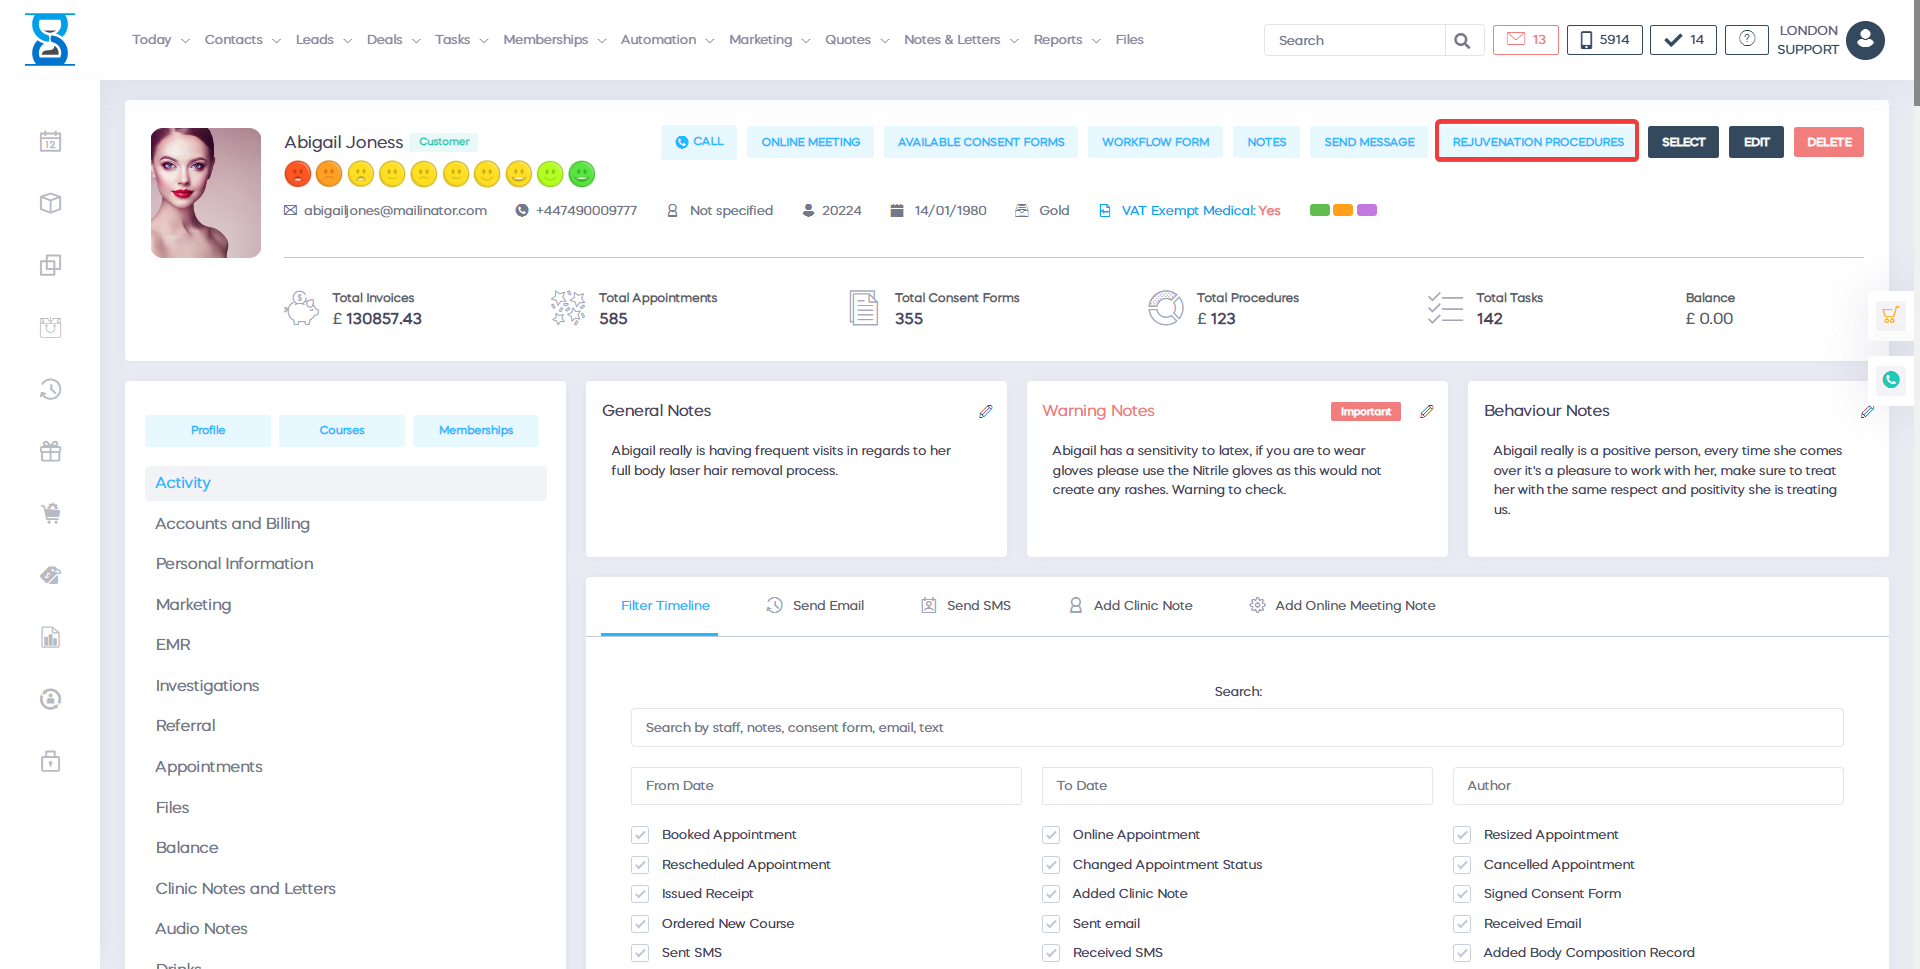
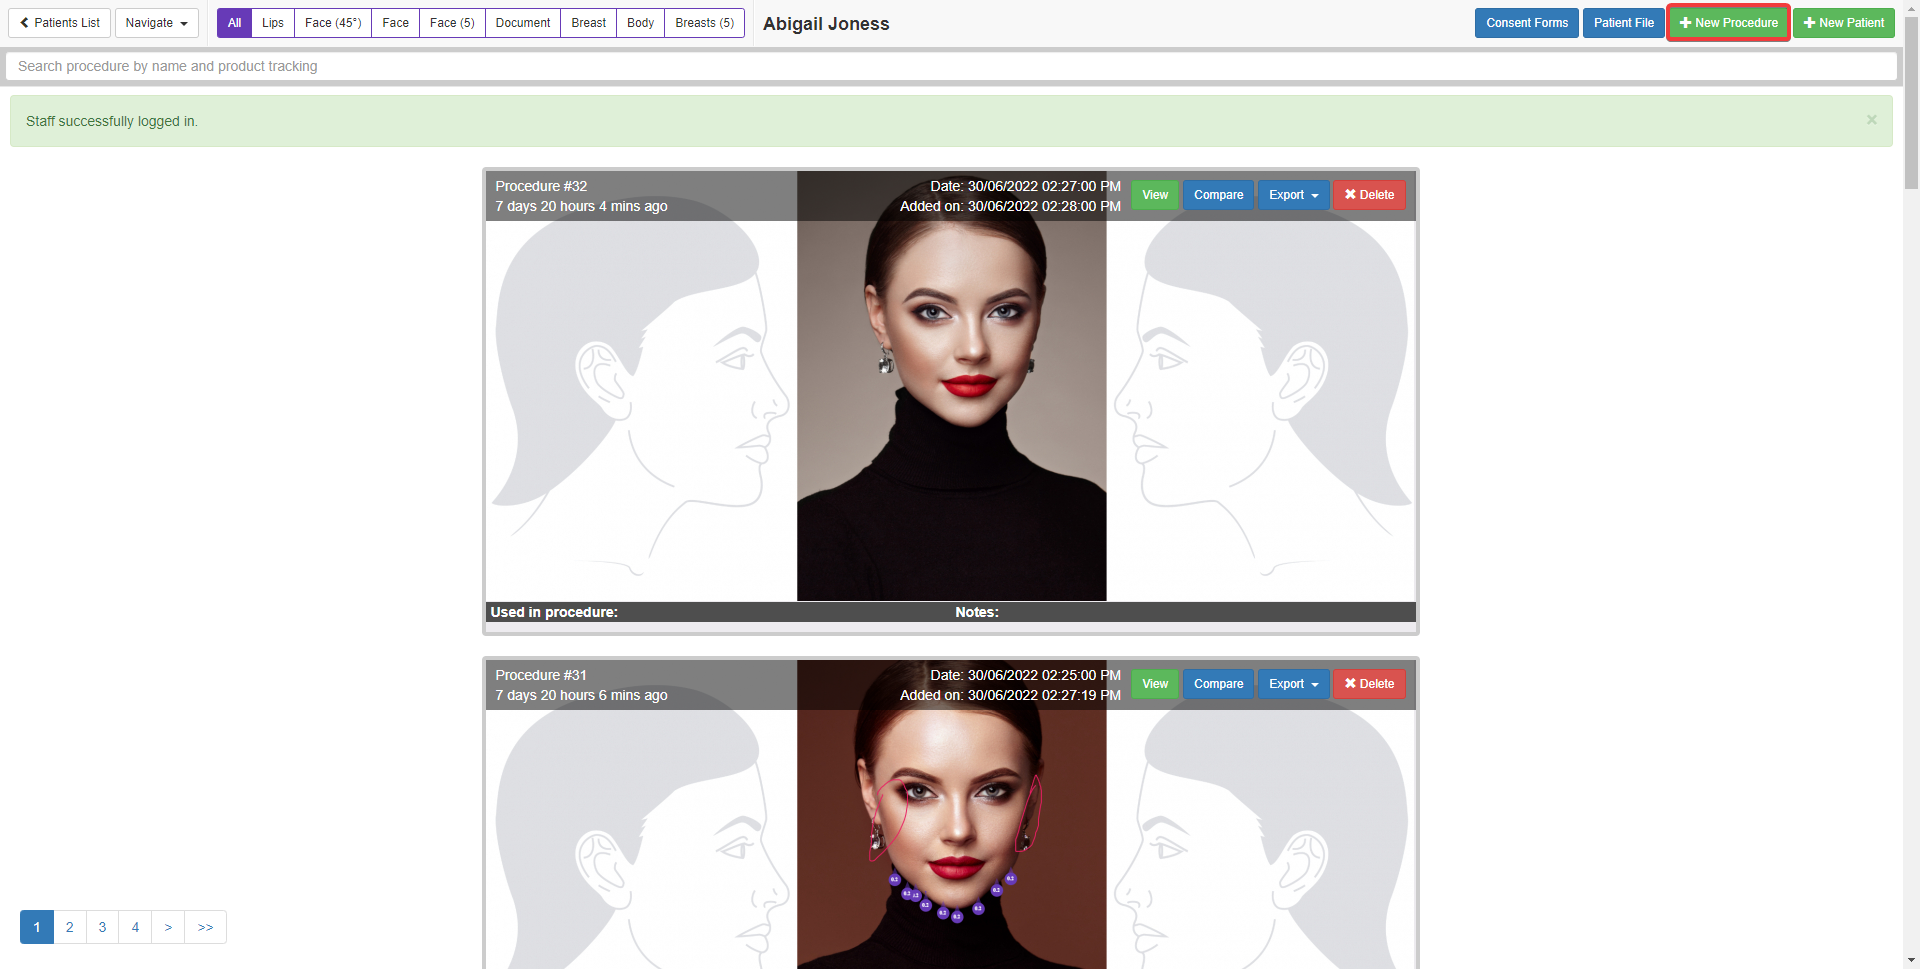
To add a new rejuvenation procedure for the selected client, press the “New” button from the top right section of the page.
There are two types of rejuvenation procedures in the system:
- Face Rejuvenation procedures
- Body Rejuvenation procedures
Body rejuvenation procedures operate in the same way as the face rejuvenation procedures but have 4 treatment areas (front, back, left, right).
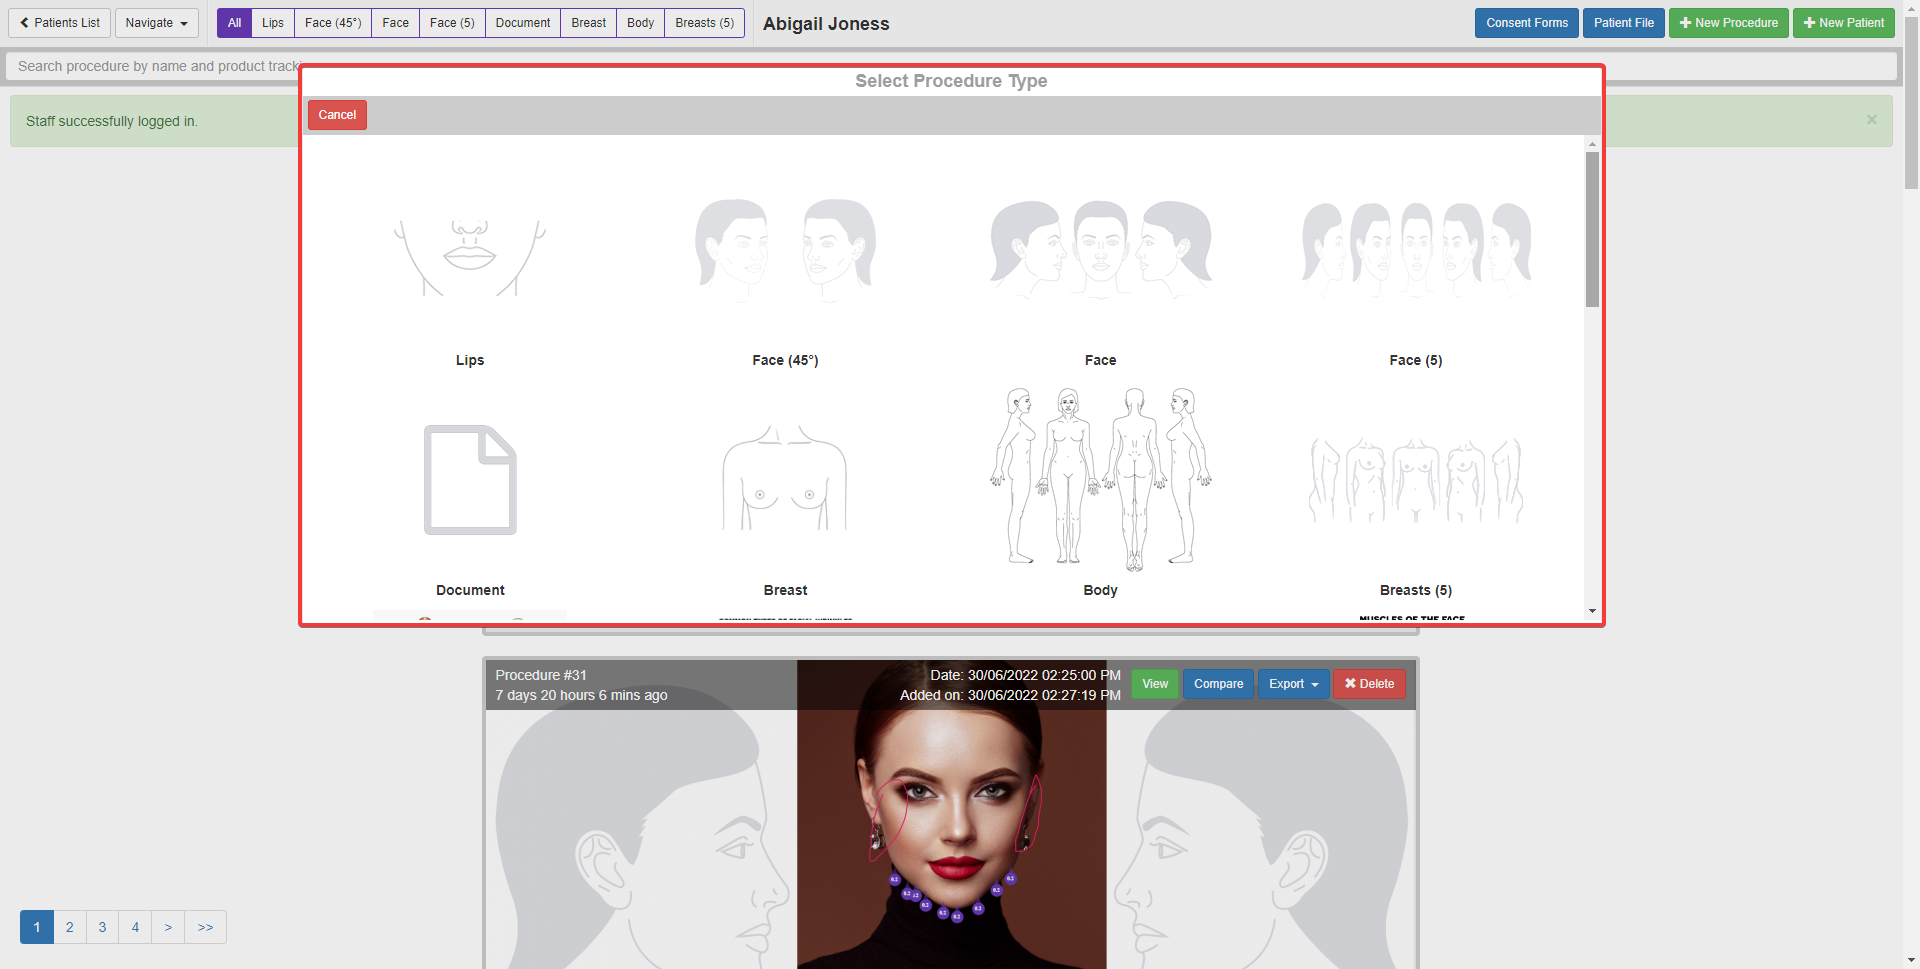
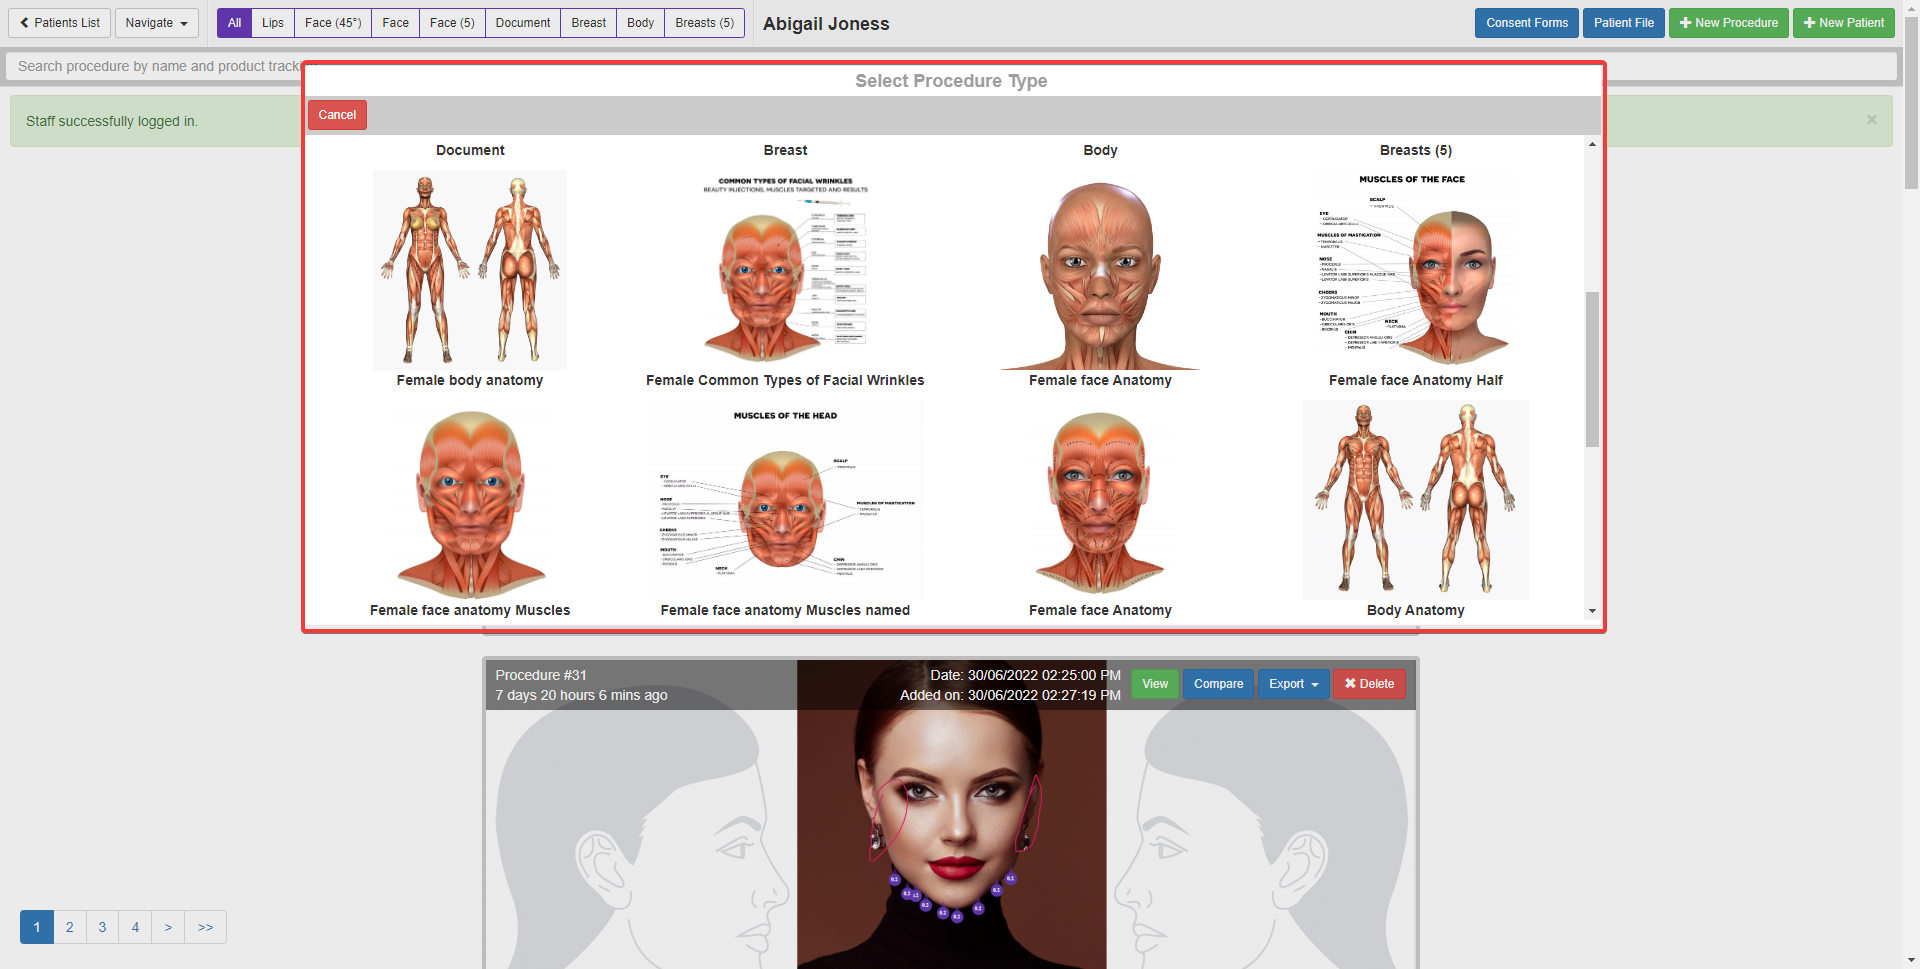
When we press the “New” button, the system will prompt you to select the rejuvenation procedure type.
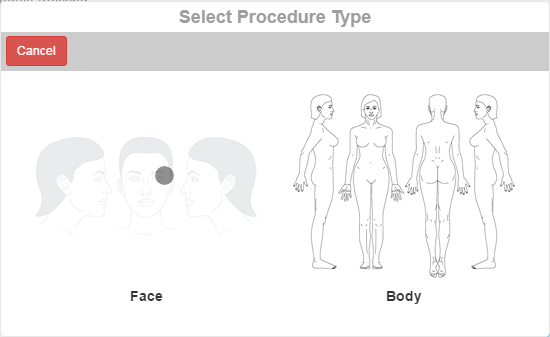
After selecting the procedure type you will be redirected to the selected procedure type creation page.
The “Procedure Information” window will open automatically from which you can specify the name, date, time, staff, signed client consent form and notes of the procedure.
The signed consent forms option lets you connect the previously signed consent forms with the current rejuvenation procedure.
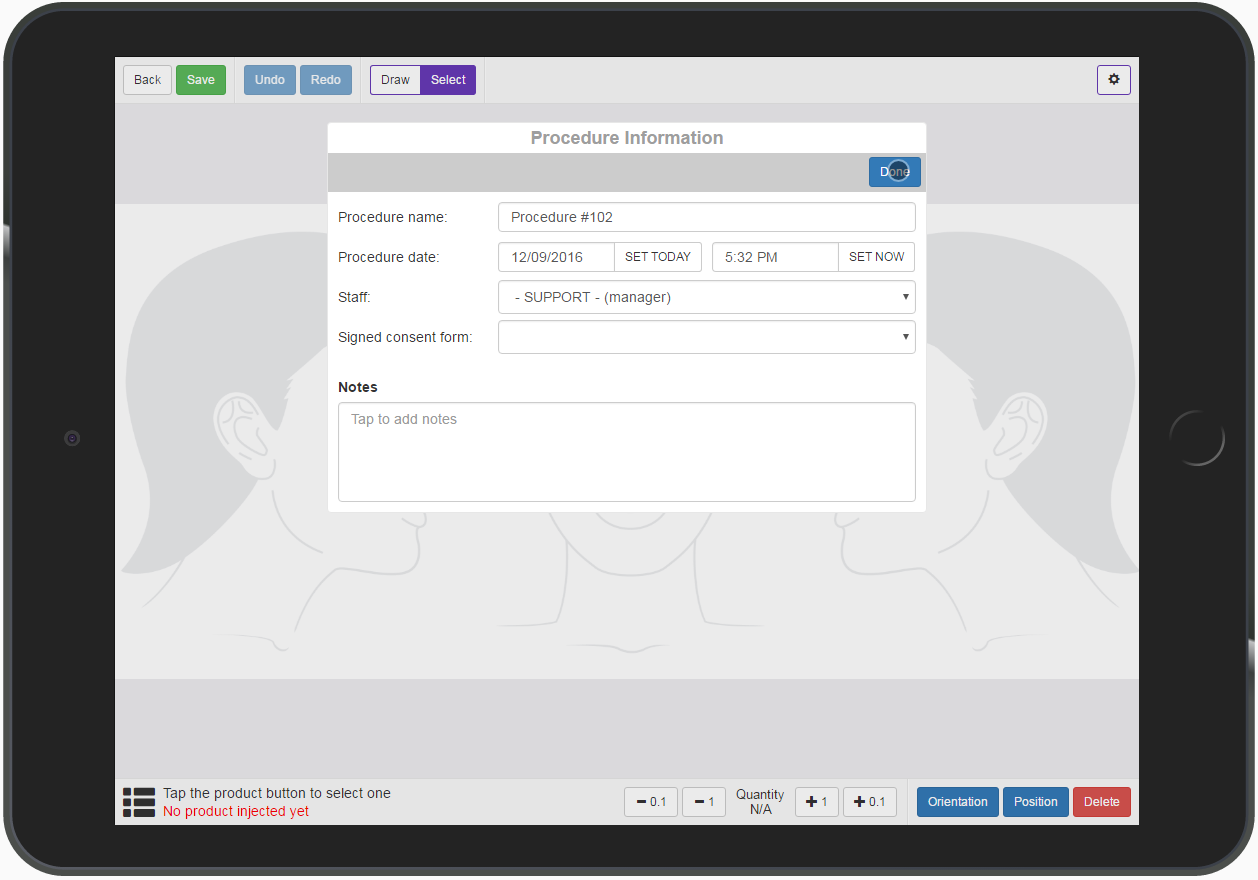
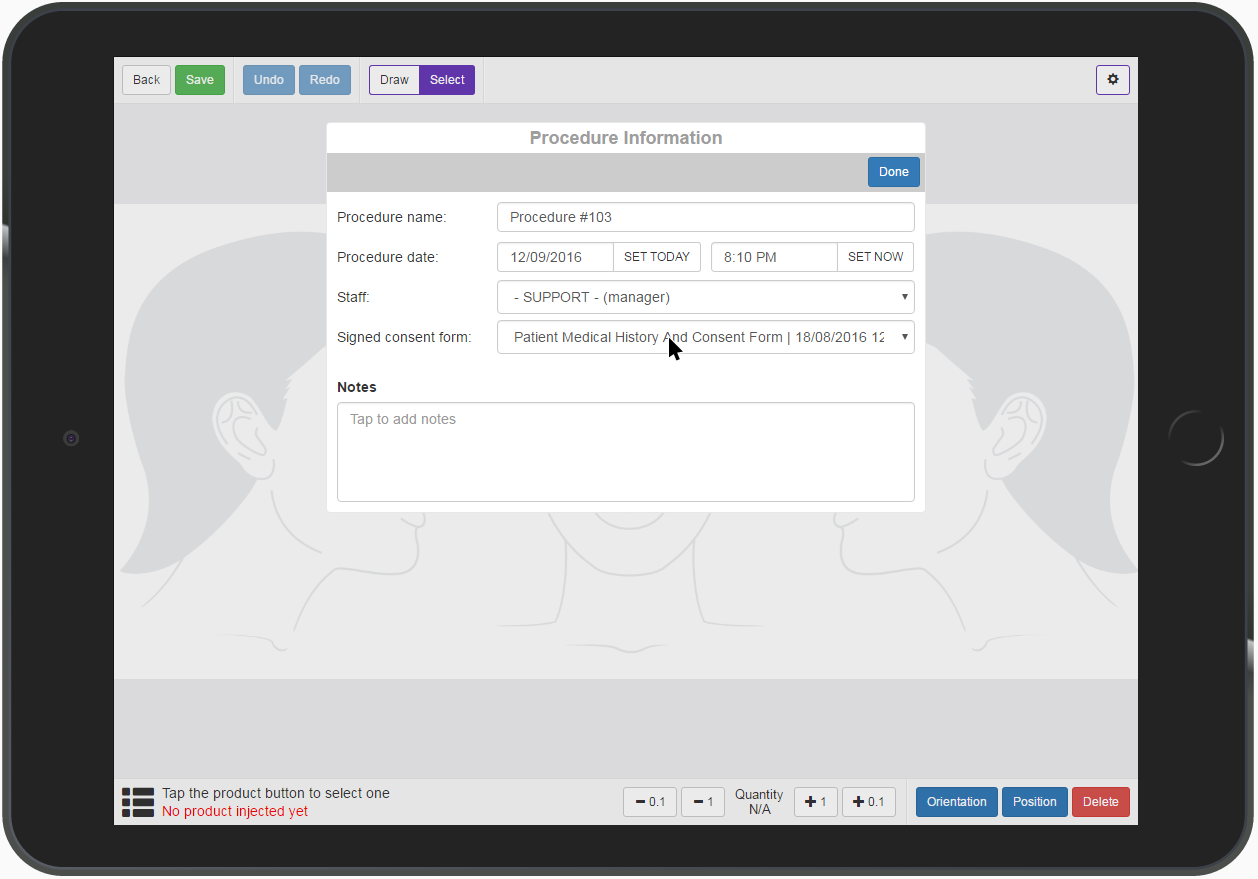
Press the “Done” button when you are done filling in the procedure details.
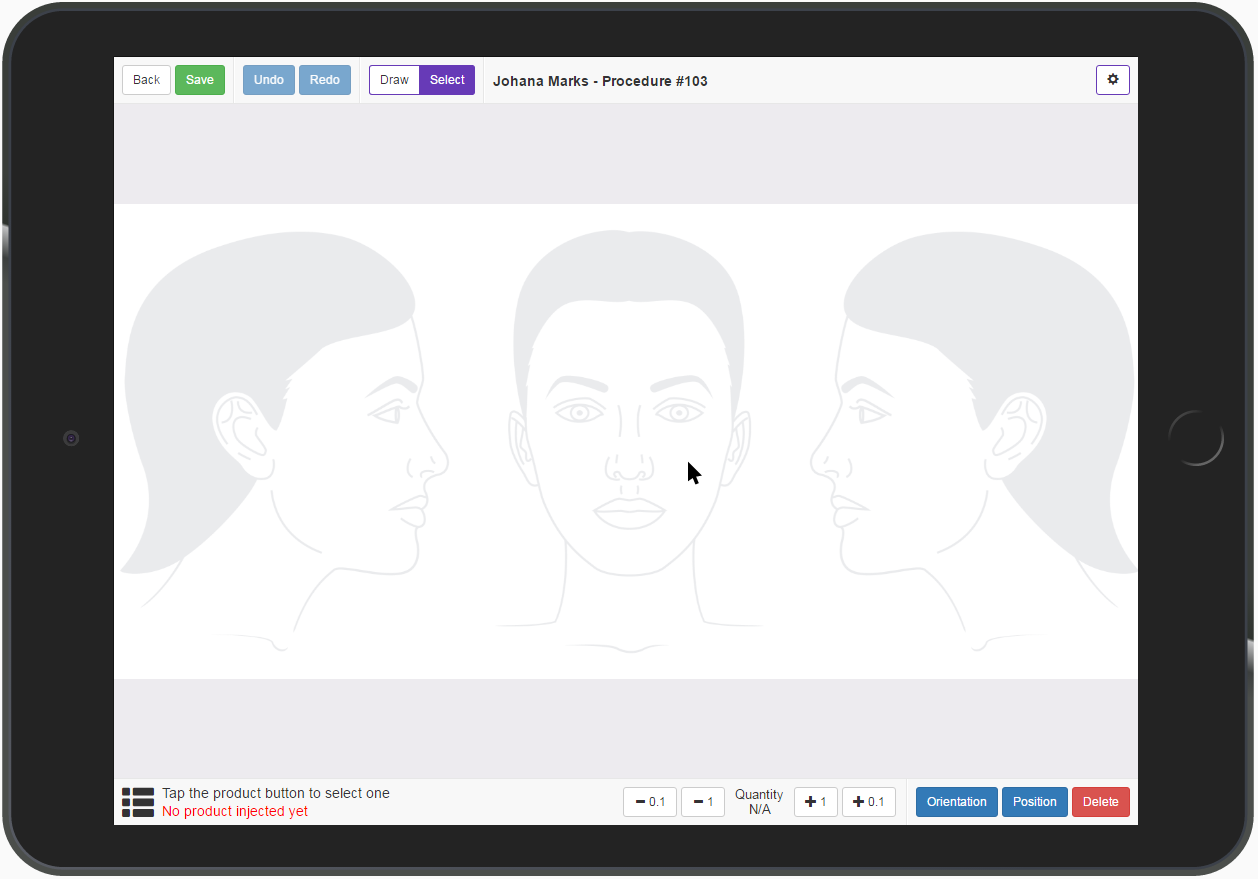
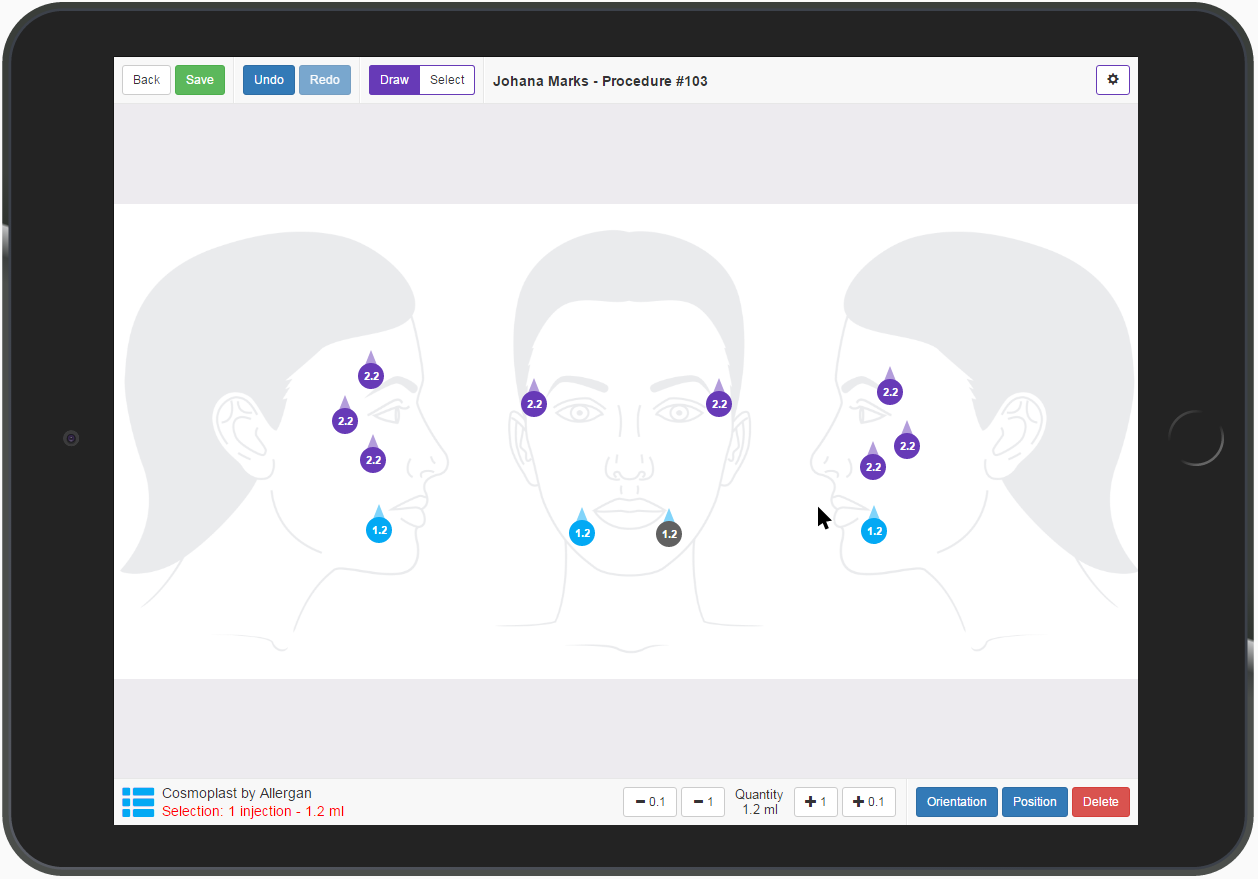
The procedure creation page is divided into three sections:
- Top menu bar
- Go back
- Save procedure
- Undo / Redo
- Mode select (draw, select)
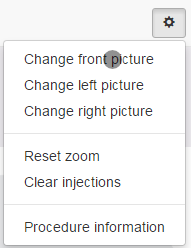
- Right cog item
- Change font/left/right pictures (upload, use camera or template)
- Reset zoom
- Clear injections (removes all injections from the canvas)
- Procedure Information (opens the “Procedure Information” window)
- Canvas section (this is where we draw the injection points and lines)
- Bottom menu bar
- Product selection
- Selected injection quantity control
- Selected injection orientation
- Selected injection position
- Delete selected injection
The procedure creation page operates in two modes:
- Draw
- Select
You can identify and change in which mode you are in by using the mode selector located in the top left section of the page.
![]()
Use the Draw mode to add injection points or draw injection lines on the canvas area.
Use the Select mode to delete or change existing injections position and quantity
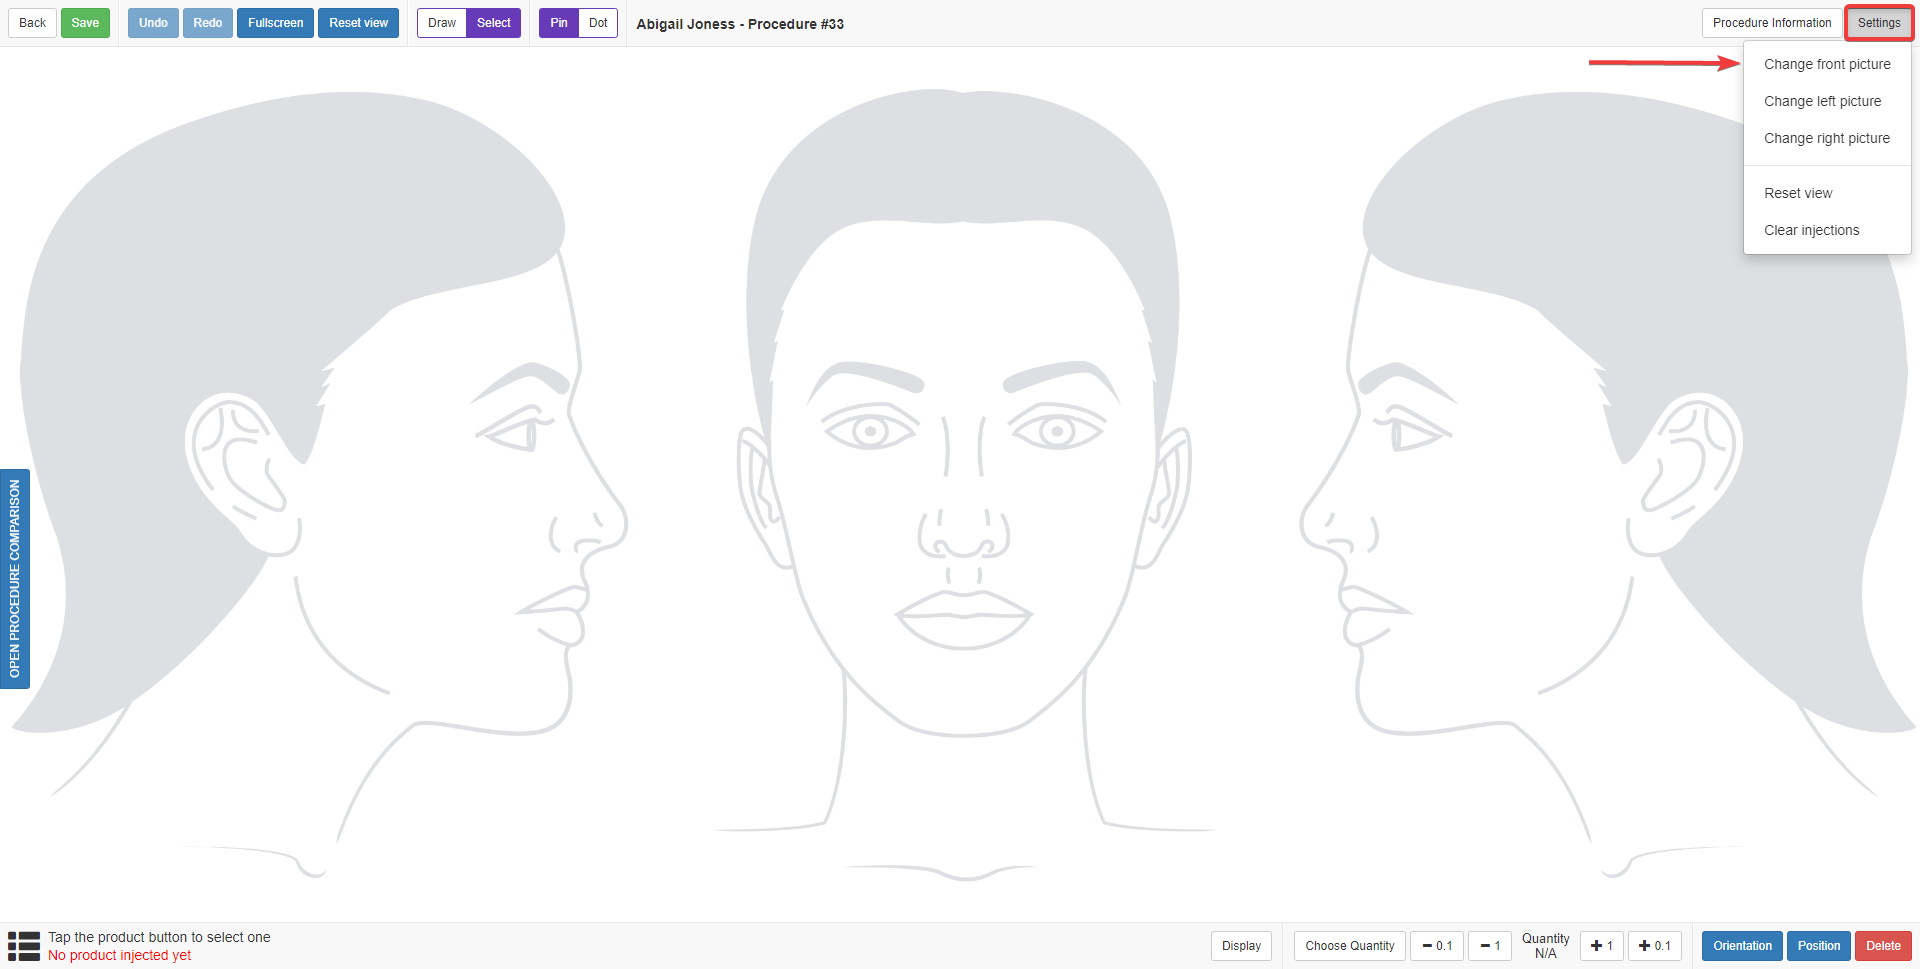
To change the front/left/right pictures, press the cog item from the top menu bar and select “Change front picture”.
The camera will open automatically and display the image preview in the centre of the screen.
Press the “Take Picture” button after you have aligned your subject with the template.
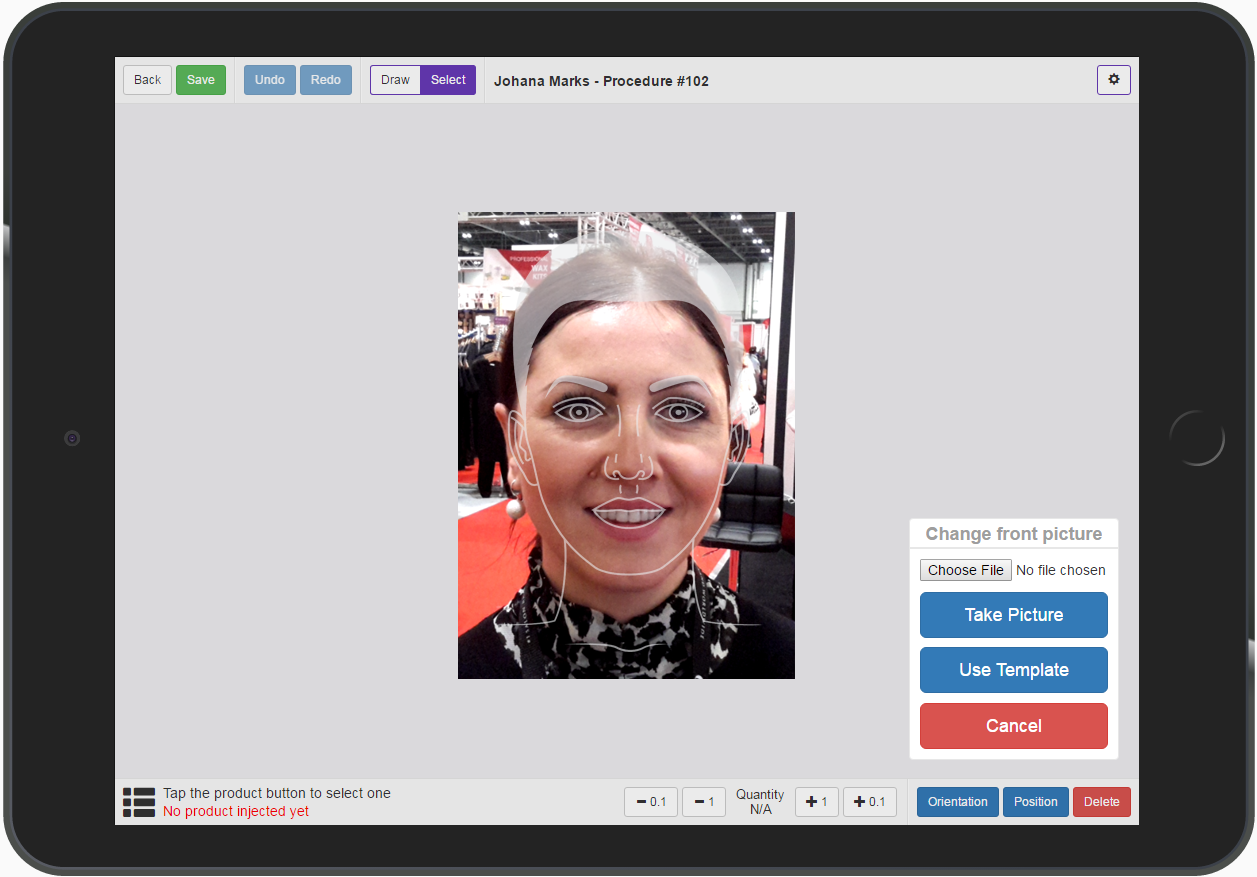
You can also upload the picture by using the “Choose File” button.
To revert to the default template, press the “Use Template” button.
Repeat the steps for the rest of the pictures (left/right) if required.
To add an injection, change the operation mode to “Draw”, select the product from the bottom left section then tap the screen where you wish the injection to be added.
Change to “Draw” mode:
![]()
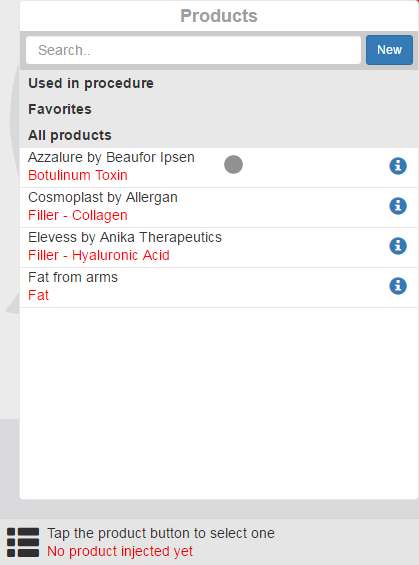
Tap on the products menu:
![]()
Select the product:
Tap on the canvas where you wish to place the injection.
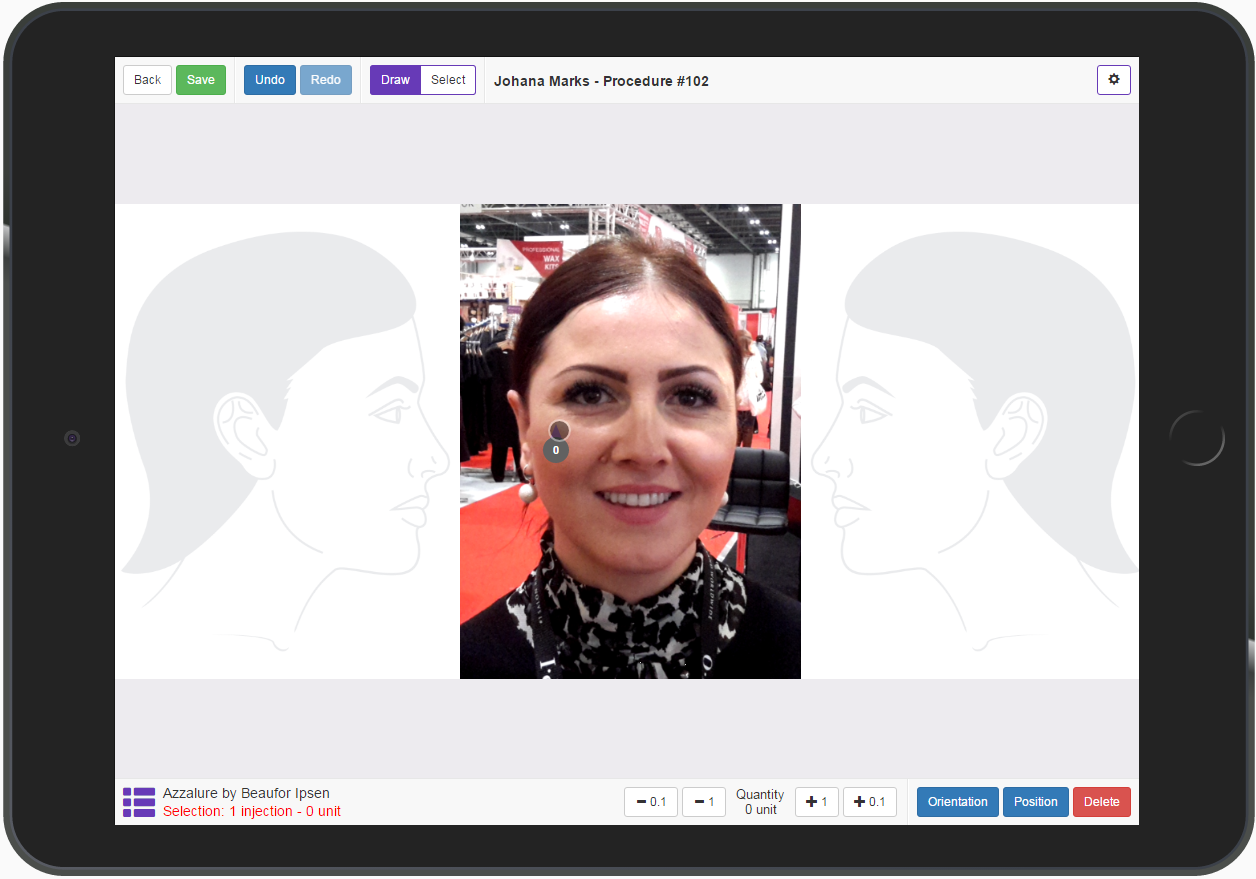
The last injection added to the canvas is automatically selected so we can change the quantity, orientation and position by using the bottom menu controls.
To change the quantity displayed for the injection, use the quantity control section of the bottom menu.
![]()

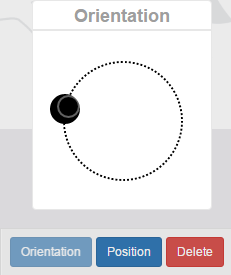
To change the orientation of the injection, press the “Orientation” button and then adjust the orientation from the orientation window.
![]()
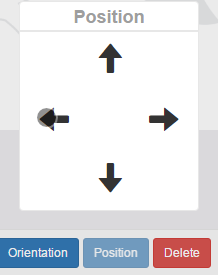
To change the position of the injection, press the “Position” button and then tap and hold on the position controls to move the injection in the desired direction.
![]()
To delete the selected injection, press the “Delete” button.
![]()
You can also undo the operation by using the undo button located in the top left section of the page.
To draw a line on the canvas tap and draw the line on the canvas.
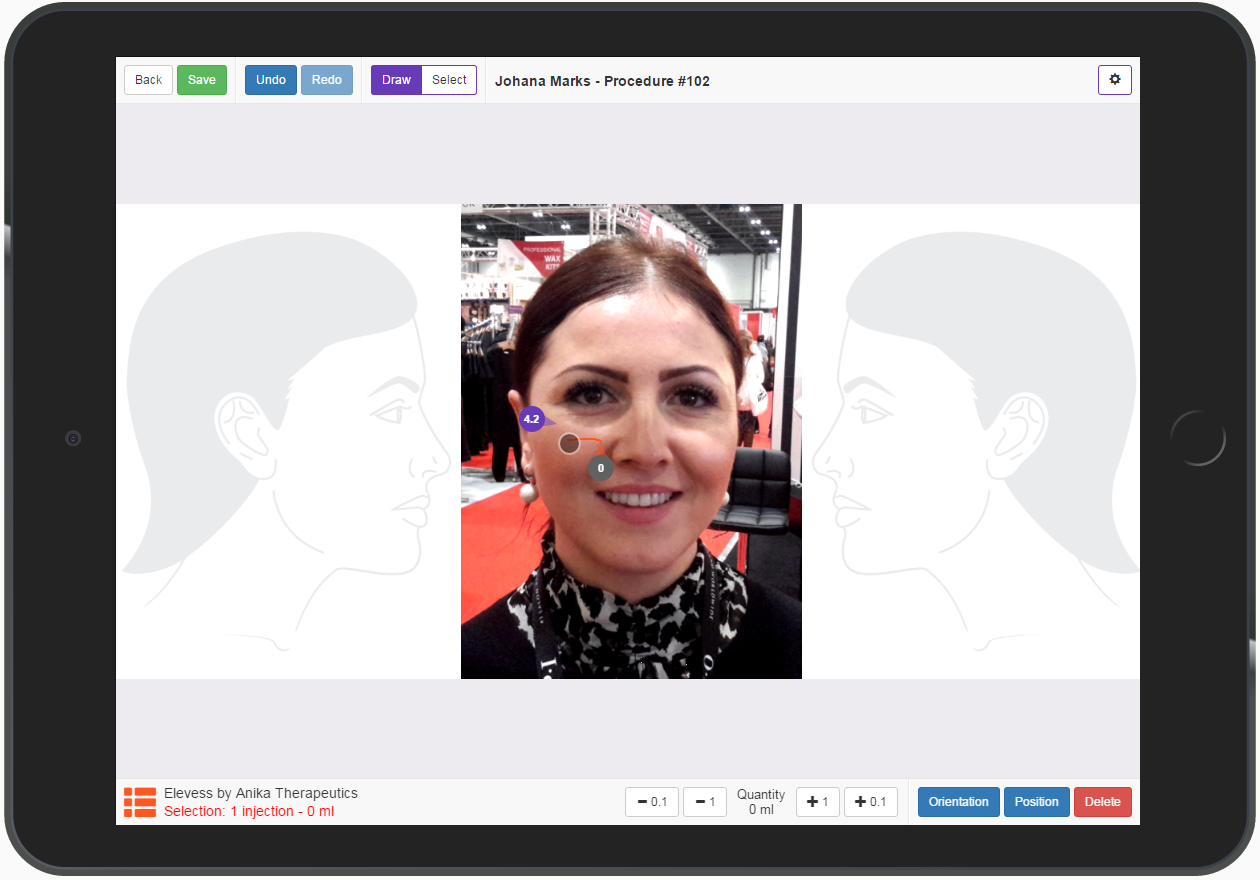
To modify an existing injection or line change we must change the operating mode to “Select”.
![]()
Select the injection by taping on it and then change the quantity, orientation or position.
The injections can also be moved directly by dragging them to the desired position while in “Select” operating mode.
To zoom in the page, use the pitch gesture on an empty area of the canvas while in “Select” mode.
To remove all injections done with a certain product, open the products menu and then tap on the red remove icon of the product.

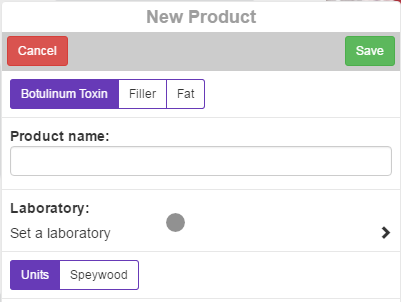
To add a new product, press the “New” button from the products menu.

There are three types of products in the system:
- Botulinum toxin
- Filler
- Fat
For botulinum toxin products we must type the product name, select the laboratory and unit type (units, speywood).
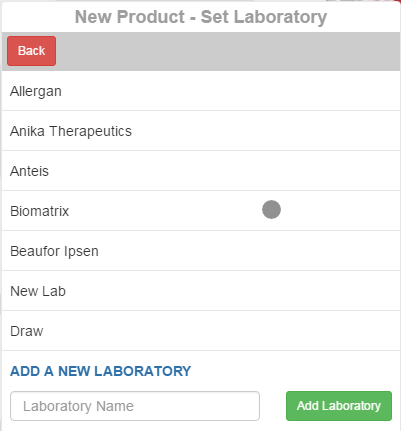
To select the laboratory, tap on the “Laboratory” item and choose the laboratory from the list.
If the laboratory is not present in the list we can add it by filling in the “Laboratory Name” field and then pressing the “Add Laboratory” button.
For filler products we must type in the product name, select the laboratory and molecule.
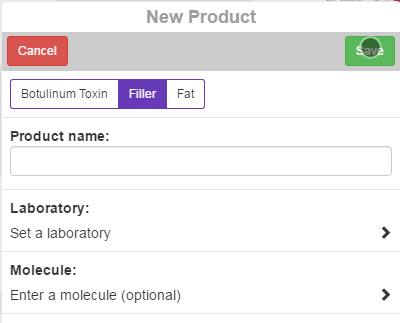
Molecules are optional; they are selected and added in the same way as laboratories (see above example).
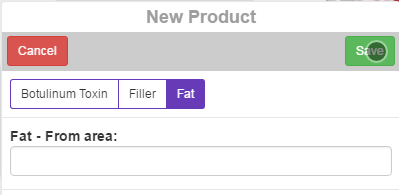
For the “Fat” product type we only specify the “area” field.
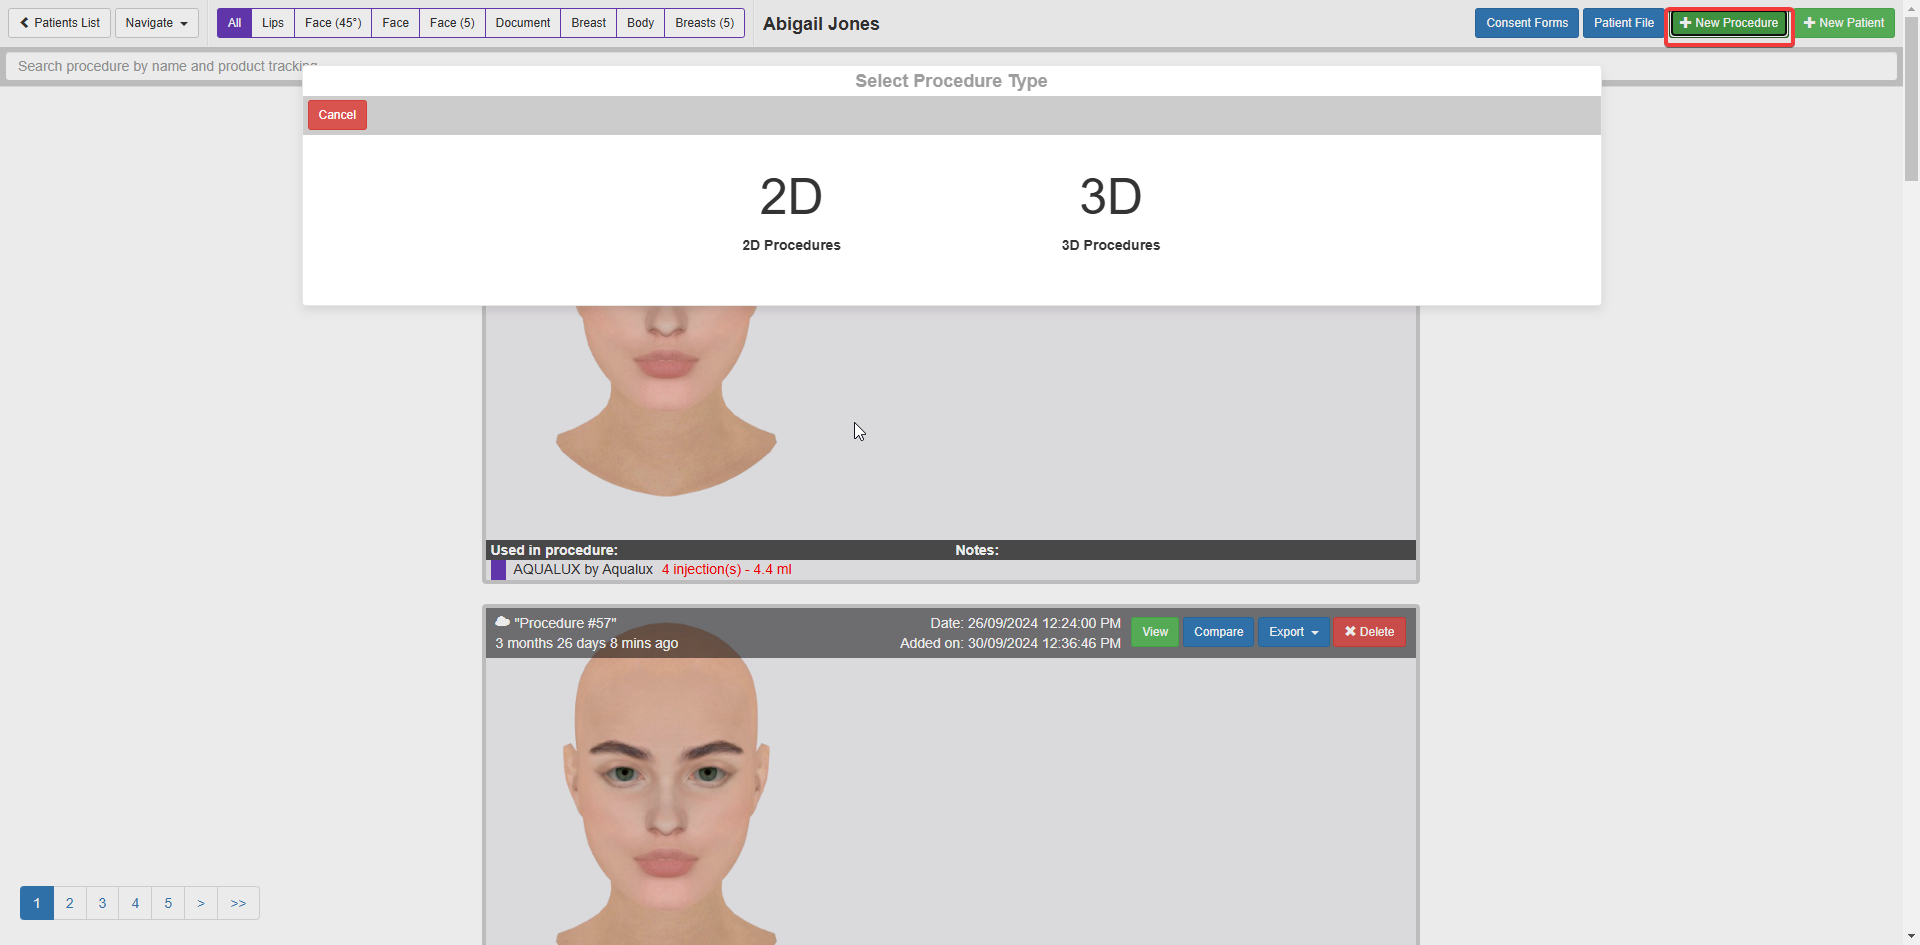
Performing Rejuvenation Procedures in 3D Mode
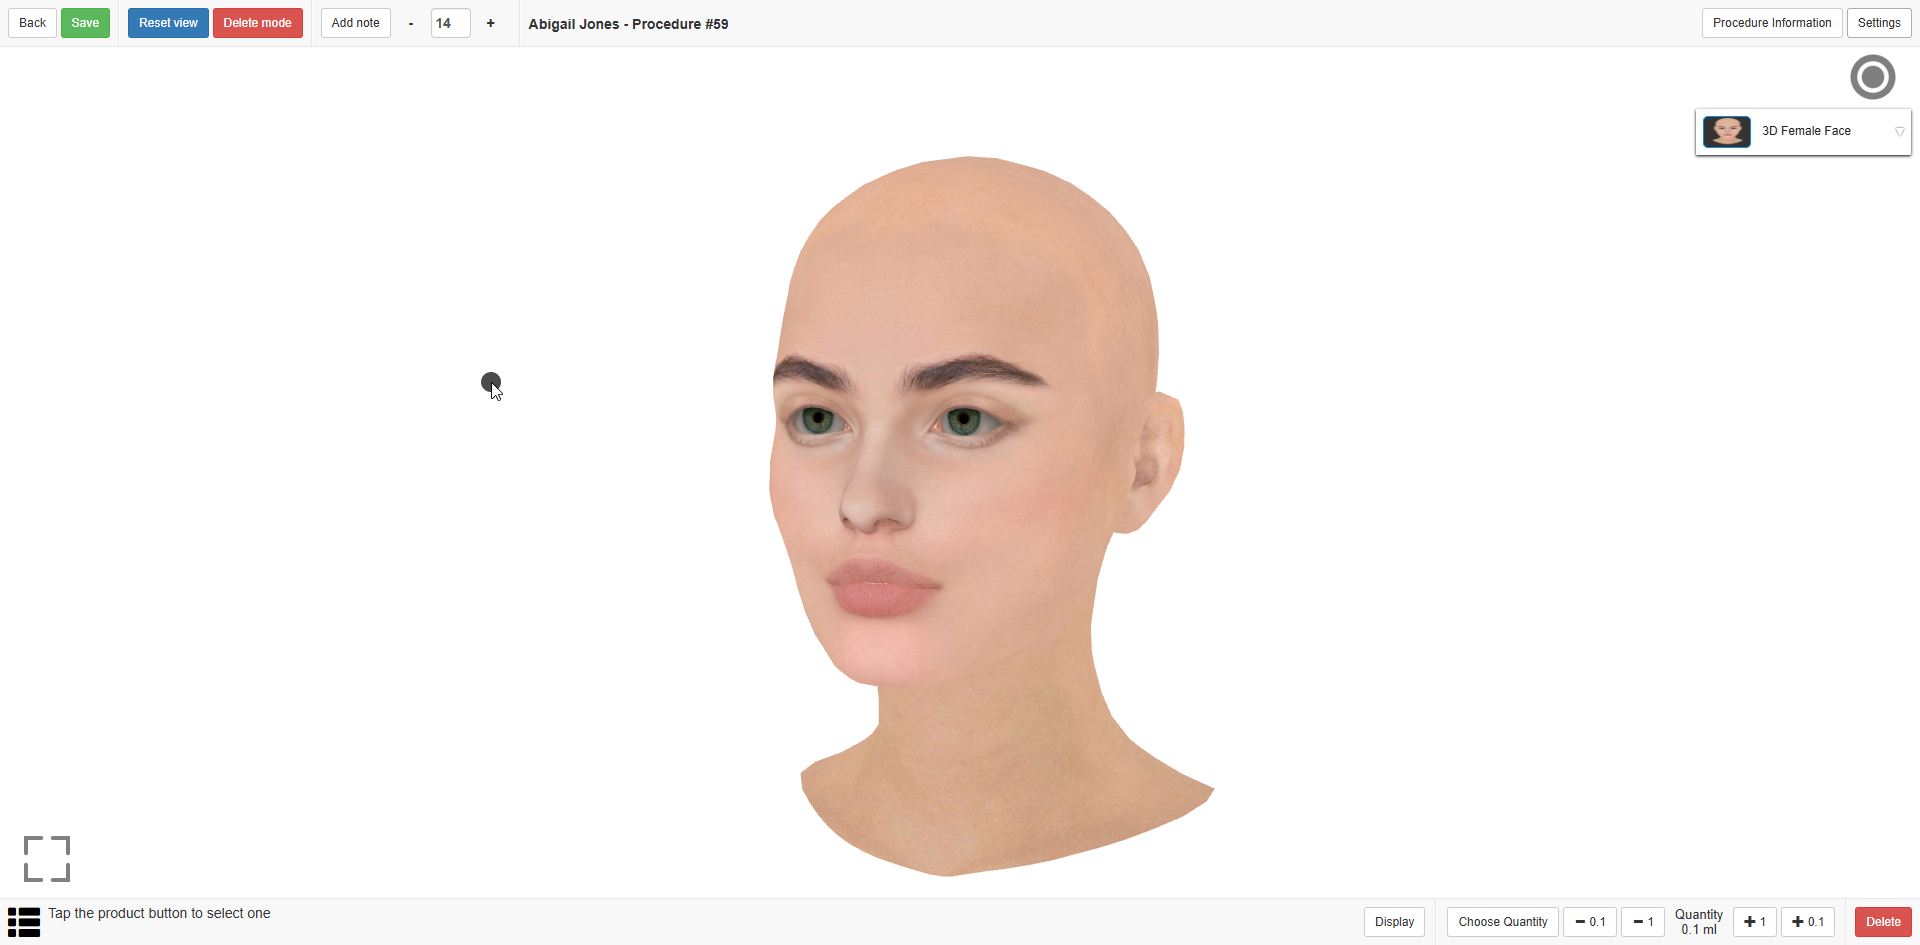
This newly introduced feature allows you to utilize a 3D model to design and visualize rejuvenation procedures with greater precision.
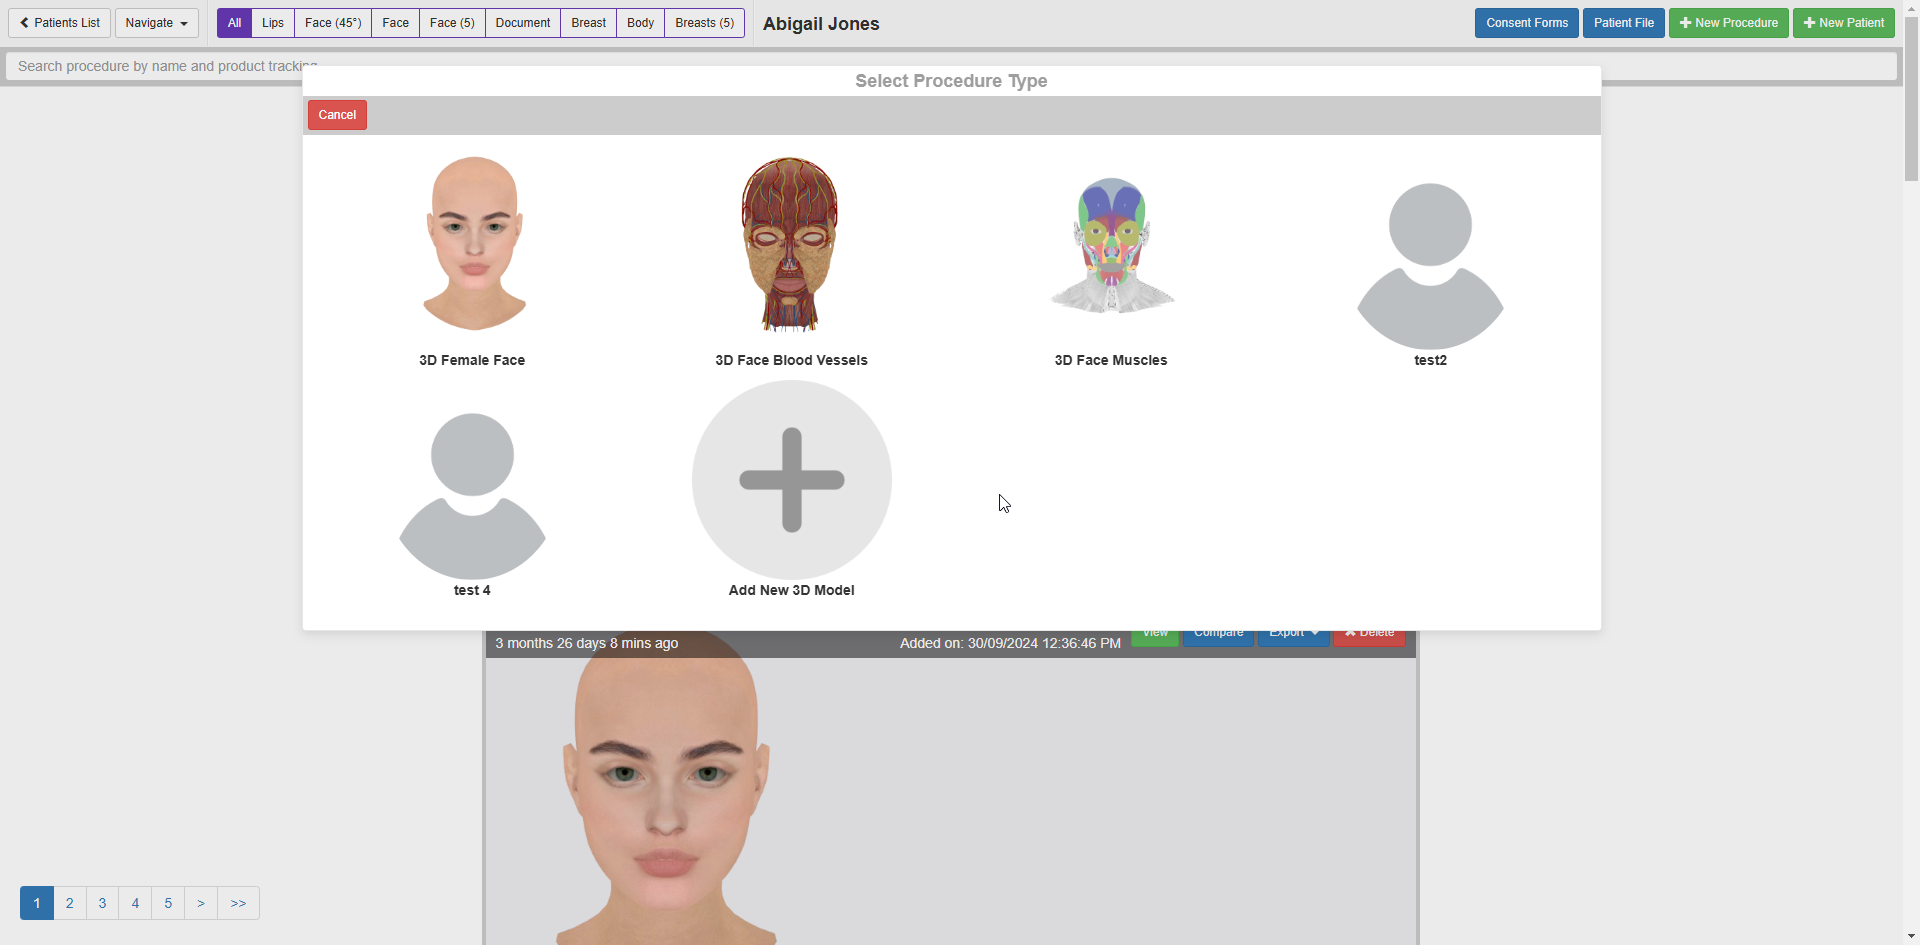
To get started, simply click New Procedure, and you will be prompted to choose whether to use a 3D model or 2D model. Select the 3D option and choose the desired procedure from the available options.
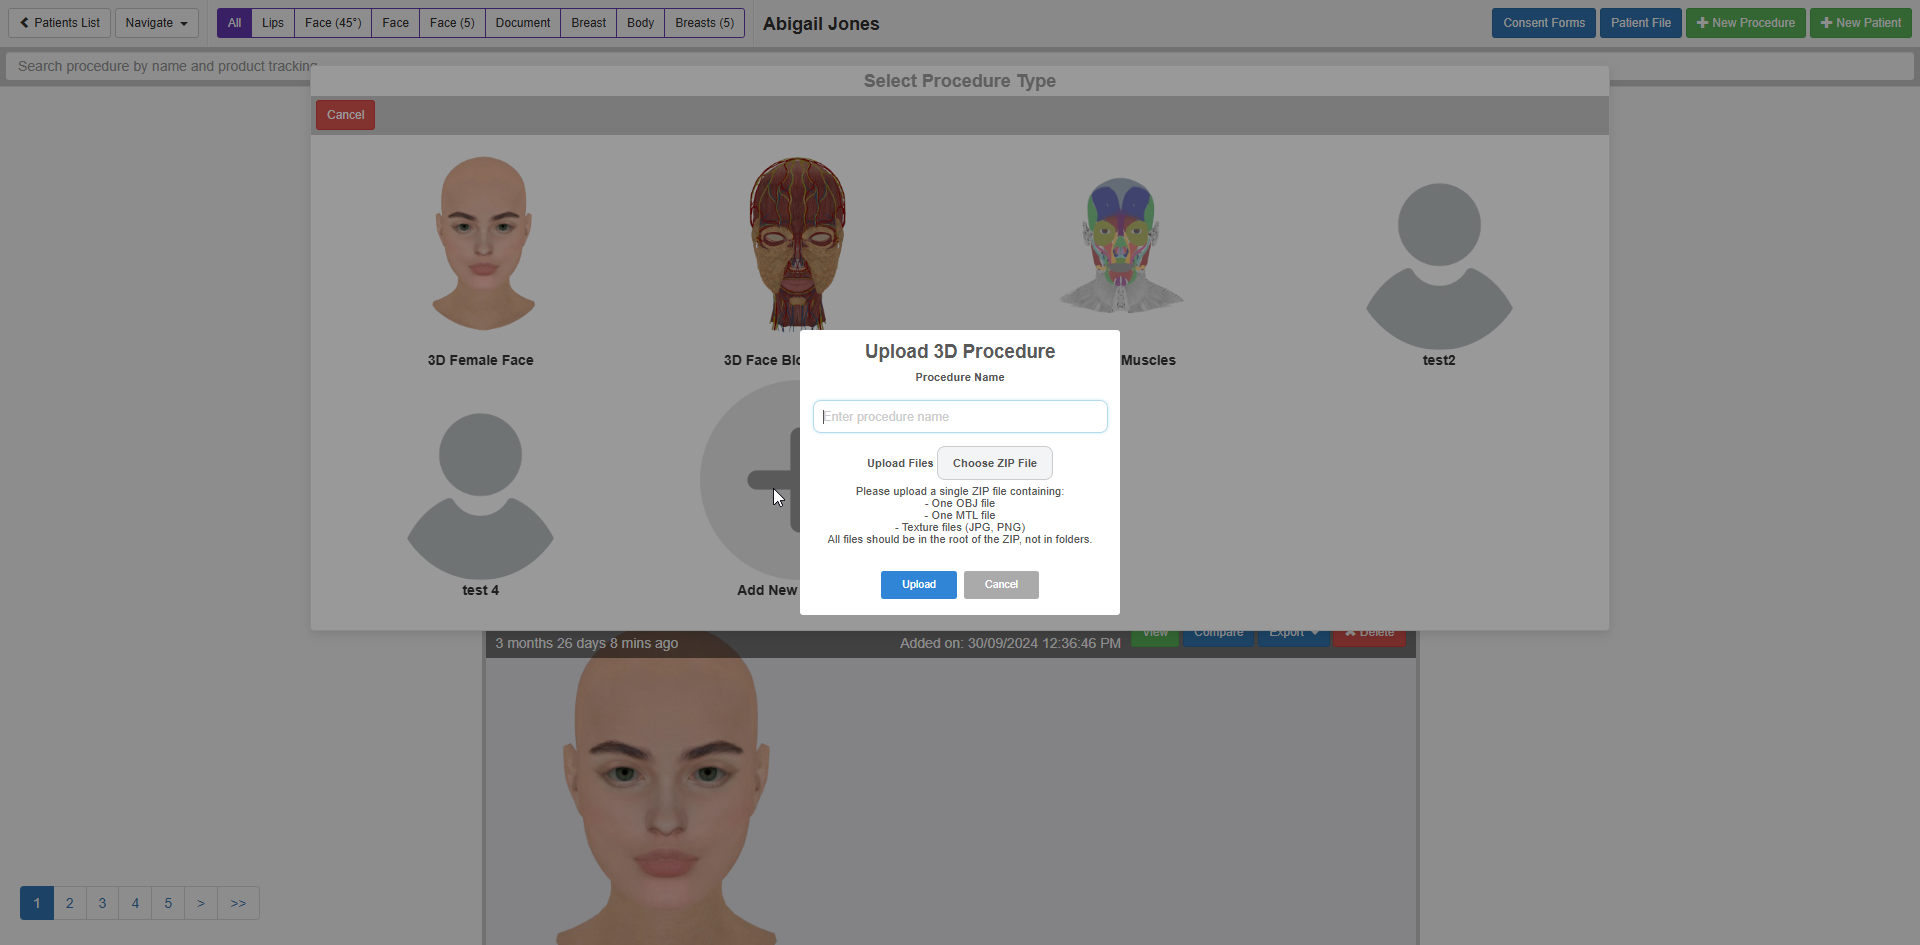
Additionally, you have the flexibility to import your own custom 3D models, enabling a more personalized approach to treatment planning.