
To send an email to your client you have to type the email or create a template first. To create an email template or an SMS template, search in admin area “Marketing emails” or "Marketing SMS"

This will open the marketing emails or sms template page.
- Press the “Add new” button to add a new template.
- Press the “Edit” button to edit an existing template.
- Press the “Delete” button to delete an existing template.
In order to access our database of Email or SMS templates, please open the “Marketing emails” or "Marketing SMS" pages from the admin area, then click the "Library" button.
To send an email or an SMS to your client go to the client profile and press the “Activity” button.
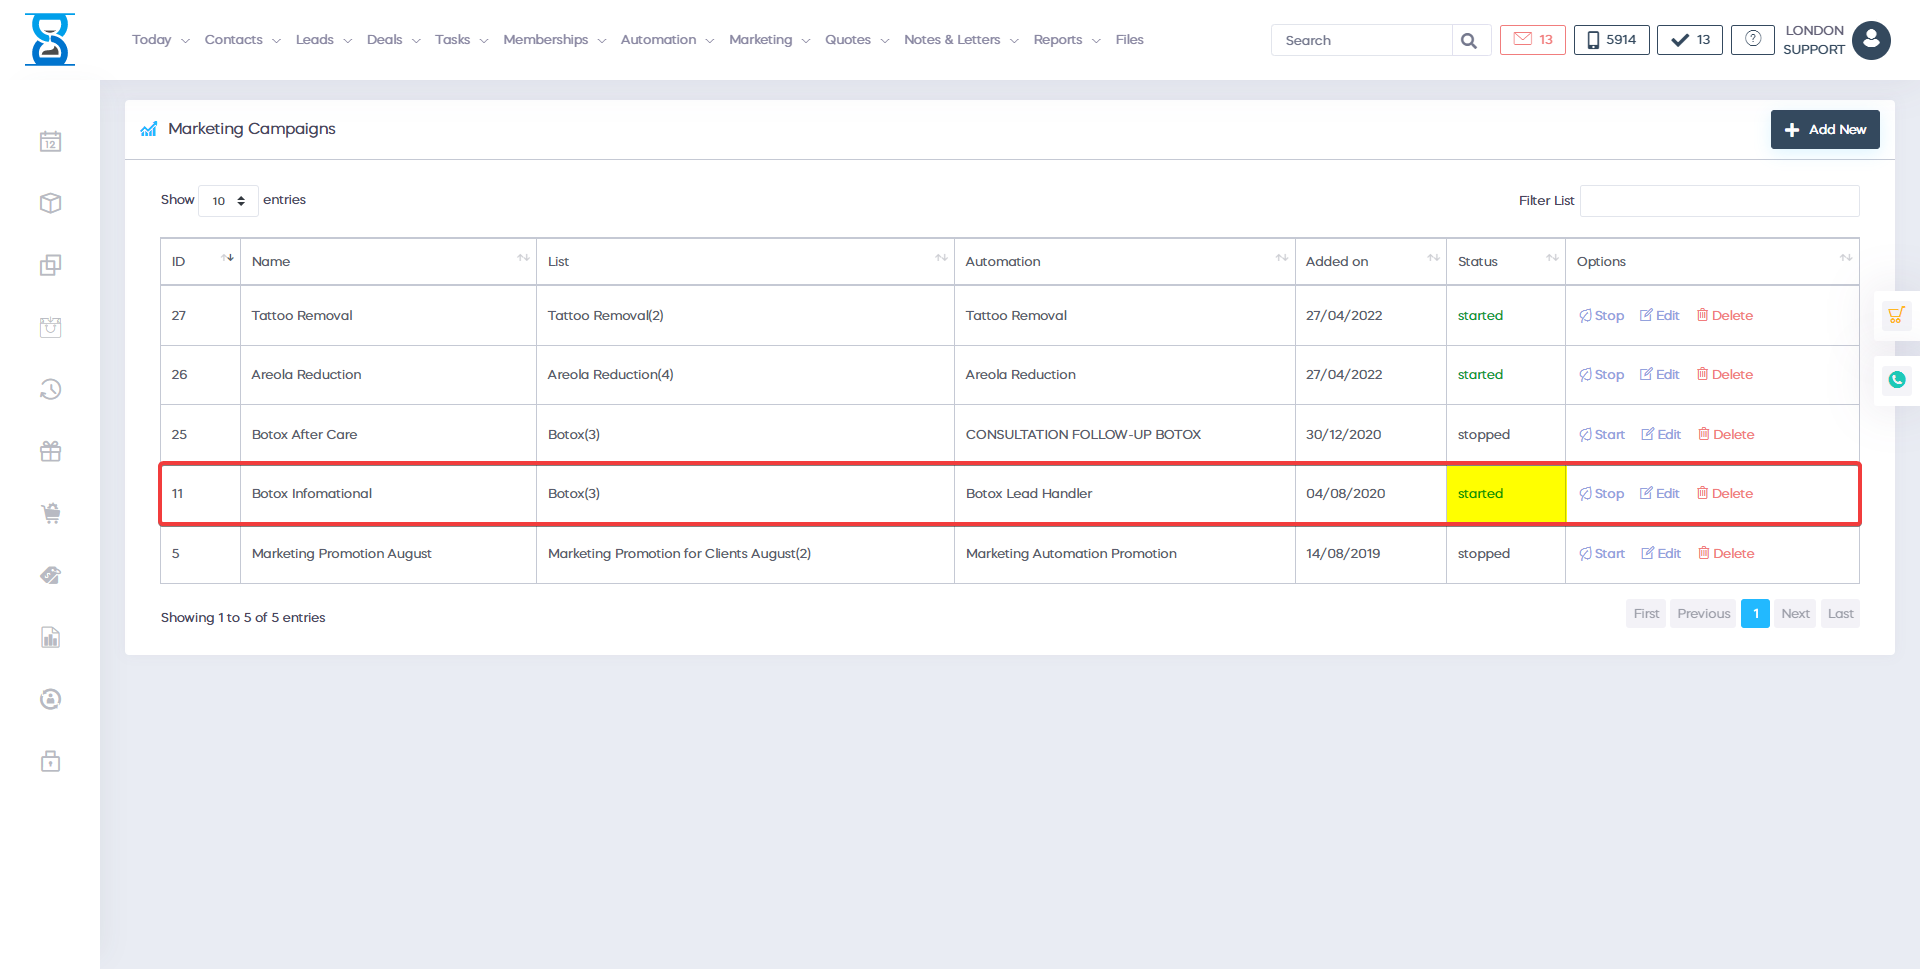
In order to create a Marketing Campaign you first need to create a marketing automation. To access the Marketing Automation you will need to click on the "Automation" button from the menu:
Once you have clicked on this button, this menu should appear:
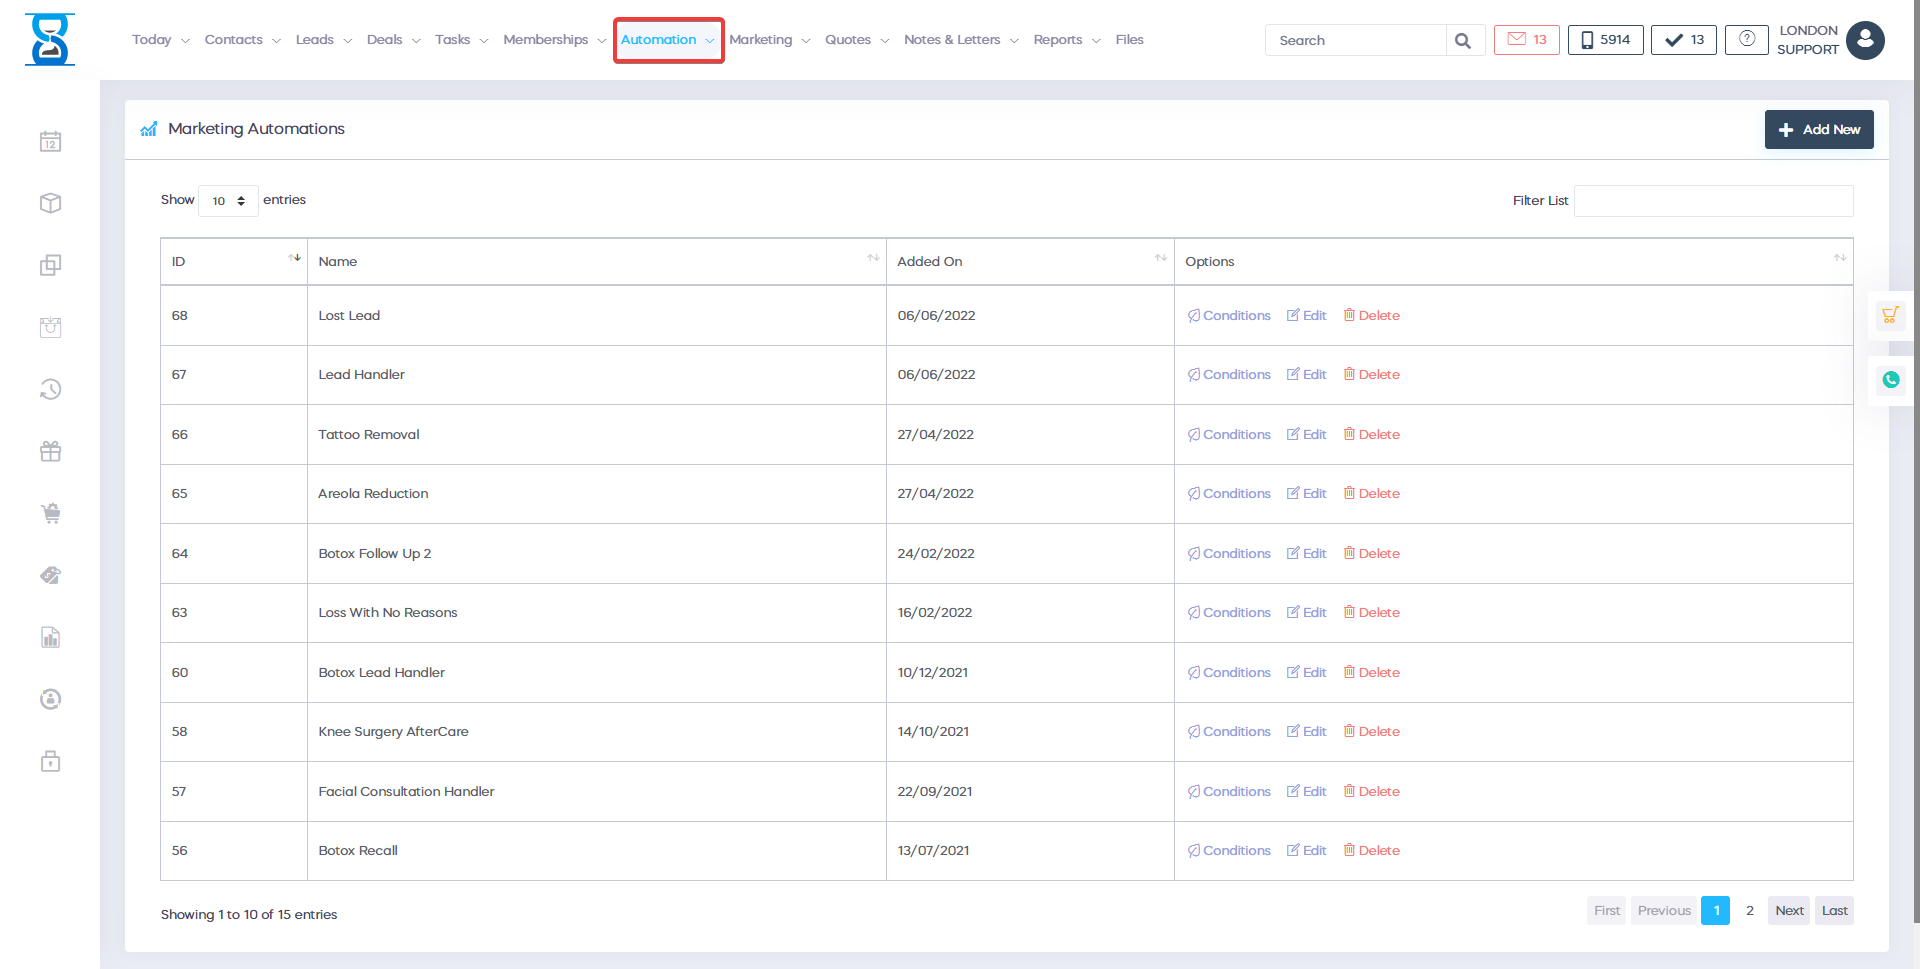
Here you will be able to see all the different marketing automation that you have created. You can see each individual automation by clicking on the "Conditions" button :
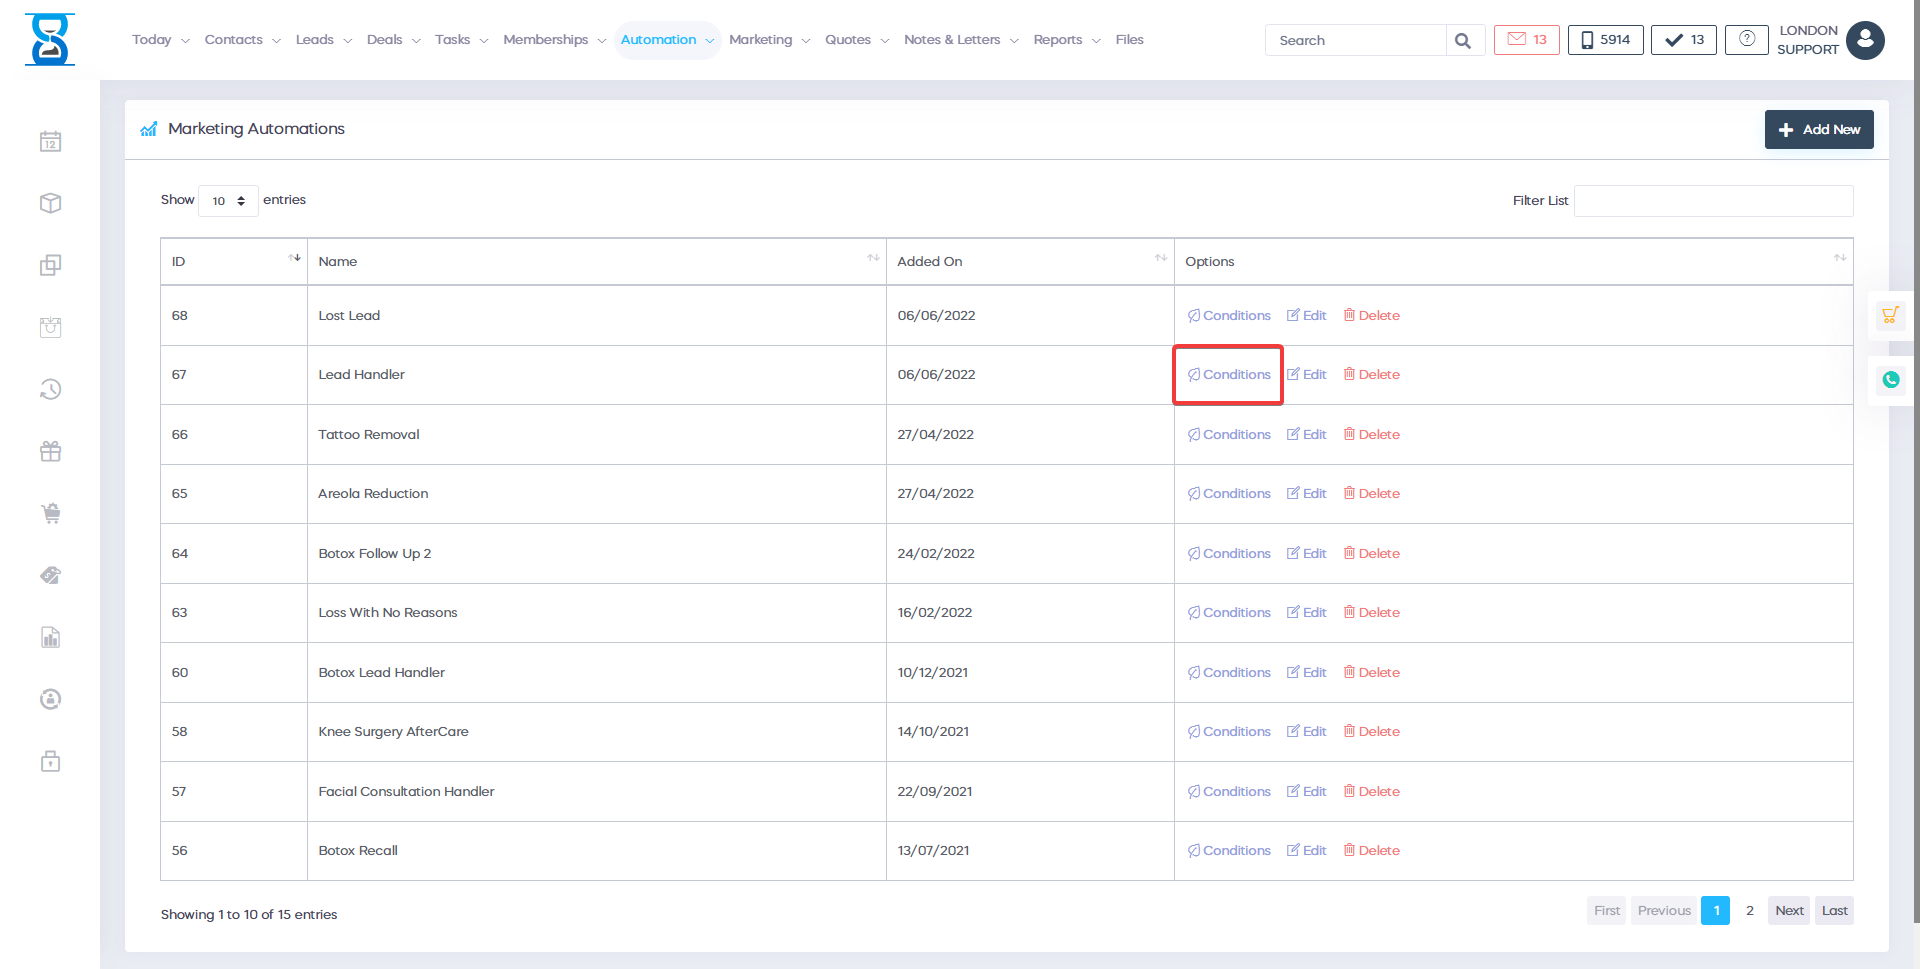
Clicking on this button will take you to an automation tree such as this one:
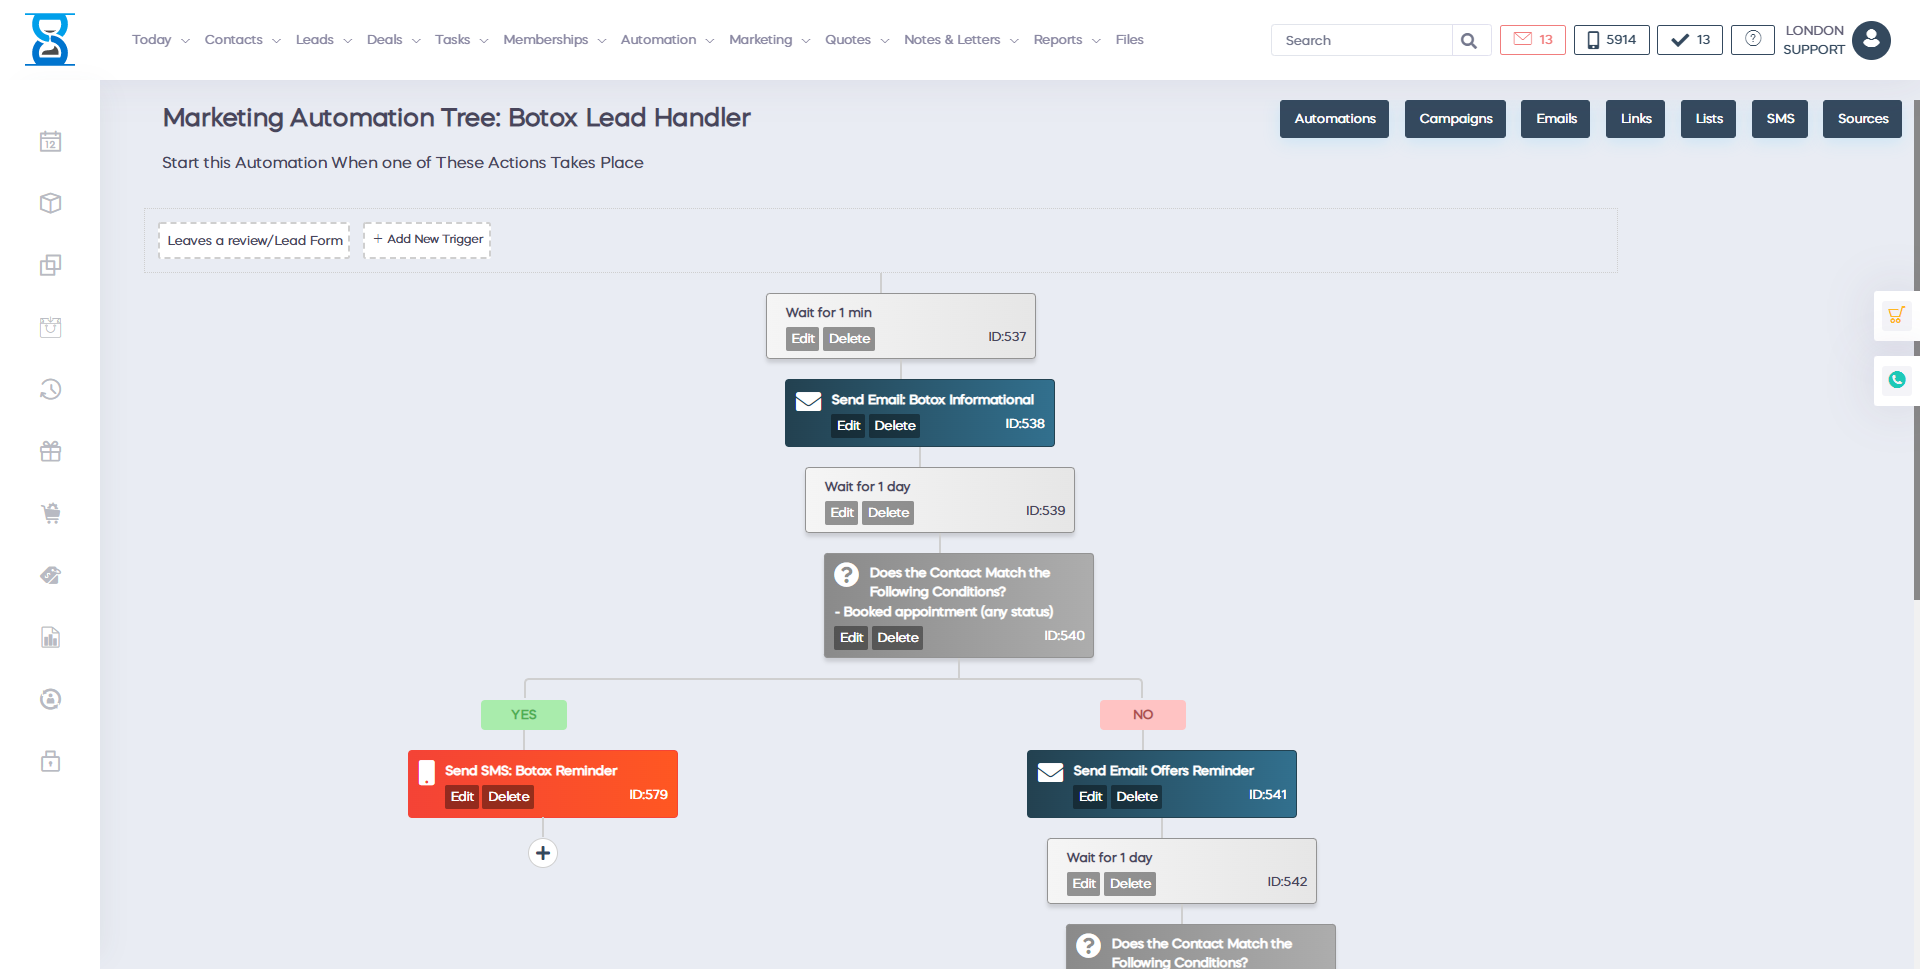
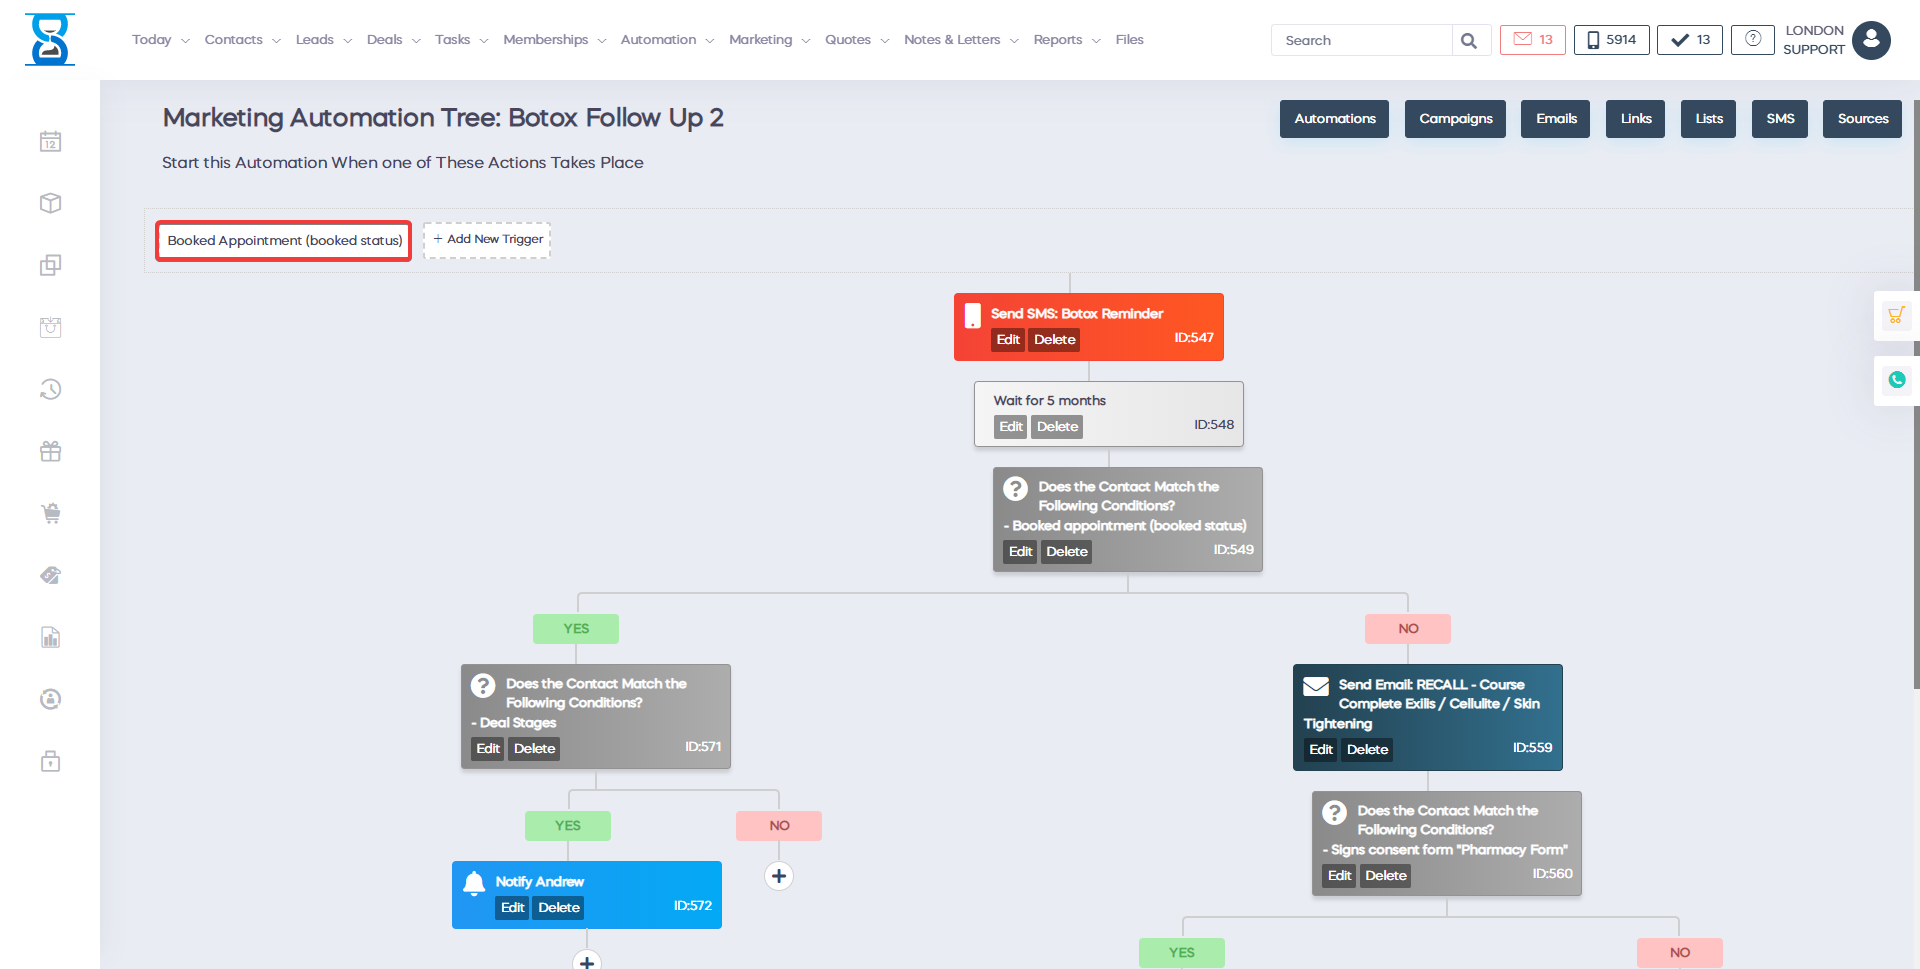
Each automation tree starts with a trigger. A trigger refers to when a certain action has been met. For example when a customer books an appointment. Clicking on "Booked Appointment (booked status)" will allow us to see the different triggers. This is the window that will appear when we click on the trigger:
In here you are able to see the condition that will trigger the automation. For each condition we have different options. For the "Booked Appointment (created date)" condition we can select the appointment status and we can select for which services we want this automation to be applied.
Moving on, the next element that we have in the automation that we have used as an example earlier on is a condition:
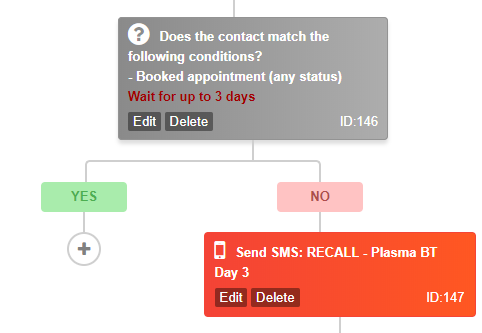
The way this works is that the software checks if the customer booked an appointment. If the customer books an appointment in the time period of 3 days after they have booked their first appointment, then the automation will end since the customer "went" to the "Yes" branch.
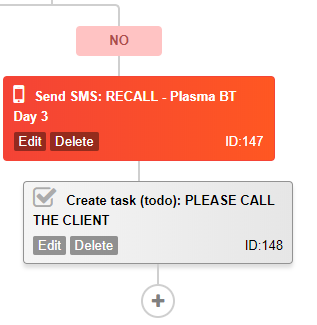
If the customer doesn't book an appointment in 3 days time, the "no" branch will be used to send an SMS reminder to the customer since they didn't meet the condition. After the SMS reminder has been sent to the customer, a task will automatically be created for a member of staff to call that customer. The Automation feature will change the way you run your business. It will help you automate more tasks and the more repetitive the tasks, the less work you will need to do. Day by day, automation is big, because it makes more tasks automated, leads to better performance and great results. For example, if you have previously used to chat with a customer, now you can take the customer's phone number and send an SMS text, send an email reminder, or an email for the preliminary and follow-up care.
To sign a permanent form after the customer arrives, you will enter the customer and the business name as well as some additional details for the treatments they are interested in, or links to video testimonials. You can do all this with one automation. Automation will save you a lot of time, it will help you manage your business better and easier and it will help with the development and scaling up. With the Automation feature, you can create automations in the software and you can use marketing campaigns with personalized and branded emails, templates, sms and texts. With Customer list links and Marketing sources, you can promote your business and create an unlimited number of landing pages for your website.
When the customer arrives after seeing your promotion campaign or landing page, they will need to complete the Custom landing page form, where you can choose the fields you want: first name, phone number, email subject or treatments. It can tell you exactly what you are looking to book and where. The customer can ask a question once they finished completing the form - it can be branded in any form, with any user, field, or color. You can link the form to Automation, even if they keep an appointment online or fill out a form when they have a specific interest in a given treatment. You can start sharing this link once they fill out the form, or that the customer fills out online. The Booking process in the Automation tree automatically sets the list of conditions based on their details. You have the option to activate triggers, or change the meeting status to start the automation.
You have different conditions you can calculate and distribute in different stages, you can aim for normal encounters which can be booked at the reception. With the Online booking tab, you can determine which procedures you want, which treatments, courses or memberships and target what will be applicable to the Automation function. You can choose a time, a day, a week or any period of time you decide and ask the automation to check in, using the smart tools we have integrated. If the customer has booked a meeting, you can check any condition, then you can split it into two branches and see if the customer has booked it, then send an email and create a task to automate it. If the customer has not paid in advance, you can send an SMS. You can request and create a receiving task - to call the client, or you can follow up in two days with a specific email. You can email a list of video recommendations, the associated achievements or benefits of treatment they are interested in.
You can create different conditions and automation, you can target a certain segment of customers if they have interest in specific procedures. Also, you can make follow-up reminders for the customer to come to the clinic for the treatment: every three months, every six months, every nine months, or once a month. At this stage you will be able to add conditions, one action or two, you can create a new segment or turn into a weight block and wait a certain period of time. If you add a new segment, you can actually add the condition. If you want your costumer to sign a consent form, you can select it from the list of forms already imported. After the customer has signed it, just go and submit the form by email in pdf format. Sign the form, convert it, then go back to Automation.
You can set a specific period of time or conditions. Then, you can go and do an action for which you can wait a certain period of time: you have the Check-in time, you can create actions, send emails at the same time with reporting errors to someone on your team. Automated action can wait for a specific period of time. Check the condition and if the customer has reacted in one way or another. Apply to our email or switch to sms, creating a text or an assignment task to the team. Then return to the top of the Automation to Contact. Of course, you can define your own Automation trees, you can create your own campaigns and in the campaigns target a specific number of customers. We can import personalized emails, many templates. There are many forms and templates in the Library, many built-in sms texts that you can use and you can define and determine what email do you want to use. Automation is also applicable to sms text in which you have a lot of templates.