
![]()
The Calendar is the page from which you manage your appointments and waiting list.
You can access the Calendar page from the “CALENDAR” button on the left menu (see above icon).
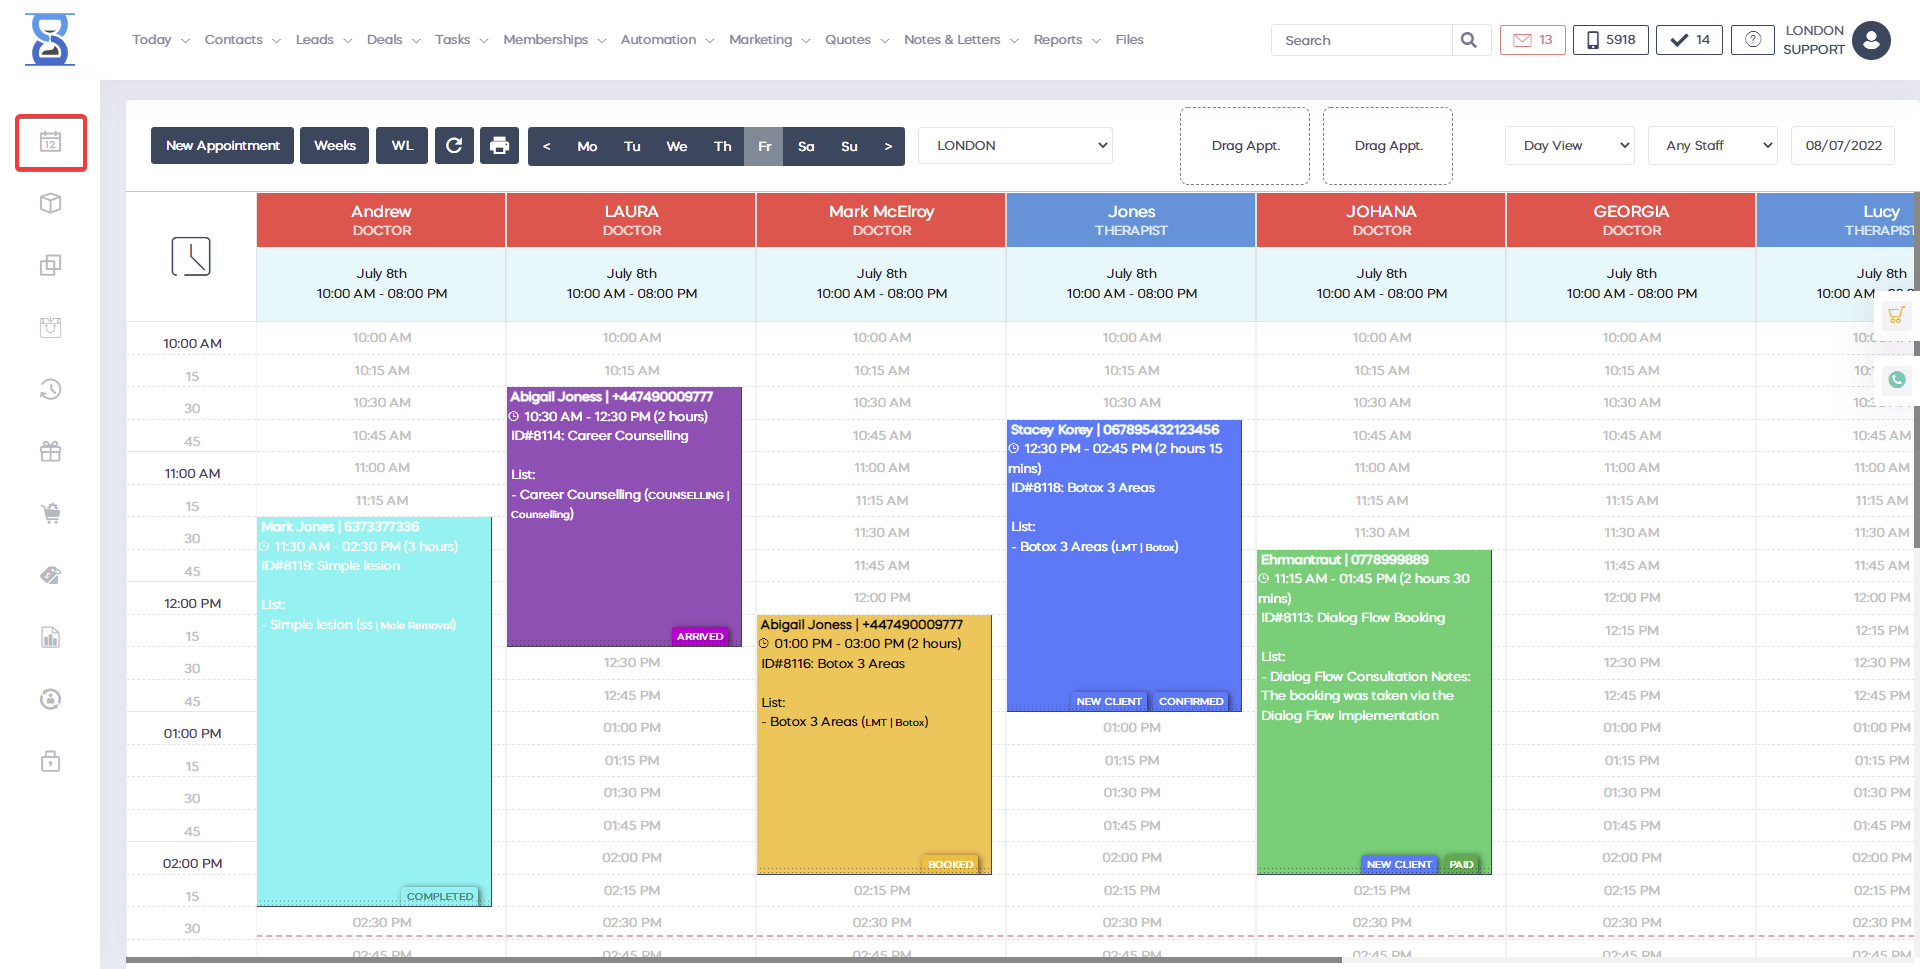
Layout:
The Calendar is divided into 4 sections:
- Top section for date navigation, location selection, waiting list and appointment type legend
- Staff columns (horizontal) with a button to scroll to the current time (left clock icon)
- Time section (vertical)
- Appointments section
The appointments section can be scrolled both horizontally and vertically.
Date navigation
You can select the day you wish to view your appointments in multiple ways:
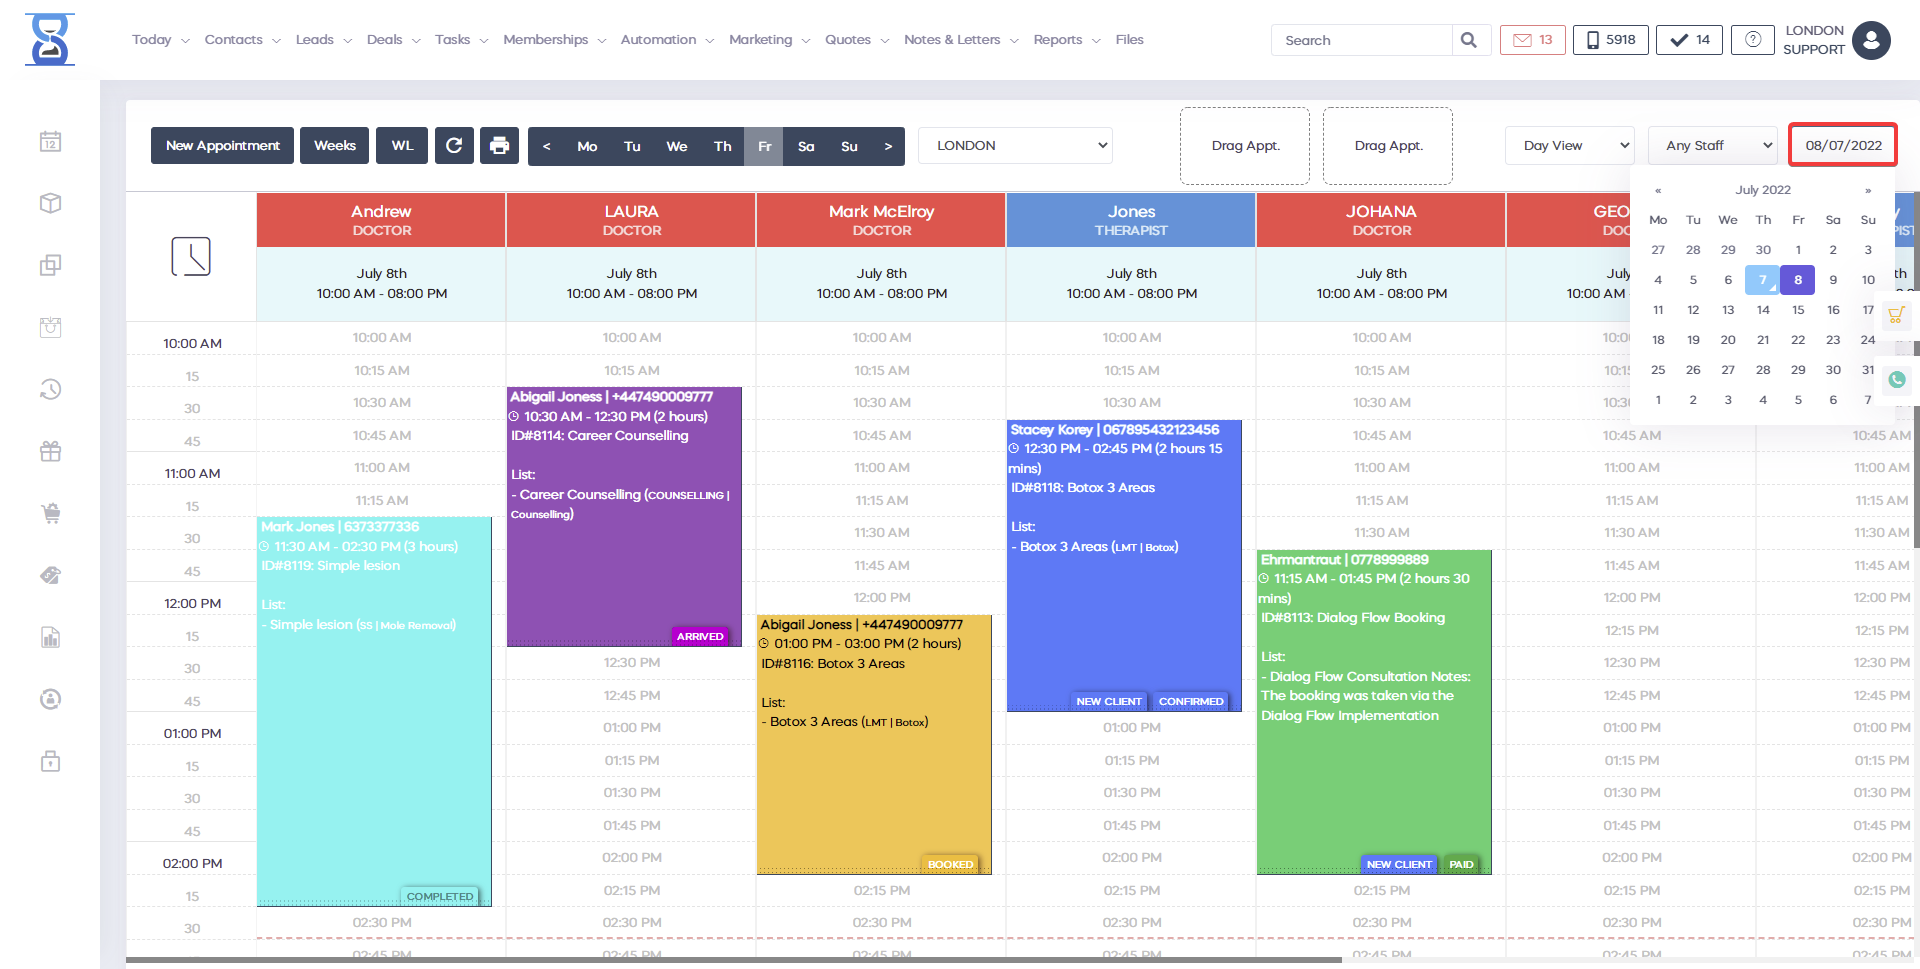
- Selecting the day directly from the date calendar.
- Using the week day navigation located in the top section of the page.
- Using the “Weeks” button to select 1-7 days or 1-12 weeks in the future.
To select the day from the date calendar click on the “View bookings from” field and then select the date.
The weekday navigation is located on the top section of the page.
You can select the weekday directly as illustrated below:
You can also use the next “>>” and previous “<<” buttons to change the day:
The weekday navigation will automatically get the start and end of the week that corresponds to the selected day in the Calendar.
For Example, if the current day is 25th of August and the selected day inside the Calendar is 3rd of September (Saturday) then when you press the Monday button it will take you to the 29th of August.
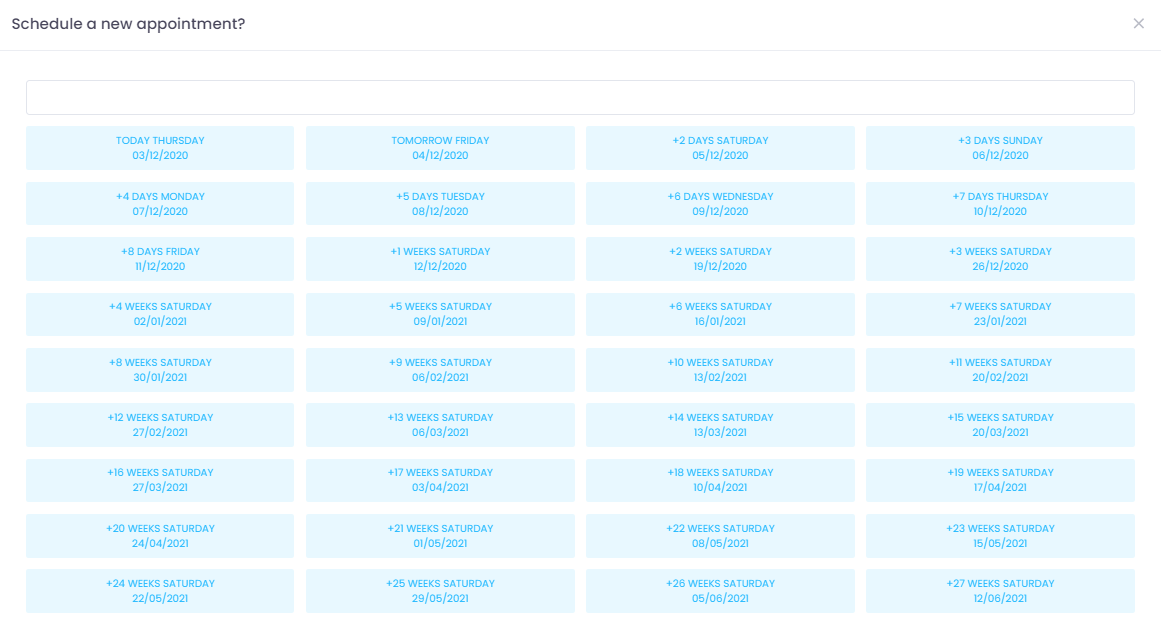
The “Weeks” button is located on the top section of the page.
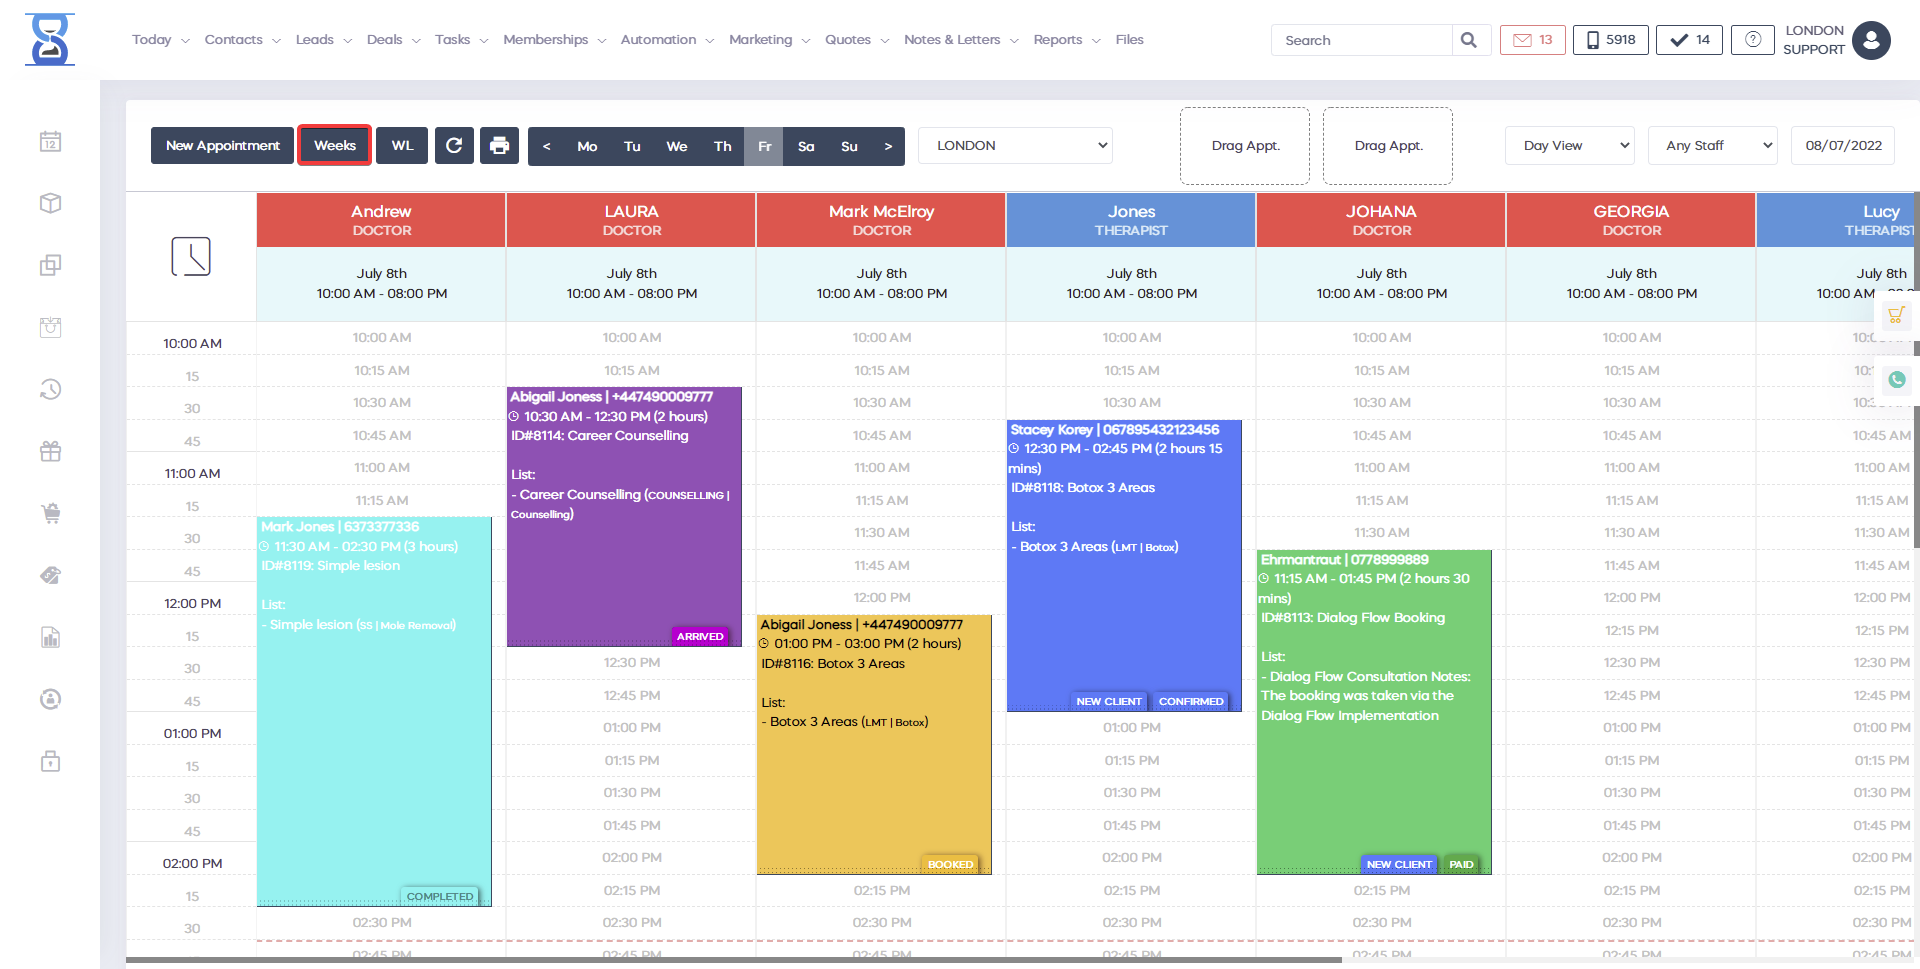
Upon pressing it will open a window from which you can select the days or weeks in advance of the current selected day.
To reload the bookings to check if there are new appointments (e.g. added from the online booking) use the “Check” button located in the top section of the page.

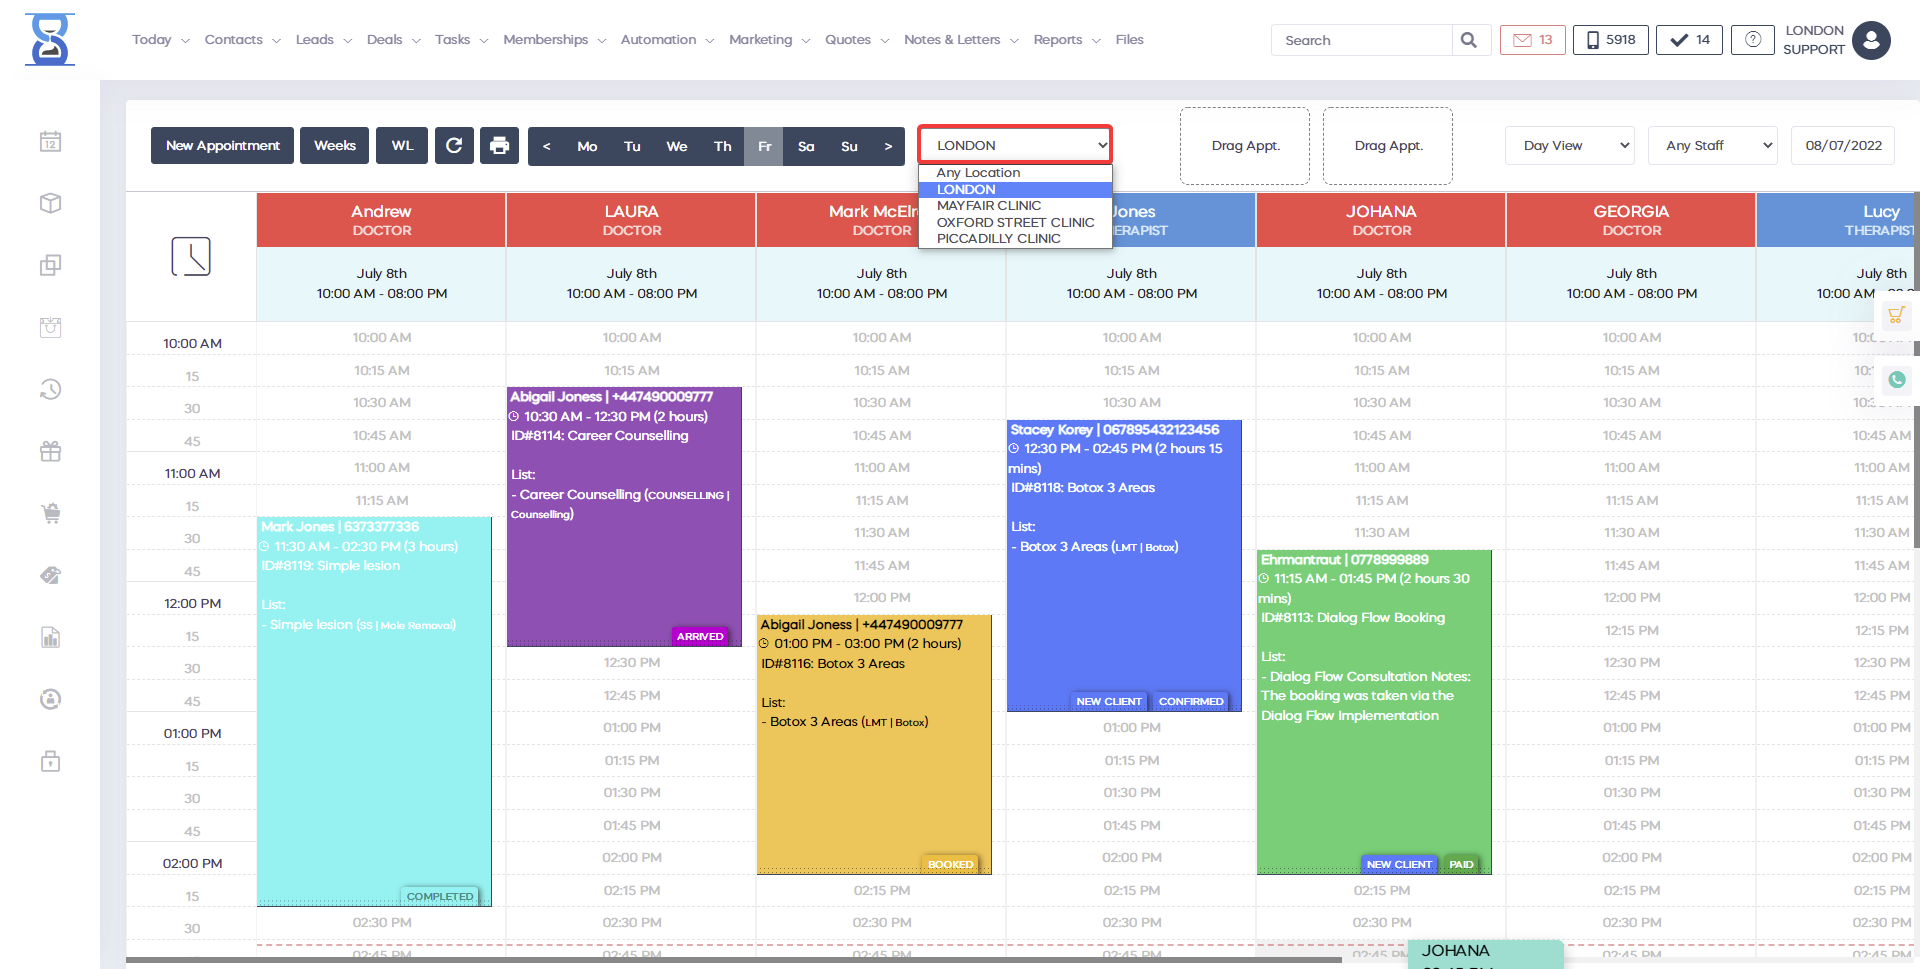
Location change
If you have multiple branches you can change the location at which you manage the appointments by using the location drop box located in the top section of the page.
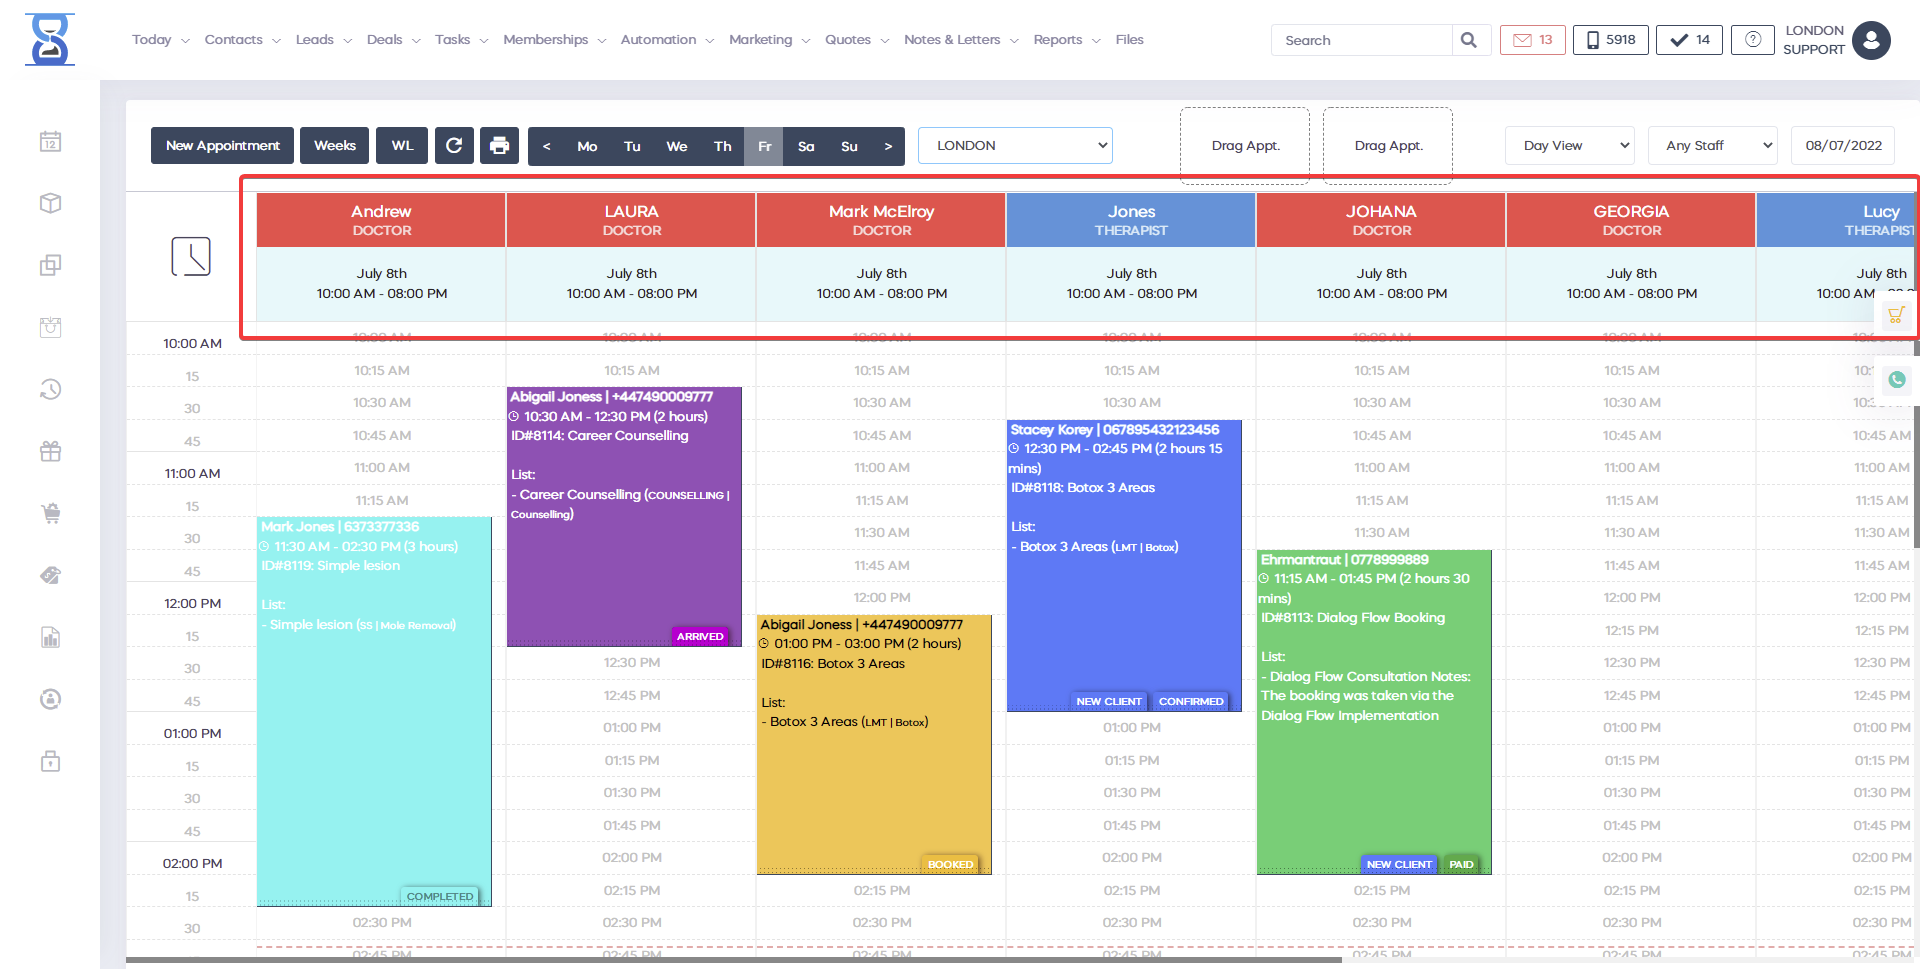
The Staff List
The staff is displayed in a horizontal list below the main date and location controls.
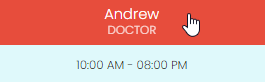
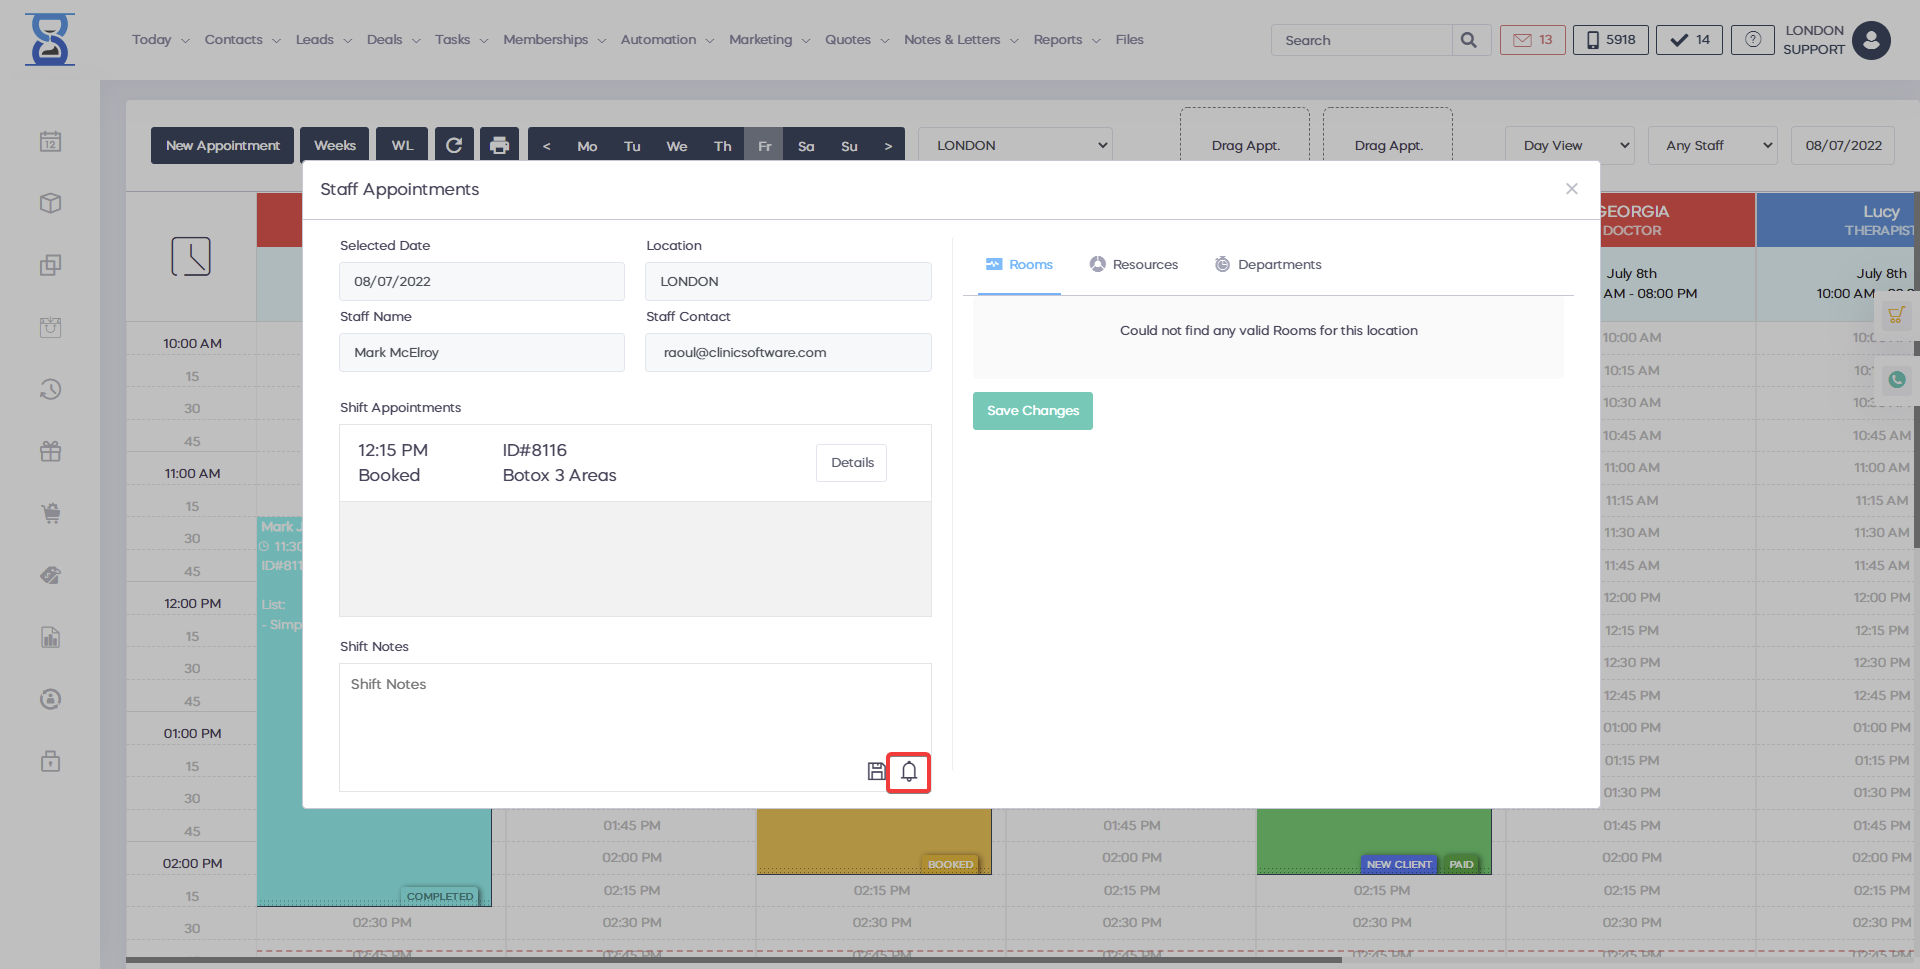
If you click on the staff name a window will open containing a list of all of the selected staff’s appointments.
From this window, you can also see the staff contact details and notify them by Email and SMS.
Appointments that are too small in duration (e.g. 5 minutes or lower) can also be easily accessed from this window.
Staff notifications
To notify the staff, click on the staff name from the Calendar and then press the “NOTIFY STAFF” button.
A window will open allowing you to send out Email and SMS notifications.
Current time
To scroll the Calendar to the current time click on the clock icon located before the staff list.

The Calendar will scroll to the current time indicated by the red dotted line.
Appointment statuses
There are 5 statues that an appointment may have:
- Booked (yellow colour)
- Confirmed (blue colour)
- Arrived (violet colour)
- Paid (green colour)
- Check (red colour)
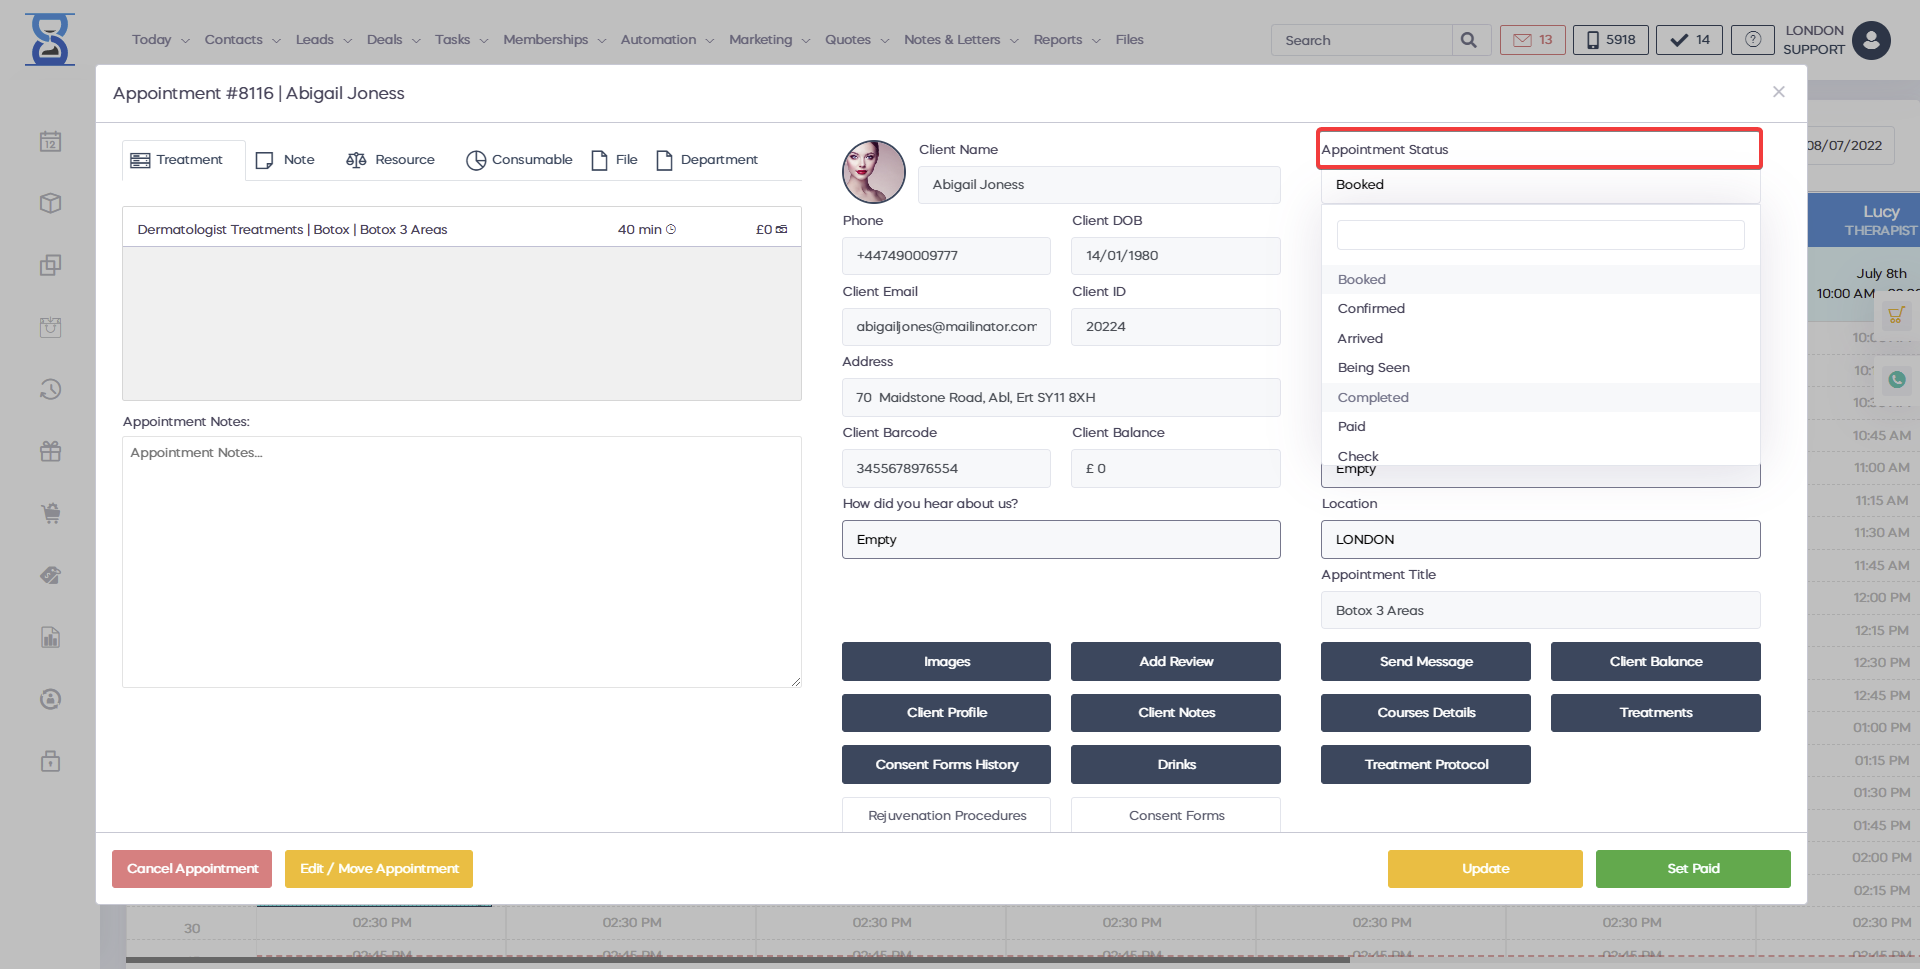
The default status of an appointment when added through the Calendar is “Booked”.
When you update the client status to “Arrived” the system if configured will send notifications to the staff informing of the client loyalty category if set.
On the arrived status, if configured the salon waiter will also receive an email containing the beverages specified in the appointment “Drinks” option.
Notifications are also sent on the other types of status if configured the client and/or the staff can be notified if the appointment is rescheduled, resized, its treatment lists are changed or if it has been cancelled.
When the appointment status is changed to “Paid” or “Paid on the same day as the appointment” if the appointment is of services type the system will automatically add the appointment’s services into the cart and redirect you to a page from which you take the payment by pressing the CASH / CARD buttons.
The “Check “status is the default status for appointments booked through the online booking page.
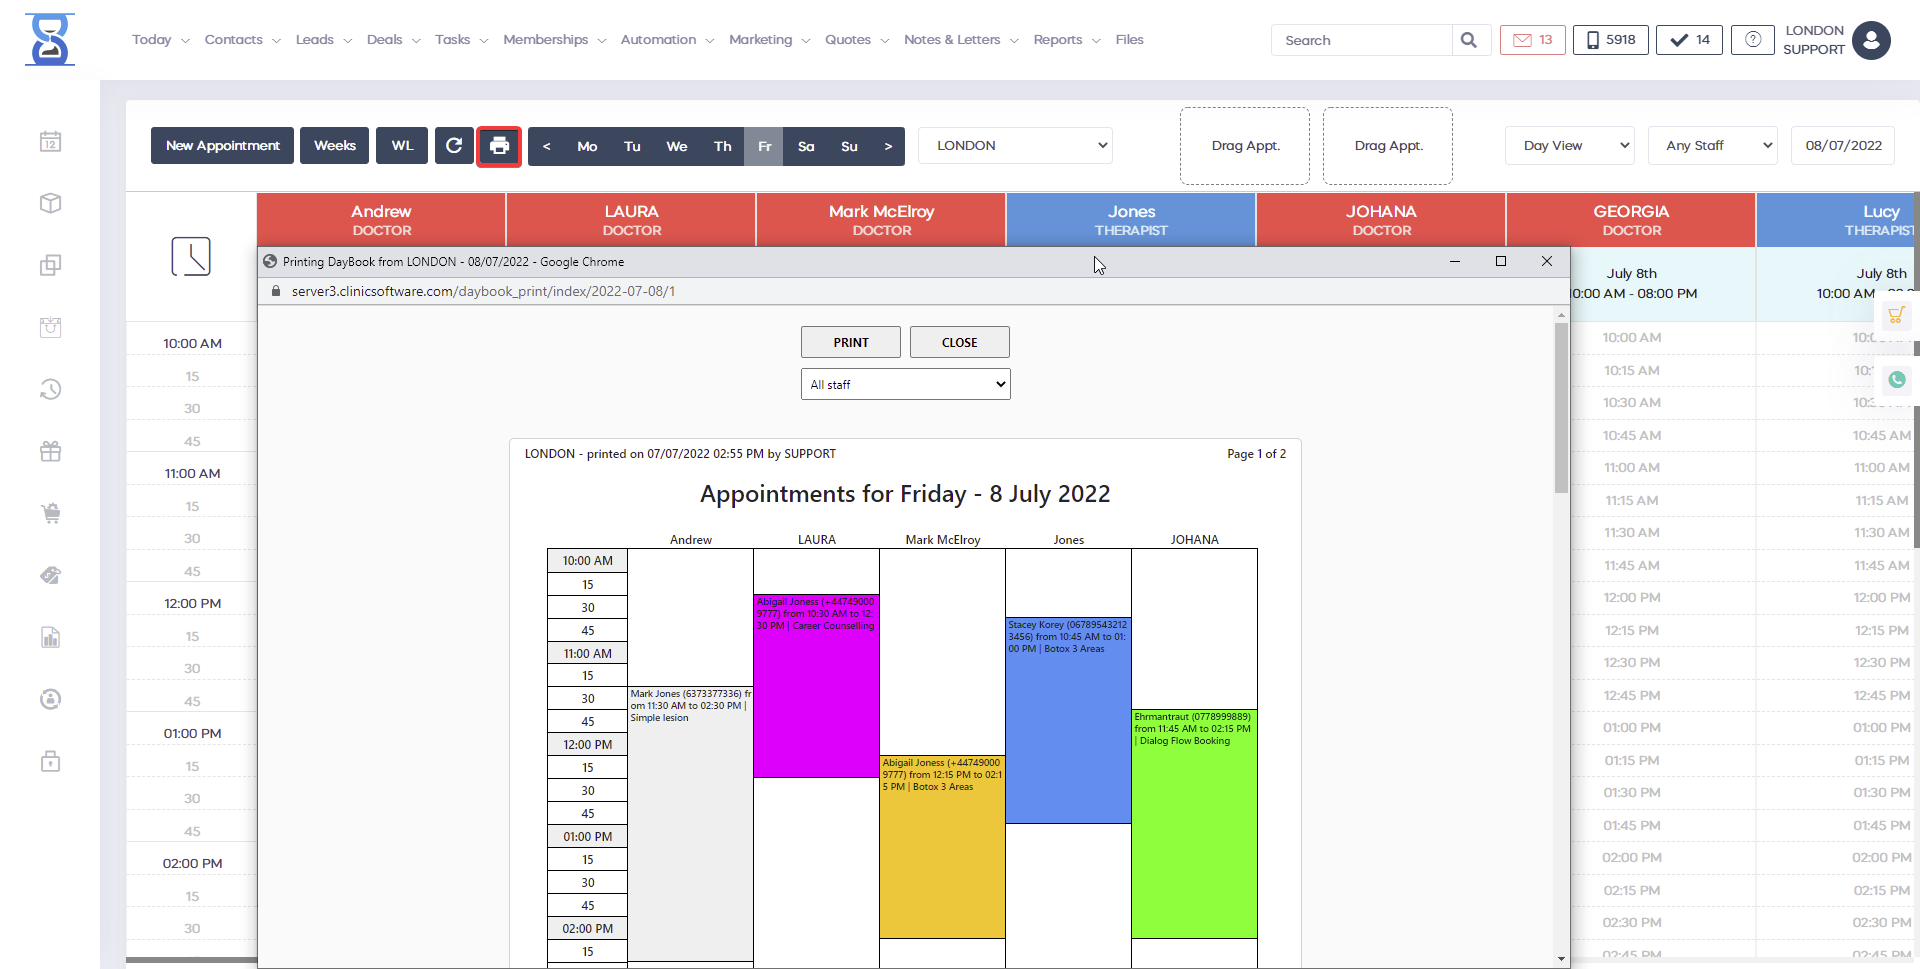
Appointment types
There are 3 types of appointments that you can book from within the Calendar:
- Services type appointments
- Courses type appointments (sessions based and minutes based courses)
- Patch Tests type appointments
Each appointment type contains only items of its type (services, courses, patch test).
The services type appointment also can contain Groupon codes.
Appointments booked through the online booking page will also feature an “ONLINE APPOINTMENT” header for identification.
The Calendar tab of the software can be accessed with one click. You have a list of all employees who work on a particular day. You have the ability to switch between locations, or in case you have business with more than one branch, you can easily manage everything from one system. You can easily switch between the day view, the month view and resource view, you can switch between staff members, and you can change the date. Any doctor, any therapist, each employee has its own column as well as a lot of features and details about their meetings on a particular day. If you want to book an appointment you just have to click on the white space. This will allow you to choose in advance the time, which means you'll save an extra step and you will save time. You can choose what would you like to do to: book a meeting at busy times or create new ones, as well as new shifts. You can proceed with the booking appointment dropbox automatically, which enables you to enter the name of the treatment from the keyboard. If you want to reserve a large area for laser hair removal processing, simply select the treatment, click on the green button to the right side and add the appointment. If you want to know more about the appointment, just click on it. If you want to go through the booking process once again, it's easy to book the appointment in the software using its options. If you click on New appointment, you save a lot of time. The Appointment Booking column in the system allows you to select the employee or the doctor you would like to book an appointment with, as well as the name of the customer, the product and the date and time. There is also have a booking window for a more detailed description and a simple, more specific information. You can choose a treatment from the list of procedures available. If you would like to book more procedures at once, you are able to log in and add notes for the meeting and you have the ability to use a specific room from the Resources tab. You can determine and specify a department, you can search for the customer in the database, by name, phone number, address, date of birth or ID. In addition, you can choose the most active customers who were present in in the clinic in the last 30 days, from the list. Also, you can choose to search for an existing customer, enter a new customer, you can switch between branches, book the customer in another branch located in the neighboring district or change the meeting title. You can change the date, cancel the duration and you can set the start time and end time. You can choose the Marketing tab as a source that will help you at a later stage when you will analyze the reports within the economic activity. Also, you can choose a staff member for a specific treatment. On top of that, you can add meeting notes with everyone, or related notes for this appointment. You have the opportunity to fill the gap if you would like to be fully booked by the end of the day. You can instantly notify the client with an SMS text or email or you can separate two and three appointments from the left hand side. When you book the next meeting with the therapist you will be asked. After you select the client, you can access the client notes, the client's previous treatments, previous drinks and you can search in the calendar for the next available slot. This window is very customizable and you have a wide range of options to choose from. You can carry out your activities: simply press the button for another appointment and it will be reserved for you. For a new assignment, select the meeting from the search box on the right hand side, choose two or three dates and add an appointment. The next step in using the Calendar. The Calendar gives you the option to choose between the weeks. When you open it in advance, you can see the availability for x weeks. There is no need to look at another calendar. You can easily click and the system will open the Calendar for you. On a specific day you have a waiting list feature. You can add customers on the waiting list until the next slot will be available in the Calendar. You can call and contact the customer to book the next meeting. In addition, you have the option to print the calendar in a4 format. In case your therapist wishes to read the assignments, you have the ability to drag and drop the appointment. If you want to reschedule the meeting for another day, you can find a free slot, drag and drop the appointment to change the day and reschedule the meeting in a different day. For example, if you want to reschedule a meeting, you can easily pick a day in the calendar. If you want to go back and choose the previous day in the Calendar you can see all the appointments and you have the option to change the appointment window in a weekly view format. In the Calendar, there is a status for each encounter and a specific color which will represent it. If you click on a meeting, you will be able to see the name of the treatment you must provide. The Treatment Notes category is associated with the client`s ability to use the resources. You have the possibility of using certain consumables or products used in the treatment, as well as the ability to upload files related to the customer and department. On the right side, you have the customer data: first name, last name, date of birth, customer ID, address and balance. On the right hand side, you have an assignment status that can be changed depending on where the meeting is located, the treatment and a default setting of reserved appointment if they have responded to the sms sent in advance. If the customer answers yes, it will automatically turn blue and if they answer no, it will turn red. You have the Arrived Status when the customer is at the reception, and you have Seen, Completed and Paid for when the payment is in the process of being made. If anyone needs to check the appointment, select the appointment and it will turn red if someone else should check it out while you are busy with another customer. You can use different meeting statuses for business: you have the waiting status, the confirmation status - in case you need to confirm the reserved meeting, and the user who booked it. You have the start time and the place, as well as many useful buttons where with one click you can go almost everywhere in the system. You can visit the customer profile, their notes and the client history. If you want to sign a consultation form, you can click on Consultation forms. This way, you get immediate access to the form. You can automatically send an instant message, via sms text or email. You also have the option for a treatment protocol that the senior physician may write for the junior doctor and the ability to check all courses the customer has had so far, as well as the number of available sessions: how many sessions have been used, how many installments have been paid and what remains to be paid. In this case, you will change the status to This meeting, press the update button, so the meeting is updated. In the Calendar feature we have real-time integration between the software calendar and your smartphone calendar so you have access to the calendar on the go. You have a real sync feature there, which will move all the appointments to your calendar. If you want to set a payment, click on the appointment page then on the right hand side you will find the treatment and the discount applied to the customer. The client is selected, as well as the customer balance. You also have an option to access the client`s history, meetings or the payment method you need. If you want to select an employee from the list, the system knows where to find it, based on the commissions of your employees. As a payment method, you can activate any payment method, you can use a card, you can make a cash payment, use a direct debit voucher or a loyalty card. If you hit another payment, you will be able to see other payment methods from our integrations. We can also add a custom payment method, in order to see the report at the end of the day: how many payments do you have? If you choose to make a cash payment you will be able to see an invoice preview - the invoice can be customized with any logo colors, in any way or form. Either if you print it or not, it will be recorded in the customer account history, so you can print it at a later stage. In addition, we can automatically send the the invoice by email or SMS text. The list of services is located on the left hand side. If you click on the second category of the menu, you will have access to the Services list and import the services you offer, providing your customers with a duration and a price. You can change the price at any point in time within the duration. You have the possibility to personalize it in any way and you can determine who is able to provide a certain treatment from Access Control List section. After importing your procedures, anyone can book appointments based on permission from the Calendar tab.