
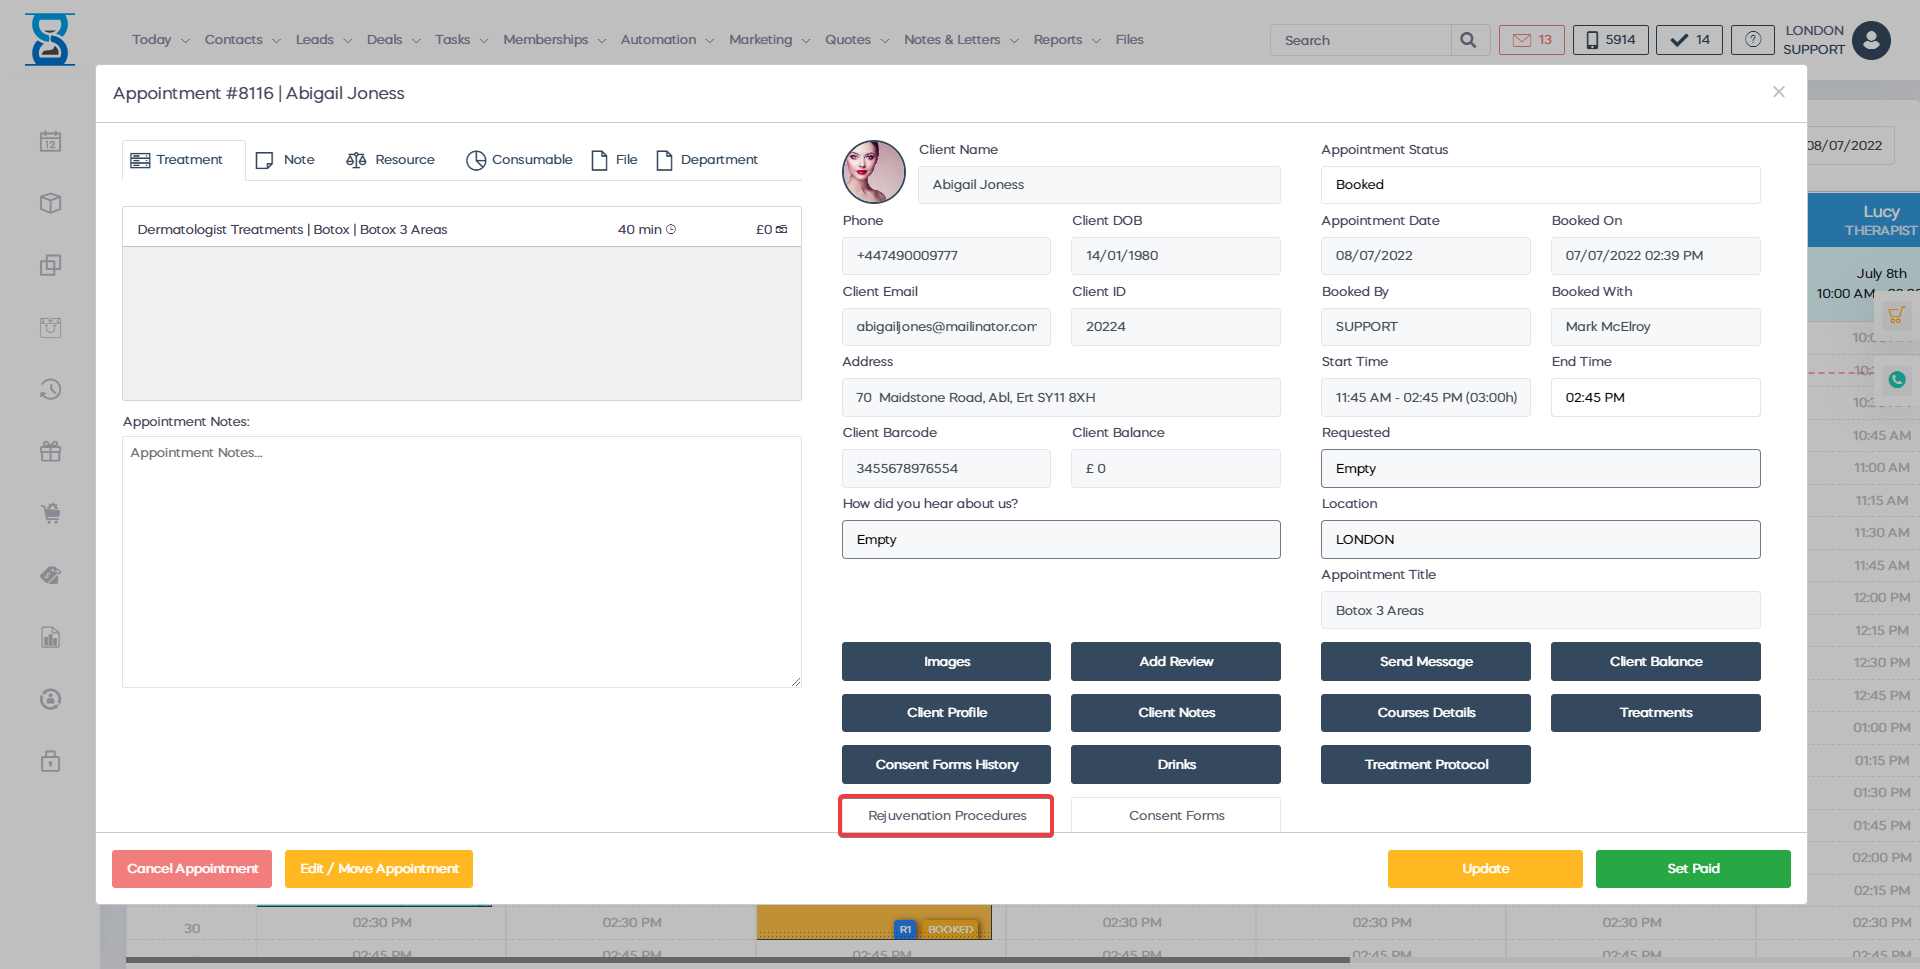
The rejuvenation feature allows you to keep a record of the face and body procedures (e.g. botulinum toxin and dermal fillers) and keep track of treatment progress with before and after pictures.
The client rejuvenation procedures can be accessed by pressing the “Rejuvenation Procedures” button from the appointment window then scanning the QR code with your tablet.
After scanning the QR code the system automatically logs you in as staff, selects the client and opens the client’s rejuvenation procedures list.
To add a new rejuvenation procedure for the selected client, press the “New” button from the top right section of the page.
After selecting the procedure type you will be redirected to the selected procedure type creation page.
The “Procedure Information” window will open automatically from which you can specify the name, date, time, staff, signed client consent form and notes of the procedure.
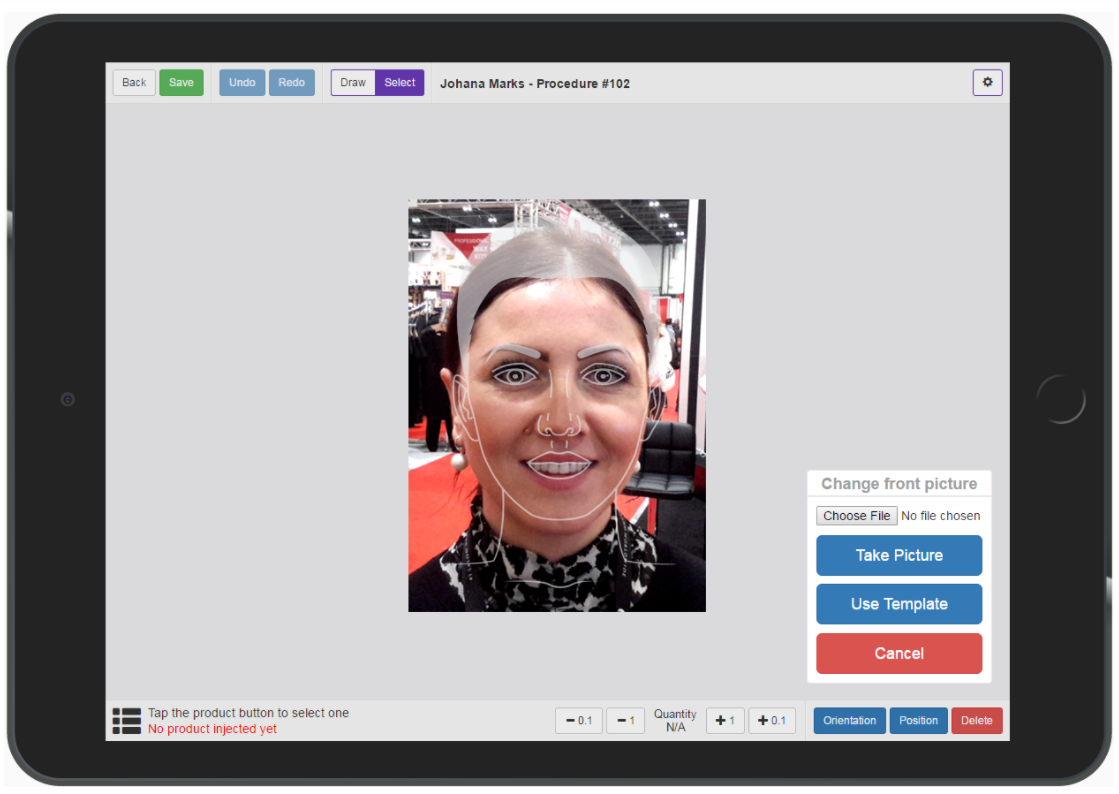
The camera will open automatically and display the image preview in the centre of the screen.
Press the “Take Picture” button after you have aligned your subject with the template.

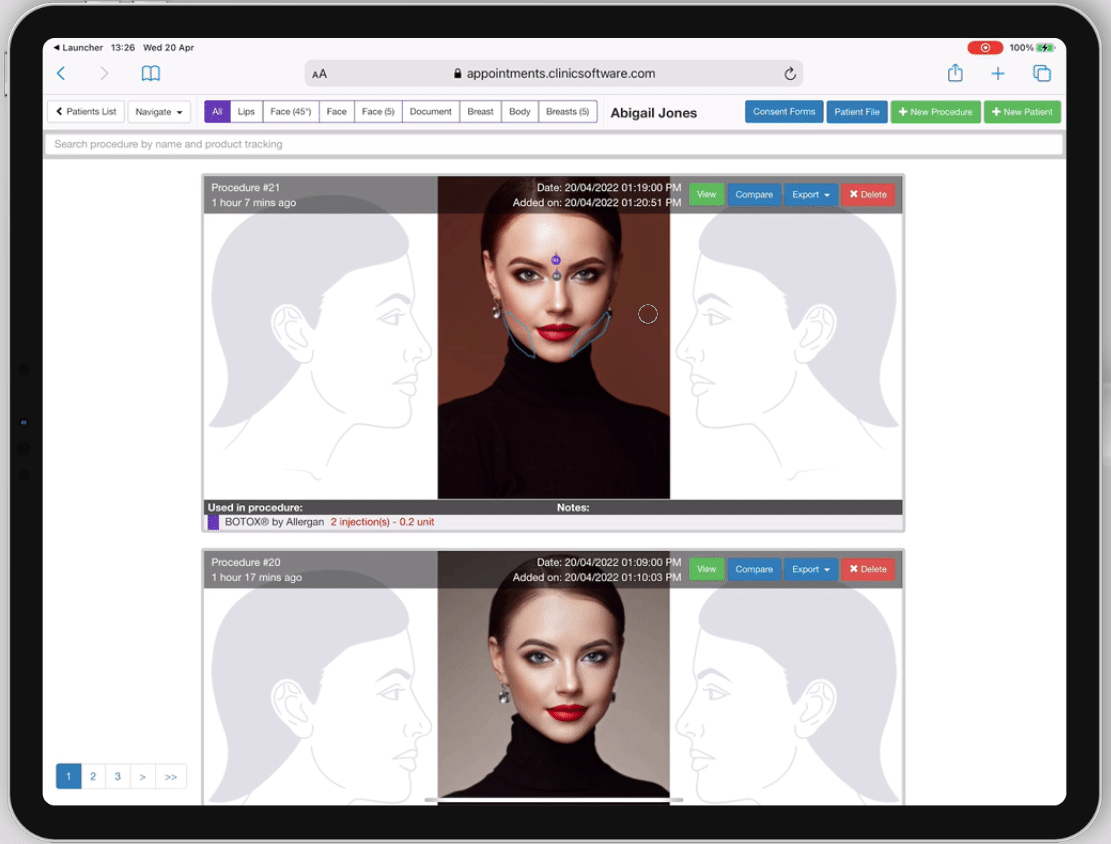
To compare two rejuvenation procedures, press the compare button of the initial procedure and then select the procedure you wish to compare it to from the drop box.
Press the “Compare” button of the first procedure:
The rejuvenation feature allows you to keep a record of the face and body procedures (e.g. botulinum toxin and dermal fillers) and keep track of treatment progress with before and after pictures.
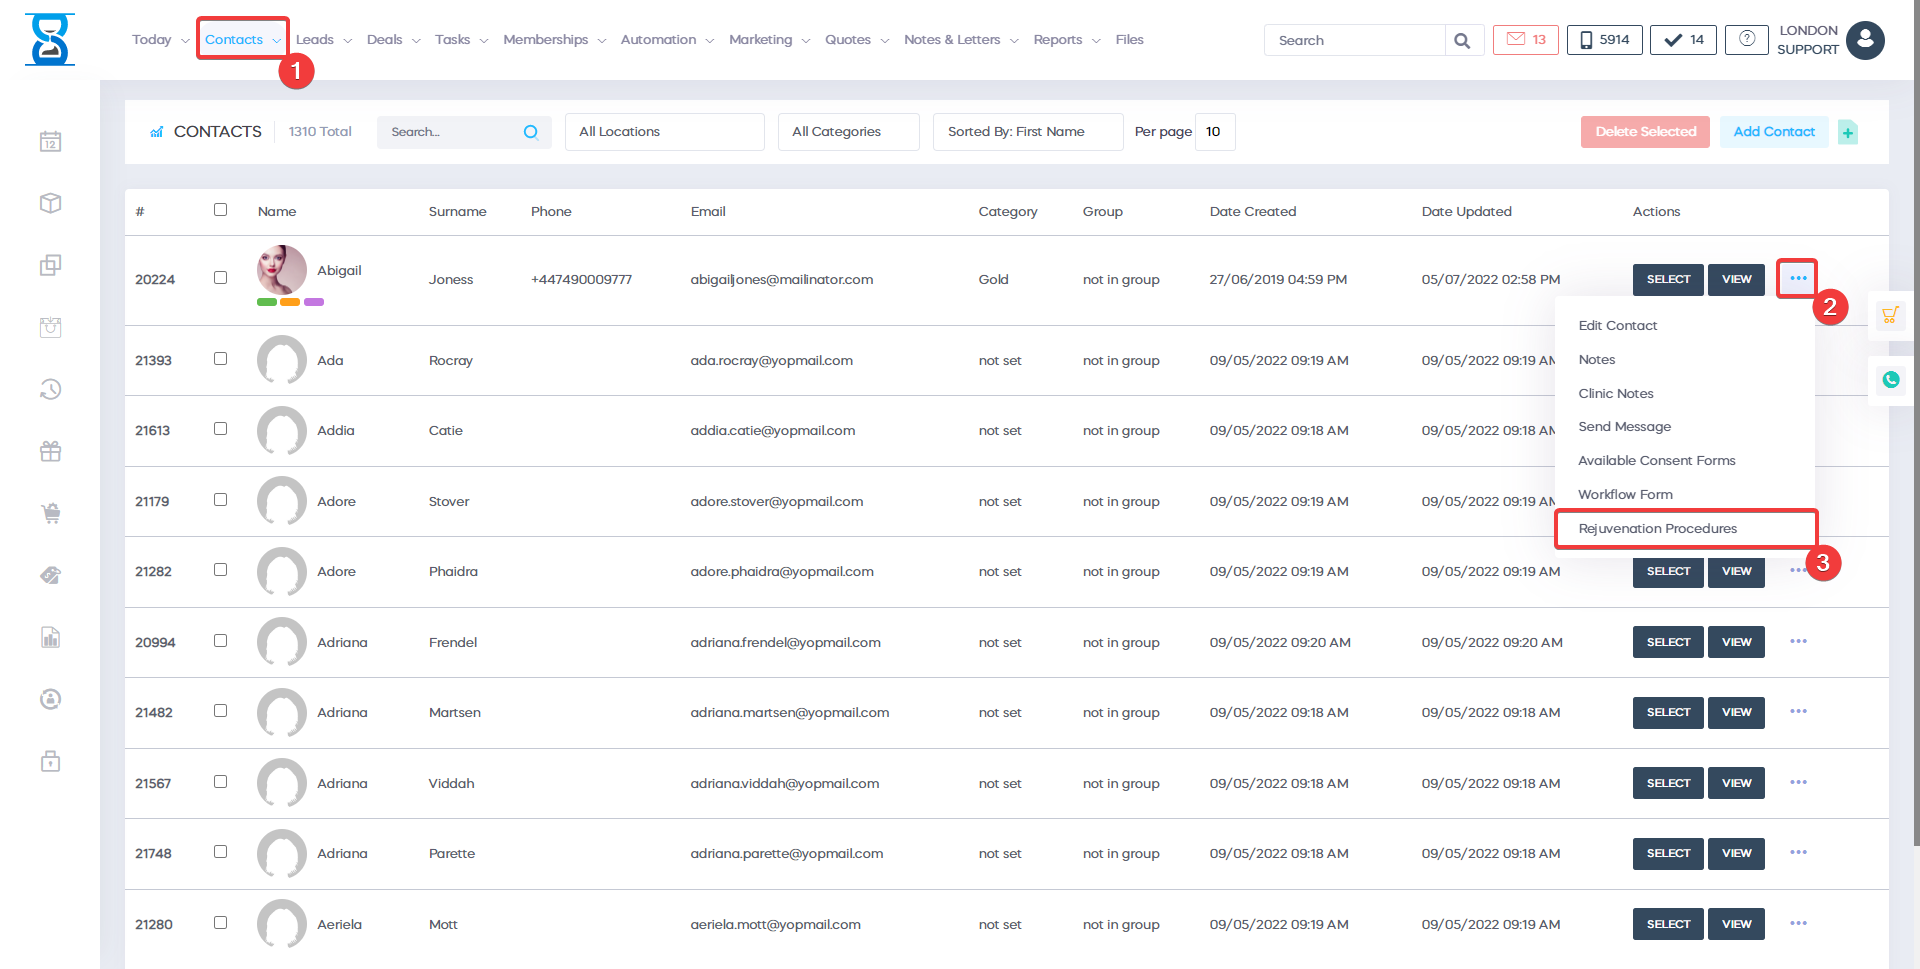
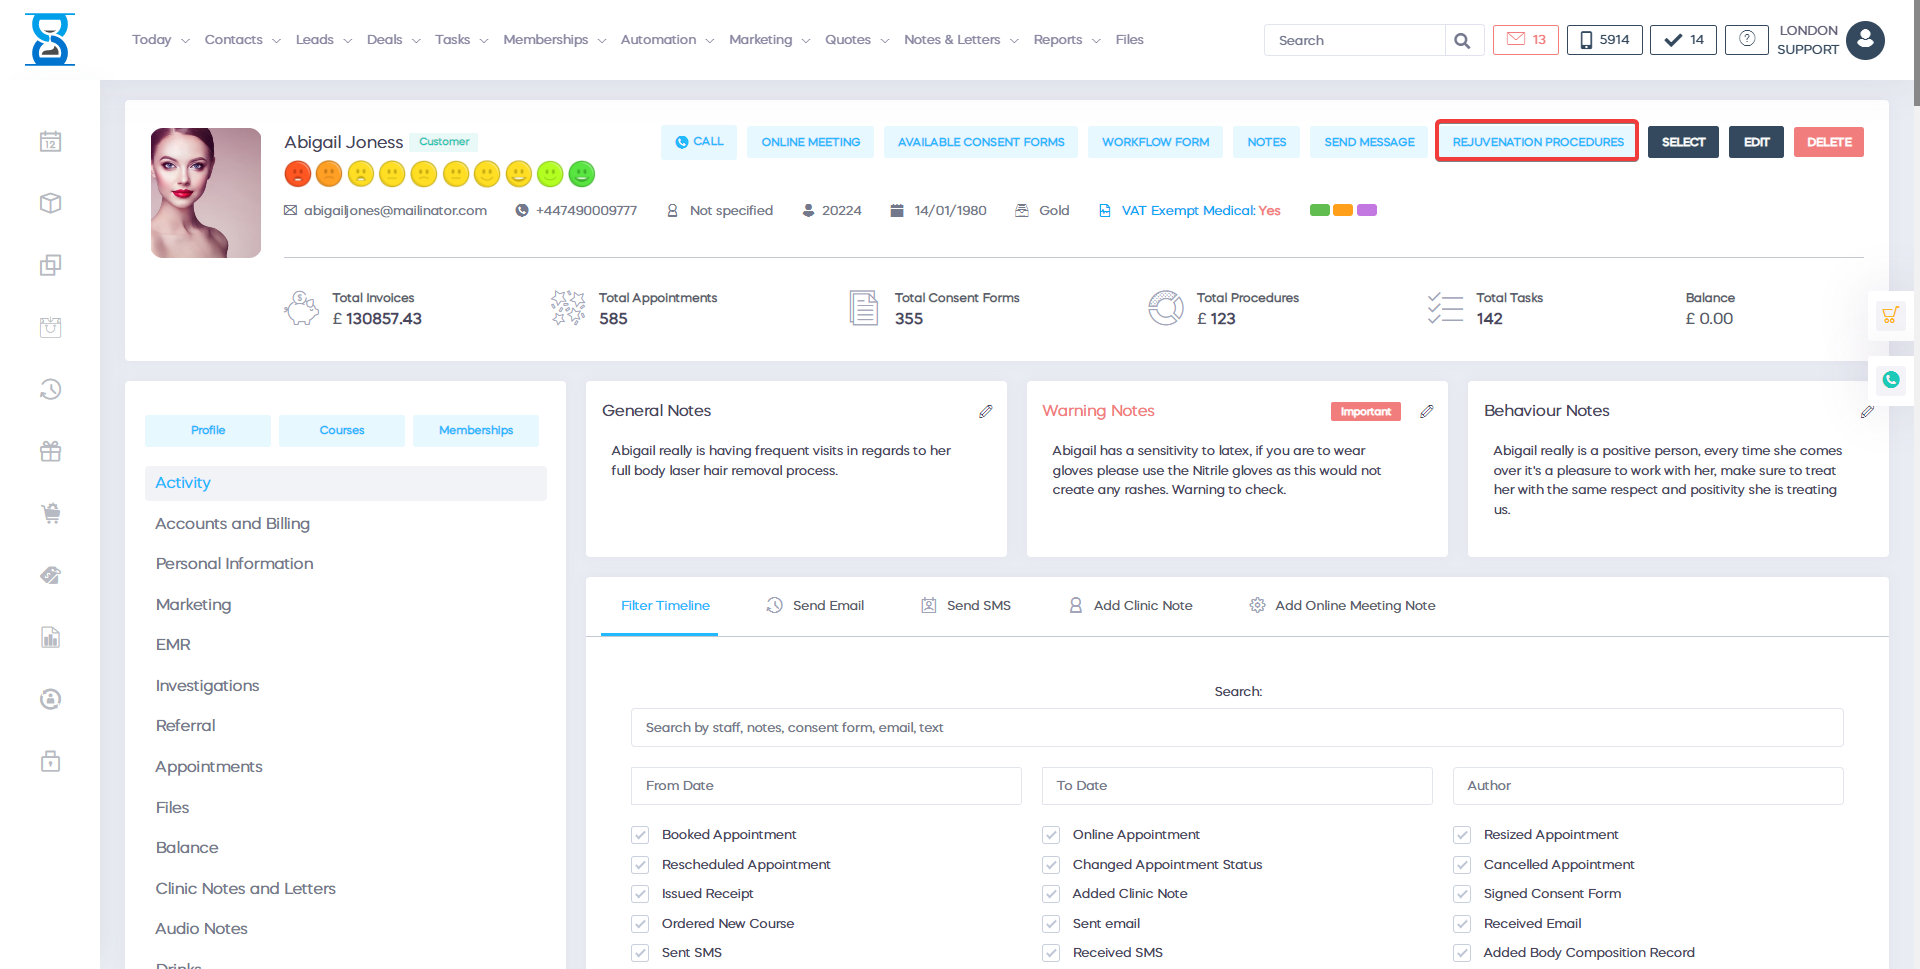
The client rejuvenation procedures can be accessed by pressing the “Rejuvenation” button from the main software client list page and then scanning the QR code with your tablet.
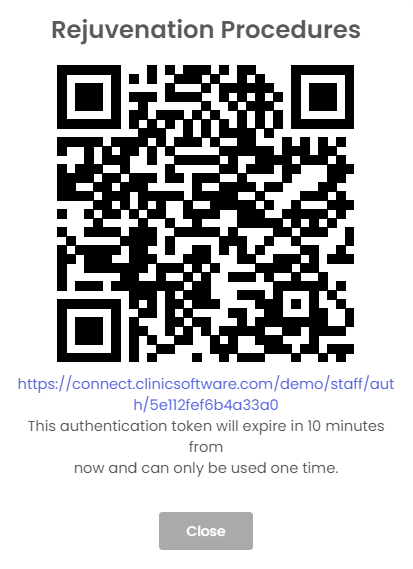
After scanning the QR code the system automatically logs you in as staff, selects the client and opens the client’s rejuvenation procedures list.
To go back and select a different patient, press the “< Patients List” button.
![]()
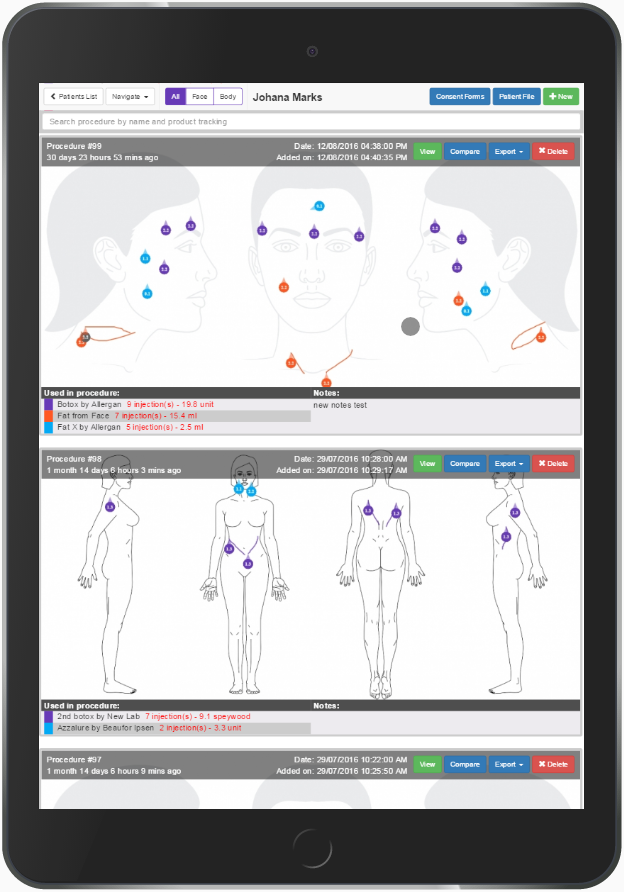
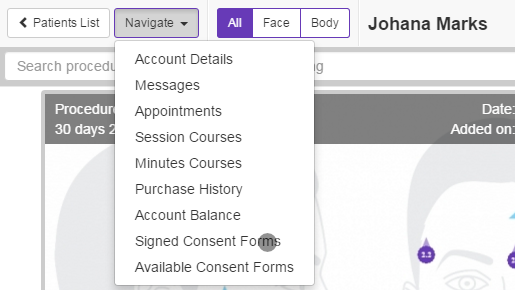
To access the client profile, use the “Navigate” button to select the page from the menu.
To display only the face or body type procedures, select the procedure type from the top-left button group.
![]()
To sign a new consent from for the selected client, press the “Consent Forms” button from the top right section of the page.
![]()
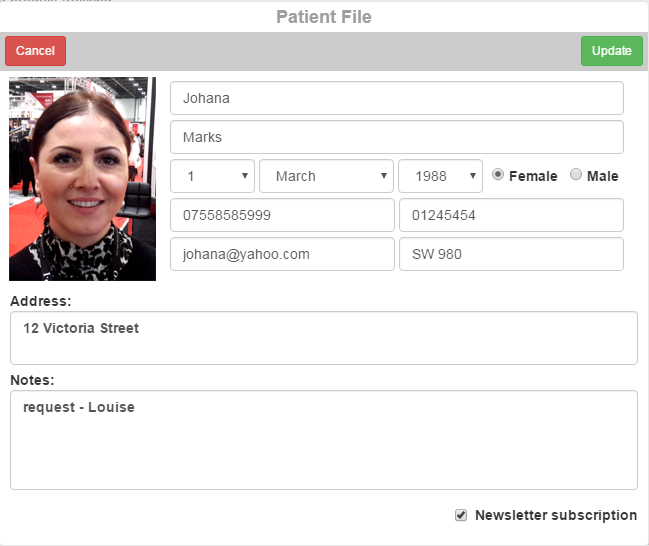
To view and edit the selected client details, press the “Patient File” button from the top right section of the page.
![]()
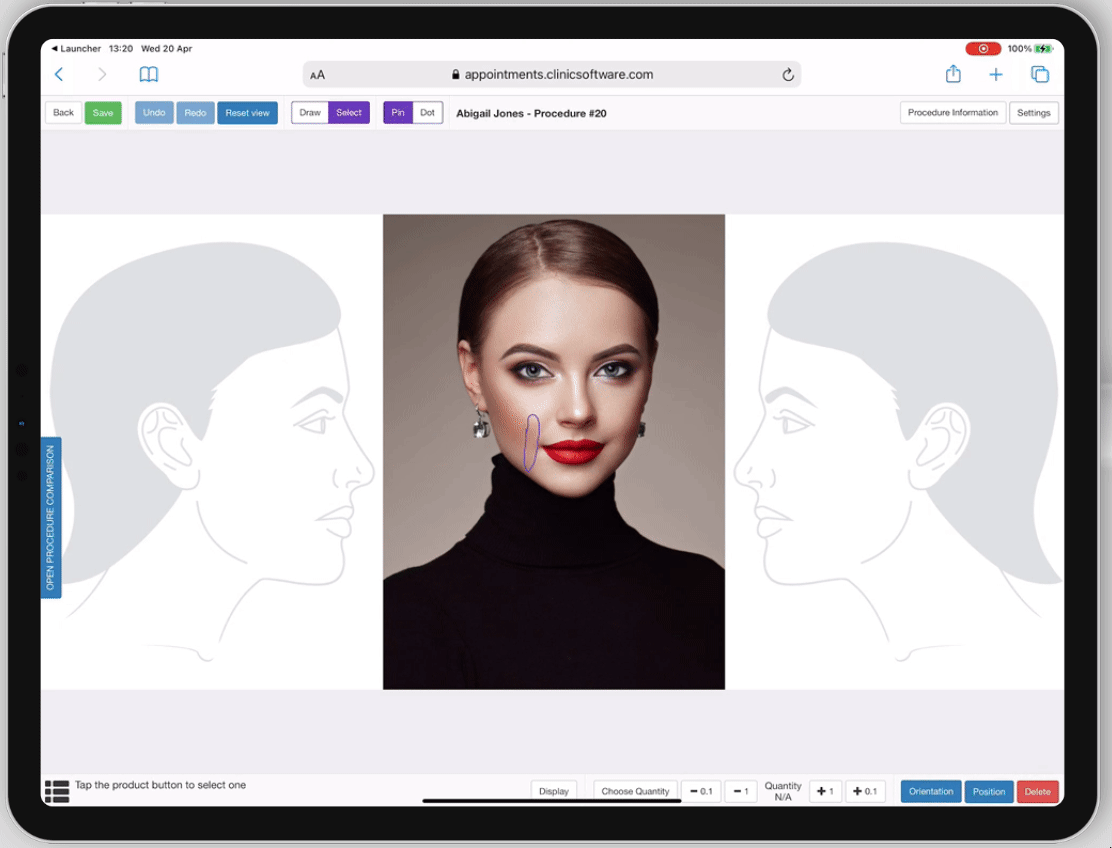
To create the rejuvenation procedure, you have access to a specific form from the computer, that exists in a list of apps for mobile devices and tablets. Or, if you want to, you can use any tablet you have around and scan the qr code. After scanning it, the system will automatically open the customer`s profile and you can see what procedures has the client had before. You also have the option to choose different procedures for lips, face, body, chest or scalp. You can click on the existing procedures and see which injectables were used and the quantities that were injected. You can tap on the left hand side to to select the product you want to use, then you can tap and choose the quantity from the right hand side, or you can switch from one to the other.
You can choose what to display and what to hide, you can even change the orientation of the needle. You can track an unlimited number of procedures not just taking the before and after pictures for each treatment, but also monitor injections (for which you must use the dot function). You have the drawing function - where you can zoom in and out and you can easily track the treatment very accurately and you can also import your own products. The system will automatically detect signed paperless consent forms before providing a physician. You can click Change settings on the template you are using and get a linear picture of the patient You can use the template or a real photo to show the treatment` s effects in time.
After saving the procedure, you have the option to align procedures side by side and see exported images in zip or pdf format. If you are comparing a procedure, you can choose the date at the bottom and see the before and after photo. You can even import your own templates or forms, customize and create a great customer journey experience. If you click on a new procedure, you will see the other templates you can use. You can continue working from your computer, compare the procedure results, the before and after. You can choose what to show and what to hide - features only available on the tablet before, are now also available for the PC. It `s a great feature to use with your customers.